Buzzy lavender grow kits are seed-plus-medium bundles that let you sprout lavender on a windowsill without any prior gardening experience. The setup is straightforward, but lavender is one of the slowest and fussiest seeds in the Buzzy lineup, taking anywhere from 14 days to 6 full weeks to germinate, and it absolutely will not sprout if its seeds are buried or the medium dries out. Once you know those two rules and match your setup steps to your exact kit model, the whole process becomes much less mysterious.
Buzzy Lavender Grow Kit Instructions: Step by Step

Marcus Thornfield
12 May 2026
What's in a Buzzy lavender grow kit
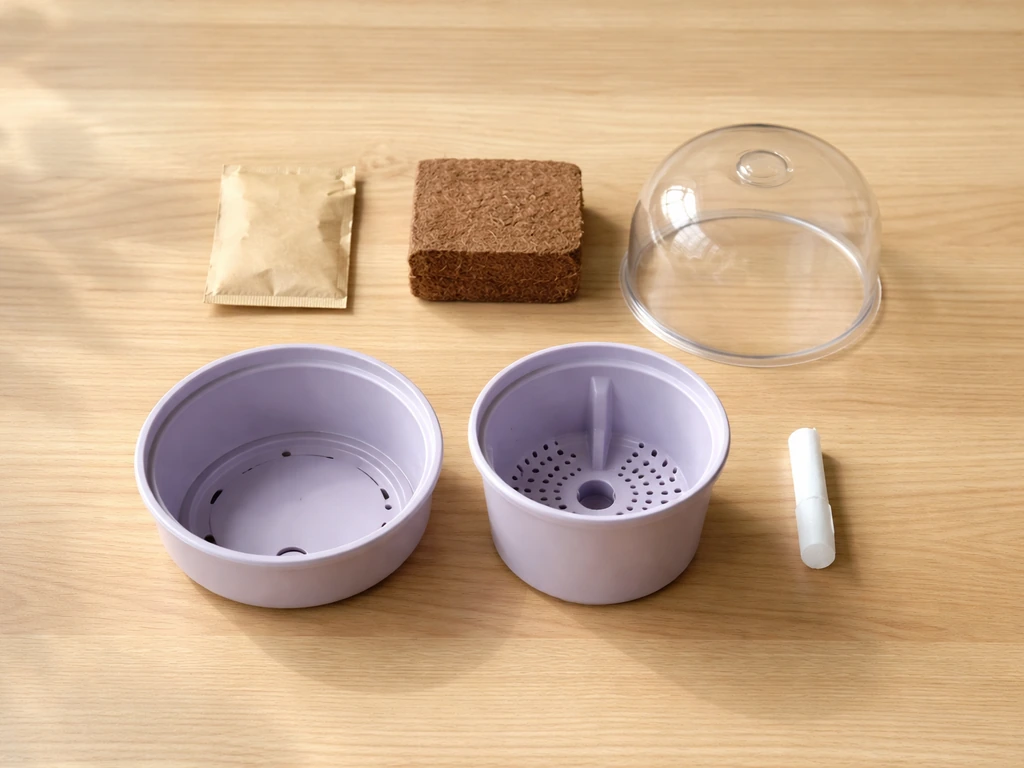
Every Buzzy lavender kit is an all-in-one bundle, but the specific pieces differ by model. At minimum, every kit includes a lavender seed packet, some form of growing medium, a planter or container, and a printed instruction card. What changes between models is the type of container and how you water it.
The growing medium is almost always a compressed coconut husk pellet or disc that expands when you add water. Some kits, like the Zen Garden Windowsill Kit, pair this with a painted metal planter and include seeds for both lavender and chamomile. The Ceramic Self-Watering kit (commonly sold at Target) includes a ceramic outer pot with an internal wick system, which waters the plant from below. The Terra Cotta Grow Kit (found at Walmart and Kohl's) uses a simple 7 cm terracotta pot with a drainage hole. The Lavender Basket Kit uses a decorative basket planter. There is also a pail-style kit available at Michaels. The kits are cosmetically different, but the core germination rules are the same across all of them.
Identify your kit model before you start
Before you do anything else, figure out which kit you have. This matters because the watering method is different depending on your planter type, and using the wrong method early on is one of the most common reasons seeds fail or mold appears. Look at your container and compare it against the descriptions below.
| Kit Name | Container Type | Watering Method | Key Setup Difference |
|---|---|---|---|
| Zen Garden Windowsill Kit | Painted metal planter | Spray bottle or gentle top-water | Expand coconut pellet, add to planter, then sow |
| Ceramic Self-Watering Kit | Ceramic pot with inner wick | Fill outer reservoir only | Do not let water touch bottom of inner pot |
| Terra Cotta Herb Grow Kit | 7 cm terracotta pot with drainage hole | Spray bottle or gentle top-water | Standard sow-and-mist method |
| Lavender Basket Kit | Decorative basket planter | Spray bottle only | Strong water flow washes tiny seeds away |
| Lavender Pail Complete Kit | Pail-style container | Spray bottle or gentle top-water | Same surface-sow rules apply |
If your kit includes a small inner pot sitting inside a larger outer pot, you have the self-watering wick version. If your container is one single piece, you are using the standard top-water method. Check your instruction card for the model name if you are still unsure. The germination rules do not change between models, but the watering setup absolutely does.
Step-by-step setup: from unboxing to sowing
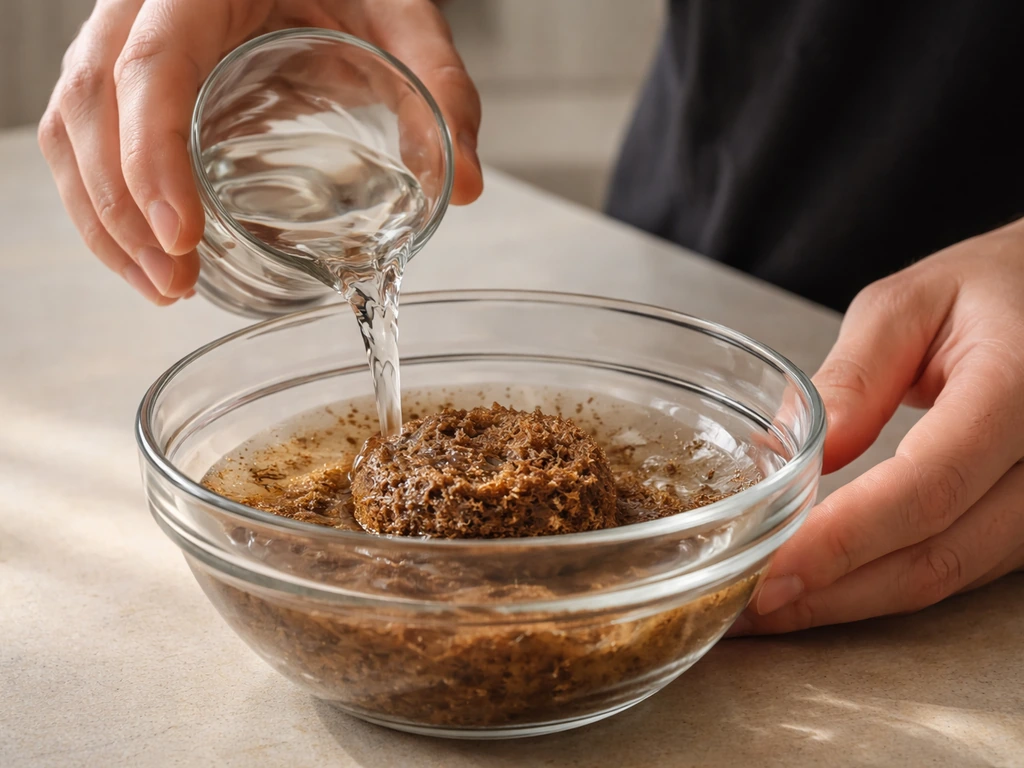
Step 1: Expand the growing medium
If your kit includes a compressed coconut husk pellet (it looks like a flat disc or a small puck), place it in a bowl and slowly pour room-temperature water over it. It will expand significantly, usually doubling or tripling in size. Once fully expanded, use a fork to fluff and loosen the fibers. You want it to feel light and airy, not compacted into a brick. Then transfer it into your planter and press it down lightly so the surface is roughly level.
Step 2: Set up the self-watering wick (if applicable)
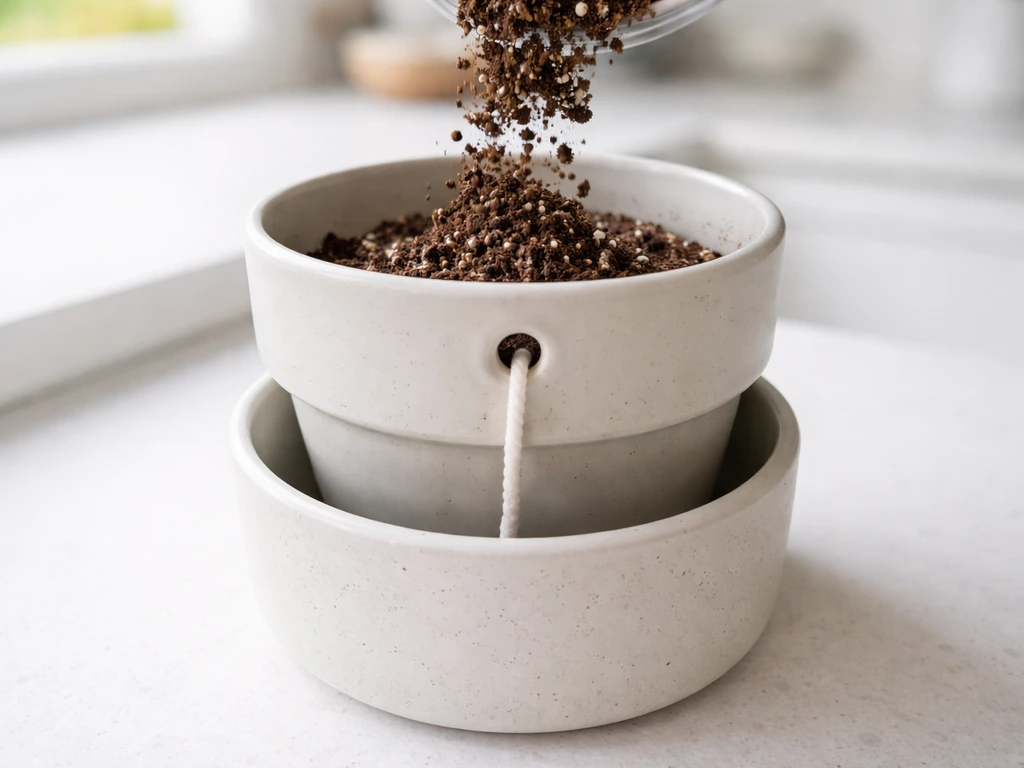
If you have the Ceramic Self-Watering Kit, thread the wick through the hole in the inner pot before you add your growing medium. The wick should dangle down into the reservoir below when the inner pot is seated. Fill the outer reservoir with water, but here is the critical part: the water level should never actually touch the bottom of the inner pot. If it does, the medium will stay oversaturated, which is a fast path to mold and root rot. Leave a small air gap between the water surface and the inner pot's base.
Step 3: Sow the seeds correctly
This is where a lot of beginners go wrong. Lavender seeds need light to germinate, which means you do not bury them. Scatter the seeds directly on the surface of the moist growing medium, then gently press them in with your fingertip or the back of a spoon so they make contact with the medium. That is it. Do not sprinkle soil or medium on top of them. Do not cover them with plastic wrap if it blocks all light. Burying lavender seeds, even a few millimeters, is one of the most reliable ways to get zero germination.
Step 4: Initial watering
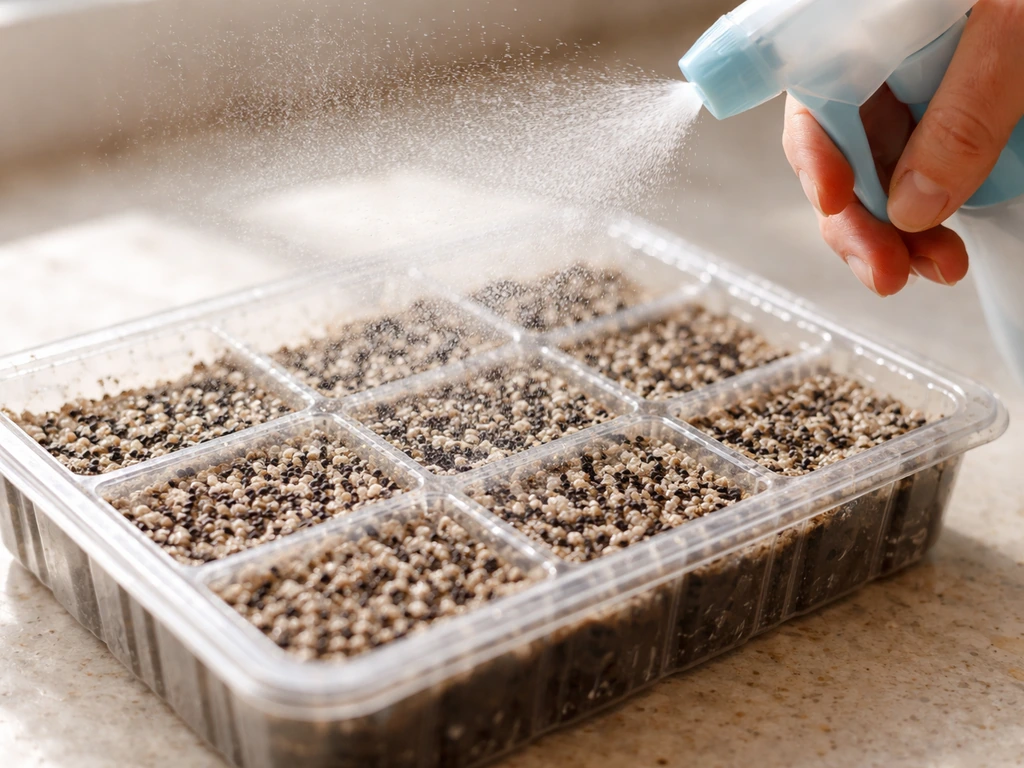
Use a spray bottle for your first watering, regardless of kit type. A stream of water from a watering can or tap will physically wash tiny lavender seeds off the surface and into corners or drainage holes. A fine mist settles moisture into the medium without disturbing the seeds. Mist until the surface looks evenly damp but not pooled with water. For the self-watering kit, fill the reservoir at this stage and mist the surface lightly on top.
Step 5: Placement and optional dome
Place your kit somewhere warm and bright. A south-facing windowsill is ideal. If your kit came with a clear plastic dome or humidity cover, go ahead and use it for the first week or two to help hold moisture around the seeds while they germinate. If it has ventilation slots, great. If not, lift it for 10 to 15 minutes once a day to let fresh air in. Remove the dome completely once you see the first seedlings breaking the surface.
Daily care once seeds are sown
Light
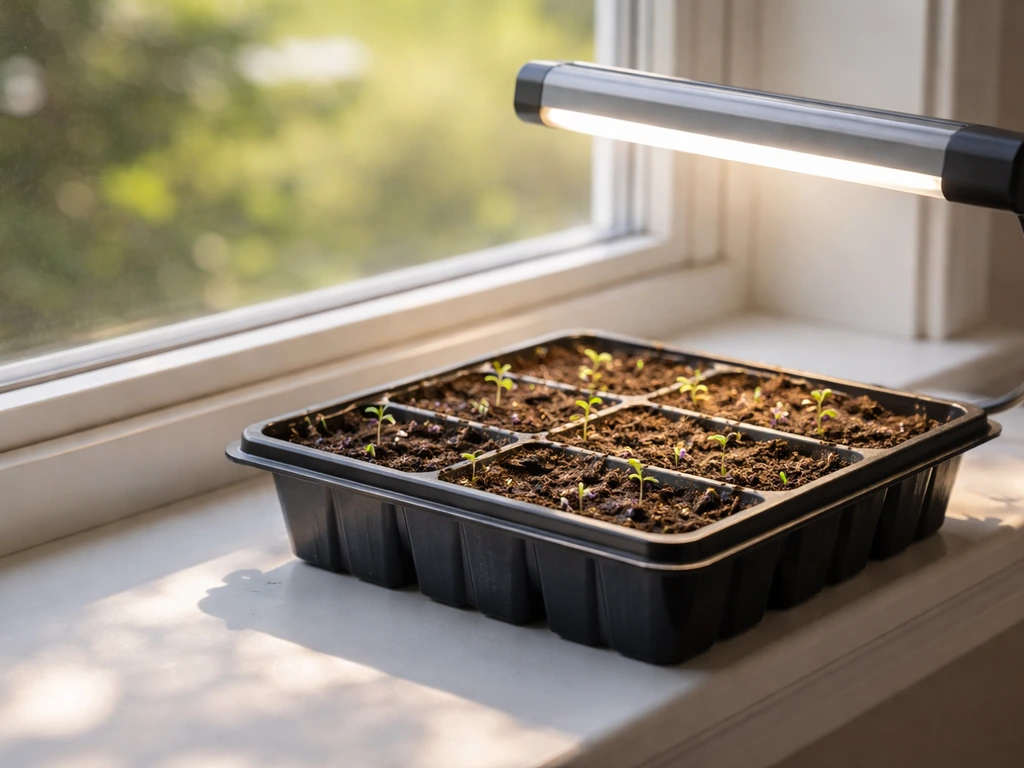
Lavender is a sun-lover. Aim for at least 6 hours of direct or bright indirect light per day. A south-facing windowsill is your best bet indoors. If your space gets less than that, or if you see seedlings stretching and leaning dramatically toward the window (called being "leggy"), move the kit closer to the light source or add a small grow lamp positioned about 4 to 6 inches above the seedlings for 12 to 14 hours a day. Leggy seedlings with long, pale stems are almost always a light problem, not a watering problem.
Watering
Before seeds germinate, keep the surface of the growing medium consistently moist but never soggy. Check it every day and mist if the top layer is starting to dry out. Once seedlings are up and have their first set of true leaves, you can switch from a spray bottle to gentle top-watering with a small watering can, but keep it light. Lavender's biggest enemy at this stage is overwatering. If the medium feels cool and damp when you press a finger into it, it does not need more water yet. For the self-watering kit, just monitor the reservoir level and refill when it gets low.
Temperature
Target a temperature range of 60 to 70°F (15 to 21°C) during germination. For example, NYBG’s Mertz Library FAQ recommends targeting 60 to 70°F for germinating (at least some) lavender types under glass or with light exposure. Lavender seeds prefer a warm environment, and a cold windowsill in winter can slow or stall germination significantly. If your home runs cool, placing the kit on top of a refrigerator or near a warm appliance (not a heating vent that blasts dry air directly on it) can help. A seedling heat mat set to low is also a legitimate option if you want to speed things up.
Airflow
Good air circulation is non-negotiable for lavender seedlings. Stagnant, humid air is the main driver of mold and damping-off (more on that in the next section). If you are using a humidity dome, vent it daily. Once the dome is off, a light breeze from an open window or a small fan on its lowest setting pointed nearby (not directly at the seedlings) will strengthen stems and dramatically reduce mold risk.
Feeding
Do not feed seedlings right away. Wait until each seedling has grown its second set of true leaves, then water with a balanced liquid fertilizer diluted to half the strength listed on the package. After that, fertilize about once a month. Coconut husk medium has very few nutrients on its own, so this step matters more than it would with regular potting soil.
When things go wrong: troubleshooting the common issues
No germination after 2–3 weeks
First, breathe. Buzzy's own documentation for the Zen Garden kit lists lavender germination at 4 to 6 weeks, which is much longer than most herbs and flowers. If it has been less than 4 weeks, keep going. The medium needs to stay moist the entire time. If it dries out even once during that window, seeds that were on the verge of sprouting can fail. Check placement too: if the kit has been sitting in a cool or low-light spot, move it to a warmer, brighter location. If you are past 6 weeks with zero activity, the seeds may have dried out at a critical moment, or the seed viability was low. Sow a second round using the remaining seeds from your packet if any are left.
Mold on the medium surface
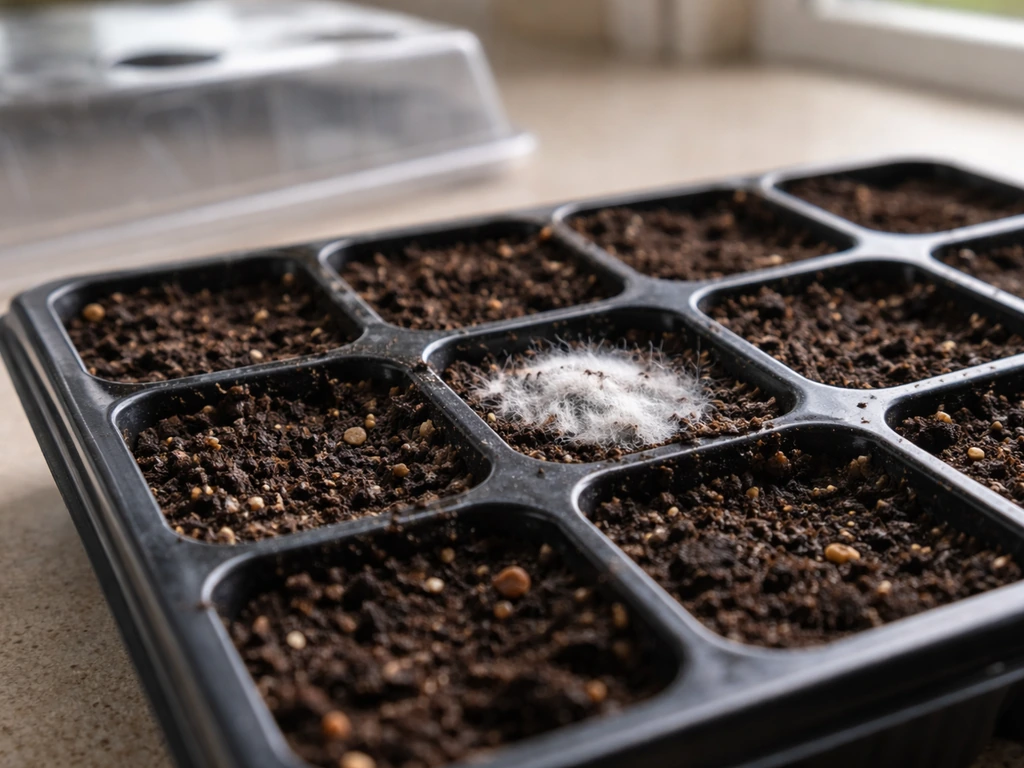
White fuzzy mold on the surface almost always means too much moisture and too little airflow. Remove the dome immediately, reduce how often you are misting, and move the kit somewhere with better ventilation. A tiny battery-powered fan nearby can make a real difference. Gently scrape off the surface mold with a clean spoon, then let the top layer dry out slightly before misting again. The seeds underneath are often still viable if you catch this early.
Damping-off (seedlings collapsing at the base)
Damping-off is a fungal condition where seedlings look healthy one day and then suddenly collapse, with a pinched or mushy stem right at the soil line. Lavender is genuinely susceptible to this. It is caused by the same combination of overwatering, poor airflow, and warm humid conditions that causes mold. Unfortunately, once a seedling damps off, it cannot be saved. But you can stop it from spreading: reduce watering immediately, improve airflow, thin out any crowded seedlings by snipping (not pulling) the weaker ones, and make sure the remaining seedlings have some space between them.
Leggy, pale, or floppy seedlings
Seedlings stretching toward the light with long thin stems and pale color are not getting enough light. Move the kit to your brightest window or add a grow lamp. Position the lamp 4 to 6 inches above the seedlings and run it for 12 to 14 hours per day. You can also gently brush your hand over the seedlings for 30 seconds once or twice a day to simulate a breeze, which encourages thicker, stronger stems.
Slow growth after germination
Lavender is naturally slow. If seedlings have germinated but seem stuck, check three things: temperature (below 60°F will slow growth noticeably), light (not enough hours or intensity), and feeding (if the seedlings have their second set of leaves and you have not started fertilizing yet, start now at half strength). Also check that the growing medium is not staying bone dry between waterings.
Seeds washed to one side of the container
This happens when watering was too forceful early on. Unfortunately, you cannot herd tiny lavender seeds back to an even spread. Going forward, switch to a spray bottle and mist from a few inches above the medium surface. The seeds that did land in a moist spot can still germinate, so do not give up on the kit.
Harvesting lavender and keeping the plant going
Lavender grown from a small windowsill kit will not produce the dramatic flower stalks you see in a field, but it will grow into a compact, fragrant little plant that you can absolutely harvest from. Once stems are several inches tall and you see flower buds forming, you can snip stems just above a leaf node (the point where leaves branch off the stem). Harvest in the morning if possible, when the essential oils are most concentrated. Tie small bundles and hang them upside down in a dry, airy spot to dry, or use fresh sprigs in cooking, sachets, or just as a scented desk plant.
To keep the plant going after a first harvest, cut stems back by about one-third, being careful not to cut into woody stem tissue if any has formed. Keep the plant in bright light and water sparingly, since established lavender actually prefers drier conditions than seedling-stage lavender does. Feed once a month with a balanced fertilizer at the recommended dilution. With good light and careful watering, your kit plant can reflower and stay productive for a full season on the windowsill.
If your kit planter is very small (the 7 cm terra cotta pot, for instance), your plant will eventually outgrow it. When you see roots emerging from the drainage hole or the plant looking cramped, transplant it into a 4 to 6 inch pot with well-draining potting mix. Do this gradually: give the transplanted plant a few days out of direct sun to recover, then move it back to its bright spot. Buzzy's general guidance calls this acclimatizing, and it genuinely reduces transplant shock.
A quick note on other Buzzy kits
If you enjoy the process of growing lavender from a Buzzy kit, the same patient, light-focused approach applies to other plants in the Buzzy lineup. Buzzy also makes kits for cacti, succulents, bonsai, forget-me-nots, tomatoes, and other plants, each with their own germination quirks and care routines. If you are using a buzzy succulent grow kit, follow the included instructions for light, watering, and how to handle the starter medium other plants in the Buzzy lineup. If you are using a buzzy tomato grow kit, follow the included instructions for sowing depth, watering frequency, and light levels so the seeds can germinate reliably tomatoes. If you are growing a Buzzy forget-me-not kit, follow the specific instructions on the card for your model so you match its germination and watering needs forget-me-nots. For a bonsai style kit, you’ll want to follow the same idea of checking the medium moisture closely and matching the sowing and watering steps to your specific kit model. If you are using a buzz y cactus grow kit, follow its specific instructions for planting depth, watering cadence, and light so the seeds can sprout reliably kits for cacti. The core skill you build here, reading the medium moisture correctly and giving seedlings strong light, transfers directly to all of them.
FAQ
Can I pre-wet the coconut husk pellet and leave it sitting while I set up the kit?
It is best to expand and fluff the pellet shortly before sowing. If it sits after expanding, it can over-hydrate and compact, which increases mold risk. If you must wait, keep it lightly damp, not dripping, and use it the same day.
What if my lavender seeds stick to the pellet fibers when I scatter them?
Lightly pressing with your fingertip or the back of a spoon is enough. If seeds clump into one spot, mist lightly and wait, do not try to spread them later because lavender seeds are tiny and easily displaced. Uneven distribution usually still produces some sprouts.
Should I thin seedlings if many sprout close together?
Yes, if several seedlings emerge from the same spot, thinning helps airflow and reduces damping-off. Use scissors to snip the weaker ones at the medium level, do not pull, pulling can disturb roots of the remaining seedlings.
My dome/humidity cover has no ventilation slots, should I remove it immediately after sowing?
No, you can use it initially, but remove it once you see the first seedlings breaking the surface. If you keep it longer, vent daily (lift for 10 to 15 minutes) and keep misting minimal. A fully sealed dome for too long is a common mold trigger.
How often should I mist, and how do I know the medium is damp enough?
Check daily. Mist only when the top surface starts to lose its even damp look. Avoid puddles or a heavy wet sheen, press a finger into the top layer, if it feels cool and damp, wait before misting again.
Will lavender germinate if I accidentally covered the seeds with medium or a thin layer of soil?
Even a small covering can dramatically reduce germination because lavender needs light. If it was just a very light smudge, you can try gently uncovering them and misting to re-dampen the surface, but expect lower success than starting with seeds on top from day one.
For the Ceramic Self-Watering kit, how low should the water be relative to the inner pot?
Keep an air gap so the reservoir water level never touches the bottom of the inner pot. If water is high enough to wick up continuously at the base, the medium stays oversaturated, increasing mold and root rot risk.
Can I bottom-water a standard top-water kit?
It is usually not recommended because most standard kits rely on surface moisture without soaking. If your standard kit has no controlled drainage and you add water from below, seeds can wash or the medium can stay overly wet. Stick to misting and gentle top-watering as the kit instructions guide.
What do I do if I see white fuzzy mold before any seedlings appear?
Act quickly. Remove the dome (if using), mist less or stop misting for a short window, improve airflow with gentle nearby circulation, and scrape off surface mold carefully with a clean spoon. Let the top layer dry slightly before resuming light misting.
Do lavender seedlings need fertilizer right after the second set of true leaves?
Wait until you have a clear second set of true leaves, then switch to half-strength balanced liquid. Do not fertilize earlier, coconut husk medium has limited nutrients, and early feeding can stress seedlings or worsen moisture conditions.
Why are my seedlings leggy even though I placed the kit on a bright windowsill?
Windowsills often provide uneven intensity, especially if the light angle is low. Rotate the kit daily toward the light source to prevent one-sided stretching, and if stems are long and pale, add a grow lamp positioned close (about 4 to 6 inches) for longer daily hours.
How do I stop lavender from stalling if it germinated but growth seems slow?
Verify temperature first (below about 60°F slows growth noticeably), then confirm light duration. If seedlings are past the second true leaf stage, start half-strength fertilizer on schedule. Also check for intermittent dryness, a medium that dries out even briefly can delay progress.
If there is no germination after 6 weeks, should I wait longer or start over?
If you are beyond 6 full weeks with no sprouts, it is usually time to sow again. Lavender seeds can lose viability, and prolonged dryness during the waiting period is a common reason. Use any remaining seeds and restart with fresh, evenly moist conditions.
Can I harvest lavender from a windowsill kit the first season, and how much should I cut?
Yes, when stems are several inches tall and you see buds forming, you can snip stems just above a leaf node. Harvest in the morning. After the first harvest, cut back by about one-third to encourage regrowth.
When should I transplant from the small kit pot to a larger container?
Transplant when roots emerge from drainage holes, or the plant looks cramped and stops making new growth. Move into a 4 to 6 inch pot with well-draining mix, keep it out of direct sun for a few days to reduce transplant shock, then return it to bright light.
Is it safe to use tap water for misting and reservoir filling?
Generally yes if it is room temperature. Avoid very cold water from winter taps, it can shock roots and slow early germination. If your tap is very hard or leaves residue, consider using filtered or distilled water for the earliest stage to prevent salt buildup.