If you have a Buzzy Seeds grow kit sitting in front of you and the instructions feel more confusing than helpful, you're in the right place. This guide walks you through everything from unboxing to your first real sprouts, and covers what to do when things go sideways.
Buzzy Seeds Grow Kit Instructions: Setup, Germination, Fixes

Marcus Thornfield
19 Apr 2026
Whether your kit is a simple seed-starting setup or one of Buzzy's specialty varieties like their sunflower, daisy, or watermelon kits, the core process is the same with a few key differences depending on your exact model. If you’re using a Buzzy Seeds daisy grow kit, the kit-specific planting and germination expectations can make the biggest difference.
For a daisy variety, follow the daisy grow kit instructions in this guide to match the right planting depth and germination expectations.
First, figure out which Buzzy Seeds kit you have
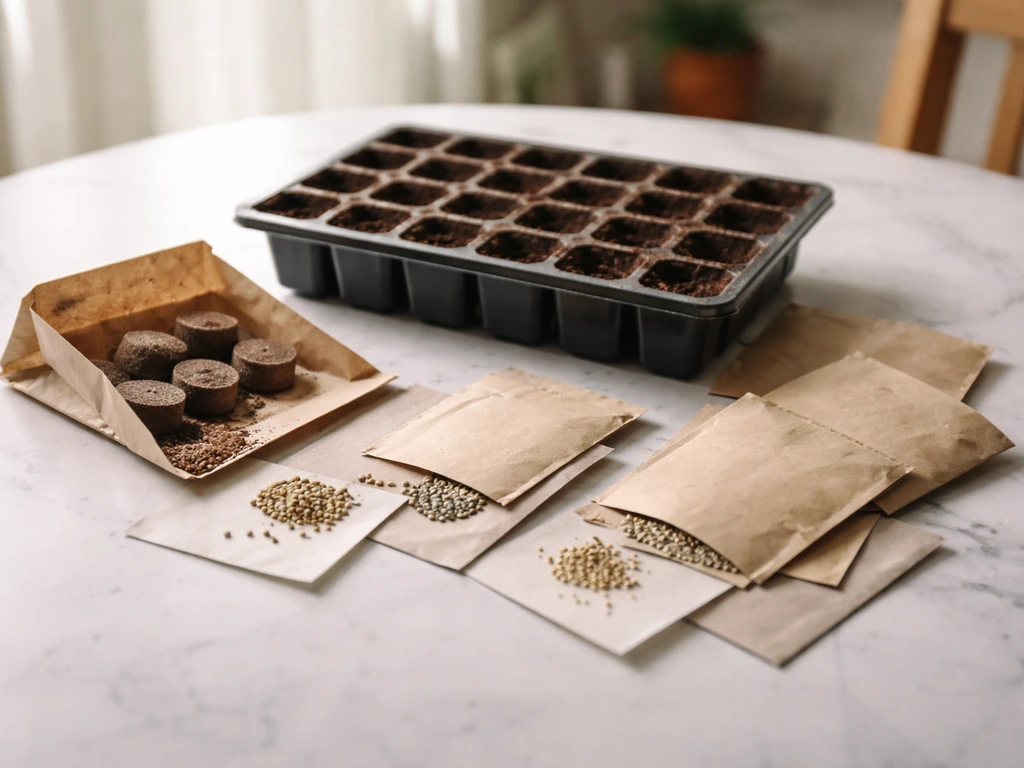
Buzzy Seeds makes a range of kits, and the instructions can vary meaningfully between models. Before you do anything else, check what's printed on your box or seed packet. The kit name usually tells you the plant type (lavender, basil, sunflower, strawberry, etc.), and that matters because germination timelines and planting depths differ quite a bit between varieties.
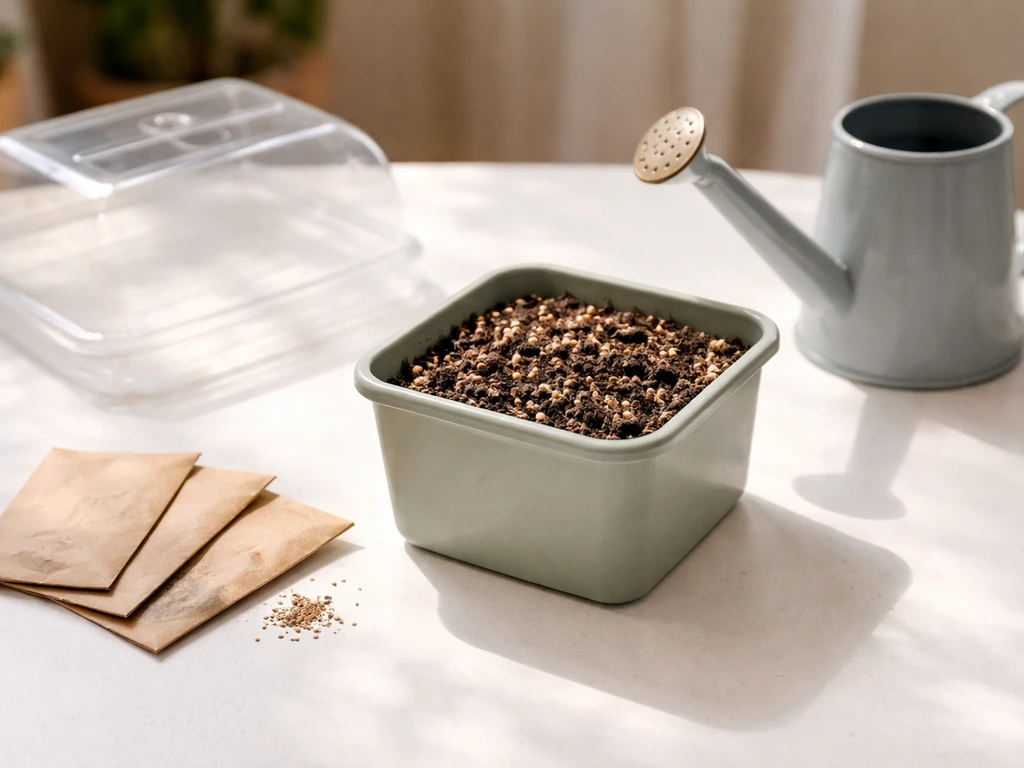
Every standard Buzzy Seeds kit includes three core components: a planter (usually a small pot or tray), a compressed coconut husk growing medium (the little puck or disc that expands when wet), and the seed packet itself. Some kits also include a plastic humidity dome or cover. Check your box against this list and set everything on a clean surface before you start.
- Planter pot or tray
- Compressed coconut husk growing medium (looks like a flat disc or small brick)
- Seed packet (check the variety name carefully)
- Plastic humidity dome or cover (included in some models)
- Instruction card or insert
If anything is missing or damaged out of the box, hold onto the packaging. You'll need it if you contact Buzzy Seeds support later. Missing seeds or a broken planter are legitimate reasons to reach out before you even start.
The quick setup overview before you dive into steps
Here's the short version of what you're about to do, so nothing comes as a surprise: you'll hydrate the growing medium first, fill your planter with it, plant your seeds at the right depth, place the kit somewhere warm and bright, and then keep the medium just barely moist while you wait. That's the whole arc. The steps below just fill in the details.
One thing worth knowing upfront: the biggest mistakes people make with these kits happen right at the start, either overwatering the growing medium or planting seeds too deep. Buzzy Seeds notes that rosemary should be sown onto the surface of the growing medium and not covered, because rosemary seeds need light to germinate planting seeds too deep. Both kill germination before it even starts. Keep those two things in mind and you're already ahead.
Step-by-step instructions by kit type
Seed-starting kits (the most common Buzzy format)
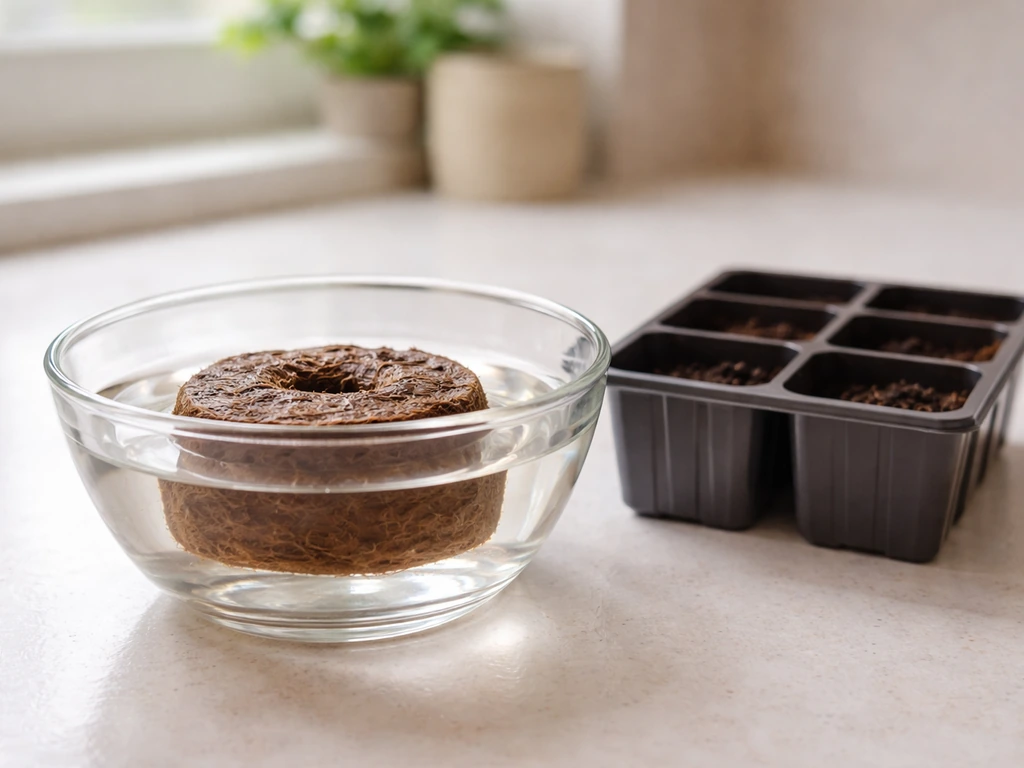
- Hydrate the growing medium: Place the coconut husk disc in a separate bowl (not the planter) and pour warm water over it. Watch it expand, which takes a few minutes. Add water gradually so it fully absorbs rather than flooding it. Once expanded, fluff it gently with a fork to break up any clumps.
- Fill the planter: Scoop the hydrated medium into your planter. Leave about half an inch of space at the top. The medium should feel like a wrung-out sponge, moist but not dripping.
- Check your seed's planting depth: This is where the instruction card matters. The general rule from Buzzy Seeds is to plant seeds about as deep as they are wide. Tiny seeds like lavender or petunia go on the surface and are barely covered or left uncovered entirely. Larger seeds like nasturtium go about half an inch deep, and something like pumpkin goes a full inch down.
- Plant the seeds: Make a small indent at the right depth, drop in the seeds, and gently cover. For seeds that need light to germinate (Buzzy's guide lists alyssum, bee balm, impatiens, lavender, and petunia among them), just press the seeds lightly onto the surface and don't cover them.
- Pre-soak if needed: Check your seed packet. Certain hard seeds benefit from soaking. Spruce seeds, for example, should soak for 24 hours before planting to improve germination rates. Most flower and herb seeds don't need this step.
- Place your kit: Set it in a warm spot between 65°F and 75°F. This is the range Buzzy Seeds recommends for most common varieties. Avoid cold windowsills or spots near air vents.
- Cover if you have a dome: If your kit included a humidity cover, put it on now. It helps retain moisture during the first critical days. Remove it once sprouts appear.
- Water gently and consistently: Check the surface daily. When it starts to feel dry to the touch, give it a light watering with a spray bottle or a small watering can. The goal is lightly moist, not wet.
Water-based or mini-terrarium style kits
Some Buzzy kits use a more enclosed or water-wicking setup rather than traditional top-watering. If your kit has a small reservoir at the base, a wick system, or a sealed clear dome, the main difference is that you fill the reservoir to the marked line rather than watering the medium from the top. The coconut husk medium still needs to be hydrated first the same way. Once planted, you top up the reservoir when it drops below the minimum line rather than checking the surface daily. Everything else, including temperature, light, and seed depth, stays the same.
Light, water, temperature, and timing: the real numbers
Getting these four conditions right is what separates a successful kit from a frustrating one. Here's what Buzzy Seeds actually recommends, with some practical context added.
Light
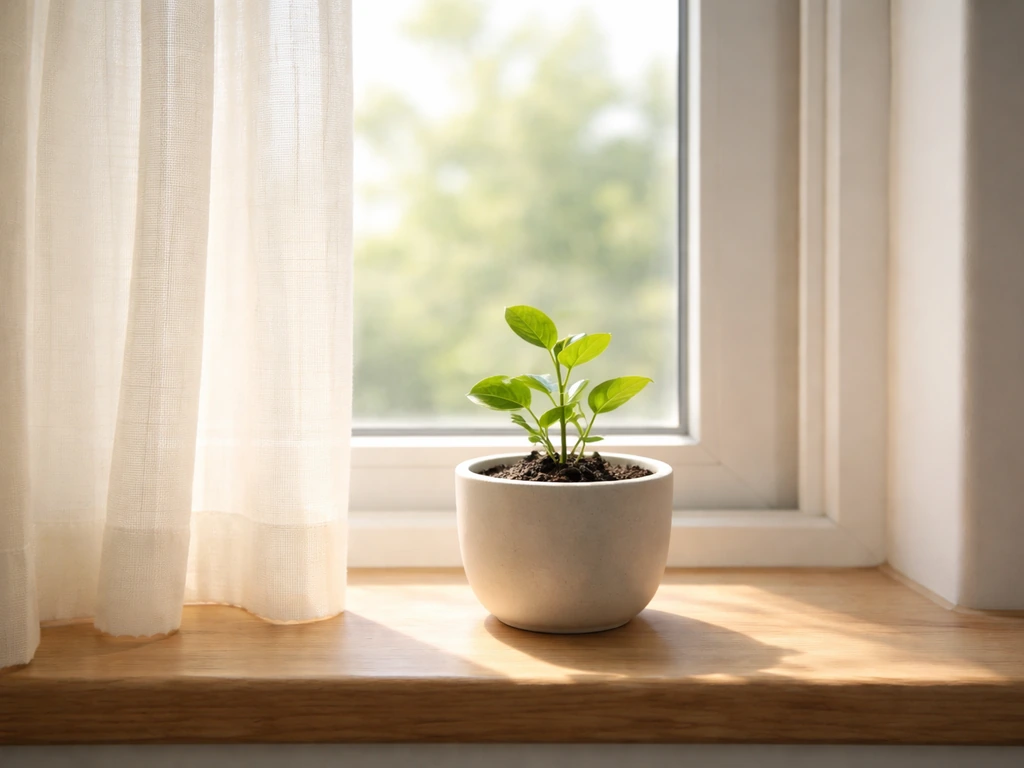
Place the planter in a bright spot, ideally near a south- or east-facing window. Buzzy Seeds recommends avoiding prolonged harsh direct sunlight, which can dry out the medium too fast and stress young seedlings. If natural light is limited (common in apartments or during winter), a basic grow light placed a few inches above the planter works well. You don't need anything fancy. Keep the light on for about 14 to 16 hours per day and off overnight.
Water
The single most useful watering instruction from Buzzy Seeds is this: keep the medium lightly moist, check it daily, and only water when the surface starts to feel dry. That's it. A gentle spray or a small pour from a watering can is all it takes. Overwatering is the most common mistake and one of the leading causes of mold and root rot in these kits.
Temperature
Aim for 65°F to 75°F (18°C to 24°C). Most kitchen counters or living room shelves fall in this range naturally. Avoid placing the kit near a drafty window in winter or directly on a cold tile floor. Warmth speeds up germination; cold slows it down dramatically or stops it entirely.
Timing and germination expectations
This is where a lot of people panic unnecessarily. Germination timelines vary a lot by seed variety. Buzzy Seeds' own planting guide shows that lavender and strawberry can take 4 to 6 weeks to sprout, while rosemary takes 14 to 30 days. Fast germinators like lettuce or basil might show up in under a week. Always check the planting guide for your specific variety before deciding something has gone wrong.
| Seed Variety | Germination Timeline | Planting Depth |
|---|---|---|
| Lavender | 4–6 weeks | Surface, do not cover |
| Strawberry | 4–6 weeks | Surface or very shallow |
| Rosemary | 14–30 days | Light cover |
| Lettuce | 7–14 days | 1/4 inch |
| Pansy | 10–21 days | 1/8 inch |
| Nasturtium | 10–14 days | 1/2 inch |
| Pumpkin | 7–14 days | 1 inch |
When things go wrong: troubleshooting common problems
No germination after two or more weeks
First, check what your seed variety's actual timeline is. If you planted lavender last week and nothing has happened, that's completely normal. If you're past the expected window, check three things: Is the medium staying moist (not bone dry, not soggy)? Is the temperature at least 65°F? Were the seeds planted at the correct depth? Seeds planted too deep won't make it to the surface in time. If all three look fine and you're still getting nothing, Buzzy Seeds offers a Grow Guarantee: if your seeds don't sprout or your seedlings struggle, they'll replace the seed packet completely free. Look for the 'Replace My Seed Packet' option on their website.
Mold on the surface of the medium
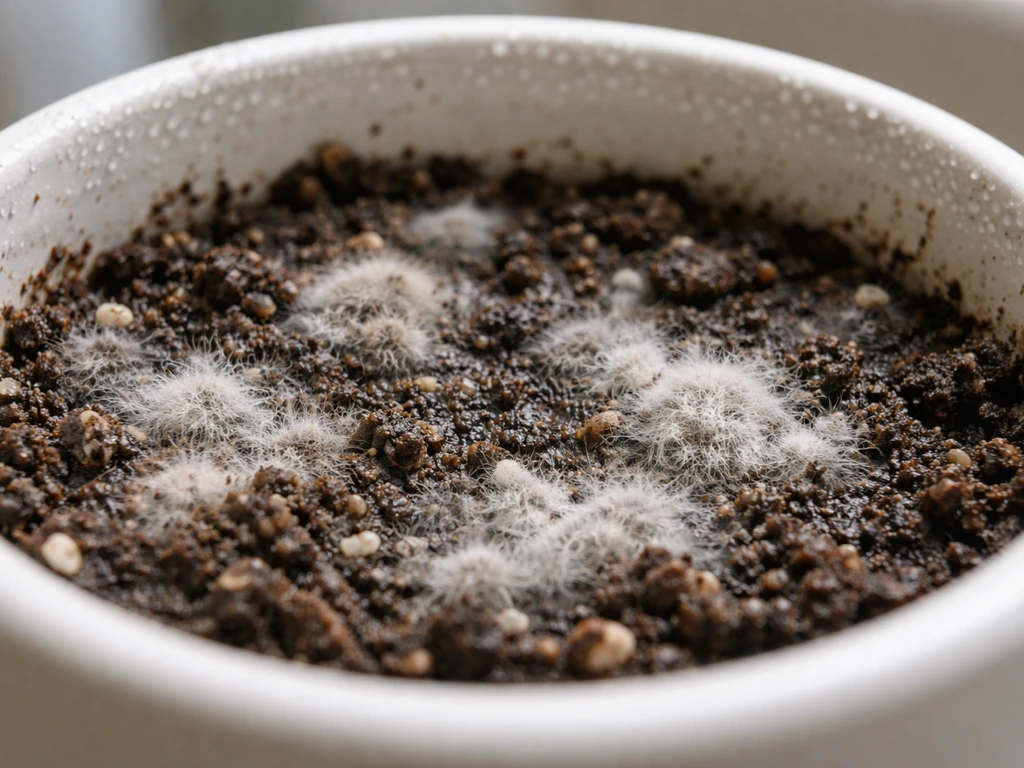
White or gray fuzzy growth on the soil surface is almost always caused by overwatering combined with poor air circulation. Let the surface dry out slightly between waterings, remove the humidity dome if you're using one, and increase airflow around the kit. You can gently scrape off the affected area and let the top layer dry before watering again. If the mold is persistent, it's a sign you're watering too frequently.
Fungus gnats
Tiny flies hovering around your kit are fungus gnats, and they love consistently wet growing medium. The fix is to let the top half inch of the medium dry out between waterings. Gnats can't complete their life cycle in drier conditions. Avoid bottom-watering only as a short-term strategy to keep the surface dry. Yellow sticky traps placed near the kit also help catch adults while you fix the moisture situation.
Leggy or weak sprouts
If your seedlings are tall, thin, and flopping over, they're not getting enough light. Move the kit closer to a brighter window or drop a grow light down to within a few inches of the seedlings. This is one of the most fixable problems in the whole process. You'll see improvement within a day or two of giving them more light.
Uneven germination (some spots sprout, others don't)
This usually comes down to inconsistent seed depth, uneven moisture in the medium, or seeds that ended up too close together and competed. It's normal to see some variation, especially with smaller seeds. Focus on the seedlings that are doing well rather than trying to rescue every spot.
Medium drying out too fast
If you're watering daily and the medium still dries out quickly, your spot is probably too warm, too sunny, or too drafty. Move the kit to a slightly cooler, less exposed location. You can also use a humidity dome to slow moisture loss during the germination phase.
Keeping it going: maintenance, thinning, and harvesting
Thinning your seedlings
Once your seedlings grow their first true leaves (that's the second set of leaves, not the initial seed leaves), it's time to thin. This just means removing weaker or crowded seedlings so the strongest ones have room to grow. It feels counterintuitive to pull out seedlings you worked hard to grow, but overcrowding leads to weak plants and disease. Pinch them at soil level rather than pulling, so you don't disturb nearby roots.
Fertilizing
The coconut husk medium doesn't have a lot of nutrients on its own, so once your seedlings develop their second set of true leaves, start feeding them. Buzzy Seeds recommends a balanced, water-soluble fertilizer at half strength, applied about once a month. Don't start fertilizing before this stage as it can burn young roots.
Harvesting and cutting
For herb kits, harvest by snipping stems just above a leaf node to encourage bushier growth rather than just cutting the top. For flower kits, deadheading (removing spent blooms) keeps the plant producing. For kits like strawberry or other fruiting varieties, patience is key since those take considerably longer to reach a harvestable stage.
Running a second batch
To get consistent results batch after batch, clean the planter thoroughly between uses to remove old medium, root debris, or any mold residue. Start with fresh coconut husk medium. Don't reuse leftover medium from a previous run as it may harbor disease or fungal spores. Buzzy's kits are designed to be repeatable, so a clean start each time makes a real difference.
Safety, storage, and what to do if something's wrong with your kit
Handling and safety basics
Coconut husk growing medium is non-toxic, but wash your hands after handling it, especially before eating. If your kit includes any nutrient packets or additives, keep them out of reach of children and pets, and mix them at the dilution rate specified. Never apply nutrients at full strength to seedlings.
Storing unused seeds and medium
If you're not planting right away, store the seed packet in a cool, dry place away from direct sunlight. A sealed bag in a drawer or cupboard works fine. Don't store seeds in the refrigerator unless the packet specifically recommends it, and keep them away from moisture. Unused dry coconut husk medium can be stored in a sealed bag indefinitely.
Missing parts, defective kits, and the Grow Guarantee
If your kit arrived with missing components, a cracked planter, or seeds that simply won't germinate despite following the instructions correctly, Buzzy Seeds has you covered. If you need a replacement for more than one seed variety, Buzzy Seeds says you should submit a separate Seed Replacement Request form for each variety. Their Grow Guarantee offers a free seed packet replacement if your seeds don't sprout or your seedlings struggle.
Look for the 'Replace My Seed Packet' call-to-action on the Buzzy Seeds website. For defective or missing hardware components, contact their support team directly with a photo of the issue and your order information. Their Terms and Conditions note that products are provided as-is, so documenting the problem clearly from the start helps move things along faster.
If you're working with a specific Buzzy variety like their sunflower or watermelon kits, some of the setup details above, particularly planting depth and germination time, will differ from smaller flower or herb kits. The core method stays the same, but always cross-reference with the variety-specific planting guide for accurate timelines before deciding something has gone wrong.
FAQ
Can I hydrate the coconut husk medium ahead of time and use it later?
No. Buzzy-style kits are designed so the coconut husk medium hydrates first, then you plant into that evenly expanded puck, and you keep it lightly moist afterward. If you soak the medium and then let it dry out completely before planting, the medium often becomes uneven, which can cause patchy germination.
Should I keep the humidity dome on the entire time until seeds sprout?
It depends on what you mean by “humid.” If your kit includes a dome, remove or crack it once you see active sprouting, and increase airflow if you notice any fuzzy growth. Keep the medium moist but not wet, the dome can trap excess humidity and worsen mold when watering is inconsistent.
What if I’m not sure I planted at the right depth?
Check the seeds packet or kit label for the exact depth callout, because different Buzzy varieties can vary. If you cannot find the depth guidance, plant at the depth stated for that variety, otherwise choose a conservative approach (slightly shallower is usually better than too deep for reaching the surface). Seeds planted too deep are a common reason for a complete standstill.
How do I avoid overwatering when I’m watering from the top?
You generally should not. These kits rely on maintaining the medium at a lightly moist level, but a thick, constantly wet layer encourages fungus gnats and mold. Instead, wait until the top portion of the medium begins to feel dry, then water gently enough to re-moisten without turning the surface into a puddle.
My seedlings started, now they are growing slowly. What should I check first?
If seedlings look fine but growth stalls, first confirm light and temperature are within the recommended range. Next, verify that the medium is staying just moist, not drying to bone-dry, and not staying soggy. For nutrient-fed kits, remember you should not fertilize until after the second set of true leaves.
Can I thin seedlings earlier or transplant them instead of pinching?
Yes, but only if you do it gently and selectively. If seedlings are crowded, thin once they have enough size to handle safely, pinch at soil level, and avoid pulling. After thinning, keep moisture consistent so the remaining seedlings do not dry out while the others are removed.
What should I do if the growing medium starts smelling bad or stays wet?
If the medium smells sour or looks continuously wet, it is over-saturated. Let the surface dry slightly between waterings, improve airflow, and avoid watering again until the top feels dry to the touch. If mold keeps returning, reduce watering frequency and remove any dome during the sprouting and early seedling stage.
Do yellow sticky traps replace fixing the fungus gnat problem?
Sticky traps help catch adult fungus gnats, but they do not solve the underlying cause. The real fix is to adjust watering so the top half inch dries between waterings. Using bottom-watering temporarily can help some people control surface moisture, but it can also mask the real issue if the medium stays wet deeper down.
How can I tell mold from normal residue on the coconut medium?
A “musty” film can be mistaken for mold, especially when the surface is wet too often. True mold usually appears as white or gray fuzzy growth that spreads. If it is only a slight residue, focus on changing the watering rhythm and airflow, scrape only if fuzzy growth is clearly present, and avoid repeatedly re-wetting the same spot.
What causes leggy seedlings, and how do I correct it quickly?
If seedlings are stretching, light is usually the cause, move the kit closer to brighter light or lower the grow light so it is a few inches above. Also check that you are not placing the kit in a drafty, colder spot, temperature swings can slow growth and lead to weak, leggy seedlings.
My seeds did not sprout. When do I decide it’s time to use the Grow Guarantee?
If you get no sprouting by the end of the variety’s expected window, verify seed depth, medium moisture (not soggy, not bone dry), and temperature. Then give it a little extra time only if the timeline in the guide allows for a range, but if you are past the high end, use the Grow Guarantee replacement option.
Does germination require darkness or light for buzzy seeds kits?
Some seeds need darkness to germinate, others prefer light. Your kit is designed for the specific variety, so follow the printed guide for that packet. If you cover the seeds for one variety when the kit expects light, you can delay or prevent germination.
Is uneven germination expected, or should I replant?
It can be normal for seedlings to look a bit uneven early, especially with smaller seeds. Treat uneven emergence as normal up to the variety’s germination window. If you see only one or two sprouts after the window ends, then troubleshoot depth, moisture level, and temperature rather than reseeding right away.
What if I fertilized too early by mistake?
Fertilizer can burn young roots, so wait until the second set of true leaves, then use half-strength water-soluble fertilizer. If you accidentally fed earlier, pause feeding immediately and flush gently with plain water (only enough to avoid pooling), then resume only after the correct growth stage.