
Biobizz Bio·Grow is a liquid organic fertilizer dosed at 1–4 ml per litre of water (roughly 4–15 ml per US gallon), used from early vegetative growth right through to the transition into flowering. Mix it into plain water, check your pH sits between 6.2 and 6.5, and water your plants as normal. That is the core of it. This guide unpacks every detail you need to use it confidently, whether you are running a simple soil kit, a coco setup, or a small consumer hydro system.
Biobizz Bio Grow Instructions: Complete Dosing Guide

Marcus Thornfield
14 Jul 2026
Who this guide is for
If you have just picked up a bottle of Biobizz Bio·Grow and the instructions feel vague, you are in the right place. This walkthrough is written for DIY gardeners, hobbyists, and anyone who bought a consumer grow kit and wants clear, no-jargon steps. You will find exact doses for soil, coco, potting mixes, and common hydro buckets, a stage-by-stage feeding schedule, a printable quick-reference chart, troubleshooting fixes, and notes on where to find kit-specific guides across this site.
What Biobizz Bio·Grow actually is
Bio·Grow is a liquid organic growth fertilizer made from Dutch sugar-beet vinasse, which is basically the fermented, molasses-like byproduct of sugar beet processing. That base is rich in naturally occurring sugars, potassium, and micro-nutrients. The NPK ratio is 4-3-6 (nitrogen 4%, phosphorus 3%, potassium 6%), so it leans toward potassium rather than being a heavy nitrogen feed like some synthetic veg nutrients.
Because it is built around an organic fermentation extract rather than mineral salts, it works by feeding the microbial life in your soil or coco as much as it feeds the plant directly. That is why growers who use living soil or build healthy root zones tend to get on well with it. It is not a standalone complete fertilizer for every stage, but it is the go-to Biobizz product for the vegetative period, often paired with Bio·Bloom once plants shift toward flowering.
When to use Bio·Grow and what it works best with
Bio·Grow is designed for the growth phase. You start it once seedlings have a couple of sets of true leaves and roots have moved beyond the seed, roughly week 1 to 2 after germination. You continue feeding it through early and late vegetative growth, then taper it off as plants transition into flowering, at which point Bio·Bloom takes over.
It works across a wide range of media. Soil is where it performs most naturally because the organic sugars actively support soil bacteria and fungi. Coco coir and soilless mixes are also fine, though they need slightly closer EC monitoring since they lack the buffering of soil. Biobizz even publish schedules for hydro use, though in those environments you will need to be more attentive to reservoir cleanliness, since organic nutrients can encourage microbial growth in standing water.
One useful manufacturer tip worth flagging: Biobizz actually suggest you can swap Fish·Mix in place of Bio·Grow during the vegetative phase if you prefer, then switch to Bio·Grow when you want to trigger the transition toward flowering. It is an either/or approach rather than a strict rule, but it is good to know the two products are interchangeable in that role.
Safety and storage before you start
The official Biobizz Safety Data Sheet (revised January 2023) classifies Bio·Grow as non-hazardous under CLP regulations, so it is genuinely low-risk to handle. That said, the SDS does list standard precautions worth following: avoid skin and eye contact, wear gloves if you are mixing large volumes or have sensitive skin, and keep it away from eyes when pouring. If you do get it in your eyes, rinse with water for several minutes.
- Store in a cool, ventilated place away from direct sunlight — the SDS specifically states 'Keep cool. Protect from sunlight'
- Keep the bottle tightly closed between uses to prevent oxidation and contamination
- Once mixed into water, use the nutrient solution promptly — within 24 hours is the commonly cited window for mixed organic solutions, since organic material in water can change character quickly
- Keep out of reach of children and pets
- Do not store near food, feed, or drinking water
- Write the date you opened the bottle on the label so you can track freshness
Tools you will need before mixing
You do not need a lot of equipment, but a few basic tools make a real difference between guessing and actually knowing your plants are getting the right feed.
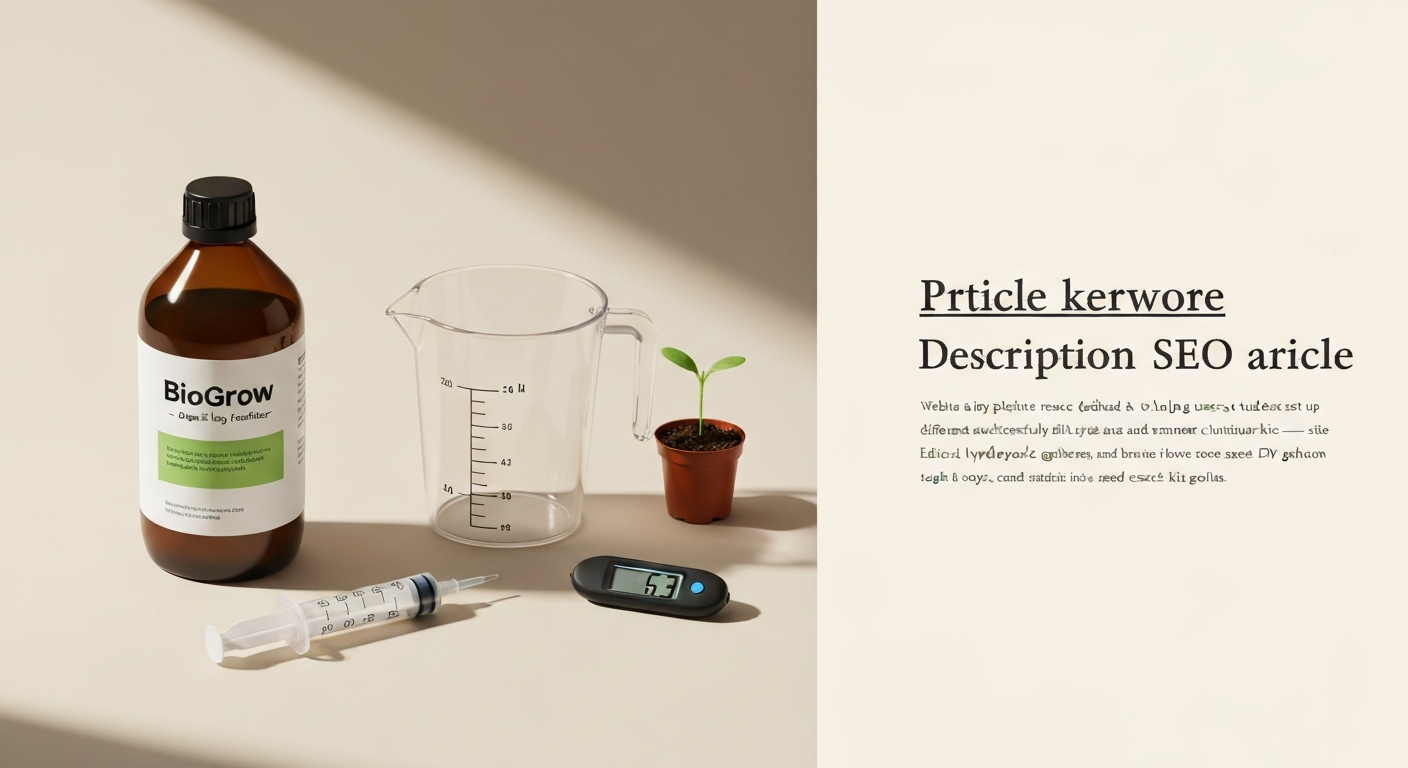
- Measuring syringe or pipette (1–5 ml range): far more accurate than measuring spoons for small doses, especially at 1–2 ml/L starter doses
- Measuring jug or bucket with clear litre/gallon markings: needed to know your exact water volume before dosing
- pH meter (digital pen-style): essential for hitting the 6.2–6.5 target range — pH strips are not precise enough for this
- EC/TDS meter: tracks your total dissolved nutrient level so you can spot overfeeding before your plants show it
- Thermometer: water temperature affects nutrient uptake and microbial activity — aim for water around 18–22°C (64–72°F)
- pH Up and pH Down solutions (Biobizz Bio·Up and Bio·Down or equivalent): for correcting pH after mixing
- Notebook or phone notes: log your doses, pH readings, and EC readings each feed — you will thank yourself when something goes wrong
General mixing rules: always follow this order
The order you add things to water matters more than most beginners expect. Adding nutrients to an already-adjusted pH solution, or dropping pH correctors in before nutrients, leads to inaccurate readings and can cause nutrient lockout.
- Start with plain, room-temperature water in your mixing container
- Add Bio·Grow (and any other nutrients) to the water and stir well
- Add any Biobizz supplements or additives after the base nutrients
- Stir the whole solution again
- Now test pH and EC with your meters
- Adjust pH up or down as needed using small amounts of pH corrector
- Re-test pH after adjusting — it can shift slightly as it settles
- Use the solution within 24 hours
Baseline dosage and how to convert ml per litre to ml per gallon
The official Biobizz product data sheet gives a regular watering dose of 1–4 ml per litre. An older Biobizz data sheet published US gallon guidance as 5–12 ml per gallon for regular watering, with later weekly values reaching 7, 11, and 15 ml/gallon in heavier feed weeks. These figures align with the simple maths: 1 US gallon is 3.785 litres, so multiplying your ml/L dose by 3.785 gives you the ml/gallon equivalent.
| Dose (ml/L) | 1 L | 5 L | 10 L | 1 US gal (3.78 L) | 5 US gal (18.93 L) |
|---|---|---|---|---|---|
| 1 ml/L | 1 ml | 5 ml | 10 ml | ~3.8 ml | ~18.9 ml |
| 2 ml/L | 2 ml | 10 ml | 20 ml | ~7.6 ml | ~37.9 ml |
| 3 ml/L | 3 ml | 15 ml | 30 ml | ~11.4 ml | ~56.8 ml |
| 4 ml/L | 4 ml | 20 ml | 40 ml | ~15.1 ml | ~75.7 ml |
A practical tip: always measure with a syringe rather than estimating. At a 2 ml/L dose into a 5-litre watering can, you are adding exactly 10 ml. Eyeballing that in a tablespoon or bottle cap is not accurate enough, especially at the lower seedling doses.
Dosing for soil grows
Soil is Bio·Grow's natural home. The organic sugars feed soil microbes, which in turn release nutrients to plant roots. This means soil setups are also slightly more forgiving if you dose a little conservatively.
| Growth stage | ml per litre | ml per US gallon |
|---|---|---|
| Early veg (weeks 1–2) | 1–2 ml/L | 4–8 ml/gal |
| Mid veg (weeks 3–4) | 2–3 ml/L | 8–11 ml/gal |
| Late veg / pre-transition (week 5+) | 3–4 ml/L | 11–15 ml/gal |
| Transition to flower | 1–2 ml/L (tapering) | 4–8 ml/gal (tapering) |
Step-by-step soil mix preparation (10-litre reservoir example)
- Fill your watering can or mixing bucket with 10 litres of plain tap or filtered water at around 20°C
- Draw up 20 ml of Bio·Grow in your syringe (using a mid-veg dose of 2 ml/L x 10 L)
- Add the Bio·Grow to the water and stir for 30 seconds
- Add any supplements (see compatibility section below) and stir again
- Test EC — for mid-veg soil, aim for roughly 1.3–1.6 mS/cm total
- Test pH — target 6.2–6.5 for soil
- Adjust pH if needed using small drops of Bio·Down or Bio·Up, re-test after each adjustment
- Water your plants as normal, applying until you see a small amount of runoff from the base
- Dispose of any unused solution or use it within 24 hours
Dosing for coco and soilless mixes
Coco coir and perlite-based soilless mixes hold fewer nutrients than pre-amended soil, so plants rely more directly on what you put in the water. The dose range is similar to soil, but you should feed more frequently (often every watering) and watch your EC more closely since there is less buffer.
| Growth stage | ml per litre | ml per US gallon |
|---|---|---|
| Early veg | 1–2 ml/L | 4–8 ml/gal |
| Mid veg | 2–3 ml/L | 8–11 ml/gal |
| Late veg | 3–4 ml/L | 11–15 ml/gal |
| Transition | 1–2 ml/L (tapering) | 4–8 ml/gal (tapering) |
In coco, you are feeding the plant more directly, so EC management matters more. Keep the total solution EC under 1.0 mS/cm for young plants and step up gradually through veg. Mix and pH-adjust every batch fresh, since organic nutrients left in a reservoir or can overnight can change character. Manufacturer and resellers advise that mixed Biobizz liquid nutrients should be used within 24 hours and to follow label dosing guidance to avoid microbial changes and overdosing use within 24 hours. In coco, a pH of 6.2–6.5 still applies.
Dosing for potting mixes and pre-fertilized media
Many consumer grow kits come with potting mix or starter compost that already contains nutrients, sometimes enough for the first 4–6 weeks. If your medium is pre-fertilized, you risk overfeeding by adding Bio·Grow at full dose on top of an already-loaded substrate.
The practical approach is to start at half-strength or lower (0.5–1 ml/L) and watch for signs of excess before stepping up. Check the EC of your runoff water: if it is already high, hold off on adding more nutrients until it drops. The Biobizz manufacturer advice is clear here: it is always better to be modest than to add more. A plant will not die from a slight underfeeding, but an overdose can cause real harm.
| Media type | Starting dose | ml per litre | ml per US gallon |
|---|---|---|---|
| Pre-fertilized potting mix (weeks 1–4) | Half dose | 0.5–1 ml/L | 2–4 ml/gal |
| Pre-fertilized potting mix (weeks 5+, when nutrients deplete) | Standard dose | 2–3 ml/L | 8–11 ml/gal |
| Standard un-amended potting mix | Standard dose | 1–4 ml/L | 4–15 ml/gal |
Dosing for consumer hydro kits (buckets, small DWC, drip systems)
Hydro is where organic nutrients like Bio·Grow require the most attention. In a recirculating system or deep water culture (DWC) bucket, the organic matter in Bio·Grow can encourage microbial growth if left sitting in a warm reservoir for too long. This is not a dealbreaker, but it does mean you need to stay on top of reservoir management.
| Growth stage | ml per litre | ml per US gallon | Reservoir change frequency |
|---|---|---|---|
| Early veg | 1–2 ml/L | 4–8 ml/gal | Every 7 days |
| Mid veg | 2–3 ml/L | 8–11 ml/gal | Every 5–7 days |
| Late veg | 3–4 ml/L | 11–15 ml/gal | Every 5–7 days |
| Transition | 1–2 ml/L (tapering) | 4–8 ml/gal (tapering) | Every 5–7 days |
Keep your reservoir water temperature below 22°C to slow unwanted microbial activity. Change your reservoir solution at least every 7 days (every 5 days is better in warmer conditions). Between changes, top up with plain pH-adjusted water rather than adding fresh nutrient mix on top of old. Keep your system clean, rinse buckets, tubes, and net pots when you do a reservoir change.
Feeding schedule by growth stage
This schedule is based on the official Biobizz 2024 Nutrient Schedule and is designed as a practical starting point. Every plant and environment is different, so treat these as your baseline and adjust based on what you observe.
| Stage | Weeks (approx) | Bio·Grow dose (ml/L) | Bio·Grow dose (ml/gal) | Notes |
|---|---|---|---|---|
| Seedling / clone | Weeks 1–2 | 0 (hold off) | 0 | Seedlings do not need Bio·Grow yet — plain water or very dilute feed only |
| Early veg | Weeks 2–3 | 1 ml/L | ~4 ml/gal | Introduce Bio·Grow at low dose, monitor closely |
| Mid veg | Weeks 3–4 | 2 ml/L | ~8 ml/gal | Step up as plant grows vigorously |
| Late veg | Weeks 4–6 | 3–4 ml/L | ~11–15 ml/gal | Full dose range for healthy established plants |
| Transition to flower | Week 6–7 | 1–2 ml/L (tapering) | ~4–8 ml/gal | Begin reducing Bio·Grow, introduce Bio·Bloom |
| Full flowering | Week 7 onward | 0 (stop) | 0 | Stop Bio·Grow, use Bio·Bloom as directed |
The key moment to stop Bio·Grow is when you see the first signs of flowering: the plant forming its early flower sites or pistils. From that point, Bio·Bloom takes over as the primary feed. Carrying Bio·Grow too far into flower can push excessive vegetative growth when you want the plant to put energy into buds or fruit.
Mixing Bio·Grow with other Biobizz products and common nutrients
Biobizz products are designed to work together, and the 2024 Nutrient Schedule gives clear rules for combining them. The most important rule for supplements: when you use one or two of the trio (Alg·A·Mic, Acti·Vera, Fish·Mix) in a feed, use 1–2 ml/L of each. When you use all three together in the same solution, drop every one down to a maximum of 1 ml/L each. Exceeding that combined dose risks an organic overload.
| Product | Compatible with Bio·Grow? | Typical combined dose | Notes |
|---|---|---|---|
| Bio·Bloom | Yes | Overlap during transition only | Reduce Bio·Grow while introducing Bio·Bloom |
| Top·Max | Yes | Per schedule (flowering phase) | Typically added in mid to late flower, not during veg with Bio·Grow |
| Alg·A·Mic | Yes | 1–2 ml/L (1 ml/L if using all three supplements) | Stress recovery and general tonic |
| Fish·Mix | Yes (or use as replacement) | 1–2 ml/L alongside, or replace Bio·Grow entirely | Can substitute Bio·Grow in veg or run alongside at lower doses |
| Acti·Vera | Yes | 1–2 ml/L (1 ml/L if using all three supplements) | Immune support and aloe-based additive |
When mixing with third-party nutrient brands, the key is to not combine organic-based products like Bio·Grow with mineral nutrients at high doses. High-salt mineral feeds can interfere with the microbial activity that makes Bio·Grow effective in soil. If you are using a non-Biobizz base nutrient, keep doses conservative and always check combined EC before feeding. Always add each product to the water separately, stir between additions, and test pH and EC at the end before adjusting.
How to measure and adjust pH and EC
Target pH and EC ranges by media
| Media | Target pH | Seedling EC (mS/cm) | Veg EC (mS/cm) | Transition EC (mS/cm) |
|---|---|---|---|---|
| Soil | 6.2–6.5 | <0.8 | 1.3–1.6 | 1.3–1.6 |
| Coco / soilless | 6.2–6.5 | <1.0 | 1.3–1.6 | 1.3–1.6 |
| Hydro (DWC/drip) | 6.2–6.5 | 0.6–0.8 | 1.3–1.6 | 1.5–1.8 |
Adjusting pH with Bio·Up and Bio·Down
The neat Bio·Grow product has a pH of around 5.51, so adding it to water typically lowers pH slightly. After mixing your full solution, always test and adjust. The official Biobizz figures for their pH products are worth memorising: 0. According to Biobizz, pH and EC regulation (FAQ), Bio·Up / Bio·Down adjustment effect (0.1 ml figures), 0.1 ml of Bio·Down in 1 L lowers pH by about 0.5 while 0.1 ml of Bio·Up in 1 L raises pH by about 0.1 Biobizz — pH and EC regulation (FAQ) — Bio·Up / Bio·Down adjustment effect (0.1 ml figures). 1 ml of Bio·Down added to 1 litre of nutrient solution lowers pH by approximately 0.5. The same 0.1 ml of Bio·Up in 1 litre raises pH by only about 0.1. That asymmetry is important. Bio·Down is powerful so add it in tiny increments. Bio·Up is gentler, so you need more of it to raise pH the same amount.
Add your pH adjuster drop by drop, stir well, and re-test before adding more. pH can continue to drift slightly for a few minutes after adjustment, so be patient. If you overshoot low pH and need to raise it, use Bio·Up. If you went too high, use Bio·Down carefully. Recalibrate your pH meter every 1–2 weeks using a standard calibration solution, a meter that drifts out of calibration is the single most common reason for unexplained pH problems.
Troubleshooting common problems
Nutrient burn (tips browning, curling down)
Burnt leaf tips that curl downward are a classic sign of too much nutrient salt. In an organic product like Bio·Grow it can happen if you push doses above 4 ml/L, especially in small containers or pre-fertilized media. Fix: flush your medium with plain pH-adjusted water (2–3 times the container volume), wait until the plant shows recovery, then restart feeding at 50% of your previous dose.
Underfeeding (pale leaves, slow growth)
Yellowing that starts on older, lower leaves and moves upward is often a nitrogen deficiency. In this case it usually means you are either not feeding enough or your pH is off (locking out available nitrogen). Check your pH first, if it is outside 6.2–6.5 correct it before increasing dose. If pH is fine, step your Bio·Grow dose up by 0.5–1 ml/L and monitor over the next few days.
pH drift
Organic nutrients interact with your medium and naturally cause pH to drift between feeds, especially in coco and hydro. If pH keeps drifting outside your target range between waterings, check: (1) that you are adjusting after mixing all nutrients, not before; (2) that your meter is calibrated; (3) that your water source has not changed (tap water pH and mineral content can vary seasonally). In hydro, more frequent reservoir changes also help control drift.
Yellowing (general)
Not all yellowing means nutrient deficiency. Check light distance, watering frequency, and root health before increasing nutrient dose. Overwatering is more common than underfeeding in beginner soil grows. If the medium stays wet for more than 3–4 days between waterings, let it dry out more before feeding again, waterlogged roots cannot absorb nutrients even if they are present.
Tip burn
Light brown crispy tips that do not curl usually indicate a calcium or micro-nutrient imbalance rather than classic nutrient burn. In organic soil grows, this can sometimes happen when the microbial population is disrupted. Check your pH (calcium is poorly available below 6.0), and consider adding Alg·A·Mic at 1–2 ml/L as a recovery tonic.
Salt buildup in medium
Bio·Grow is lower in mineral salts than synthetic nutrients, but salt can still accumulate over time, especially in containers with poor drainage. Signs include a white or yellowish crust on the medium surface and persistently high EC in runoff. Prevention: always water to 10–20% runoff so salts drain out regularly. If buildup is already present, do a plain-water flush and hold off on nutrients for one to two feeds.
Common mistakes beginners make (and how to avoid them)
- Starting Bio·Grow too early on seedlings — wait until true leaves appear and roots are established
- Dosing without measuring water volume first — always know exactly how many litres or gallons you are mixing into
- Adjusting pH before adding nutrients — always add nutrients to water first, then test and adjust pH
- Using a pH meter that has not been calibrated recently — recalibrate every 1–2 weeks
- Not checking EC at all — high EC is invisible until the plant shows stress; meter checks catch it early
- Adding Bio·Grow on top of already-fertilized starter mix — start at half dose or skip the first few weeks
- Leaving mixed organic nutrient solution sitting overnight or longer — always mix fresh and use within 24 hours
- Pushing dose above 4 ml/L thinking more is better — Biobizz explicitly warns against overdosing organic nutrients
- Using all three Biobizz supplements (Alg·A·Mic, Acti·Vera, Fish·Mix) at full dose simultaneously — max 1 ml/L each when combining all three
- Continuing Bio·Grow into full flowering — taper and stop it when flowering begins, switch to Bio·Bloom
Quick-reference dosing chart (print and tape near your grow)
| Stage | ml/L | ml per 5 L | ml per 10 L | ml per 1 US gal | ml per 5 US gal | Target pH | Target EC (mS/cm) |
|---|---|---|---|---|---|---|---|
| Seedling (no feed) | 0 | 0 | 0 | 0 | 0 | 6.2–6.5 | <0.8 |
| Early veg | 1 | 5 | 10 | ~3.8 | ~18.9 | 6.2–6.5 | ~1.0–1.3 |
| Mid veg | 2 | 10 | 20 | ~7.6 | ~37.9 | 6.2–6.5 | ~1.3–1.6 |
| Late veg | 3–4 | 15–20 | 30–40 | ~11.4–15.1 | ~56.8–75.7 | 6.2–6.5 | ~1.4–1.8 |
| Transition | 1–2 (tapering) | 5–10 | 10–20 | ~3.8–7.6 | ~18.9–37.9 | 6.2–6.5 | ~1.2–1.5 |
| Flowering (stop Bio·Grow) | 0 | 0 | 0 | 0 | 0 | 6.2–6.5 | Per Bio·Bloom guide |
Biobizz Bio·Grow: honest product review
What works well
- Genuinely beginner-friendly: the 1–4 ml/L range is forgiving and hard to catastrophically overdo at normal doses
- Works well in soil-based grows where it actively supports microbial life, not just plant nutrition
- Low odour compared to Fish·Mix, making it easier to use indoors
- Organic certification means it is compatible with organic growing approaches
- Pairs seamlessly with the rest of the Biobizz line when you follow the schedule
- NPK of 4-3-6 gives a balanced, potassium-leaning profile suited to growth stages
Limitations to be aware of
- Not a complete standalone fertilizer — it needs to be paired with Bio·Bloom for a full grow cycle
- Organic content can cause reservoir issues in recirculating hydro systems if not managed carefully
- pH of the neat product is around 5.51, so you will almost always need to adjust pH upward after mixing
- Bottle size options (250 ml, 500 ml, 1 L, 5 L) mean cost-per-litre drops significantly if you buy larger — smaller bottles can feel expensive for the volume
Value for money and alternatives
At current pricing, Bio·Grow sits in the mid-range for organic liquid fertilizers. It is not the cheapest option, but the dosing efficiency (1–4 ml/L means a 1-litre bottle goes a long way for a small hobbyist grow) makes the cost reasonable per feed. If you are looking for alternatives at a similar budget, General Hydroponics FloraSeries is a widely available three-part mineral option that covers more media types out of the box, though it is not organic. For soil-focused organic growers who want to stay in the Biobizz ecosystem, Fish·Mix is a direct vegetative-phase alternative to Bio·Grow that some growers prefer for the slightly higher nitrogen content. If you are curious about how other nutrient lines approach mixing and dosing, their approaches share some useful principles with Bio·Grow's method.
Step-by-step walkthrough: a typical soil grow kit using Bio·Grow (first 6 weeks)
This is a copy-paste-ready starter plan for a beginner using a consumer soil-based grow kit with Bio·Grow as the main vegetative feed. Adjust timing based on how your specific plant is developing, these are guidelines, not hard rules.
- Days 1–7 (germination and seedling): Sow seeds or transfer clones into moist, unfertilized or lightly pre-fertilized soil. Water with plain pH-adjusted water (6.2–6.5). No Bio·Grow yet.
- Days 8–14 (first true leaves appear): Continue with plain water. If leaves look pale yellow after day 10–12, introduce Bio·Grow at 0.5–1 ml/L. Measure, mix, check pH and EC before watering.
- Days 15–21 (early veg): Feed Bio·Grow at 1–2 ml/L every second watering (water plain in between). EC target ~1.0–1.3 mS/cm. Watch leaf colour — healthy veg leaves should be mid to deep green.
- Days 22–28 (mid veg): Step up to 2 ml/L if the plant is growing vigorously and showing no stress. Feed every second watering. Check runoff EC — if it is rising above your input EC, hold the nutrient feed for one plain-water cycle.
- Days 29–35 (late veg): Increase to 3 ml/L if growth is strong and EC is within range. Continue feeding every other watering or as the medium dries out (every 1–2 days in small containers).
- Days 36–42 (transition toward flower): If your plant is showing pre-flower signs (white hairs, bud sites forming), begin tapering Bio·Grow down to 1–2 ml/L. Start introducing Bio·Bloom at the manufacturer's recommended starting dose alongside. This is the overlap week.
- Day 43 onward (flowering): Stop Bio·Grow completely. Switch fully to Bio·Bloom and continue with the Biobizz flower-phase schedule.
Finding the right kit-specific walkthrough for your setup
Bio·Grow works across a wide range of setups, but the specifics of your kit matter. A small DWC bucket system needs different reservoir management than a basic soil pot, and a pre-fertilized starter kit needs a different feeding approach than plain coco. Across this site you will find walkthroughs for specific soil grow kits, coco-based systems, and consumer DWC and drip kits that show exactly how to apply these dosing principles to your exact setup. For a kit-specific example, see the Rainbow Mix Pro grow instructions for step‑by‑step guidance tailored to that substrate and hardware.
If you are new to organic liquid nutrients and want to understand how other products in the same category approach mixing and dilution, the guides on general bio grow instructions and flora grow instructions cover some useful crossover principles around mixing order, EC management, and stage-based dosing. If you are mixing multiple nutrient lines or exploring full three-part systems, the flora grow mixing instructions guide and the rainbow mix pro grow instructions are also worth a read for context on how different formulation philosophies compare.
FAQ
What authoritative primary sources should I consult to create an accurate beginner guide for Biobizz Bio·Grow?
Use Biobizz manufacturer documents as primary sources: the official Bio·Grow product data sheet (latest PDF), the Safety Data Sheet (SDS), and the Biobizz Nutrient Schedule ALL PF (2024). Supplement with Biobizz FAQ pages on pH/EC and mixing rules. For EC/ppm stage baselines and seedling sensitivity, consult extension/university guidance or established hydroponic feed charts (e.g., General Hydroponics). Keep reseller pages only as secondary confirmation for product spec details.
What exact per‑liter and per‑gallon dosing values are authoritative for Bio·Grow?
Manufacturer dosing (regular watering) is 1–4 ml per litre. Legacy US‑gallon labeling lists ~5–12 ml per gallon; converted from 1–4 ml/L gives ~3.8–15.1 ml per US gallon (3.785 L). Use the official 2024 nutrient schedule for week‑by‑week ml/L values; start at ~1 ml/L and step up to 3–4 ml/L in vegetative growth as indicated by the schedule.
How should I present dosing for common container sizes (worked conversions)?
Provide quick conversions and round sensibly: 1 L = 1–4 ml; 5 L = 5–20 ml; 10 L = 10–40 ml. 1 US gal (3.785 L) ≈ 3.8–15 ml; 5 US gal ≈ 19–76 ml. For kit volumes (e.g., 2, 10, 20 L) scale linearly. Always recommend measuring with a syringe or graduated dropper and double‑check values before adding.
What simple feeding schedule by growth stage should beginners follow?
Follow the Biobizz nutrient schedule theme: Seedlings/Clones: 0.5–1 ml/L (very light to none depending on medium). Early Vegetative (weeks 1–3): 1–2 ml/L. Mid Vegetative (weeks 4–6): 2–3 ml/L. Late Vegetative/start flowering transition: 3–4 ml/L. Switch to flowering regime/products per schedule when initiating bloom. Advise conservative stepwise increases and to hold or reduce dose if plants show stress.
How do dosing recommendations differ by media (soil, coco, potting mixes, consumer hydro kits)?
Soil/potting mixes: start low (0.5–1 ml/L) because media often contains nutrients; increase to 2–3 ml/L in veg if needed. Coco: behaves like inert substrate—start around 1 ml/L and ramp to 3–4 ml/L faster; monitor EC. Hydro/consumer drip or DWC kits: start very conservatively (1 ml/L) and target EC ranges from general hydro charts; use EC/ppm readings to adjust rather than fixed ml/L alone. Always consult the Biobizz chart for medium-specific weekly values in the 2024 schedule.
What are the practical step‑by‑step mixing instructions per litre and per gallon?
Stepwise mixing (per batch): 1) Fill container with most of the required water volume (room temperature). 2) Measure and add Bio·Grow at target ml/L (or converted per gallon). 3) Mix thoroughly. 4) Check and adjust pH to the recommended 6.2–6.5 (Biobizz target). Use Bio·Up/Bio·Down in small increments (manufacturer guidance: 0.1 ml/L Bio·Down lowers pH ~0.5; 0.1 ml/L Bio·Up raises pH ~0.1). 5) Recheck EC/ppm if monitoring. 6) Use solution promptly (use within 24 hours for organic mixes is prudent). For per‑gallon: use same steps substituting converted ml per gallon values.