Most crystal grow kits follow the same basic process: dissolve the included powder in hot (not boiling) water, place your seed crystal or pipe cleaner shape into the solution, set it somewhere stable and undisturbed, and wait 1 to 5 days for crystals to form. The catch is that details vary a lot between brands, and using the wrong water temperature or measurement can mean no crystals at all. Whether you have a Kidz Science Magic Crystal Growing Kit, a Science by Me borax kit, or something similar, this guide walks you through every step and tells you exactly what to watch for along the way. If you follow the steps that come with your specific kit, you’ll have a clear path to how to grow crystals with crystal growing kit materials.
Crystal Grow Kit Instructions: Science by Me and Kidz Science Guide

Marcus Thornfield
28 Apr 2026
Step 1: Figure out exactly what kit you have
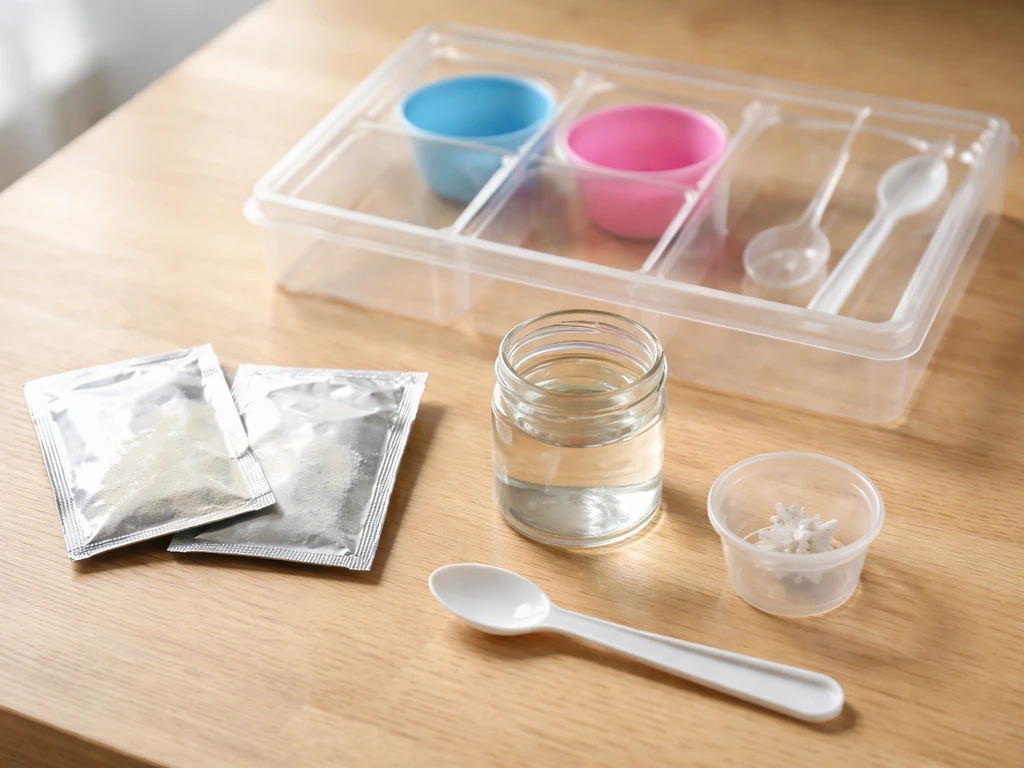
Before you do anything, open the box and lay everything out. Different crystal kits sold under nearly identical names use different chemicals, different growing methods, and different containers. Getting this wrong from the start is one of the most common reasons people end up with nothing in the tray after three days of waiting.
Check the instruction sheet or the kit box itself for a 'package contents' or 'what's in the box' list. Then match each item against what you actually have in front of you. Here's what each major kit type typically includes:
| Kit Type | Typical Contents | Crystal Method |
|---|---|---|
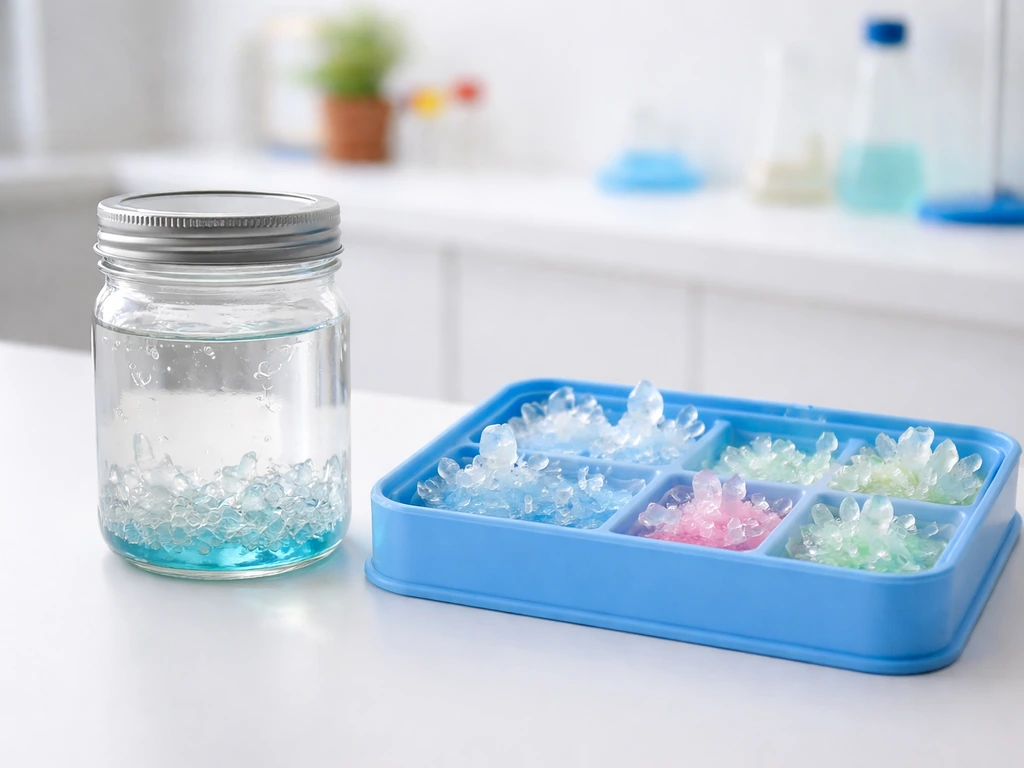
| Kidz Science Magic Crystal Growing Kit (2GoodShop) | Grow tray, powder packet, wooden stirring stick, star-shaped seed crystal | Powder dissolved in water, poured into tray; crystals grow on seed and tray surface |
| Science by Me Crystal Kit | Wide-mouth jar, string or pipe cleaner shape, measuring cup and spoon, borax powder | Borax dissolved in hot water; pipe cleaner shape hung in jar to grow crystals |
| Generic 'crystal grow kit' | Varies widely; may include alum or sodium acetate packets, cardboard base, color drops | Usually tray or jar method depending on chemical used |
If your kit doesn't match either of these exactly, that's fine. Look for the chemical name on the packet. Borax, alum (potassium aluminum sulfate), and sodium acetate are the three most common. The method changes slightly for each, so knowing which one you have matters before you start measuring anything.
Also check whether you need to supply anything yourself. Most kits assume you have access to hot water, a measuring cup (if not included), and a stable flat surface. Some kits, especially Science by Me style kits, also require string or a pencil to suspend the growing piece over the jar.
How to set up your crystal kit: prep, measuring, mixing, and activation
Once you know what you're working with, setup is straightforward. The steps below apply broadly to tray-style kits like Kidz Science and jar-style kits like Science by Me, with notes for each where they differ.
Prep your workspace and containers

Rinse your tray or jar with clean water before you begin. Any soap residue, dust, or oils on the surface can interfere with crystal formation. Don't use dish soap and assume a quick rinse is enough. Rinse thoroughly and let it air dry, or wipe it with a clean paper towel. For jar-style kits, make sure the jar is large enough that your pipe cleaner shape hangs in the middle without touching the sides or bottom.
Measure and mix the solution
For Kidz Science-style kits: measure out about 1 cup (240 mL) of hot tap water. It should be hot but not boiling. Boiling water can cause problems with some powders and is a burn risk for kids. Pour the water into the tray or a mixing container first, then add the powder packet. Stir gently but consistently for 2 to 3 minutes using the included wooden stick until the powder is completely dissolved. You should see the solution go from cloudy to mostly clear.
For Science by Me borax kits: the ratio is typically 3 tablespoons of borax per 1 cup of hot water. Stir until the borax dissolves as much as possible. A small amount of undissolved borax settling at the bottom is normal and actually helpful. Pour the solution into the wide-mouth jar, leaving a bit of room at the top.
Place your seed crystal or shape

For tray kits: place the seed crystal (the small star or rock piece included in the kit) into the center of the tray. Then carefully pour the dissolved solution over it, or pour into the tray first and then place the seed. Follow whatever your specific instructions say here, as some kits want the seed dry first.
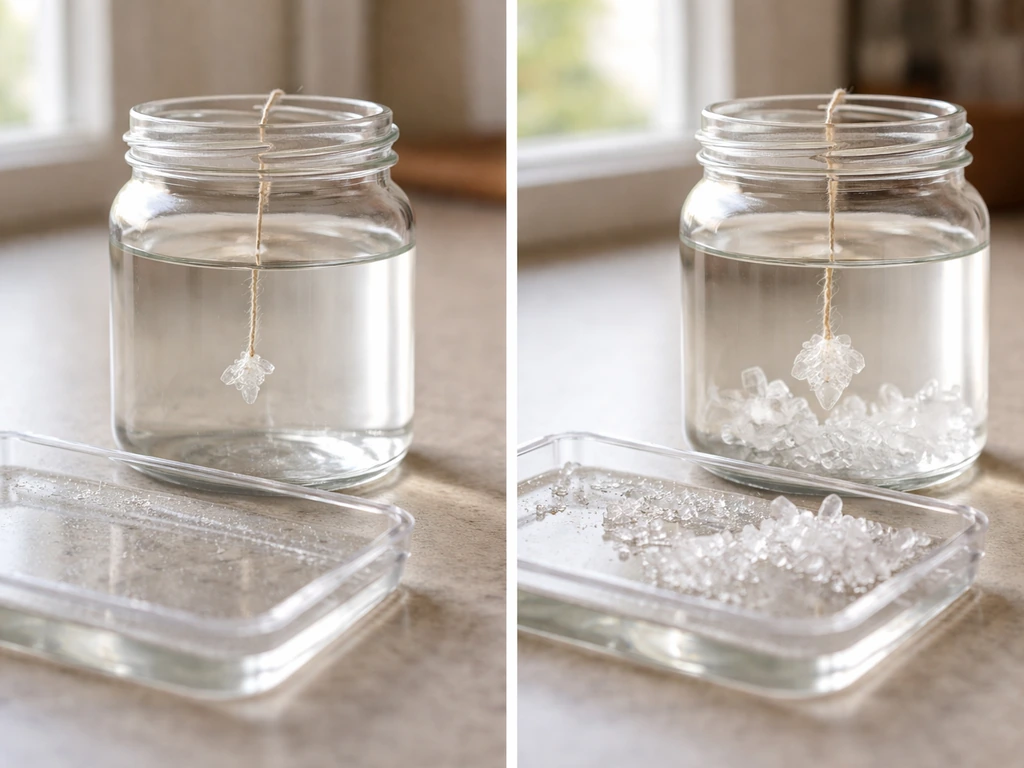
For jar kits: attach your pipe cleaner shape to a string, tie the string to a pencil or stick, and rest the pencil across the top of the jar so the shape hangs in the middle of the solution without touching the bottom. This is what gives the crystals a surface to cling to and grow on.
Find the right spot to leave it
Place your kit somewhere it absolutely will not be moved, bumped, or disturbed. EIS STEAM Subject: Borax Crystals also advises leaving the container in a dark place or cabinet for 1 to 3 days so crystals can form as the mixture cools blank" rel="noopener noreferrer">place your kit somewhere it absolutely will not be moved, bumped, or disturbed.. A countertop away from foot traffic, a shelf out of reach of pets or younger siblings, or a spare corner of a desk all work well. Avoid windowsills with direct sunlight, spots near heating vents, air conditioning units, or anywhere with drafts. Temperature swings are one of the biggest enemies of crystal growth.
Daily care while your crystals are growing
The biggest thing to remember during the growing period is: don't touch it. Crystal formation happens slowly and depends on the solution being undisturbed. Every time you pick up the tray to check, you risk knocking loose crystals that have just started to form.
Timing and what to expect each day
- Day 1: The solution may look unchanged. Tiny crystals might start forming on the seed or tray edges. This is normal.
- Day 2 to 3: Visible crystal structures should begin to appear. For borax kits, the pipe cleaner shape usually shows a clear crystal coating by day 2.
- Day 3 to 5: Most tray-style kits are fully grown by this point. Jar kits can continue growing for up to a week if you want larger crystals.
- Beyond day 5: If you see no crystals forming at all by day 3, something went wrong in setup. See the troubleshooting section below.
Temperature and placement
Room temperature between 65 and 75 degrees Fahrenheit (18 to 24 Celsius) is the sweet spot for most kits. Warmer rooms slow evaporation, which can delay growth. Colder rooms can speed up crystallization but sometimes produce smaller, less defined crystals. If your house runs warm, try moving the kit to a slightly cooler room. If it runs cold, make sure you're not near an exterior wall in winter.
Evaporation vs. submersion: knowing which method yours uses
Tray-style kits (like Kidz Science) rely on evaporation: as the water slowly evaporates, the dissolved minerals concentrate and crystallize onto the seed and tray surface. You want the tray left open, not covered. Jar-style kits with a hanging shape rely on the shape being submerged in a supersaturated solution: crystals deposit on the pipe cleaner as the solution cools. When the hot-water borax solution cools, it becomes supersaturated relative to the cooler temperature, so borax can crystallize out hot water holds more dissolved borax. Covering the jar loosely can slow evaporation and sometimes helps produce larger crystals with jar kits. Knowing which type you have tells you whether to leave the container open or loosely covered.
Water clarity
Some cloudiness in the solution on day one is normal. If the solution stays very cloudy or turns a greenish or brownish color after day two, that can indicate contamination (see troubleshooting below). For tray kits, a thin crust forming across the top of the solution is a good sign: that's where crystallization starts. Don't break it.
Troubleshooting: when things aren't going as planned
Most crystal growing problems come down to four things: the powder didn't fully dissolve, the kit was disturbed, the temperature is off, or something contaminated the solution. Here's how to diagnose and fix each one.
No crystals forming after 3 days
This usually means the powder didn't fully dissolve, or the water wasn't hot enough to create a supersaturated solution. The fix is to start over with fresh hot water and stir longer (at least 3 full minutes). If your kit came with extra powder, use it now. If not, some kits allow you to carefully re-dissolve the existing solution by gently warming it in a microwave-safe container for 20 to 30 seconds and stirring again before replacing it in the tray.
Only tiny or weak crystals
Small crystals usually mean the solution cooled too fast, there was too much evaporation before crystallization could build properly, or the kit was placed somewhere too warm or too drafty. Next time, mix the solution hotter, place it somewhere more temperature-stable, and avoid drafts. If you're using a jar kit, covering the jar loosely with plastic wrap (not sealing it completely) can slow the process and produce larger crystals.
Crystals growing in the wrong places
Crystals forming on the tray rim, jar walls, or string instead of the seed crystal are common and mostly harmless. For tray kits, this just means the crystallization started on all available surfaces. The seed crystal should still grow. If crystals formed on the jar walls in a borax kit but barely on your pipe cleaner shape, the shape may have been touching the glass. Reposition it so it hangs freely in the center.
Cloudy or contaminated solution
If the solution turns discolored or smells off, it's likely contaminated. This usually happens from using a dirty container, tap water with a lot of minerals, or touching the solution with unwashed hands. Discard the batch, thoroughly clean the tray or jar, and start fresh using filtered or distilled water if your tap water is very hard.
Temperature problems: too hot or too cold
Direct sunlight heats the solution unevenly and can dissolve crystals as fast as they form. A room that's too cold (below 60 F / 15 C) can cause premature crystallization before the seed is even placed, giving you a chunky, uneven mess rather than defined crystal shapes. Both extremes also speed up or slow down evaporation in ways that hurt the result. Stick to a stable indoor room away from windows and vents.
Safety and cleanup at home
Most crystal grow kits marketed for kids use low-toxicity chemicals, but that doesn't mean zero precautions. Borax (used in Science by Me style kits) is a skin and eye irritant and should not be eaten. Alum powder (common in many generic kits) is generally low-risk but can cause irritation. Always have kids wash their hands after handling the solution, the seed crystal, or finished crystals.
- Keep the solution and grown crystals out of reach of toddlers and pets.
- If a spill happens, blot it up with paper towels and wipe the surface with a damp cloth. Borax and alum solutions clean up easily with water.
- Don't pour leftover solution down the drain in large amounts. For borax kits, dilute heavily with water before disposal. Check local guidelines if unsure.
- Grown crystals from borax or alum kits are not edible, even if they look like candy or gemstones. Make sure kids understand this.
- Wear the included gloves if your kit provides them, especially when handling hot solution or the finished crystals for the first time.
Cleaning the tray or jar after the project is easy. Soak in warm water for a few minutes to dissolve any stuck crystals, then rinse. Don't scrub crystals dry: they're hard and will scratch surfaces. Most residue dissolves on its own with a soak.
When to harvest, how to store, and how to do better next time
When your crystals are ready to harvest
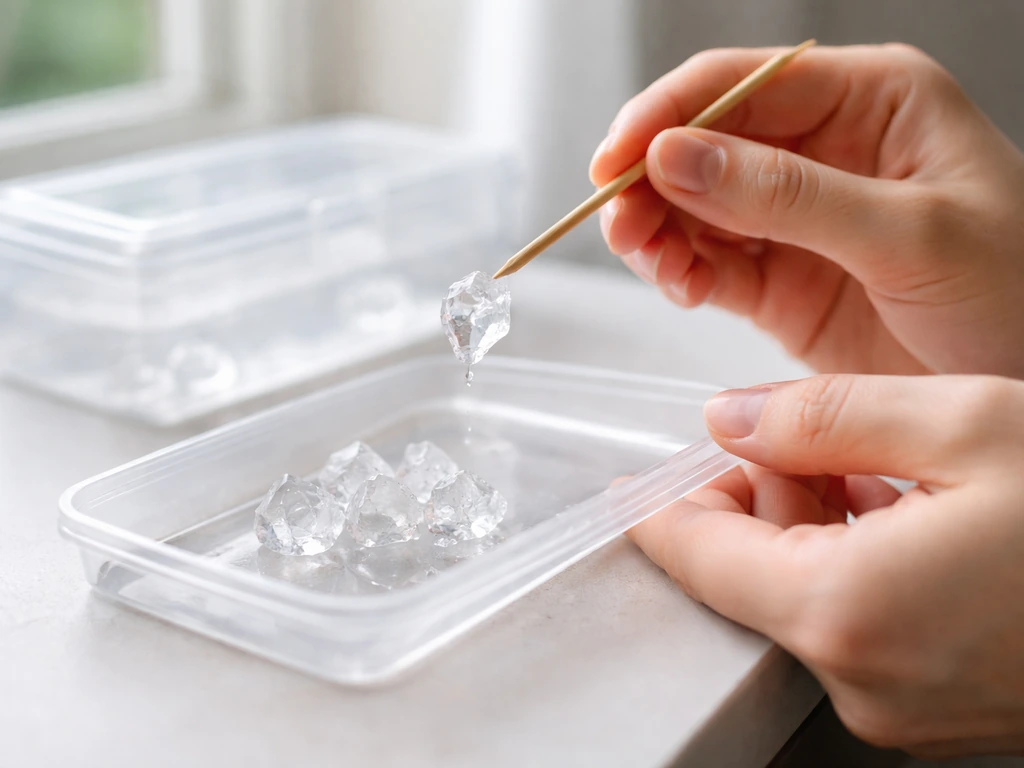
For tray kits, harvest when the solution has mostly evaporated and the crystals look fully formed and dry on the surface. Gently lift the seed crystal using the wooden stick or tweezers and set it on a paper towel to dry for an hour before handling. For jar kits with a hanging shape, lift the pipe cleaner shape out of the solution once crystals reach the size you want, let it drip dry over the jar, then hang or rest it somewhere to finish drying for a few hours.
How to store and display your crystals
Keep finished crystals away from humidity (bathrooms are a bad choice) and avoid handling them too much, since skin oils can dull the surface. A small display box, a clear plastic case, or a glass jar with a lid all work well. Borax crystals are fairly stable at room temperature. Alum crystals can be coated with a thin layer of clear nail polish or craft sealant to make them more durable and less likely to crumble if you want to keep them long-term.
Getting better results on your second attempt
Most people get noticeably better results on their second try once they know what to expect. A few specific things that make the biggest difference: use filtered or distilled water instead of tap water, make sure your water is genuinely hot when you mix (not just warm), stir longer than you think you need to, and find the most stable temperature spot in your home.
If you're using a borax kit similar to Science by Me, try a slightly higher borax-to-water ratio (3. 5 tablespoons per cup instead of 3) for denser crystal coverage. Some brands, including Science Squad and Project MC2 style kits, have their own variations on these steps worth comparing if you're looking to try a different type of crystal-growing experience next time.
If you have Project MC2 style kits, use the project’s own instructions and compare the mixing and timing steps to get the best results. Science Squad instructions follow the same core crystal-growing logic, but comparing the exact steps for your specific kit can help you avoid common mix and timing mistakes.
The most important thing is not to get discouraged by a failed first batch. Crystal growing is one of those projects where the second attempt almost always works better, because now you've seen the process once and you know exactly what 'it's working' looks like. Keep your setup notes, adjust one thing at a time, and enjoy the results. If you want to make it extra easy, follow the klutz grow your own crystal jewelry instructions for a kid-friendly step-by-step approach.
FAQ
What if my crystal grow kit instructions say “hot water,” but my tap water never feels truly hot?
Use the hottest water you can safely handle, then verify it by timing how fast the powder dissolves (faster and more complete dissolution usually means it is hot enough). If your powder consistently won’t dissolve or you get lots of residue, switch to filtered or distilled water and consider heating water in small batches (carefully, away from kids) until it is genuinely hot, not just warm.
Can I use boiled water or microwave the whole solution after mixing?
Avoid boiling during mixing, because very high heat can interfere with how some powders form crystals and it increases burn risk. If you need to fix a weak batch, warming only small portions in a microwave-safe container for 20 to 30 seconds can help re-dissolve, then you should stir thoroughly and restart with a fresh “don’t disturb” placement.
How do I know whether I have a borax kit versus an alum or sodium acetate kit?
Check the chemical name on the powder packet, not the kit name, since different brands can look similar. The chemical controls the method, so if your kit is labeled by chemical (borax, alum, or sodium acetate), follow the instructions tied to that chemical rather than guessing based on the crystal color or the seed type.
My tray has a crust, but crystals aren’t growing on the seed. What should I do?
First, confirm the seed is truly centered and not touching the tray bottom or edges. If crystallization is happening everywhere else, the seed may be slightly out of the best “growth zone” or the solution may have formed a surface layer too quickly. Leave it undisturbed longer, and next time focus on temperature stability and correct water measurement.
Is it okay to cover a jar kit tightly to prevent spills or dust?
Tightly sealing often slows or changes crystallization, because the process relies on controlled evaporation and cooling. For most jar kits, the better approach is a loose cover (for example, loosely laid plastic wrap) only if you want slower evaporation or larger crystals, but keep it consistent with your kit’s instructions.
Why do my crystals look cloudy or chalky instead of clear and defined?
Cloudy or chalky crystals often come from contamination, imperfect dissolution, or the solution cooling too fast. Try longer stirring at the correct hot-water temperature, use a cleaner rinse-free container, and avoid disturbing the solution during the first day when the crystal structure is establishing.
Can I reuse leftover solution or crystals from a failed batch?
Usually no. If the solution is contaminated, discolored, or the powder is not dissolving correctly, reusing it can keep the problem going. For mild issues like incomplete dissolution, re-dissolving a small portion briefly and rebuilding the setup may work, but if you already saw discoloration or an off smell, discard and start fresh.
Does using tap water versus distilled water really matter?
Yes, especially with hard tap water. Mineral content can raise the background crystallization and push crystals to form on walls or rim instead of the seed. If you frequently get weak or messy results, use distilled or filtered water from the start, not only for troubleshooting later.
What is the safest way to handle finished crystals for storage or display?
Handle finished pieces minimally and wash hands before touching to reduce oil smudges. Let crystals dry completely before storing (humidity can make them dull or dissolve slowly), and avoid keeping them in damp rooms like bathrooms. For borax, room-temperature stability is usually better, but alum crystals can be more fragile if not sealed.
How long should I wait before I decide nothing is going to grow?
Many kits fall in a 1 to 5 day window, but the first check should be early only to confirm the solution color and that it is forming something. If day two shows contamination signs (greenish or brownish shifts, off odors), discard rather than waiting longer. If everything looks normal but growth is minimal, give it the full recommended window before restarting.
My kit says not to touch during growth, but I need to move it. Any workaround?
If you must move it, relocate the entire set-up without tipping or jostling, and avoid shifting the seed or hanging shape. Do not lift the tray or jar to “peek” during the critical early stage, since even small disturbances can knock newly forming crystals loose.