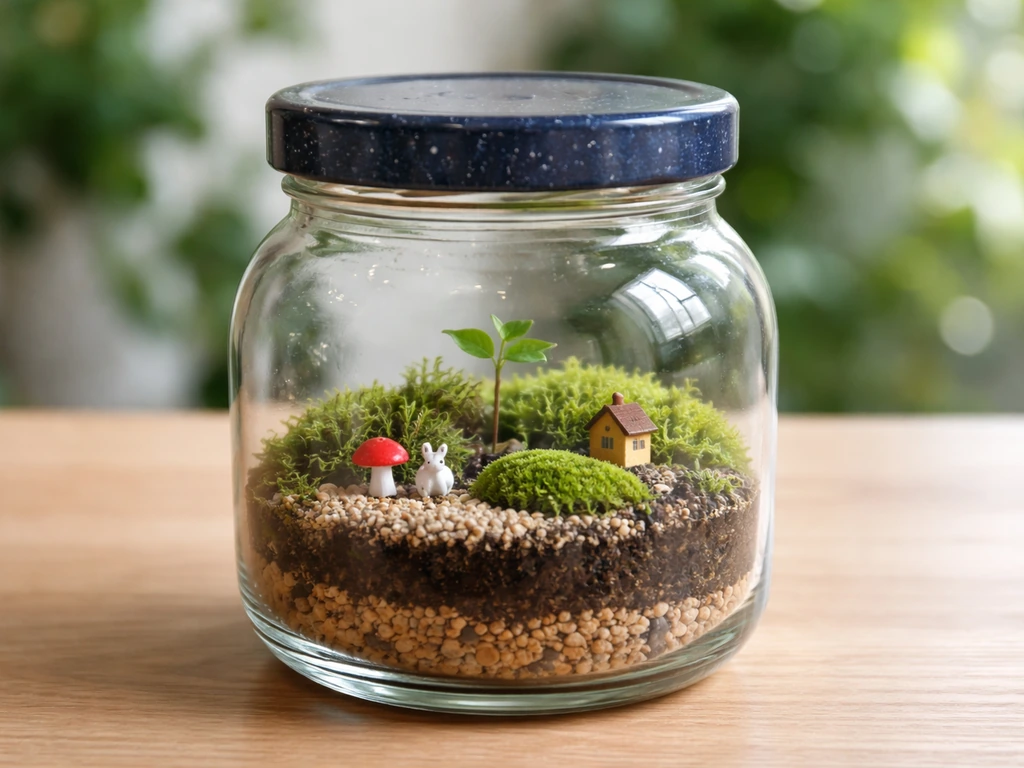
The Creativity for Kids Grow N' Glow Terrarium (model #1137000) is a self-contained mini garden kit that does two things: it grows real plants from seed, and it glows in the dark thanks to photoluminescent sand and stickers. Setup takes about 15 minutes, and you should see sprouts within 3 to 5 days if you follow the layering and watering steps correctly. If you have the dinosaur-themed version (#6568000), the steps are identical, only the decorative figurines change. Both versions of this kit are sometimes listed as 'Glow and Grow' or 'Grow n Glow,' so if you searched any of those phrases, you're in the right place.
Grow and Glow Terrarium Instructions: Step-by-Step Kit Setup

Marcus Thornfield
18 Apr 2026
What's in the kit and what you actually need
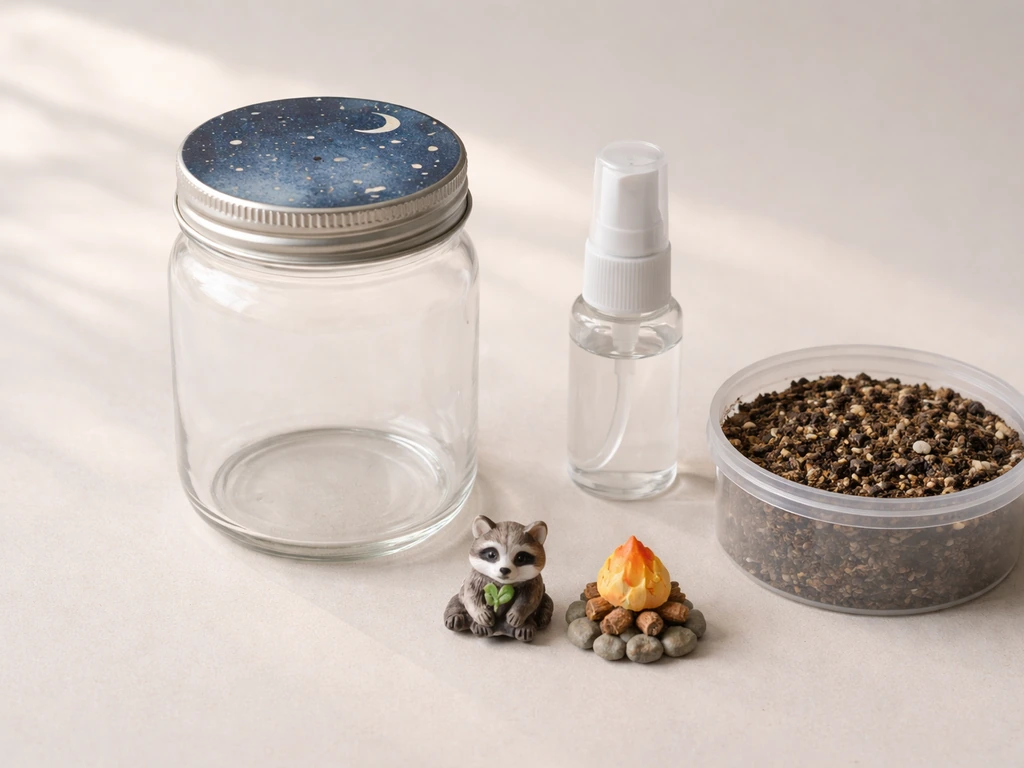
Before you open anything, do a quick inventory check. The official kit contents for model #1137000 are:
- 1 plastic terrarium jar (5" x 3.25") with a decorative starry-sky lid
- 2 resin figures (raccoon and campfire, or dinosaur-themed equivalents)
- 1 plant mister bottle
- Potting mix (vermiculite-based)
- Mini river stones
- Glowing sand (2 colors)
- Wheat grass seeds (USA organic)
- Chia seeds (USA organic)
- 15 garden stickers and 45 glow-in-the-dark stickers
- Printed instruction sheet
Everything you need for the first grow is in the box. The only thing you'll add yourself is plain tap water, about 1/4 cup for the initial soil prep, plus whatever you use for ongoing misting. No grow lights, no fertilizer, no extra tools required at the start. That said, having a pencil nearby is genuinely useful for the seed-planting step, so grab one before you sit down.
Step-by-step setup from unboxing to first light cycle
Follow these steps in order. Skipping or reversing the layering sequence is the single most common mistake, and it affects both the glow effect and drainage.
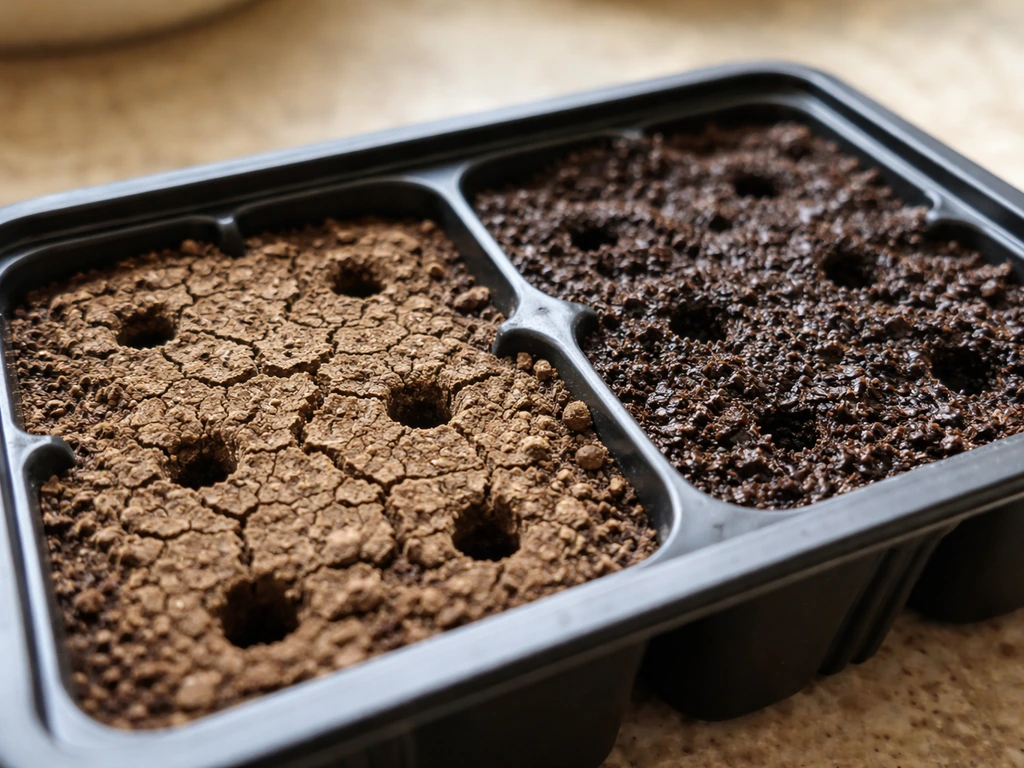
- Prep the potting mix: open the potting mix bag and pour in approximately 1/4 cup of water. Seal or pinch the bag shut and squish it until the mix clumps together like stiff clay. If it feels soupy or water pools at the bottom, squeeze out the excess before moving on. You want damp, not wet.
- Add the first layer of potting mix: spoon roughly half the prepared potting mix into the bottom of the terrarium jar and press it down gently with your fingers so it's level.
- Add the glowing sand layer: pour the glowing sand over the potting mix layer. This is the layer that will absorb light during the day and emit a soft glow at night — it needs to sit in the middle of the jar so it's visible through the glass sides.
- Add the second layer of potting mix: pour the remaining potting mix on top of the sand and press it down lightly. Leave enough headroom near the top for the stones and seeds.
- Place the mini river stones: scatter the stones across the surface of the potting mix, but leave at least one clear open patch where you'll plant the seeds.
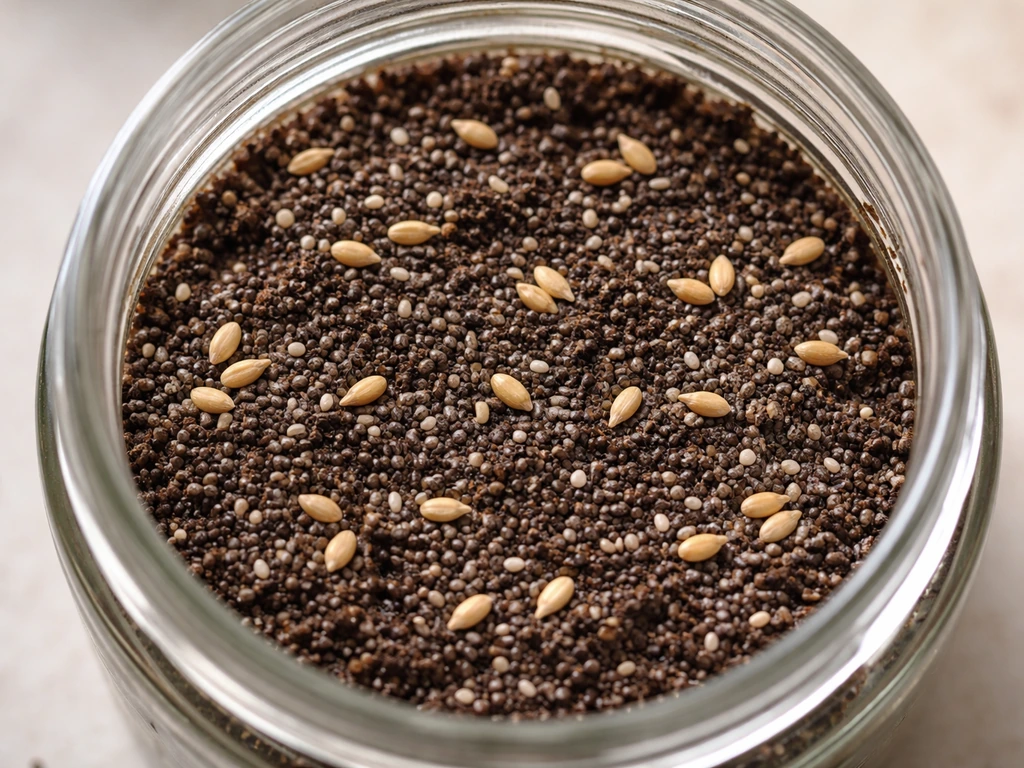
- Plant the seeds: sprinkle a few chia seeds and a pinch of wheatgrass seeds onto the exposed potting mix. Don't dump the whole packet — overcrowding leads to poor airflow and mold. Use the eraser end of a pencil to gently press each seed about 2–3mm into the soil surface.
- Mist heavily: fill the plant mister with plain water and spray the seeds and soil surface until the potting mix is thoroughly damp. You're looking for moist throughout, not dripping. Give it 8 to 10 good pumps.
- Add decorations and lid: place your resin figures, apply any stickers to the outside of the jar, and put the lid on. The lid helps retain moisture for germination.
- Place for the first light cycle: set the jar somewhere that gets bright indirect sunlight for several hours. A windowsill that doesn't get direct midday sun is ideal. This charges the glow elements during the day. After a few hours of light exposure, move it somewhere dark to see the glow effect.
That's the full first-day setup. Expect to see the first sprouts poking through in 3 to 4 days, with the wheatgrass usually showing up before the chia.
Choosing plants and placing them correctly
The kit comes with two seed types for good reason: chia and wheatgrass germinate quickly, stay small, and thrive in the confined, humid environment of a closed jar. Chia sprouts tend to form a fine, almost mossy mat, while wheatgrass shoots up in thin blades. Both look great together. Don't substitute random seeds from your pantry for the first grow, unknown germination rates and growth habits can crowd out the jar or introduce mold before you even get started.
Spacing matters even in a small jar. Spread seeds across the exposed potting mix rather than dropping them all in one spot. A thin, even scatter over a 2-inch patch is plenty. The pencil-press step is important: seeds sitting entirely on top of the soil surface can dry out before they germinate. Pushing them in slightly gives them contact with the moist soil underneath. Once you've planted and misted, resist the urge to keep opening the lid and peeking, every time you remove the lid in the first 48 hours, you release the humidity the seeds need.
Light, water, and humidity: the numbers that actually matter
This kit doesn't have an electronic LED system, the 'glow' is purely photoluminescent (light-absorbing material that releases a soft glow in the dark). So your lighting job is twofold: provide enough indirect sunlight to grow the plants, and charge the glow elements for the nighttime effect.
For plant growth, indirect sunlight is the target. A north- or east-facing windowsill works well. Avoid placing the jar where direct afternoon sun hits it, the plastic walls trap heat fast, and temperatures above roughly 85°F will stress the seedlings and dry out the soil unevenly. In research on chia (Salvia hispanica L.) germination, Plants (MDPI) reports cardinal temperatures, including base, optimum, and ceiling values, that help explain how temperature can stress seedlings and affect germination Quantifying Cardinal Temperatures of Chia Using Non. If your home gets very little natural light, a standard desk lamp placed 6 to 8 inches above the jar for 6 to 8 hours a day is a workable substitute, though sprouting may take a day or two longer.
For the glow effect, the glow-in-the-dark sand and stickers need several hours of bright light exposure before they'll emit a noticeable glow. Bright indirect light all day works fine. If you want a more dramatic glow, hold a flashlight or phone light directly over the jar for 30 to 60 seconds right before viewing it in the dark, this supercharges the photoluminescent material.
For watering, the rule is simple: check the soil surface daily and mist lightly if the top layer looks pale or dry. You should never have standing water in the jar or feel sogginess when you press the surface. If condensation is visible on the inside walls of the jar, the humidity is fine, hold off on misting that day. Overwatering is far more common than underwatering with this kit, and it's the main cause of mold.
When things go wrong: fixing the most common problems
Seeds aren't sprouting after 5+ days
Check three things: moisture, light, and temperature. Research on chia seed germination has shown that temperature, substrate, and luminosity conditions strongly influence whether and how seeds germinate (FAO AGRIS record) check three things: moisture, light, and temperature. If the soil surface has dried out and cracked, the seeds lost their germination window, mist generously and make sure the lid is on to trap humidity. If the jar is sitting in a cold spot (below 60°F), germination slows dramatically or stops entirely. Move it somewhere warmer and more consistently lit. Seeds are not a sign of permanent failure, as long as the seeds haven't rotted (soft, dark, slimy), re-moistening and repositioning will often get things moving within a day or two.
Mold or fuzzy growth on the soil
Mold almost always means too much moisture with too little airflow. Take the lid off and leave it off for 2 to 3 hours to let the surface dry out a bit, then replace it. Cut back on misting for 2 to 3 days and only water again once the surface looks dry. If mold keeps returning, try leaving the lid slightly ajar rather than fully sealed. White fuzzy mold on the soil surface is common and not necessarily fatal to the plants, but it needs to be caught early.
Algae or green slime on the jar walls
Green algae on the inside walls usually means the jar is getting too much direct sunlight. Move it to a spot with softer, indirect light. Wipe the inside walls gently with a damp paper towel if you can reach, and reduce watering frequency slightly. Algae isn't killing your plants, but it does compete for light and looks unpleasant.
The glow isn't working or is very faint
This kit uses photoluminescent materials, not LEDs, so there's nothing to 'break' electrically. A faint or absent glow almost always means the sand and stickers haven't been exposed to enough light. Make sure the jar sits in a bright spot for at least 4 to 6 hours before you test the glow in the dark. Using a bright phone flashlight directly on the jar for a minute right before your viewing session will noticeably boost the effect. If the glow has faded over time, that's normal, photoluminescent materials lose brightness after extended use, but recharging in bright light always restores some effect.
It's worth noting that some other kits in this space, like the ones covered in the Sharper Image Glow Grow Garden instructions, do use actual LED lighting systems, which have their own troubleshooting steps. If your kit has a battery compartment or a power switch, you're dealing with LEDs rather than glow-in-the-dark materials, and the fix is different.
Plants growing tall and leggy
Leggy, stretched growth means the plants are reaching for more light. Move the jar closer to a window or add supplemental lamp time. Wheatgrass in particular will get floppy if light is too low, 6+ hours of decent indirect light keeps it upright and healthy.
Finding your kit's manual or making a printable checklist
The physical instruction sheet included in the box is your best starting point, it's specific to your model number (check the bottom or side of the box). If you've lost it, search for 'Creativity for Kids 1137000 instruction manual' or '6568000 instruction manual' to find scanned versions. Model numbers matter here because Creativity for Kids has produced several variants under similar names, and the steps can differ slightly between versions.
If you have a different brand with a similar name, it's worth checking whether a dedicated guide exists for your exact kit. For example, the Discovery Mindblown Glow Grow instructions cover a distinct product line with its own layering and lighting steps that don't map directly to the Creativity for Kids version. Using the wrong manual is a surprisingly common source of confusion.
If you want a printable checklist you can keep next to you during setup, here's a condensed version you can copy or print:
- Inventory check: confirm all kit contents are present
- Add 1/4 cup water to potting mix bag, squeeze to clay consistency
- Layer 1: add half the potting mix, press down
- Layer 2: add glowing sand over potting mix
- Layer 3: add remaining potting mix, press down
- Place mini river stones, leave a seed planting area
- Scatter chia and wheatgrass seeds, press in gently with pencil
- Mist thoroughly (8 to 10 pumps) until soil is damp
- Place resin figures and apply stickers
- Put lid on and place in indirect sunlight
- Check moisture daily, mist if surface looks dry
- Watch for sprouts at day 3 to 4
- Test glow effect in darkness after several hours of light exposure
For readers who discovered this kit through a larger terrarium build-out, the Discovery DIY terrarium grow kit instructions cover a similar beginner-friendly format but with a different container and plant selection, worth a look if you want to compare approaches.
Ongoing maintenance and when to reset or upgrade
Once your plants are up and growing, the routine is simple: check the soil daily, mist lightly when it's dry, and make sure the jar gets its light exposure. Here's a realistic schedule:
| Timeframe | Task |
|---|---|
| Daily (first 2 weeks) | Check soil moisture, mist if surface is dry, observe growth |
| Every 2 to 3 days | Wipe condensation from lid interior if it's heavy, check for mold |
| Week 2 onward | Trim wheatgrass if it gets too tall or starts to flop over the edges |
| Week 3 to 4 | Assess overall plant health — if crowded, thin out by removing weakest plants |
| Month 2+ | Decide whether to replant with fresh seeds or repurpose the jar as a decorative terrarium |
Wheatgrass typically peaks around 2 to 3 weeks, at which point you can harvest it (cut at the base with small scissors) or simply let it complete its natural cycle. Chia stays interesting longer as a texture element. When the plants start to look spent or the soil becomes compacted and water-resistant, it's time for a reset: empty the jar, rinse it, recharge the glow sand in bright light for a day, and replant with fresh seeds if you have extras. Many people also transition the jar into a purely decorative display at this stage, keeping the glow elements and figures without replanting.
If you're interested in other kits from the same Discovery brand family, the Discovery Glow Grow instructions walk through a version with slightly different components and seed types, useful if you're thinking about gifting a second kit or comparing the two. The core grow-and-glow concept is the same, but small differences in jar size and seed selection change the day-to-day routine enough to be worth checking before you start.
The main thing to remember is that this kit is designed to be low-stakes and forgiving. If your first attempt doesn't sprout well, run through the three-point checklist: soil moisture, light quality, and temperature. Almost every failure with this kit traces back to one of those three factors. Fix any of them, and you'll usually see progress within 48 hours.
FAQ
How do I know I added the right amount of water for the first soil prep (about 1/4 cup), and not too much?
After mixing, the soil should look evenly damp but not glossy or soggy. If you see puddling, heavy dark clumps, or feel wetness when you touch the surface through the opening, drain and rebuild the top layer with some of the dry potting mix (if included). If you cannot remove mix, mist much lighter for the next 2 days to avoid compounding excess moisture.
What should the condensation level look like, and when is it a problem?
A light fogging on the inside walls is normal, especially in the first 48 hours. If condensation is constant with a wet sheen, or you can wipe it off and it refills quickly, reduce misting and rely on indirect light to manage humidity. If you do not see any condensation at all after watering correctly, the environment may be too dry or too cool, so increase misting slightly and warm the jar rather than opening the lid repeatedly.
Can I rotate the jar to keep growth even, and how often should I do it?
Yes, rotating 1/4 turn is fine, but do it quickly and avoid taking the lid off. A good rule is to rotate every day or every other day during the first week, especially if the light comes from one side. If you must adjust light drastically, wait until after misting (not before) to prevent extra humidity loss.
Do I need to keep the lid fully sealed the entire time?
For normal sprouting and early growth, keep it sealed to retain humidity. If you see recurring mold, the article suggests leaving the lid slightly ajar, but do not fully remove it for long periods. Try a small gap for 24 to 48 hours while monitoring the soil surface, then reseal when the surface looks drier.
What if my seeds sprout but then stop growing or look “stalled”?
A stall usually points to temperature being too low or light being too weak. Aim for a consistently warm spot above 60°F and ensure several hours of bright indirect light. Also re-check moisture, if the surface stays pale or cracks, seeds may still be alive but not hydrated enough, so mist lightly and promptly re-check 12 to 24 hours later.
My wheatgrass is growing tall and thin, but chia looks fine. What should I change first?
Start with light quality and duration. Wheatgrass shows stretching faster, move the jar closer to the strongest indirect window or increase lamp time by 1 to 2 hours per day. Avoid increasing watering as a first response, extra moisture with low light can encourage mold while still leaving wheatgrass floppy.
Can I harvest wheatgrass early, and will it regrow in the same jar?
You can harvest when blades are long enough to cut at the base, but regrowth depends on how compact the soil becomes and whether moisture stays balanced. For best results, avoid repeatedly cutting very short, after harvesting check the soil surface daily and mist only when it begins to pale. If the jar becomes water-resistant or algae/mold starts appearing, a reset with fresh seeds is more reliable than trying to extend the first batch.
What’s the safest way to clean up mold or algae without damaging the plants?
For white fuzzy mold, the article recommends air-drying briefly, then cutting back misting. If you choose to wipe, use only gentle surface removal with a damp paper towel where reachable, do not dig into layers. For algae on walls, wipe the inside surfaces and adjust light to softer indirect exposure, then reduce watering frequency so the top layer dries slightly between mists.
How bright should I recharge the photoluminescent sand and stickers, and what if I forget before bedtime?
Several hours of bright light exposure gives the best glow. If you forgot, a short charge helps, hold a flashlight or phone light directly over the jar for 30 to 60 seconds right before viewing, it will noticeably boost brightness even if it is not the full day charge. If you test glow right after opening the lid, it may be dimmer because the jar is not fully recharged.
Is it okay to open the jar to check progress more often than every 48 hours?
Frequent lid openings are the most common reason humidity drops too quickly, leading to poor germination and uneven growth. If you need to check, look through the jar first, or open for the shortest possible time and reseal immediately. If seedlings already sprouted, brief checks still matter less, but opening during the first 2 days is high risk for drying.
Can I use a different seed type next time if the first kit didn’t do well?
For the first run, the article advises against substituting pantry seeds because germination rates vary and mold can start before sprouts stabilize. If you want to experiment later, do small tests outside the jar or in a separate container first, then only transplant if seeds reliably germinate. Otherwise, stick with the included chia and wheatgrass for consistent jar performance.
What should I do if I suspect my jar is overheating in sunlight even though I moved it once?
Plastic walls can trap heat fast, especially with afternoon sun. Use a thermometer if you can, and keep the jar away from hot window glare. If temperatures spike above the mid-80s°F range, expect uneven drying and stressed seedlings, move to a north or east exposure and reduce direct light until the soil moisture stabilizes over 24 to 48 hours.