You can successfully germinate giant sequoia seeds from a grow kit by cold stratifying the seeds for 4 to 6 weeks (unless your kit already did this for you), planting them about 1/8 inch deep in moist seed-starting mix, and keeping them under bright light at 65 to 75°F. Most kits, including the popular Jonsteen Giant Sequoia Seed Grow Kit, walk you through the whole process from stratification to transplanting, but the instructions can feel vague at the critical moments. This guide translates those steps into concrete actions and tells you exactly what to do when things go sideways. If you are instead trying to grow a living christmas tree kit, the same idea applies, so follow your specific tree kit instructions closely for timing and setup.
Grow a Tree Giant Sequoia Kit Instructions: Step by Step

What's in a giant sequoia grow kit (and how to identify your parts)
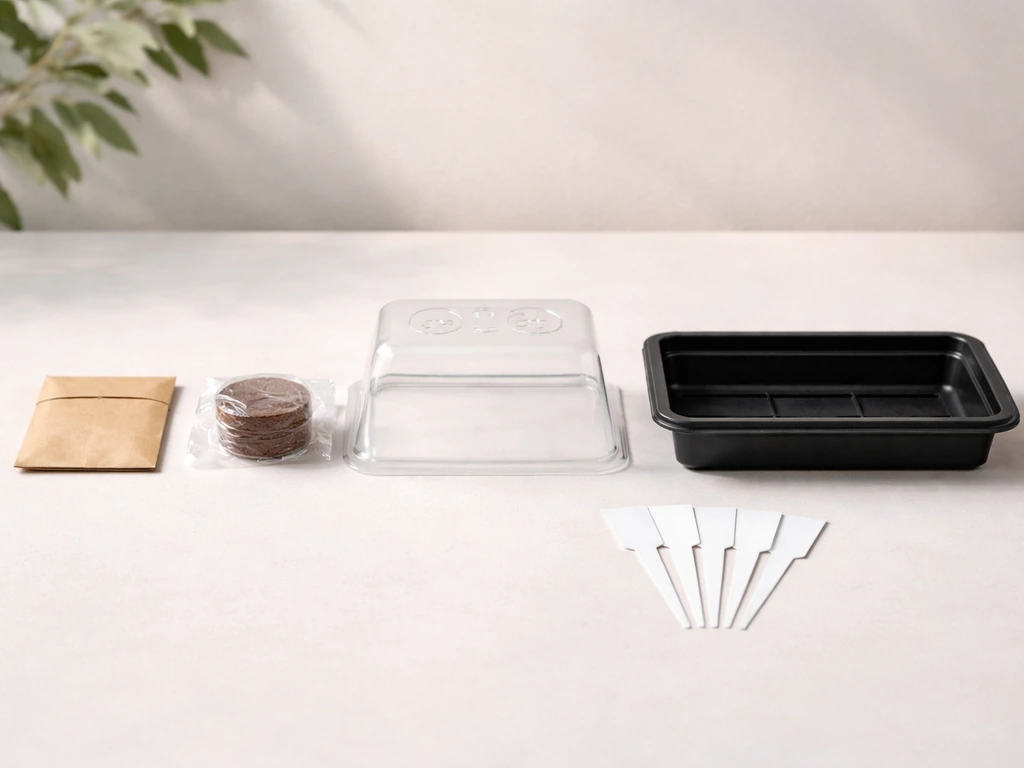
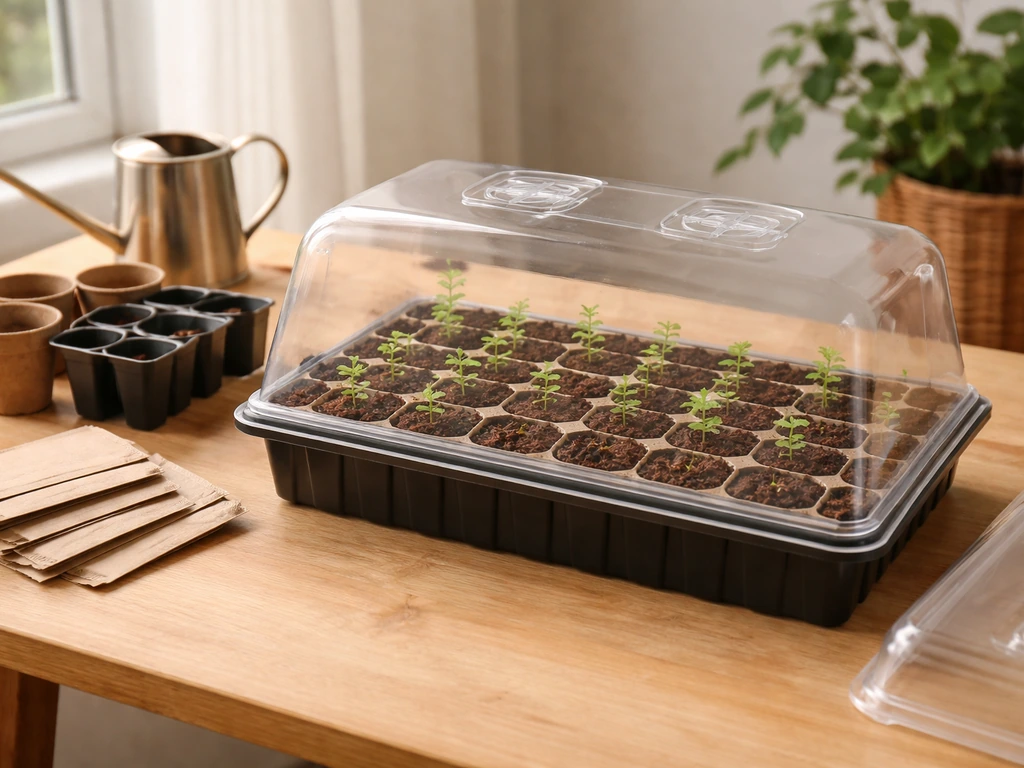
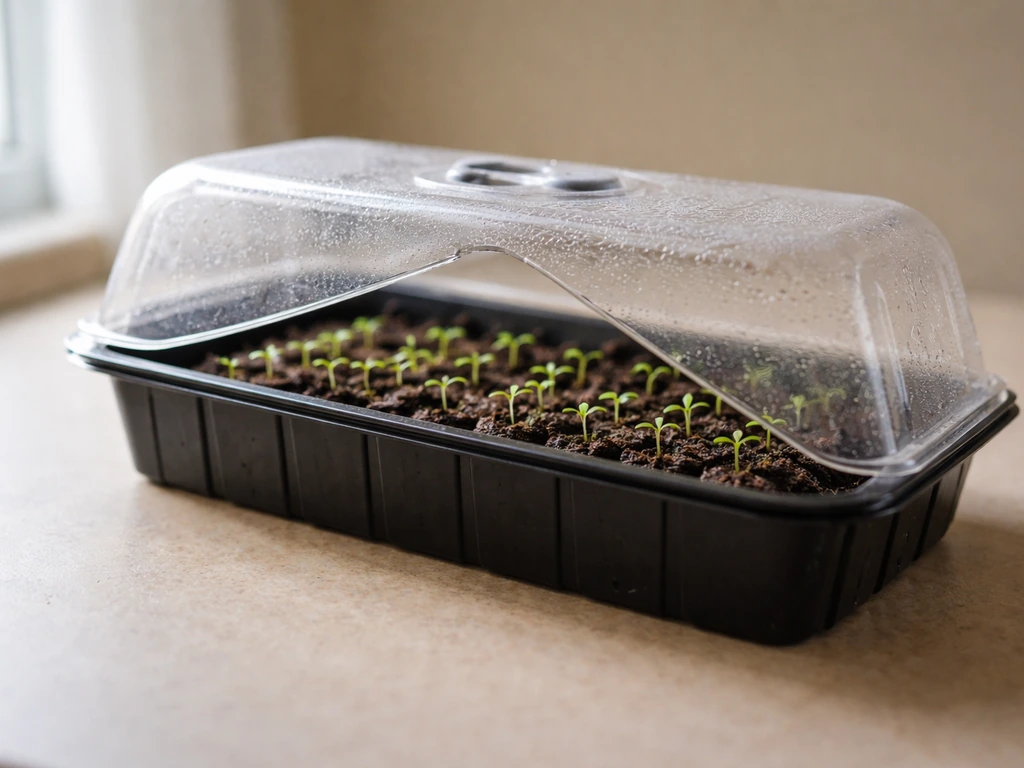
Most commercial giant sequoia kits, like the Jonsteen all-in-one kit, include a small packet of seeds, a compressed peat or coco coir growing medium puck, a clear plastic mini-greenhouse (usually a small tray with a humidity dome or a lidded container), and a printed instruction card. Some kits also include a small pot or biodegradable planter, a plant label or marker, and occasionally a slow-release fertilizer pellet or two.
Before you do anything, lay everything out and match it to this list. Giant sequoia seeds are tiny and flat, often described as looking like oat flakes, with a slightly papery texture. The growing medium puck will expand significantly when you add water, so don't open it over your sink and walk away. If your kit came with a small plastic bag of loose growing mix instead of a compressed puck, that's fine too. If you see a small mesh bag or a separate stratification pouch, your kit wants you to cold-stratify before planting. If the seeds came in a sealed foil packet with no special cold-storage instructions, check the instruction card to see if stratification is already done.
- Seeds: tiny, flat, oat-flake shaped, light tan or brown
- Growing medium: usually a compressed peat or coco coir puck, or a bag of seed-starting mix
- Mini-greenhouse: a plastic tray with clear dome, a small lidded container, or a resealable bag
- Instruction card or booklet
- Optional: small pot or biodegradable planter, plant label, fertilizer pellet
If anything is missing or you're not sure what a piece is for, the Jonsteen FAQ is a good starting point since their kit is one of the most widely sold. Other kit brands follow a similar structure, so the steps below apply across most of them.
Pre-plant prep: stratification and seed treatment (and when to skip it)
Giant sequoia seeds need a period of cold and moisture before they'll germinate reliably. In the wild, this happens naturally over winter. In a kit, you replicate it through a process called cold stratification: you moisten the seeds and refrigerate them for a set period, usually 4 to 6 weeks at around 34 to 40°F. This is the step most beginners skip or rush, and it's usually why seeds never sprout.
Here's the important decision point: check your kit's instruction card first. Some kits, including certain versions of the Jonsteen kit sold in seasonal windows, ship seeds that have already been cold-stratified at the factory. If your instructions say something like 'seeds are pre-treated' or 'ready to plant directly,' skip the stratification steps below and go straight to planting. If there's any mention of 'refrigerate before planting' or a stratification schedule, follow those steps exactly.
How to cold-stratify your seeds if your kit requires it
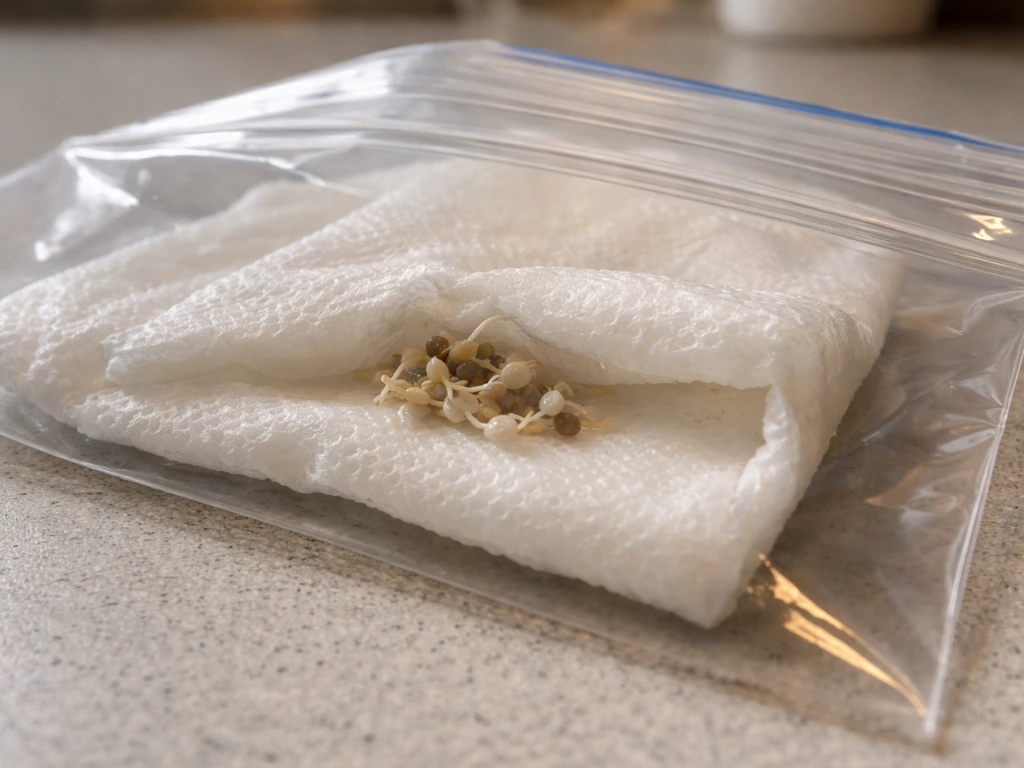
- Dampen a small piece of paper towel or a pinch of peat moss until it's moist but not dripping.
- Place your seeds in the damp paper towel or mix them into the damp peat, then put everything in a small zip-lock bag or the stratification pouch your kit included.
- Label the bag with today's date so you know when to plant.
- Place the sealed bag in your refrigerator, away from the back wall (which can freeze) and away from fruit, which releases ethylene gas that can harm seeds.
- Check every week or two to make sure the medium is still damp. Add a tiny drop of water if it's dried out.
- After 4 to 6 weeks, the seeds are ready to plant. Some kits specify exactly 4 weeks; follow your kit's number if it gives one.
If you notice a seed has already started to crack or show a tiny white tip (the radicle) during stratification, that seed is ready now. Don't wait for the full period if germination is already starting.
Planting instructions: media, depth, container, and setup
Once your seeds are stratified (or ready to plant from the packet), it's time to set up your mini-greenhouse and get seeds in the ground. This step matters a lot. Too deep and the seeds struggle to push through. Too shallow and they dry out. The right container setup controls moisture without suffocating the roots.
Preparing your growing medium
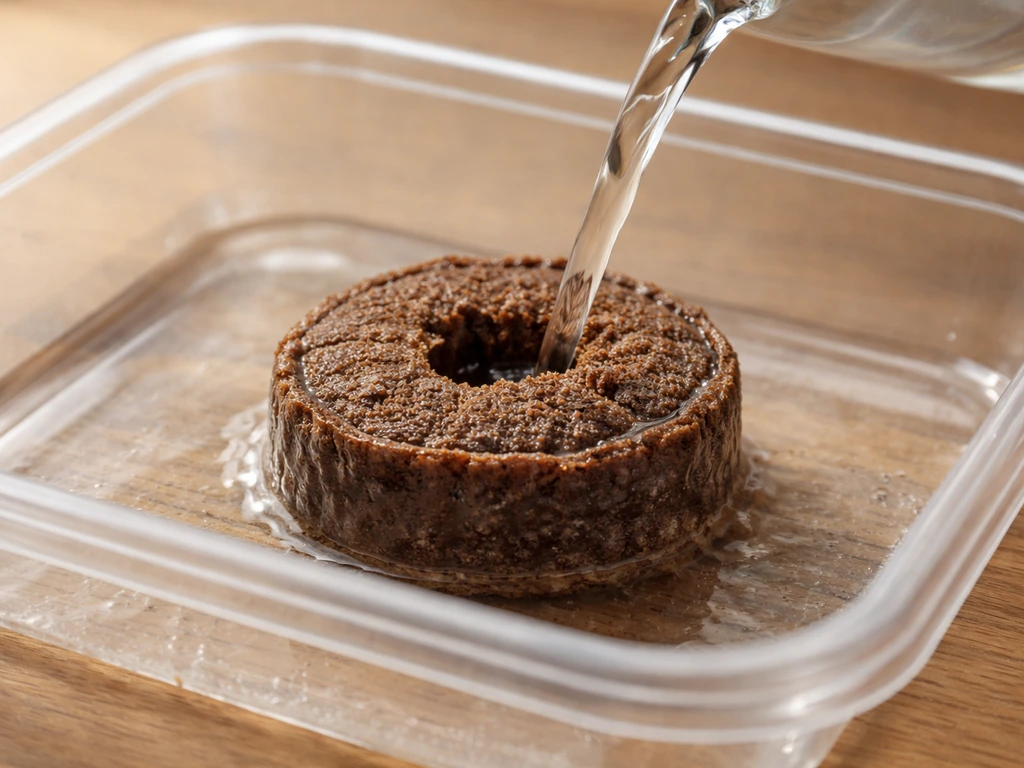
If your kit has a compressed puck, place it in the tray or container and slowly pour warm water over it, a tablespoon at a time, until it fully expands. This usually takes about 1/4 to 1/3 cup of water total. Let it absorb fully, then gently break up any clumps with your fingers. The mix should feel like a wrung-out sponge: moist all the way through but not waterlogged. If water pools in the bottom of the tray, you've added too much. Tip the tray gently to drain off the excess, or blot with a paper towel.
Sowing the seeds
- Fill your container or tray with the prepared growing medium to about 1/2 inch from the top.
- Make small indentations about 1/8 inch deep (roughly the thickness of two stacked pennies). Use a pencil tip or your fingernail.
- Place one seed per indentation, flat side down if you can tell. Giant sequoia seeds are small enough that orientation doesn't need to be perfect.
- Cover the seeds lightly with the growing medium, just enough to fill the indentation. Do not press down hard.
- If you have multiple seeds, space them at least 1 inch apart so seedlings don't crowd each other.
- Place the clear dome or lid on the container, or slide the tray into a clear zip-lock bag. You're creating a humid microclimate that keeps the seeds from drying out.
- Label with the date and species so you track the germination window accurately.
Drainage is something cheap kits often get wrong. If your mini-greenhouse tray has no drainage holes, be conservative with watering from here on. A tray that sits in standing water will rot seeds fast. If you are asking how to use tree grow tubes for young trees, the same principles for airflow and avoiding soggy conditions apply. If you can poke a couple of small holes in the bottom with a toothpick, do it.
Seedling care: light, temperature, watering, and airflow
Giant sequoia seedlings are more sensitive than the tree's massive adult reputation suggests. They want consistent conditions: bright indirect light, moderate warmth, and moisture that never swings from bone dry to soaking wet. Get these four things right and you're most of the way there.
Light
Place your mini-greenhouse in a spot that gets at least 6 hours of bright light per day. A south or east-facing windowsill works well. Avoid direct midday sun through glass during summer, which can cook seeds inside a closed dome. If you're doing this in winter or in a low-light home, a basic LED grow light set 4 to 6 inches above the dome for 14 to 16 hours a day will work much better than a dim window. Once seedlings emerge, they need as much light as you can give them to avoid getting leggy.
Temperature
Aim for 65 to 75°F during germination and early seedling growth. Giant sequoias are cool-weather trees at their core, so they don't need tropical warmth. Avoid placing the dome on a heat mat unless your room is consistently below 60°F. Too much bottom heat pushes temperatures inside the dome above 80°F, which can stall germination or cause mold.
Watering
While the dome is on, the medium should stay moist from the initial watering for quite a while. Check every 2 to 3 days by lifting a corner of the dome or pressing gently on the surface. If the top of the medium feels dry to the touch, mist lightly with a spray bottle. Do not pour water directly into the tray. Once seedlings emerge and you start venting the dome (see airflow below), you'll need to water a little more often, probably every 2 to 4 days depending on your home's humidity.
Airflow
Once you see the first seedlings breaking the surface, usually around 2 to 4 weeks after planting for stratified seeds, start venting the dome. Prop it open slightly for a few hours each day for the first week, then leave it off completely in week two. Keeping the dome sealed too long after germination creates the exact humid, stagnant conditions that mold and damping-off love. A gentle airflow is one of the most underrated tools in early seedling care.
Troubleshooting: when things go wrong and what to do right now
Giant sequoia grow kits have a few predictable failure points. Here's how to diagnose them fast and fix them before you lose the seedlings.
| Problem | Likely cause | What to do now |
|---|---|---|
| Seeds haven't sprouted after 4 weeks | Skipped or shortened stratification, or seeds dried out | If unstratified, refrigerate seeds in damp medium for 4 to 6 weeks and replant. Check that the medium hasn't dried out under the dome. |
| White or gray fuzzy mold on the surface | Too much moisture, no airflow, dome left on too long | Remove the dome, let the surface dry slightly, and increase ventilation. Mist the surface lightly with a diluted hydrogen peroxide solution (1 part 3% peroxide to 9 parts water). |
| Seedling stem pinches or collapses at soil level | Damping-off (fungal disease) | Remove affected seedlings immediately. Improve drainage and airflow. Avoid overwatering. There's no saving a seedling with damping-off, but you can protect others. |
| Seedlings are tall, thin, and floppy (leggy) | Not enough light | Move to a brighter spot immediately or add an LED grow light 4 to 6 inches above the seedlings for 14 to 16 hours per day. |
| Seeds or seedlings seem stuck or very slow | Too cold, too warm, or overwatered | Check that temperatures are 65 to 75°F and that the medium drains. Reduce watering frequency. |
Mold is the most common complaint with indoor seed kits in general, not just sequoia kits. It tends to show up in week one or two when the dome is keeping humidity very high. A little surface mold doesn't always kill seeds, but act on it fast. Damping-off, which is the stem-collapse situation, is always fatal to the affected seedling but doesn't have to spread if you catch it early and fix your conditions. Cornell University notes damping-off is caused mostly by fungi and can be a complex of diseases, with rotting at the soil line after emergence leading to seedling collapse Damping-off, which is the stem-collapse situation.
Transplanting, up-potting, and the long-term care timeline
Giant sequoias grow surprisingly fast for a tree, but they're still a tree. You won't go from kit to sapling overnight. Here's a realistic timeline so you know what to expect at each stage.
| Stage | Timeframe | What's happening / what to do |
|---|---|---|
| Stratification | 4 to 6 weeks in fridge | Seeds are breaking dormancy. Keep moist and cool. |
| Germination | 2 to 4 weeks after planting | Cotyledons (seed leaves) push through the surface. Keep dome on but start venting. |
| Early seedling | Weeks 4 to 8 after sprouting | First true needles appear. Remove dome fully. Water more regularly. Keep under bright light. |
| First transplant | 6 to 10 weeks after sprouting, or when roots fill the kit container | Move to a 4-inch pot with well-draining potting mix. Handle roots gently. |
| Up-potting | Every 6 to 12 months as roots fill container | Move up one pot size at a time. Don't jump from a 4-inch pot to a 2-gallon container; this leads to overwatering and root rot. |
| Outdoor planting | 1 to 3 years from germination, climate permitting | Only if you're in USDA zones 6 to 9 and have the space. See the section below. |
When you do the first transplant out of the kit container, use a well-draining potting mix, not straight garden soil or compost, which compacts and drowns young roots. A mix of 2 parts quality potting mix to 1 part perlite is ideal. Water in well after transplanting, then hold off for a few days to let the roots adjust. Giant sequoias don't like sitting in soggy soil at any stage.
Fertilizing can start lightly about 3 to 4 weeks after the first transplant. A balanced, diluted liquid fertilizer (something like 10-10-10 at half the recommended strength) applied once a month during the growing season is plenty. Don't fertilize in the first few weeks after transplanting, as it can burn stressed roots.
When (and whether) to move outdoors: climate, hardening off, and what to expect
Giant sequoias are native to a very specific band of elevation in the Sierra Nevada mountains of California, typically 5,000 to 7,000 feet. They're cold-hardy once established, growing well in USDA hardiness zones 6 through 9, but they struggle in hot, humid, low-elevation climates. If you're in the southeastern US, coastal Florida, or a region with hot and humid summers, long-term outdoor planting is likely to disappoint. If you're in the Pacific Northwest, the upper Midwest, the Mountain West, or similar temperate climates, you have a real shot.
Before moving any seedling outdoors, you need to harden it off. This means gradually exposing it to outdoor conditions over 7 to 14 days. Start with 1 to 2 hours outside in a shaded, sheltered spot. Increase exposure by an hour or two each day. Bring the plant back inside if temperatures drop below 40°F overnight. By the end of two weeks, the seedling can handle full outdoor exposure. Skipping this step is one of the fastest ways to kill a healthy seedling through transplant shock.
As for space expectations: giant sequoias become very large trees over decades. A kit-grown tree planted in the ground is a long-term commitment, not a landscape filler. If you're in the right climate and have the space, it's a genuinely rewarding project. If you're not in the right climate or just want to enjoy the growing experience, keeping the tree in a container for a few years is a completely valid approach. Many people grow them as impressive specimen plants in large pots before deciding on a permanent plan.
If you enjoy the process of growing trees from seed kits, this same approach to stratification, moisture control, and careful transplanting applies to other tree kits too, like living Christmas tree kits or palm tree grow kits, which follow similar early-care patterns even though the species behave very differently once established. The kit skills you build with a giant sequoia transfer well. Money does not grow on trees, and a seed grow kit is still an investment, so it helps to plan your budget before you start money does grow on trees plant kit.
FAQ
How do I know whether my giant sequoia seeds were already stratified when I open the grow kit?
Check both the instruction card and the seed packet wording, look for terms like “ready to plant” or “pre-treated.” You can also inspect a few seeds, if they are already cracked or have a small white radicle, they are ready, skip the full refrigeration schedule and plant immediately.
My compressed medium puck expanded too much or looks uneven, what should I do before planting?
Break up clumps after it fully absorbs water, then confirm moisture is “wrung-out sponge” moist, not freely draining. If you see pooled water at the bottom, drain the tray and discard any excess, then let the surface dry slightly before sowing.
What’s the best way to plant tiny giant sequoia seeds so they are the right depth?
Aim for about 1/8 inch (a light cover). For accuracy, sprinkle seeds onto the surface first, then add a thin dusting of the same moistened medium. Avoid pressing them down, the goal is contact without burying too deep.
Should I keep the dome fully sealed until germination, or can I vent earlier?
Keep it closed until you see emergence, then start venting promptly. If you already notice surface mold or a strong musty smell before seedlings appear, vent slightly earlier and reduce moisture, high humidity and stagnant air are what drive damping-off.
Is it normal if I see some surface mold, and when should I take action?
A small amount early can be managed, but act fast. Remove the affected surface layer if it’s localized, improve airflow by venting more, and stop adding water until the top just starts to dry, if seedlings collapse or stem bases darken, you likely need to adjust conditions immediately.
How can I tell damping-off versus seeds that simply did not germinate?
Damping-off usually looks like seedlings that start then suddenly collapse at the soil line, stems turn dark or mushy. Seeds that fail to germinate remain intact and uncracked. If you have collapsed seedlings, stop overwatering, increase ventilation, and consider discarding the worst seedlings to protect remaining ones.
What should I do if no seeds sprout after 4 to 6 weeks in the kit?
First confirm the stratification schedule matched the kit instructions, many failures come from skipping cold storage. Next check temperature and light, aim for 65 to 75°F with strong bright light. If medium stayed bone dry during stratification or early incubation, restart the cycle with fresh stratified seeds if possible rather than repeatedly replanting the same batch.
Can I speed things up with a heat mat, or will that help germination?
Avoid a heat mat unless your home stays below about 60°F. Too much bottom heat can push dome temperatures too high, which can stall germination or increase mold risk, monitor with a simple thermometer if you experiment.
When should I start watering after seedlings emerge, and how should I apply water?
Once seedlings are up and you begin venting, water more frequently but still lightly, usually every 2 to 4 days depending on humidity. Do not pour water into the tray, mist or water at the surface carefully so you keep moisture consistent without soaking the medium.
Should I transplant directly after germination, or is there a minimum seedling size?
Wait until seedlings are established enough to handle gentle handling and have grown true structure, not just a tiny sprout. Transplant into a well-draining mix, then give a few days for root adjustment without fertilizing immediately, stressed roots are more likely to burn.
What potting mix ratio is safest if my kit doesn’t include one, and what’s the common mistake?
Use a well-draining blend similar to 2 parts quality potting mix to 1 part perlite. The common mistake is using dense garden soil or uncomposted amendments that compact and hold water, that increases root rot risk.
How do I harden off a giant sequoia if my nights are near freezing?
Harden off gradually over 7 to 14 days, start with 1 to 2 hours in a sheltered, shaded location. Bring it indoors or cover it if nights drop below about 40°F, and avoid full sun exposure until the plant tolerates outdoor conditions.
Can I keep a giant sequoia in a container long-term, and what changes compared with planting in the ground?
Yes, many people keep them as large specimen containers for a few years. Use a large container with strong drainage, refresh or top-dress soil over time, and plan for eventual root space or a permanent planting decision, container trees dry out faster so monitoring moisture becomes more important.
My seedlings are getting tall and thin, what does that mean and how do I fix it?
Leggy growth usually means insufficient light. Increase light intensity using a bright window spot or an LED grow light, keep it close enough to reduce stretching, and continue venting to encourage sturdier growth.