The Buzzy Bonsai grow kit works by expanding a coconut husk pellet in water, planting pre-soaked spruce seeds about 1/4 inch deep, and keeping the medium consistently moist in a warm, bright spot with good airflow. Buzzy’s seed-planting guide also recommends soaking the seeds for 24 hours before planting to improve germination soaking pre-soaked spruce seeds about 1/4 inch deep. Germination takes anywhere from 2 to 6 weeks depending on your conditions. If you follow the soak-first rule (24 hours in water before planting), give the seedlings at least 6 hours of light per day, and resist the urge to overwater, you have a solid shot at growing a real bonsai-ready Norway Spruce from scratch.
Buzzy Bonsai Grow Kit Instructions: Setup, Care, and Troubleshooting

Marcus Thornfield
16 May 2026
What's in the Buzzy Bonsai grow kit (and how to identify your exact model)
Buzzy makes at least two different bonsai grow kits, and they're set up pretty differently, so figuring out which one you have matters before you start.
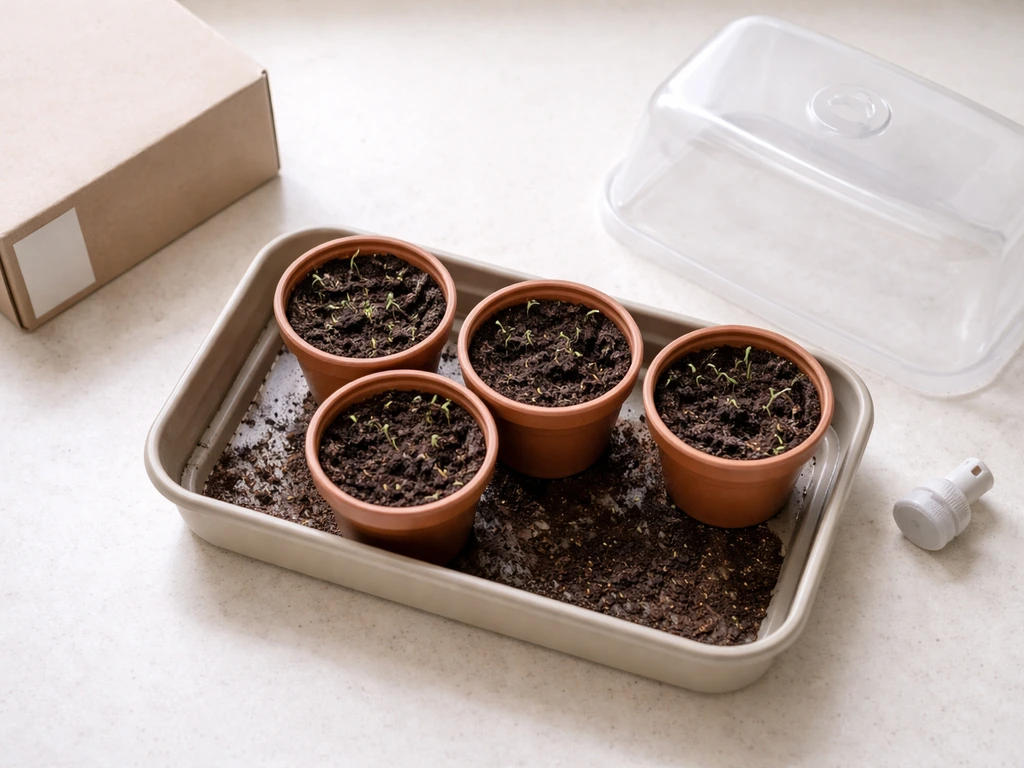
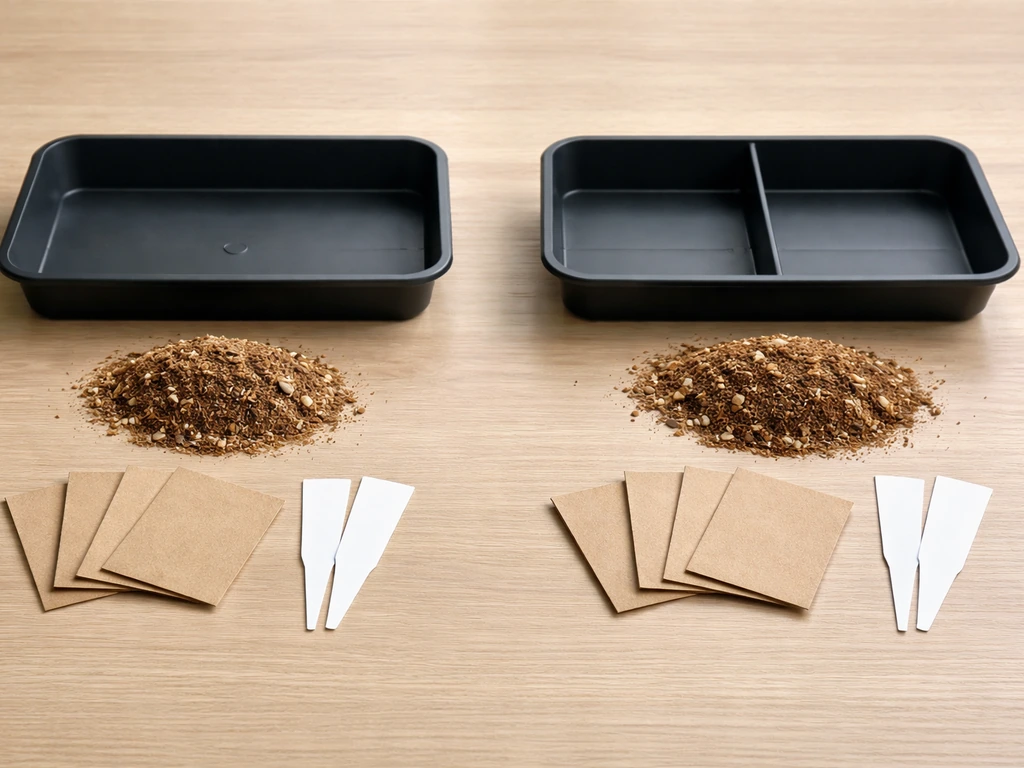
The first is the Spruce Bonsai Grow Kit (Complete Set). This is a single-variety kit built around Norway Spruce seeds. It comes with a traditional shallow bonsai pot and matching drainage tray, a water spray bottle, one coconut husk growing medium pellet, the Norway Spruce seeds, and a printed instruction card. This is the more complete starter kit, and it's the one most people find at gift shops and garden centers.
The second is the Bonsai Tree Grow Kit (Mini Ceramic Pots, 4 Pack). This one gives you four 2.5-inch round crackle-glazed ceramic pots (each about 1.25 inches tall), four coconut husk growing medium pellets, and four seed packets covering four different conifer varieties: Black Austrian Pine, Monterey Cypress, Blue Spruce, and Norway Spruce. The individual pot and kit dimensions are small (the kit box is roughly 2.75" x 3" x 3.5"), so this is more of a tabletop novelty set than a single serious planting.
To figure out which kit you have, just check the box. If you see four small pots and four seed packets, you've got the 4-pack. If you see one pot with a tray and a spray bottle, that's the Complete Set. The instructions below apply to both, but the 4-pack users should note that the tiny ceramic pots will need transplanting sooner since there's very little root space.
Unboxing, setup, and first-day instructions
Before you touch anything, set aside a bowl, about 3/4 cup of warm water, and a fork. Those are the only extra supplies you need on day one.
- Soak the seeds in plain room-temperature water for 24 hours before planting. This step is easy to skip, but it genuinely makes a difference for germination. Just drop the seeds in a small cup of water the night before you plan to plant.
- While the seeds are soaking, hydrate your growing medium pellet. Pour about 3/4 cup of warm water over the pellet in a bowl and let it expand fully. This takes a few minutes. Once expanded, fluff it up loosely with a fork so it has some air in it.
- Fill your pot with the hydrated growing medium, leaving a little space at the top (roughly 1/2 inch). Don't pack it down hard.
- Once your seeds have finished their 24-hour soak, drain them and place them on top of the growing medium, spacing them out a bit if you have multiple seeds.
- Cover the seeds with about 1/4 inch of growing medium. Gently press down so they have good contact with the medium, but don't compress it.
- Give the surface a light misting with the spray bottle (or a few drops of water if you don't have the Complete Set's spray bottle). You want it moist, not soaked.
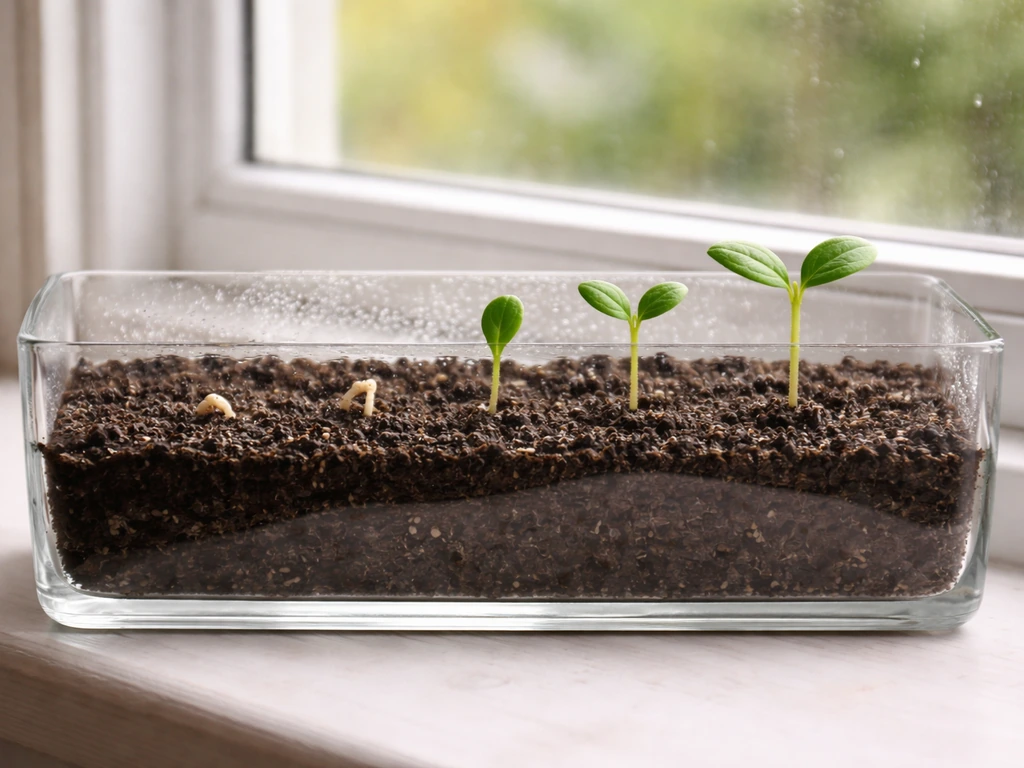
- Place the pot in a warm, bright spot with good air circulation. An unobstructed windowsill works well.
That's your whole first day. From here it's a waiting game, and patience is genuinely the hardest part of this kit.
Growing schedule: what to do week by week
Here's a practical week-by-week framework. The germination window is 2 to 6 weeks, so don't panic if nothing is happening at week two.
| Timeframe | Watering | Light | Other actions |
|---|---|---|---|
| Week 1–2 | Mist lightly every 1–2 days to keep surface moist. Never waterlogged. | Bright, indirect light. Windowsill with morning sun is ideal. | Keep in a warm spot (65–75°F). Open a window briefly each day for airflow. |
| Week 3–4 | Same misting routine. Check that medium doesn't dry out completely. | Start moving toward brighter light. 4–6 hours of direct sun is fine. | Watch for first sprouts. Don't disturb the medium by digging around. |
| Week 5–6 | Continue light watering. If seedlings have appeared, water at the base rather than misting over them. | Aim for 6+ hours of direct sunlight. A south- or west-facing window is ideal. | Introduce a small fan on low nearby, or crack a window daily to strengthen stems. |
| Month 2–3 | Once seedlings have several sets of needles, let the top layer dry slightly between waterings. | Full sun, minimum 6 hours per day. Can move outdoors if temps are consistently above freezing. | Begin half-strength balanced fertilizer once a month if seedlings have their second set of needles. |
| Spring through Fall (ongoing) | Water when top of medium is just dry to the touch. | Outdoors is ideal for spruce. Bring in if temps drop below freezing for extended periods. | Fertilize once a month with water-soluble fertilizer at half strength. Stop feeding in winter. |
| Winter (dormancy) | Continue watering but reduce frequency. | Keep in a cool, bright spot or an unheated garage if outdoors temps are extreme. | No fertilizer. First-year seedlings should be sheltered from prolonged hard freezes. |
Spruce are cold-hardy trees that thrive when exposed to all four seasons. Buzzy specifically notes they do well in USDA Zones 2 through 7 outdoors. But first-year seedlings are fragile, so if you're heading into a harsh winter, move them into an unheated garage or enclosed porch rather than leaving them fully exposed.
Troubleshooting common issues during germination and early growth
Most problems with this kit fall into three categories: nothing sprouting, something fuzzy growing on the medium, or seedlings that look weak and stretched. Here's how to handle each one.
Nothing is germinating after 3+ weeks
First, check whether you soaked the seeds before planting. If you skipped that step, germination is slower and less reliable. Also check your location: spruce seeds need warmth to germinate, and a cold windowsill in winter can dramatically slow things down. The medium should feel like a wrung-out sponge, never bone dry and never dripping. If it dried out completely at any point, the seeds may have failed. Try replanting with the reserve seeds (check your packet, there's usually more than the minimum needed).
White fuzz, green moss, or mold on the surface
This is one of the most common complaints people report with coconut husk kits, and it's almost always a combination of too much moisture and not enough airflow. If you see white fuzz or a greenish film on the medium, immediately improve the air circulation around the pot. A small fan on its lowest setting aimed near (not directly at) the pot, or simply cracking a window for a few minutes each day, is usually enough to stop it. Reduce your misting frequency slightly, and make sure the pot isn't sitting in any standing water in the tray.
Seedlings are leggy or falling over
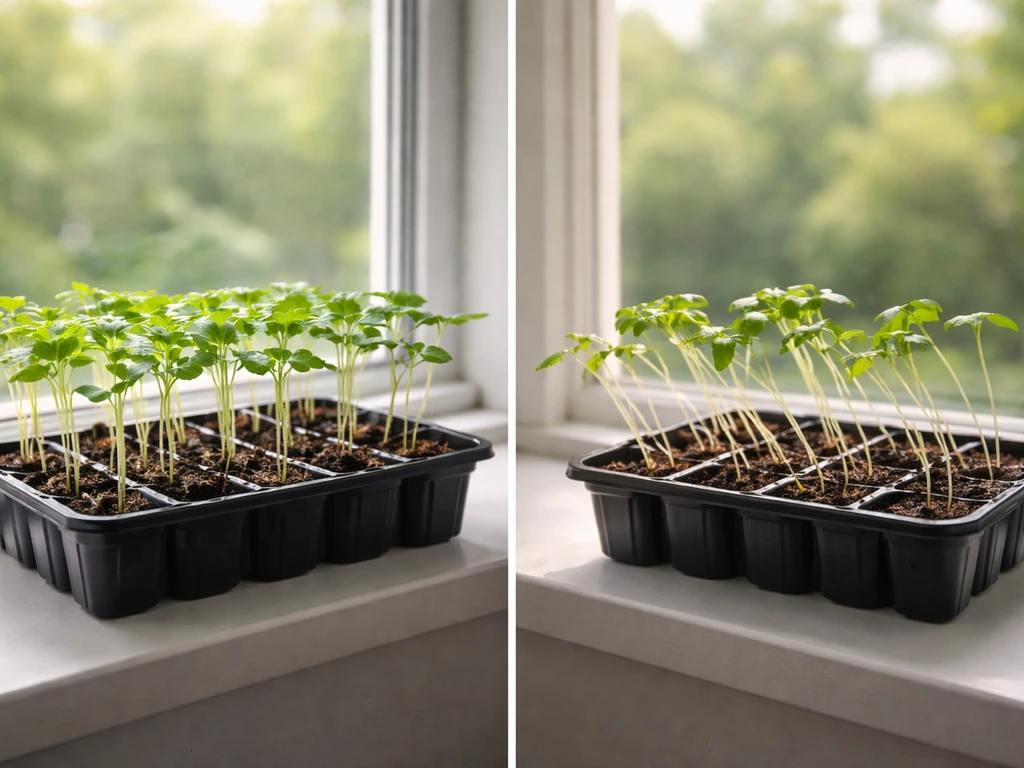
Legginess means the seedlings are stretching toward light they can't quite reach. Move the pot closer to the window, or ideally outside in a sheltered spot once temps allow. Spruce really do want direct sun, and indirect or low-light conditions will produce weak, spindly growth quickly. That same airflow trick mentioned above also physically strengthens the stem tissue, so don't skip it.
Overwatering signs
If the growing medium stays wet for more than two days without being touched, you're probably overwatering. Soggy medium leads to root rot and also encourages mold. The goal is a consistently moist medium, not a wet one. When in doubt, stick your finger about half an inch into the medium. If it still feels damp, wait another day before adding water.
Transplanting, shaping, and long-term bonsai care basics

The kit pots are not permanent homes, especially in the 4-pack version where the tiny 2.5-inch ceramic pots will limit root growth quickly. Once your seedling has been growing for about 6 to 12 months and roots start appearing at the drainage holes (or the plant is visibly top-heavy for its pot), it's time to transplant.
Move up to a slightly larger bonsai training pot, roughly 4 to 6 inches wide with good drainage holes. Use a bonsai-specific soil mix or a blend of akadama, perlite, and pumice if you want to get into it. Avoid standard potting soil, which retains too much moisture for conifers. When transplanting, gently loosen the root ball, trim any circling or damaged roots, and replant at the same depth it was growing before.
Shaping a bonsai from a kit-grown seedling is a slow process, and that's actually the point. For the first year, focus entirely on getting the tree healthy. Don't prune or wire anything until the tree has established roots and is pushing new growth confidently. After that first year, light pruning to encourage a single dominant leader (the main upright stem) is a good starting point for a spruce bonsai style. If you want to go further, bonsai wire (usually 1–2mm aluminum wire) lets you gently guide branch direction over several months, but this is a patient hobby and rushing that step can set you back.
For ongoing care, the fertilizer rule is simple: balanced fertilizer (like a 10-10-10 water-soluble formula) at half the label's recommended strength, once a month from spring through fall. Stop feeding entirely in winter while the tree goes dormant. Keep watering through winter, just less frequently.
Buzzy bonsai grow kit review: what to expect, pros and cons, and who it's for
Honest take: this kit is a great starting point for beginners and a fun gift, but it's not a shortcut to a finished bonsai. What you're really growing is a Norway Spruce seedling from seed, which is exactly how bonsai cultivation traditionally begins. The kit gives you the right supplies and a helpful structure to do that correctly. Realistic expectations matter a lot here.
| What works well | What to watch out for |
|---|---|
| Coconut husk medium is clean, consistent, and easy to work with | Tiny pots (especially in the 4-pack) need transplanting within the first year |
| Clear seed-depth and soaking instructions reduce beginner mistakes | Germination can take up to 6 weeks, which frustrates people expecting quick results |
| Complete Set includes spray bottle and matching tray, which is genuinely useful | No fertilizer included, so you'll need to buy that separately after the second set of needles appears |
| Four-variety 4-pack is a great gift or sampler experience | Four different conifer species at once can be overwhelming for true beginners |
| Cold-hardy spruce is a forgiving tree species for outdoor growing | First-year seedlings still need protection from prolonged hard freezes |
This kit is best for curious beginners, gift-givers, and people who want to understand bonsai from the ground up rather than buying a pre-shaped tree. It's not for someone who wants instant results or a mature bonsai shape within a season. If you go in knowing you're starting a multi-year project and not growing a decorative plant in a few weeks, you'll enjoy the process a lot more.
If you've found success with this kit, you might enjoy exploring other Buzzy kits that follow a similar setup process. Their lavender, succulent, forget-me-not, and tomato grow kits all use comparable coconut husk mediums and pellet-based setups, so the core skills carry over well. Buzzy also sells a fuzzy forget-me-not grow kit, and its instructions are similarly built around coconut husk pellets and consistent moisture. If you are also using a buzzy lavender grow kit, follow its instructions for the right soak time, light, and moisture level so germination goes smoothly lavender grow kits. The cactus kit is another popular option that shares some of the same patience-and-light requirements as this bonsai kit.
Your next step after reading this is simple: soak your seeds tonight, hydrate the pellet tomorrow morning, and get planted by afternoon. The hardest part of this kit isn't the setup. It's trusting the process during those quiet weeks before anything breaks the surface. If you want to grow tomatoes with a similar coconut husk/pellet setup, use the fuzzy tomato grow kit instructions that match your kit model.
FAQ
Can I start the seeds indoors and then move them outside later, and if so when should I transition?
Yes. Move them outside only after days are consistently warm and nights are no longer near freezing, and keep them in a sheltered spot for a week to harden them off (more sun each day). Sudden full sun or cold nights can cause leaf dieback even if the seedlings look healthy.
What should I do if the medium stays wet even though I’m improving airflow?
First, stop misting and let the top layer dry slightly, then water only in small amounts to keep the pellet “wrung-out,” not saturated. If the pot tray is holding water, empty it, and consider replacing the medium if you see persistent green algae or heavy white fuzz that keeps returning.
How can I tell mold or algae versus healthy fungal growth, and when should I take action?
Healthy early growth should be limited to the seed/soil surface without thick spreading coverage. If you see a continuous green film or rapid spreading white fuzz over most of the pellet, treat it as a moisture problem, increase airflow immediately, reduce misting, and monitor daily. If it keeps worsening after 48 to 72 hours, replant into a fresh, correctly hydrated pellet using reserve seeds.
Do I need to keep the medium covered or covered by plastic to maintain humidity?
Usually no. The kit’s goal is consistent moisture plus airflow. If you cover the pot, remove the cover at least daily to prevent stagnant air, and watch closely for fuzz or film. Once you see germination, excessive humidity with low airflow is the fastest route to mold.
My seedlings sprouted, but they look pale. How do I adjust light without shocking them?
Increase light gradually over several days. Start by moving closer to the brightest window or briefly into direct sun in short blocks, then extend time as the seedlings green up. If the seedlings were in low light, jumping to full sun all at once can scorch needles.
The seedlings are growing slowly, but the medium still feels moist. Is it always a mistake?
Not necessarily. Germination and early growth can be slow depending on warmth, daylight, and airflow. If temperatures are cool, growth may pause even when moisture is correct. Use the medium touch test (half-inch down should feel damp, not wet), keep light steady, and give it a full germination window before assuming failure.
When should I start fertilizing if seedlings just emerged late in the season?
Wait until you have active new growth and temperatures support growth, then follow the spring-through-fall schedule. If seedlings emerge near late fall and growth slows quickly, it’s better to skip feeding and focus on survival and root establishment, since feeding in low-light or cold periods can stress conifers.
How do I avoid transplant shock when moving from the kit pellet into a training pot?
Handle the seedling gently and keep it at the same planting depth, loosen roots minimally (only to straighten circling roots), and replant into a fast-draining mix. After transplanting, keep it in bright shade for a few days with stable moisture, then move toward normal light once new growth resumes.
My 4-pack seedlings are crowded. Can I separate them earlier than 6 to 12 months?
You can, but only when individual seedlings have enough roots to handle separation, and ideally when they can be transplanted with intact root structure. Crowding is a common limitation in tiny pots, so plan for earlier training-pot moves in the 4-pack, while still prioritizing minimal root disturbance.
What’s the safest way to water once the seedlings are established?
Use small, targeted amounts so the medium stays evenly moist without pooling in the tray. Avoid flooding, and consider bottom-watering only if the kit and your setup clearly drain well. A useful rule is to water after the top portion begins to dry, not when the pellet is already wet.