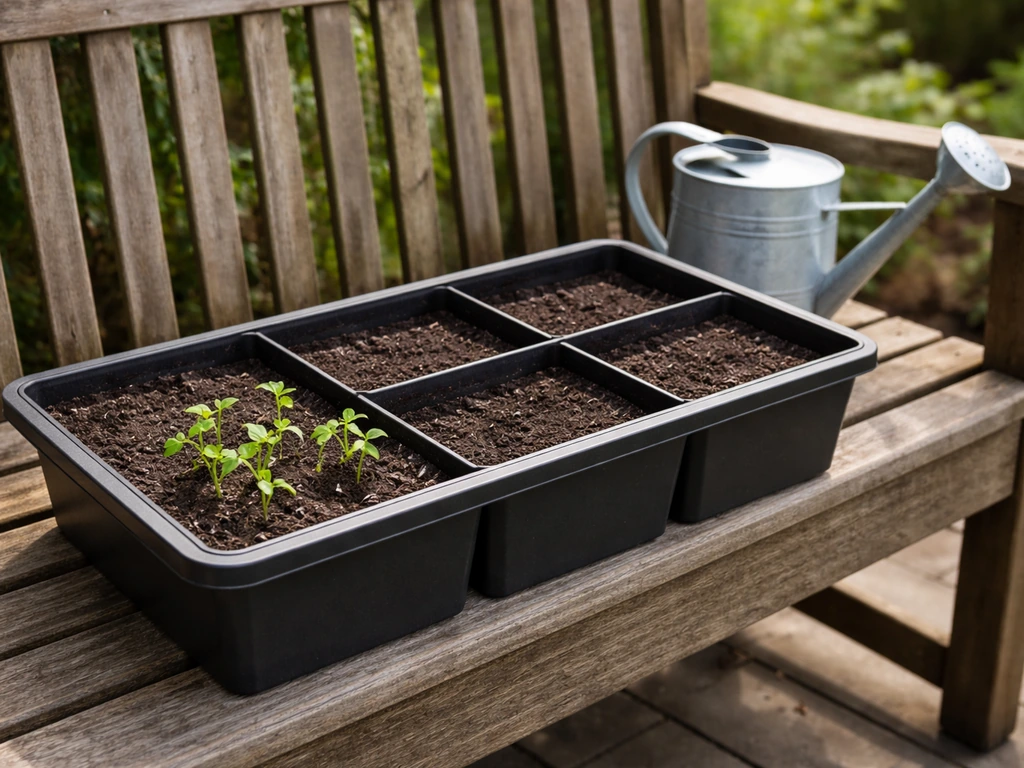
The Garden Patch GrowBox is a self-watering planter that handles fertilizing and bottom-up watering automatically, but it does not come with soil or seeds. You supply those, assemble the two-piece box, pack it with potting mix, lay the Nutrient Patch cover on top, and plant through cuts in the cover. Once the water reservoir is full, the system wicks moisture upward and the Nutrient Patch dissolves fertilizer into the soil for about four months. That is the whole concept. The rest is just knowing the exact sequence so nothing goes wrong on setup day.
Garden Patch Grow Box Instructions: Planting Guide + How-To

Marcus Thornfield
29 Apr 2026
What the Garden Patch GrowBox actually is and what you need before you start
The GrowBox is a self-watering tomato planter (though it grows far more than tomatoes). If you are also looking for keter-style elevated bed instructions, focus on the same core setup steps: choose the right fill mix, level the surface, and follow a simple watering routine self-watering planter. The box itself is UV-treated plastic, available in dark green and terra cotta, and measures 15 inches wide, 2.5 feet long, and 1 foot tall. Inside is a 4-gallon water reservoir in the lower half. The upper half holds your potting mix. A Nutrient Patch cover sits on top of the soil, tube-side down, and those tubes dissolve fertilizer directly into the mix over time. That is essentially the whole system.
What comes in the box: the two-part GrowBox planter, the Nutrient Patch fertilizer cover, pins, a planting guide, and simple instructions. If you follow the snap-and-grow greenhouse instructions included in the guide, setup is quick and the Nutrient Patch stays properly protected simple instructions. What does NOT come with it: potting mix and seeds or transplants. Garden Patch is upfront about this. Shipping a heavy bag of soil does not make sense, so you buy that locally. Before your setup day, grab a quality bagged potting mix (not garden soil or topsoil) and decide whether you are starting from seeds or using young transplants from a nursery.
Also check which version of the kit you have. Garden Patch sells the original GrowBox, value packages with multiple units, and Replant Kits (which include a fresh Nutrient Patch for an existing box). The assembly and planting steps below apply to all of them, but if you bought a Replant Kit for an existing box, skip ahead to the replanting section.
- Bagged potting mix (enough to completely fill the upper half, packed firmly)
- Seeds or young transplants for your chosen crops
- A watering can or hose with a gentle spray attachment
- Optional: the GrowBox support cage accessory if you are growing tomatoes or tall vining plants
Step-by-step: assembling and planting your GrowBox
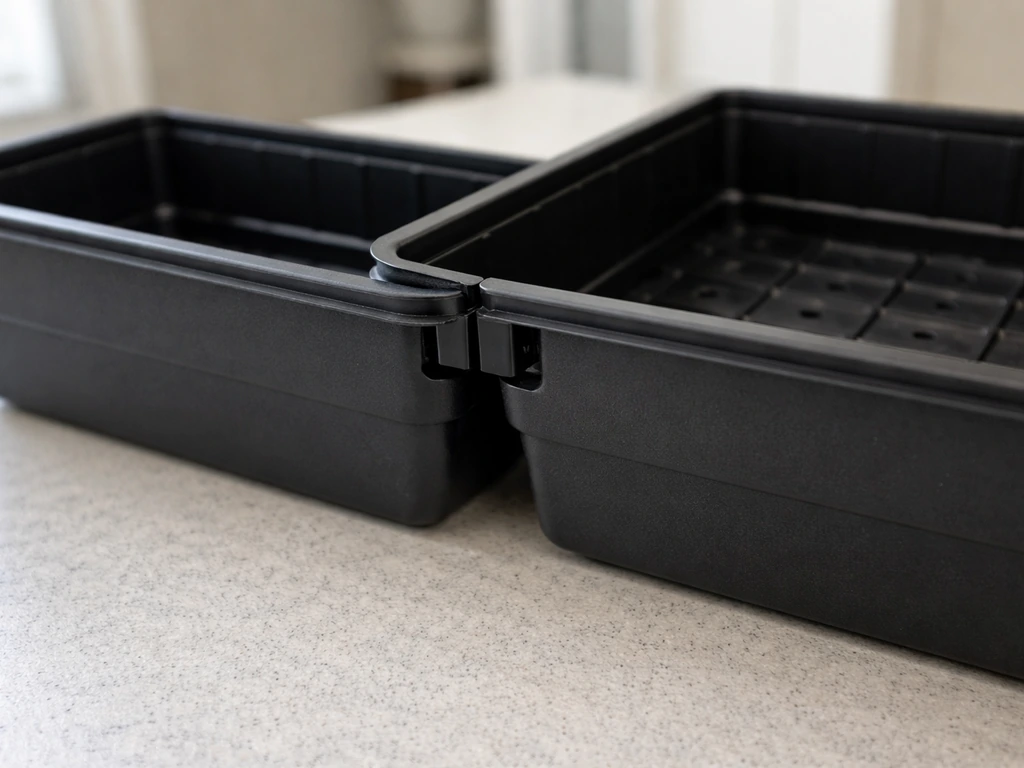
Step 1: Assemble the two halves
Remove the four pins from the bottom planter top. Join the two halves of the box, keeping the spouts on the same side. If you are using a Click and Grow Smart Garden too, follow its click-and-grow smart garden instructions for the right setup and watering schedule click and grow smart garden instructions. Snap the top onto the eight pins around the perimeter. Push the two hinged gates down until they click upright. That is the full assembly. It takes about two minutes. With patio pickers in mind, these grow box instructions also cover how to prep the planter and start your first crop patio pickers grow box instructions.
Step 2: Pack and soak the potting mix
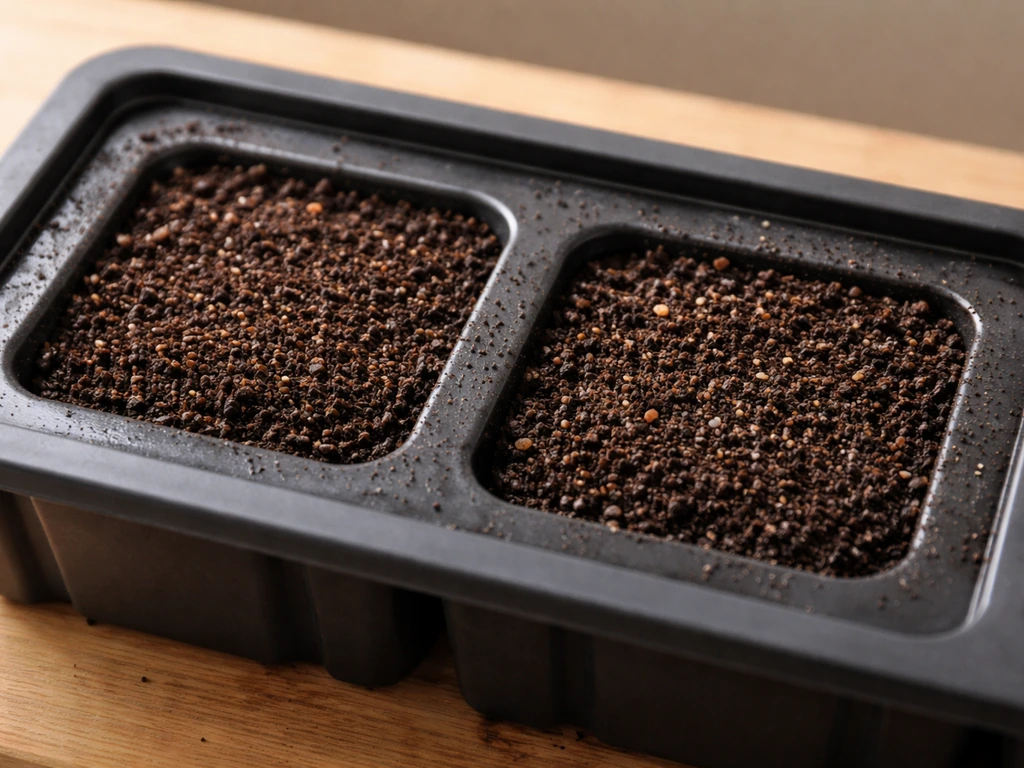
Find the two square holes in the upper tray and pack potting mix into them first. These holes are how water wicks from the reservoir below up into the soil, so packing them tightly is important. In a Reddit discussion about the GrowBox’s reservoir, overflow holes, and wicking concept, a commenter describes how the reservoir and wicking setup works in practice and asks whether roots draw water directly or through wicking soil moisture These holes are how water wicks from the reservoir below up into the soil. Then fill the upper half about halfway and soak it thoroughly with water. After that, completely fill the top with potting mix, mounding it slightly higher in the middle. Soak it again. The soil will settle, so do not be shy about how much you add. You want it genuinely full and moist all the way through before you do anything else.
Step 3: Place the Nutrient Patch cover
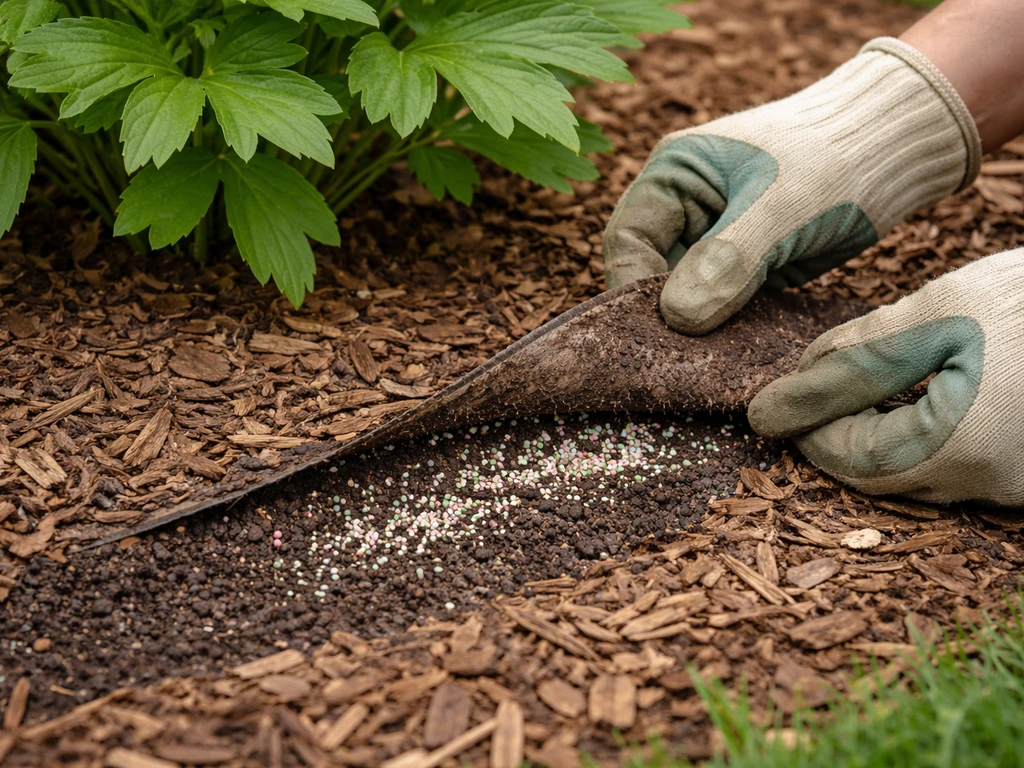
This is the step where most people accidentally ruin the fertilizer, so pay attention. The underside of the Nutrient Patch has fertilizer tubes attached to it. Those tubes dissolve the moment they touch water. Keep them completely dry until you are ready to lay the cover down. Do not spray it, do not set it on wet soil temporarily while you do something else. Once the soil is fully packed and soaked, lay the Nutrient Patch tube-side down, centered on the soil surface. Then lift one edge gently and spray a little water directly onto the tubes to make sure they start dissolving. The fertilizer should stay in a narrow strip along the underside, not get spread or mixed around.
Step 4: Plant using the numbered diagram
The Nutrient Patch has numbers printed on it. These correspond to a planting diagram in your guide that tells you how many plants of each type go in each numbered slot. Pick your crops, match them to the diagram, and cut small triangles over the corresponding numbers. Lift the flaps and plant 2 to 3 inches into the soil beneath each cut. Add a small splash of water around each transplant to close any air pockets. Then fold the flaps back around each stem and extend the stems upward through the cover. Secure flaps with the included pins so they stay snug around the base of each plant.
Planting from seeds instead of transplants
Seeds work well in the GrowBox. Instead of cutting a triangle, cut out a one-inch circle around each number. Drop 3 to 4 seeds into the hole and plant them about 2 to 3 inches into the soil. Once they sprout and you can tell which seedlings are the strongest, thin out the weaker ones by snipping them at the base. Do not pull them out or you risk disturbing the roots of the keeper.
Step 5: Fill the water reservoir
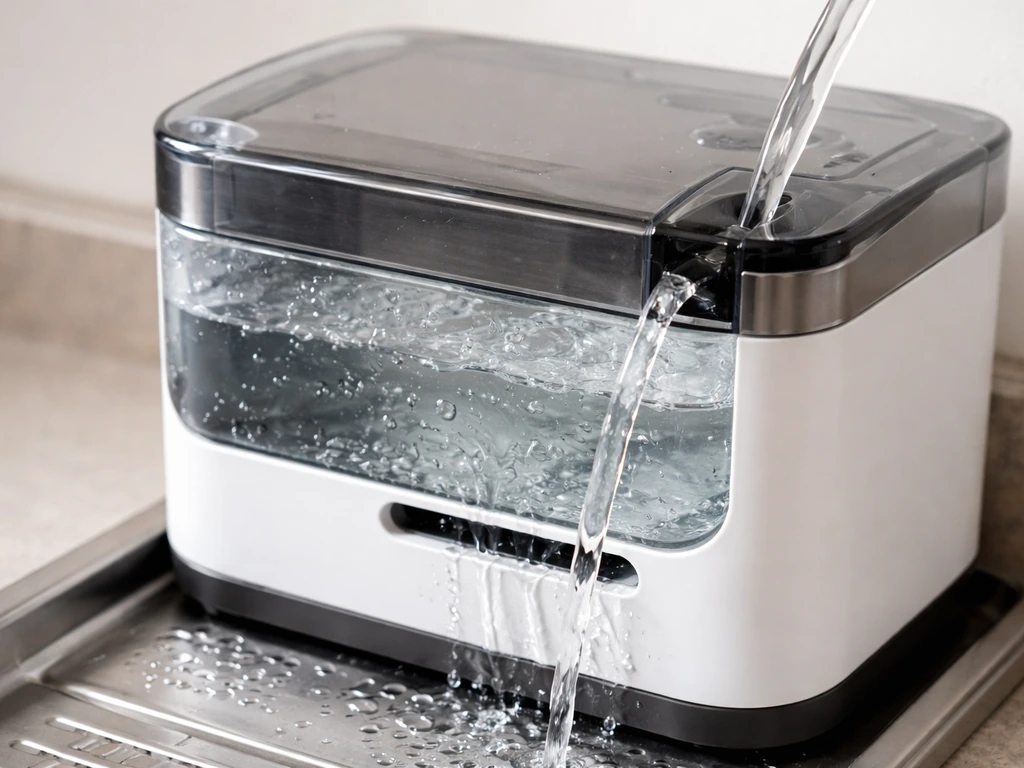
Fill the water well through the side spout until water starts to flow out from the front overflow opening. That overflow is how you know it is full. Keep the cover on going forward to protect the Nutrient Patch from rain diluting it unevenly, and just top off the reservoir through the spout as needed.
Where to put the GrowBox: light, temperature, and placement
Most vegetable plants need 6 to 8 hours of direct sunlight per day, and the official guide is clear on this. Put your GrowBox in the sunniest spot you have. A south-facing patio, deck, or balcony edge is ideal. If your space gets full sun for only part of the day, you can still grow leafy greens, herbs, and root vegetables in partial shade, but fruiting crops like tomatoes and peppers really do need those full 6 to 8 hours. Fewer hours of sun is the most common reason GrowBoxes underperform, not anything wrong with the box itself.
Temperature matters too. Cool-season crops like lettuce, spinach, and kale prefer temperatures in the 60 to 80°F range and can handle a light frost. Warm-season crops like tomatoes, peppers, and cucumbers want 70 to 95°F and should not go outside until frost risk is completely gone in your area. If you are in late April and nights still dip below 50°F, hold off on warm-season planting or bring the box inside overnight.
One underappreciated feature of the GrowBox design is that the Nutrient Patch cover allows airflow both above and below the soil surface. This helps maintain a stable growing temperature and reduces the risk of fungal problems. Do not swap out the cover for regular plastic sheeting or foil, even temporarily, because you lose that benefit.
Watering: how the system works and what you actually need to do
The GrowBox bottom-waters through capillary action. Water sits in the 4-gallon reservoir and wicks upward through the packed square holes into the potting mix. Plants pull what they need from below, so the surface of the soil can look dry while the roots are perfectly hydrated. This is normal and not a problem.
Your one job with watering is simple: never let the reservoir go dry. The manual says you cannot over-water because excess water drains out the front overflow opening before the reservoir can flood the roots. So you do not need to worry about how much you add through the spout. Just check the reservoir every day or two in hot weather, and every few days in cooler conditions. When you can see or feel that the level has dropped, top it up.
Common watering mistakes to avoid
- Watering from the top after the Nutrient Patch is in place: this can wash or dilute the fertilizer strip and create soggy spots on the surface where mold can form
- Letting the reservoir dry out completely: once the wicking chain breaks, it can take a day or two for the soil to re-wet properly from the bottom, and plants may stress in the meantime
- Assuming the soil looks moist on top so the reservoir must be fine: check the spout level directly, not the surface
- Removing the cover to check on plants constantly: every time you lift the Nutrient Patch, you risk disturbing the fertilizer tubes or the planted area
Fertilizing: what the Nutrient Patch does and when to replace it
The short answer is: you do not need to fertilize separately for the entire life of your first crop. The Nutrient Patch contains a 9-14-15 premium fertilizer blend (nitrogen, phosphorus, potassium plus trace nutrients) and releases it gradually as the tubes dissolve into the moist soil beneath. The system is designed to feed your plants automatically for about four months. For most vegetable crops that is the entire season from planting to harvest.
For perennials, herbs, and ornamentals that stick around longer than a single season, swap in a new Nutrient Patch every three months. For annuals and vegetables, you replace the Nutrient Patch when you replant your next crop. The system is genuinely set-and-forget on the fertilizer side, which is one of the biggest practical advantages over open raised beds where you have to remember to feed on a schedule.
| Growth Stage | Feeding Action | Notes |
|---|---|---|
| Germination / first 2 weeks | None needed | Nutrient Patch begins dissolving on contact with moist soil |
| Active vegetative growth | None needed | Fertilizer tubes continue releasing nutrients automatically |
| Fruiting / flowering | None needed | 9-14-15 blend covers fruiting crops through the season |
| After harvest, before replanting | Replace Nutrient Patch | Remove old cover and remnants, lay fresh Nutrient Patch |
| Perennials and herbs every 3 months | Replace Nutrient Patch | Do not let the patch run more than 3 months in continuous-growing crops |
Troubleshooting: germination problems, pests, mold, and slow growth
Seeds not germinating
If nothing has sprouted after 10 to 14 days, check three things: soil temperature, moisture, and seed depth. Warm-season seeds like tomatoes and peppers need soil temps above 65°F to germinate reliably. If your box is outside in early spring and nights are cold, the soil inside is probably too cool. Move it indoors near a sunny window or use a seedling heat mat under the box. Also confirm your seeds are planted 2 to 3 inches deep and the soil around the seed holes is genuinely moist, not just damp on the surface.
Slow growth or pale, leggy plants
Almost always a light issue. Move the box to a sunnier spot and watch for improvement within a few days. If you are already at 6 to 8 hours of sun and growth is still sluggish, check that the reservoir has not run dry and that the Nutrient Patch is still intact and in contact with the soil. A patch that has shifted or dried out will stop delivering nutrients.
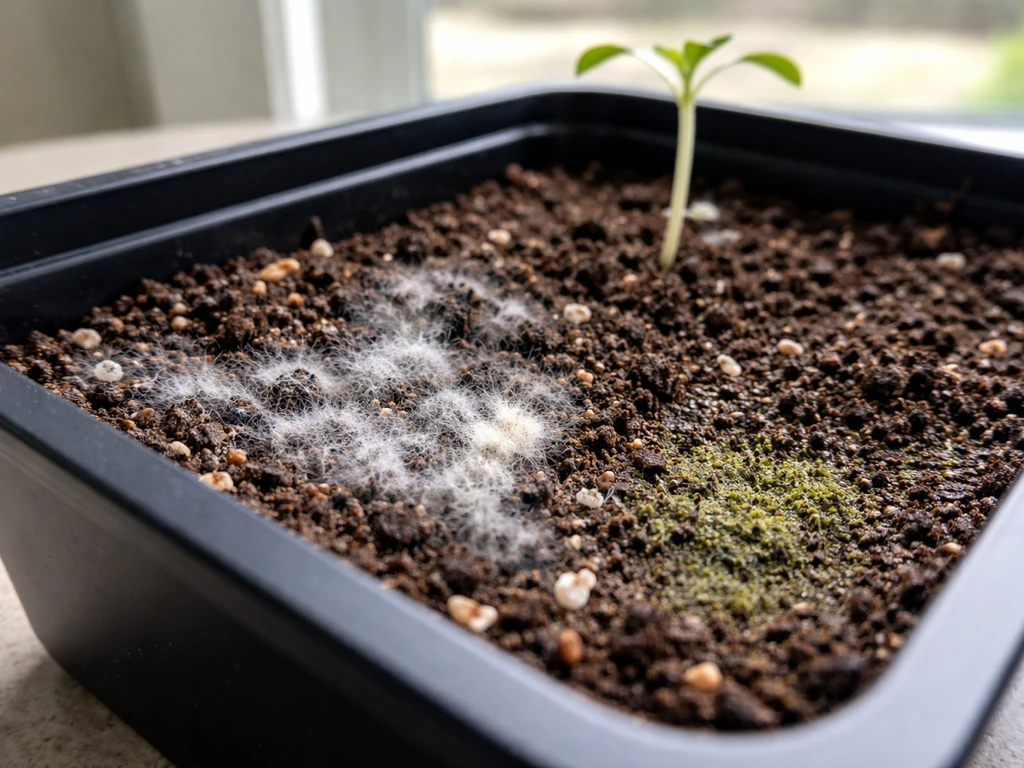
White fuzz or green algae on the soil surface
A little surface mold on the soil near the planting holes is common, especially in humid weather early in the season. It is usually not harmful to the plants. It happens when the soil surface around the planting cuts stays damp with limited airflow. The Nutrient Patch cover is designed to allow airflow that limits this, so make sure the cover is lying flat and not bunched up around your plants. If you see green algae on the outside of the box near the spout, just wipe it away. It is cosmetic.
Aphids and other pests
Aphids are the most common pest on GrowBox crops, especially on tomatoes and peppers. You will often notice a sticky residue (honeydew) on leaves before you spot the insects themselves. Look under the leaves for clusters of small soft-bodied bugs. Your best options in order of preference: blast them off with a strong spray of water from the hose, apply insecticidal soap or a mix of 5 tablespoons of dish soap per gallon of water sprayed directly on the insects, or use neem oil if the infestation is larger. Introducing ladybugs also works in outdoor settings. Avoid spraying anything directly onto the Nutrient Patch or soil surface.
Plants crowding each other out
This happens when you mix large vining plants with smaller greens in the same box. A tomato plant will shade out lettuce within weeks. Stick to the planting diagrams in your guide, which are designed so all plants in the box have compatible growth habits. If you already have a crowding problem, remove the smaller plants that are being shaded rather than letting them struggle.
Harvesting, wrapping up the season, and starting your next crop
Harvest timing depends on what you planted. Leafy greens can be harvested continuously by cutting outer leaves and letting the center keep growing. Tomatoes and peppers are ready when they reach full color and give slightly to a gentle squeeze. Do not wait for perfect color on tomatoes: if pests or weather are a concern, pick them at first blush and let them ripen on a counter indoors.
When the season ends or your crop is done, here is how to reset for the next batch. Pull out old plants from the roots. Remove the Nutrient Patch cover and discard it along with any remaining fertilizer remnants. Loosen the top layer of old soil. Here is the good news: you do not need to replace all the potting mix. The same mix lasts 3 to 4 years. Just add fresh potting mix to bring the level back up to completely full, lay a new Nutrient Patch (sold as the Replant Kit), plant your next crop through the new cover, fill the reservoir, and you are back in business.
For winter storage, remove the Nutrient Patch and let rain and cold weather rinse and compost whatever is left in the soil naturally. The UV-treated plastic handles outdoor conditions well. Come spring, top off the soil, add a fresh Nutrient Patch, and plant again.
If you enjoy the self-watering planter approach but want to explore other formats, there are some interesting comparisons worth making. If you also use a Click and Grow Smart Garden 9, follow its instructions for set up and watering so the modules perform as expected click and grow smart garden 9 instructions. Kits like the Keter Easy Grow and similar elevated garden beds take a different structural approach, while the Click and Grow Smart Garden goes fully indoor with built-in lighting. The Garden Patch GrowBox sits in the middle: outdoor-focused, low-maintenance, and built around a clever fertilizer delivery system that genuinely simplifies the feeding side of growing vegetables.
FAQ
Can I use garden soil or topsoil instead of bagged potting mix in the garden patch grow box instructions?
No. The grow box is designed around a potting mix that wicks consistently through the square holes. Garden soil often compacts and can block capillary flow, leaving roots unevenly hydrated and making it harder for the Nutrient Patch to dissolve and deliver fertilizer predictably.
How do I know the reservoir is full if water keeps draining out the overflow opening?
Fill through the side spout until you see water flow from the front overflow, then stop. After that, you should not need constant refilling, just topping off when the reservoir level drops. If overflow continues minutes after filling, check that the box halves are seated correctly and the spout side is aligned as assembled.
Is it okay to check on the Nutrient Patch by lifting it after I’ve soaked the soil?
Avoid lifting or moving it once it is placed tube-side down. Lifting can delay or disrupt contact with the moist soil, which changes how and when fertilizer starts dissolving. If you must adjust it, re-center it quickly and ensure the tubes are fully contacting the soil surface.
What should I do if the Nutrient Patch cover shifts after planting?
Re-seat it as soon as you notice the shift, tube-side down and flat against the soil. A bunched or partially lifted cover reduces airflow and can interrupt fertilizer delivery, which often shows up as slow growth or uneven performance between plants.
How many plants can I start if I’m unsure which number slots match my crop variety?
Use the planting diagram numbers in the included guide and follow the counts for your specific crop type, not the plant label size. If you are between two categories, err on the lower density so the slower-growing plants are not shaded or crowded before they establish.
Can I start with a mix of seeds and nursery transplants in the same garden patch grow box?
Yes, but plan for different establishment timelines. Plant seeds at the recommended depth, and for transplants add a small splash of water around each stem to close air pockets. Avoid re-digging later, since the planted flaps and pins are meant to keep stems supported without disturbing roots.
Why do my seedlings look tall or weak even though I’m getting enough sun?
Common causes in this system are inconsistent moisture at the top (reservoir may be too low), seeds planted too shallow or too deep, or thinned too late so weaker seedlings draw resources. Check the reservoir every day or two during hot weather and thin to the strongest seedlings once you can clearly identify them.
Is it normal that the soil surface looks dry even when plants are doing well?
Yes. The grow box bottom-waters by wicking, so the surface can dry while roots stay moist below. As long as the reservoir never runs dry and plants are growing normally, dry-looking top soil is expected.
What’s the best way to prevent fungal issues around the planting holes?
Keep the Nutrient Patch cover flat and properly seated, do not replace it with plastic sheeting or foil, and avoid over-wetting the surface beyond the normal soak. If you see early surface mold, improved airflow and stable watering usually resolves it without treating the plants.
Can I spray insecticidal soap or neem oil near the Nutrient Patch cover?
You should avoid spraying directly onto the Nutrient Patch or the soil surface. Apply treatments only to the foliage, and do it carefully so droplets do not run onto the cover. If you need to repeat treatment, wait for foliage to dry first to reduce runoff risk.
How often should I check the reservoir after the first week?
Check daily or every other day in hot weather, and every few days in cooler conditions. The key trigger is visual or tactile evidence of a drop, not a calendar schedule. Topping up before it runs low helps keep germination and early growth consistent.
When should I replace the Nutrient Patch for annual vegetables versus perennials and herbs?
For vegetables and annuals, replace when you replant the next crop (effectively starting fresh for the next season). For perennials, herbs, and ornamentals, swap in a new Nutrient Patch every three months so ongoing fertilizer delivery stays reliable.
Can I leave the box outside during winter with plants removed?
For storage, remove the Nutrient Patch and let rain and cold weather rinse and naturally compost the remaining material in the soil. Come spring, top up the soil, add a fresh Nutrient Patch, and begin planting again. If you expect extreme freezing or harsh weather, protect the box from standing debris and heavy leaves that can trap moisture at the top.
Do vining plants always fail in the grow box because of shading?
They fail when vining crops are mixed with smaller plants that need more light. If you want to grow multiple crops together, keep to the diagram’s compatible growth habits. For vining crops alone, still ensure you have space for stems to extend upward through the cover without crowding the other holes.