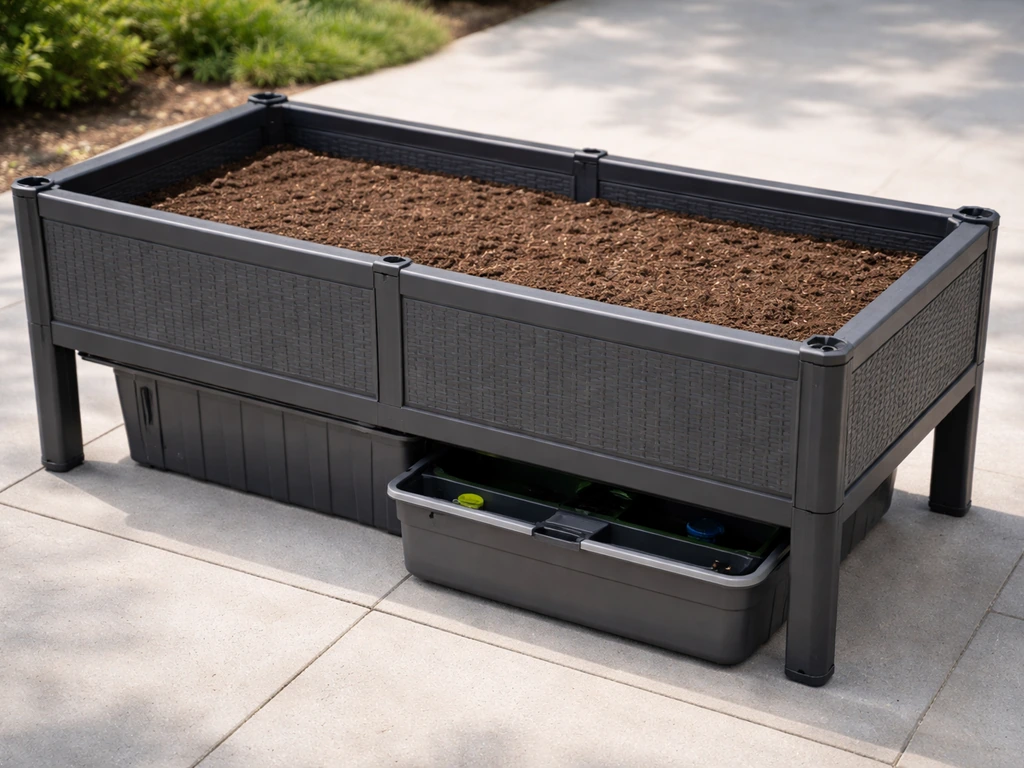
The City Pickers 'Start Pickin'' grow box (Model # 2375W-1 by EMSCO Group) is a self-watering raised bed planter with a built-in 1-gallon water reservoir, UV-protected resin construction, and drainage holes to prevent overwatering. It does not need electricity, hydroponics nutrients, or grow lights to get started, you fill the reservoir, add soil and seeds or transplants, and let the self-watering system do the work. Here is exactly how to get it set up and running on day one. If you are using a different smart garden model, follow the click and grow smart garden 9 instructions for setup steps tailored to that unit. If you also have a Click and Grow Smart Garden, follow its specific setup and care instructions for the best results click and grow smart garden instructions.
Start Pickin Grow Box Instructions: Setup and First Week Guide

Identifying your 'Pickin Grow Box'
If you searched for 'Start Pickin grow box instructions,' you almost certainly have the City Pickers Start Pickin' raised bed planter made by EMSCO Group. The model number is 2375W-1, and you can confirm it by checking the sticker on the bottom or side of the box, or by looking at the front of your instruction booklet (which should be tucked inside the packaging). The unit measures 10 inches tall, 12 inches long, and 20 inches wide, roughly the size of a large window box. It's available at Home Depot, Walmart, and Target, so the packaging design may look slightly different depending on where you bought it, but the kit itself is the same.
If your planter looks completely different from that description, say, it's a tall opaque cabinet with a grow light inside, you may have a different type of grow box entirely. In that case, the instructions here won't fully apply, and you'd want to search for your specific brand name and model number. But if you've got a rectangular, lightweight resin planter with a snap-in bottom tray, you're in the right place.
Unboxing and parts checklist
Open the box on a flat surface and lay everything out before you start. The Start Pickin' kit is pretty minimal, which is actually a good thing, less to lose, less to break. Here's what you should find inside:
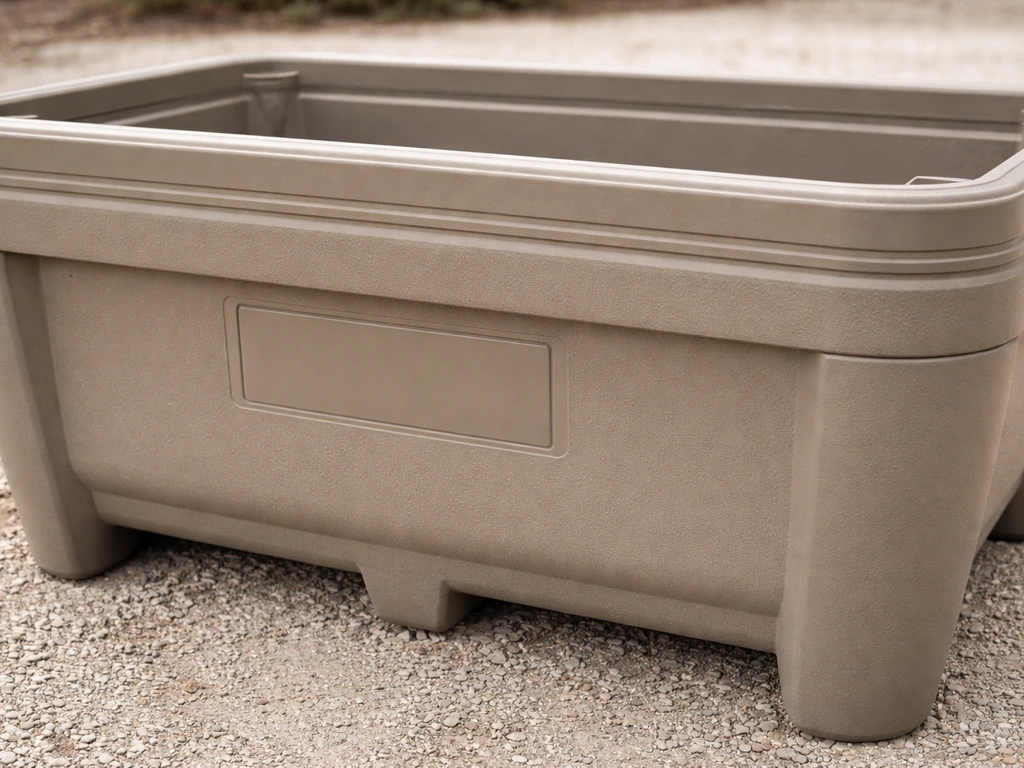
- Main grow box body (UV-protected resin, the main rectangular planter)
- Bottom water reservoir/tray (this is the self-watering base that holds the 1-gallon water reserve)
- Soil platform or aeration tray (sits above the reservoir and keeps roots from sitting in standing water)
- Fill tube or water fill port (a small tube or opening that lets you add water directly to the reservoir without disturbing the soil)
- Drainage holes or overflow ports (pre-molded into the body to prevent over-watering)
- Instruction booklet (included in every unit — keep it somewhere safe)
What is NOT included: potting soil, seeds, fertilizer, or a grow light. You'll need to supply all of those yourself. If anything on that checklist is missing or cracked, contact EMSCO Group directly before you start, it's much easier to get a replacement part now than after you've already filled it with soil.
Step-by-step setup instructions
1. Choose your location first
Pick your spot before you add soil, because once this thing is full it's heavy and awkward to move. You want a flat, stable surface, a patio, balcony, deck, or even a sturdy table works fine. With the Start Pickin' grow box, you can follow the patio pickers grow box instructions to set it up correctly for best watering and drainage. Make sure the surface is level; a tilted planter will cause water to pool on one side and the self-watering system won't work evenly. If you're putting it on a wooden deck, consider placing a tray underneath to catch any overflow.
2. Assemble the base and body
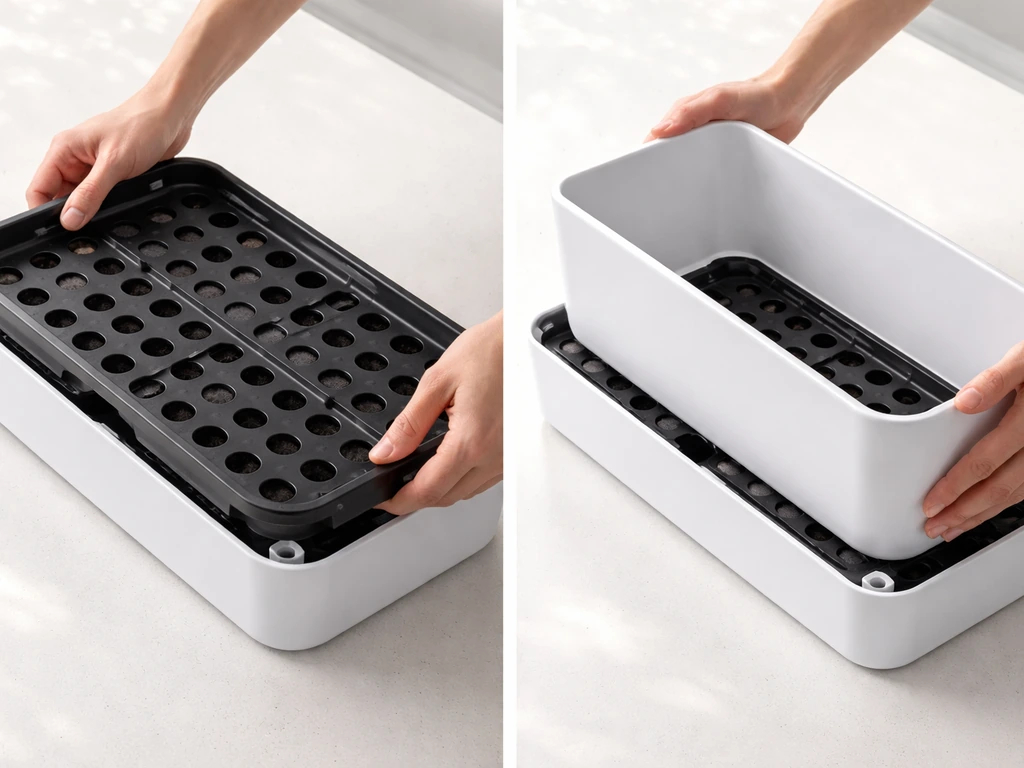
Snap the aeration/soil tray into the reservoir base first, then set the main grow box body on top. The pieces click or fit together, no tools required. Make sure the fill tube (the small water port) is accessible from the outside and not blocked. Give the assembled unit a gentle shake to confirm everything is seated securely before you add anything.
3. Add potting mix
Fill the grow box with a good-quality potting mix, not garden soil, which compacts too much and blocks the wicking action. Fill to about 1 inch below the rim so you have room to water without overflow. Gently pack it down without over-compressing. The aeration tray below keeps the roots from drowning, but the soil itself needs to be loose enough to wick moisture up from the reservoir.
4. Confirm drainage holes are clear
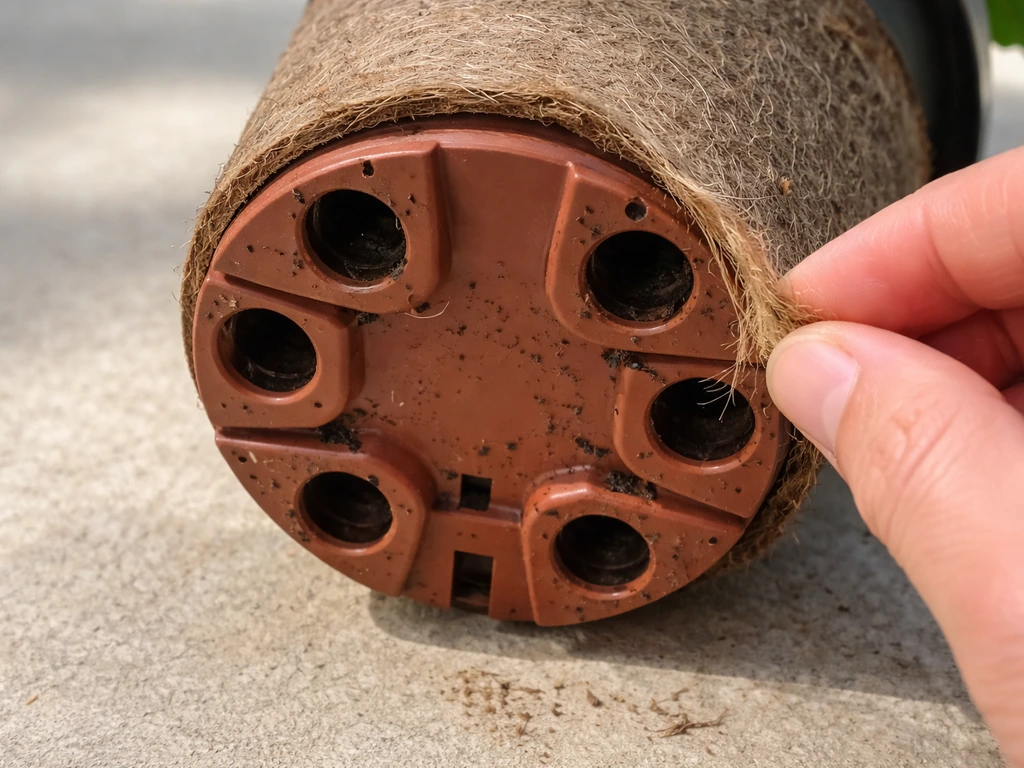
Before you do anything else, do a quick check that none of the drainage or overflow ports are blocked by packaging material or debris. These holes are what protect the plant from overwatering, if they're clogged, the reservoir can overflow into the root zone and drown your plants.
Filling and priming the water reservoir
This is the step that confuses most people, so let's be specific. The Start Pickin' holds a 1-gallon water reserve in the bottom tray. You do not pour water directly onto the soil, that defeats the purpose of the self-watering system. Instead, use the fill tube or fill port on the side of the unit to add water directly into the reservoir. Fill it until water just starts to trickle out of the overflow drainage holes. That's your 'full' mark.
For the very first fill, give the top of the soil one light watering too, just enough to dampen it. This primes the wicking action and helps get things started while the root system is shallow and can't yet reach the moisture coming up from below. After that initial top-water, switch to reservoir-only filling for ongoing maintenance.
You do not need to add liquid fertilizer to the reservoir water at this stage. Plain water is fine for seeds and seedlings. Once plants are established (usually 3 to 4 weeks in), you can start adding a diluted water-soluble fertilizer to the reservoir to give them a nutrient boost.
Lighting, temperature, and airflow
The Start Pickin' is designed for outdoor or bright indoor use, it does not come with a grow light. If you want more detailed raised bed placement and lighting tips for an easy grow setup, follow these elevated garden bed instructions grow light. Most vegetables and herbs need at least 6 to 8 hours of direct sunlight per day, so your placement decision from step one is critical. If you're growing indoors or on a shady balcony, you'll need a supplemental grow light positioned 4 to 6 inches above the seedlings for the first few weeks.
Temperature-wise, most common vegetable seeds germinate best between 65°F and 75°F (18°C to 24°C). If nighttime temps are regularly dropping below 50°F, germination will be slow or stall entirely. The UV-protected resin helps the box hold some warmth, but it's not a full insulator. If you're starting seeds in early spring or fall, consider a simple plastic dome or row cover over the box until seedlings emerge.
Airflow matters more than most beginners expect. If you're using any kind of covering, remove it for a few minutes each day once seedlings have sprouted. Good air circulation prevents damping off (a fungal issue where seedlings collapse at the soil line) and strengthens young stems. Outdoors, natural breeze handles this for you.
Planting seeds and starting your first grow
Once the box is assembled, the reservoir is full, and you've confirmed your placement is good, you're ready to plant. For seeds, make shallow furrows or individual holes according to the depth on your seed packet (most herbs and salad greens go in at 1/4 inch, larger seeds like beans at 1 inch). Drop seeds in, cover lightly with soil, and press down gently. Label what you planted and where, it sounds obvious, but it's easy to forget once you've got multiple varieties in one box.
If you're transplanting starts rather than direct sowing, dig a small hole slightly larger than the root ball, set the plant in, firm the soil around the roots, and water the top lightly on day one. The self-watering system takes over after that.
Timing your first grow is straightforward: check your seed packet for 'days to germination' (often 5 to 14 days for most vegetables and herbs) and 'days to maturity.' For spring planting, aim to start seeds in the grow box after your last frost date. For fall planting, count backward from your first expected frost using the days-to-maturity number on the packet. The small size of the Start Pickin' makes it great for quick crops like lettuce, radishes, herbs, and small peppers.
First-week problems and how to fix them
No germination after 7 to 10 days
First, check soil temperature, if it's below 60°F at the surface, seeds will sit dormant. Move the box to a warmer spot or add a heat mat under it. Second, confirm the soil isn't dried out on top; seeds need consistent surface moisture to germinate. Do one gentle top-water and check again in a few days. Old seeds also have lower germination rates, if your packet has been sitting in a drawer for a few years, that may be the issue.
Water leaking from the bottom

A small amount of overflow when you first fill the reservoir is normal, that's the overflow drain working correctly. Constant dripping between fills is not normal. Check that the fill tube is seated properly and that the soil platform hasn't shifted, allowing water to escape from an unexpected gap. If the leaking is from a crack in the reservoir tray, contact EMSCO Group for a replacement.
Green algae on the soil surface or exterior
Algae grow when moisture and light combine on a surface. On the soil surface, a thin layer of algae is mostly cosmetic and won't hurt your plants, but it can signal the soil is staying too wet on top. Let the surface dry slightly between any manual top-waterings. On the exterior of the reservoir, wipe it down with a damp cloth. Algae inside the reservoir is harder to deal with, see the maintenance section below for how to clean it out between grows.
Strange smell from the reservoir
A sulfur or rotten egg smell from the water reservoir means the water has gone stagnant and may have bacteria or algae growing in it. This usually happens when the box is in a very warm spot and the water sits too long without being refreshed. Drain the reservoir completely through the fill port (tip the box gently or use a turkey baster), refill with fresh water, and if the smell persists, flush with a diluted hydrogen peroxide solution (1 tablespoon of 3% hydrogen peroxide per gallon of water) before refilling.
Soil too wet or too dry
The self-watering system is designed to prevent both extremes, but it can only work if blank" rel="noopener noreferrer">the reservoir is kept filled. Check the water level every 2 to 3 days in warm weather. If soil feels soggy all the way through and the drainage holes are clear, you may have packed the soil too densely, roots need some air pockets. If soil feels bone dry on top, that's actually fairly normal with a self-watering system; what matters is moisture 2 to 3 inches down, where roots are.
Ongoing maintenance, cleaning, and when to get help
Day-to-day maintenance on the Start Pickin' is genuinely low effort. Check the reservoir every few days and top it off through the fill port when it runs low. Most people find they refill every 3 to 7 days depending on weather and plant size. Once plants are a few weeks old and actively growing, you can start adding a diluted water-soluble fertilizer to the reservoir water every two weeks.
At the end of a growing season, or between crops, give the box a proper clean. Remove all the soil (compost it or bag it), then disassemble the tray and soil platform. Scrub all parts with warm soapy water and rinse well. If there's algae or mineral buildup inside the reservoir, soak the tray in a diluted white vinegar solution (1 part vinegar to 3 parts water) for 30 minutes, then scrub and rinse. Let everything dry fully before reassembling or storing.
For reusing the box next season: fresh potting mix is strongly recommended. Reused soil can harbor pests, diseases, and depleted nutrients that will undermine your next crop right from the start. The box itself, with its UV-protected resin, is built to last multiple seasons outdoors.
If you run into a problem that's not covered here, a cracked reservoir, a missing part, or something in the instruction booklet that doesn't match what you have in front of you, reach out to EMSCO Group directly with your model number (2375W-1) and a photo if possible. The instruction booklet that came with your kit is also worth a second read once you've got the box assembled, because hands-on context makes those steps click in a way that reading cold doesn't. For snap-and-grow greenhouse-style instructions, check the same instruction booklet and follow the setup steps in order before you start planting.
If you're enjoying the self-watering raised bed concept and want to explore similar kits, there are other options worth comparing, including larger raised bed setups and enclosed grow systems that add lighting or automation into the mix. If you're enjoying the self-watering raised bed concept and want to explore similar kits, there are other options worth comparing, including larger raised bed setups and enclosed grow systems that add lighting or automation into the mix, plus keter easy grow instructions. The Start Pickin' sits in good company alongside other entry-level planters, and it's a solid choice for anyone who wants fresh herbs or vegetables without a complicated setup.
FAQ
How do I know the Start Pickin grow box is actually filling the reservoir correctly, not the soil?
After you fill through the side fill tube, watch for water to start trickling out of the overflow holes. If you do not see that “full” trickle but the soil looks wet, stop and check that the fill tube is seated correctly and that the aeration/soil tray is snapped into the reservoir base (a mis-seat can divert water away from the reservoir).
What should I do if my seeds sprout but the seedlings look weak or stretch?
Stretch usually means light is too low. For indoor or shady balconies, keep a supplemental light positioned 4 to 6 inches above seedlings for the first few weeks, and increase intensity or duration rather than watering more. Also remove any cover for airflow as soon as sprouts appear.
Can I use garden soil instead of potting mix, or will it still wick water properly?
It’s not recommended. Garden soil compacts and can block wicking, which prevents moisture from moving up from the reservoir and can leave roots oxygen-starved. Use a good-quality potting mix so water movement and root airflow stay consistent.
How often should I top up the reservoir in hot weather versus cool weather?
In warm conditions, check every 2 to 3 days, because the 1-gallon reservoir can drop faster as plants grow and temperatures rise. In cooler weather, you can often stretch closer to the 3 to 7 day range, but always verify by checking the reservoir level and feeling moisture 2 to 3 inches down.
Is it normal for the soil surface to stay dry even though the box is self-watering?
Yes, a dry top layer is common. The self-watering system focuses moisture where roots grow, so the key check is moisture 2 to 3 inches down. If the middle stays dry too, that points to packed soil or blocked drainage, rather than “not enough water.”
Why are my drainage holes getting blocked, and how do I prevent it?
Common causes are packaging debris during setup or soil fines washing into the wrong spots as you first fill. Before planting, confirm holes are clear. If you notice overflow not behaving normally later, inspect after removing the soil tray and rinse out any visible buildup.
What’s the best way to prevent algae on the soil surface?
Let the top of the soil dry slightly between any manual top-waterings, and avoid repeatedly wetting the surface. Also wipe the exterior of the reservoir so algae does not get a persistent moisture and light opportunity on the outside surfaces.
My reservoir water smells bad. Do I need to replace everything?
No. Drain the reservoir completely through the fill port, refill with fresh water, and if the rotten egg or sulfur smell persists, flush using diluted 3% hydrogen peroxide at 1 tablespoon per gallon before refilling. Then clean and re-check the fill tube fit so the water does not stagnate again.
Can I add fertilizer right away in the reservoir?
It’s better to wait. Use plain water for seeds and seedlings, then add diluted water-soluble fertilizer only after plants are established, typically around 3 to 4 weeks, or when active growth starts. Early feeding can overwhelm shallow roots in the initial phase.
What should I do if water is constantly dripping between fills instead of only occasional overflow?
Constant dripping usually means a leak path, such as a fill tube not seated, the soil platform shifted, or a crack in the reservoir tray. Confirm the fill tube is secure, check for gaps around the platform, and if the leak is from a cracked tray, contact EMSCO Group for a replacement.
Can I grow larger plants like tomatoes in the Start Pickin box?
You can grow small peppers and other compact varieties, but the box size is limited, so very large fruiting plants may outgrow the shallow root space and require frequent watering. If you try bigger plants, expect reduced yields and plan for pruning and support, and consider starting with fast, small-crop options instead.
How should I clean and store the box between seasons so it works well next year?
Remove and discard or compost the used potting mix, disassemble the tray and soil platform, scrub with warm soapy water, and rinse thoroughly. If you have mineral buildup or algae inside the reservoir, soak the tray in a 1:3 vinegar-to-water solution for 30 minutes, then scrub and rinse. Dry fully before reassembling, then store in a dry place to prevent residue buildup.
What heat source should I use if the surface soil is below 60°F for germination?
A heat mat under the box or relocating the box to a warmer spot works well. Avoid placing a cover too tightly for long periods without airflow, once sprouts appear, to reduce damping-off risk.