
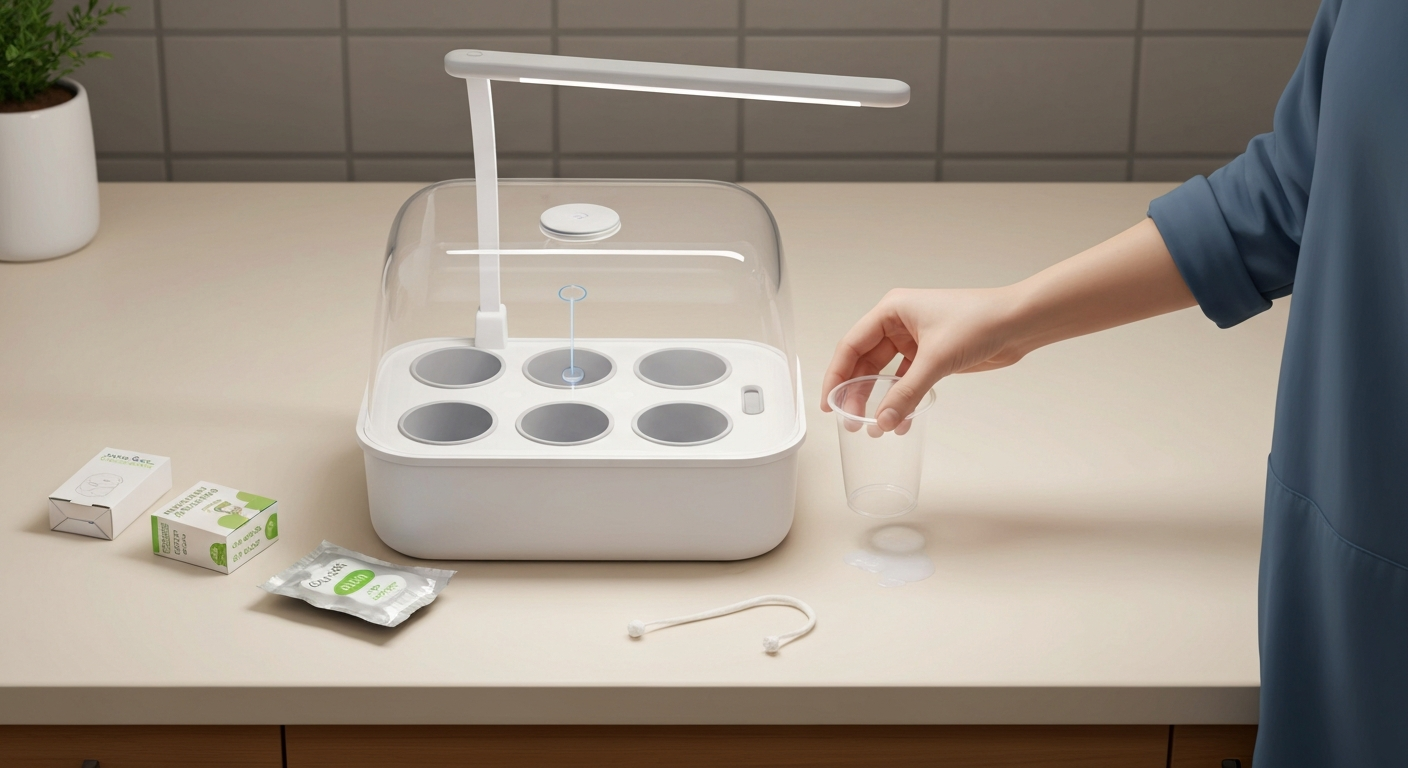
To refill a Click & Grow Smart Garden, lift out each old pod cup, drop a new pre-seeded pod into the same plastic cup (or swap in a fresh cup if yours is worn), seat it firmly into the garden tray, fill the water tank until the float indicator sits level with the garden lid, and plug the lamp back in. That's the whole process for official Click & Grow pods, no tools, no measuring, no mixing. Third-party refills follow the same physical steps with a couple of extra fit-and-seal checks described below.
Click and Grow refill instructions: model fit, steps & care

Marcus Thornfield
10 Aug 2026
What this guide covers and who it's for
This walkthrough is written for anyone staring at a Click & Grow Smart Garden (model 3, 9, or 27) with a tray full of finished or failed pods and wondering what comes next. Whether you're a first-time plant parent who just harvested their basil, or a hobbyist who wants to experiment with compatible third-party refills, this guide covers every step: identifying the right pods for your model, safely removing the old ones, installing new pods correctly, priming the system, and checking that everything is set up for a healthy first two weeks. I'll also walk through troubleshooting the most common post-refill problems, loose pods, slow germination, mold, and algae, so you don't have to guess your way through them.
Before you start, what you'll need and what to expect
The good news: Click & Grow refills require zero tools. You won't need scissors, a trowel, or anything sharp. Here's what to have on hand before you begin.
- Your Click & Grow Smart Garden unit (Smart Garden 3, 9, 27, or other compatible model)
- New Click & Grow plant pods or verified compatible third-party refills
- Replacement plastic cups, U-shaped lids, domes, and wicks if any of your existing ones are cracked or hardened (Click & Grow sells these as spare parts)
- A damp cloth or paper towel for wiping the tray
- Fresh tap water (room temperature, not cold) for refilling the tank
- A small bin or compost bag for spent pods
Estimated time: 5 to 10 minutes for a full refill on a Smart Garden 3 or 9. The Smart Garden 27 has 27 pod slots and takes 15 to 25 minutes depending on how many you're replacing and whether you're doing a full clean at the same time. Click & Grow recommends keeping room temperature between 18 and 24°C (68 and 75°F) for best germination results, so refilling in a cold garage or a very hot windowsill isn't ideal, set the garden up in its permanent spot before you start.
A quick safety note: the Smart Garden's lamp arm can be warm after a full light cycle. If you've just come off a 16-hour light phase, give the lamp 10 minutes to cool before you lean over the garden for an extended time. The water tank and tray are dishwasher-safe up to 50°C/120°F, which is worth knowing if you're planning a deep clean alongside a refill.
How Click & Grow pods actually work
Each Click & Grow plant pod is a pre-seeded biodegradable capsule packed with what the company calls Smart Soil, a mix of coconut coir and peat that's pre-loaded with nutrients and calibrated for the passive-watering system the gardens use. Click & Grow's support article 'How to use the plant pods? – Click & Grow Help Desk' describes plant pods as pre-seeded biodegradable capsules containing Smart Soil calibrated for their passive-watering system. The pod sits inside a plastic cup, and a white wick runs from the bottom of the cup down into the water tank. That wick is the whole irrigation system: it draws water upward into the soil by capillary action, keeping moisture levels consistent without pumps or timers. When you add a new pod, you're essentially resetting that cycle from scratch.
Official pods are the most straightforward option because they're sized and weighted to fit the cups exactly, and the Smart Soil is pre-calibrated for nutrient release. Third-party compatible refills, loose seeds plus a growing medium, can work well, but they require you to fill the cup yourself, which introduces variables like compaction and moisture distribution that official pods eliminate. Neither approach is wrong; they just involve different levels of hands-on work and different risk profiles, which I'll cover in the installation steps below.
Identifying your Smart Garden model
Before buying refills, confirm which model you have. Click & Grow labels the model name on the underside of the garden unit or on the original box. The three most common models and their key differences are below.
- Smart Garden 3: holds 3 pods, single lamp arm, compact footprint — fits on a kitchen counter or desk easily. The lid, tray, and tank are a single integrated unit.
- Smart Garden 9: holds 9 pods in a 3x3 grid, taller adjustable lamp arm. This is the most popular model and the one Click & Grow's official setup video is based on.
- Smart Garden 27: holds 27 pods in a modular tray system with three 9-pod sections. The pod cups and lids are the same physical size as the SG3 and SG9, but the tray layout and water-fill points differ — check the SG27-specific manual before your first refill.
- Smart Garden 9 Pro and other variants: same pod cup format as the standard SG9 but with a different lamp unit. Pod installation steps are identical.
- Wall Farm and other wall-mounted models: use the same pod cup and wick system but have a vertical layout and a rear-mounted water reservoir — consult the model-specific PDF from Click & Grow's support page for those fill steps.
The plastic cups, domes, U-shaped lids, and wicks are the same across the Smart Garden 3, 9, and 27, which Click & Grow confirms on their spare-parts listing. That means a spare cup bought for an SG3 will physically fit an SG27. The pod capsule itself is what determines what plant grows, not the model.
Refill and model compatibility at a glance
| Model | Pod slots | Same cup format as SG3/SG9? | Official Click & Grow pods fit? | Third-party refills (loose seed + medium)? | Notes |
|---|---|---|---|---|---|
| Smart Garden 3 | 3 | Yes (is the base format) | Yes | Yes, with same cup | Single lamp, compact tank |
| Smart Garden 9 | 9 | Yes | Yes | Yes, with same cup | Most common model; official setup video available |
| Smart Garden 9 Pro | 9 | Yes | Yes | Yes, with same cup | Different lamp unit, pod steps identical |
| Smart Garden 27 | 27 | Yes | Yes | Yes, with same cup | Three 9-pod tray sections; multiple fill points |
| Wall Farm Basic | 6 | Yes (same cup size) | Yes | Yes, with same cup | Vertical layout; rear reservoir fill — check model manual |
| Wall Farm Mini | 3 | Yes (same cup size) | Yes | Yes, with same cup | Smallest wall unit; same pod steps as SG3 |
Official pods vs. third-party refills, how to tell them apart
Official Click & Grow pods come in sealed foil packs, usually in sets of 3. The packaging shows the plant name, a plant illustration, and a seed lot or batch code printed on the back. The pod itself is a dark, cylindrical capsule that fits snugly into the plastic cup with a slight resistance, if it wobbles or sits high, something is off. Click & Grow's shelf-life guidance for unopened pods is approximately one year from the date of manufacture, stored in a cool, dry, dark place. Don't use pods that have been sitting in a warm kitchen drawer for two-plus years; germination rates drop noticeably.
Third-party refills come in two forms. The first is a pre-formed compatible pod from brands sold on Amazon or gardening sites, these mimic the Click & Grow format and are typically made of compressed coir. The second is a DIY approach: you fill the plastic cup yourself with a growing medium (like pure coir or a peat-perlite mix) and add seeds. The pre-formed third-party pods are easier to seat correctly and are generally more reliable than DIY fills. When evaluating any third-party option, look for seller reviews that specifically confirm fit with your model, and check that the medium doesn't include slow-release fertilizer pellets, which can cause nutrient burn in the Click & Grow's passive-wicking system.
Step-by-step: removing old pods safely
Spent pods can be surprisingly stubborn if roots have grown down through the wick hole, so take your time here rather than yanking.
- Unplug the lamp from the wall (the lamp is low-voltage, but this is good practice and prevents accidental timer resets).
- Lift the garden lid off the tray. On the SG9 and SG27 this means lifting the entire lamp-arm assembly; on the SG3 the lid detaches separately.
- Remove the U-shaped lid from the cup you're replacing. These press-fit and come off with a gentle upward pull.
- Grip the plastic cup by its rim and pull it straight up with a slow, steady motion. If roots have threaded through the wick hole into the tank, they'll release with gentle continued upward pressure — don't twist, as twisting can snap roots into the wick and block it.
- If the pod is very root-bound, dip the base of the cup briefly in a bowl of warm water for 30 seconds to soften the roots before pulling.
- Once the cup is out, remove the spent pod from the cup by pressing up from the bottom hole. The wick will usually stay attached to the cup; if it pulls out completely, set it aside and check its condition (see wick check below).
- Wipe the inside of the cup with a damp cloth. If you're seeing slime, mold residue, or mineral crust, this is the moment to do a proper clean — the cups are dishwasher-safe up to 50°C/120°F.
- Check the wick: it should be soft, white or light grey, and pliable. If it's hard, discolored, or cracked, swap it out. Click & Grow sells replacement wicks and explains that hardened wicks are one of the most common reasons soil stays dry even with a full tank.
- Dispose of the spent pod in compost if possible. The Smart Soil and biodegradable casing break down in a home compost bin. If you're in doubt, check your local composting guidelines.
Step-by-step: installing official Click & Grow pods
Official pods are designed to drop straight in, but there are a couple of steps people commonly skip that lead to poor germination.
- Before opening the pod pack, check the batch code on the back and confirm the pods are within their one-year best-before window.
- Thread the wick through the hole in the bottom of the plastic cup from the outside in, so the wick hangs below the cup. If you're reusing the same cup and wick, make sure the wick is seated fully before continuing.
- Open the foil pod pack. Each pod is a dark cylindrical capsule with a slightly concave top. Don't press or squeeze the pod — the soil is pre-compressed and compressing it further can impede germination.
- Drop the pod into the cup, flat side up. It should sit flush with or just slightly below the rim of the cup. If it's sitting too high (more than 2 to 3mm above the rim), check that the wick isn't bunched up underneath it.
- Prime the pod: pour a small amount of water directly onto the top of the pod — about one tablespoon — to pre-wet the soil surface. This gives germination a head start without waiting for the wick to fully saturate the pod from below.
- Snap the U-shaped lid back over the cup. The lid keeps the pod in place and reduces evaporation from the soil surface.
- Attach the clear dome over the top of the U-shaped lid. The dome creates a humid microclimate that dramatically improves germination speed and success. Leave it on until a seedling grows tall enough to touch the inside of the dome, then remove it.
- Place the loaded cup back into the garden tray, pressing down gently until it clicks or seats flush with the tray surface.
- Repeat for each pod slot you're filling.
Step-by-step: installing compatible third-party refills
Third-party refills need a few extra checks because fit variations can cause problems with wicking and germination. Take an extra minute on steps 3 and 4.
- Thread the wick through the bottom of the cup as described above. Use a fresh Click & Grow wick if possible; third-party wicks vary in absorbency.
- If using a pre-formed compatible pod, drop it into the cup and press it down gently. It should sit at the same height as an official pod — flush or 1 to 2mm below the rim. If there's a visible gap between the pod and the cup wall, the pod is undersized; this will cause uneven wicking and dry patches in the soil.
- If filling the cup yourself (DIY approach), fill it to about 5mm below the rim with your chosen medium, leaving a small indent in the center for seeds. Avoid packing the medium tightly — the capillary wicking only works if there's enough pore space for water to travel upward.
- Add 2 to 3 seeds to the center indent (check the seed packet for variety-specific guidance). For small seeds like basil or lettuce, a pinch of 3 to 5 seeds works; for larger seeds like kale or pea, one or two per cup is enough.
- Lightly dust the seeds with a small amount of growing medium — just enough to barely cover them. Don't bury them deep.
- Do the fit-and-seal check: press the U-shaped lid onto the cup and confirm it snaps firmly. If the lid sits unevenly because the medium is overfilled, remove a little material.
- Attach the dome, prime with one tablespoon of water on the surface, and seat the cup in the tray.
- After 24 hours, check that the soil surface is visibly moist. If it's still bone dry, the wick may not have made proper contact with the water in the tank — lift the cup, recheck the wick position, and re-seat.
Getting the garden ready after refilling
Water level and the float check
Click & Grow's Quick Start Guide is clear on this: fill the water tank until the float indicator aligns with the garden lid. Click & Grow's official Smart Garden 3 setup guide provides model-specific assembly, water-fill instructions, and downloadable manuals (Smart Garden 3 setup guide – Click & Grow Help Desk). Don't fill it past this point, overfilling can cause the wicks to stay permanently saturated, leading to root rot. Don't underfill either; the passive-wicking system needs enough water in the tank to work by capillary action. On the Smart Garden 27 there are multiple fill points along the tray; refer to the SG27 manual to confirm all of them are topped up.
Lamp and timer check
Once pods are in and the tank is filled, plug the lamp back in. Click & Grow's built-in timer runs the lamp for 16 hours on and 8 hours off. You don't need to set anything, the timer resets from the moment you plug in. If you unplug between grows, just be aware the light cycle will restart from that point. Keep the lamp at the lowest position while seeds are germinating; as plants grow, raise the arm to maintain a few centimeters of clearance above the leaf canopy.
First-time start-up checklist
- All pod cups are seated flush in the tray with no wobble
- Domes are attached to all cups with new pods
- Water tank is filled to the float line
- Lamp is plugged in and the light has come on
- Garden is positioned away from direct sunlight (the built-in lamp provides all the light it needs — direct sun causes overheating and algae in the tank)
- Room temperature is between 18 and 24°C (68 and 75°F)
- You've noted the date — most seeds show sprouts within 7 to 21 days; 21 days is Click & Grow's threshold for a failed germination claim
Aftercare for the first 7 to 14 days
The first two weeks after a refill are where most problems start. Here's what to watch for and when to act.
Water top-ups: check the tank every 7 to 14 days. How fast it empties depends on how many pods are wicking actively, room temperature, and humidity. A full SG9 in a warm room can drain the tank in about a week. Get in the habit of a quick visual check when you walk past, the float indicator drops visibly when the tank is getting low.
Dome removal: when a seedling grows tall enough to touch the dome (usually 5 to 14 days depending on the plant), pop the dome off. Leaving it on once a seedling is touching it can cause humidity-related mold at the stem base.
Thinning: Click & Grow pods often include multiple seeds to improve germination odds. Once you have two or more seedlings in one cup, snip the weaker ones at soil level with scissors. Don't pull them out, pulling disturbs the roots of the seedling you're keeping.
Troubleshooting common problems after refilling
No sprouting after 21 days
This is Click & Grow's official threshold for a germination failure. First check: is the soil moist? Lift the dome and press a finger lightly to the soil surface, it should feel damp, not wet and not bone dry. If it's dry, the wick is the likely culprit. Remove the cup, pull the wick out fully, re-thread it so it hangs at least 2 to 3cm below the cup base, and re-seat. If the soil is moist and still nothing has sprouted by day 21, Click & Grow's refund policy allows for a pod replacement claim, you'll need your order number and evidence of growing conditions (original garden, original cups and wicks). Note that this replacement guarantee specifically requires pods to have been grown using original Click & Grow accessories.
Loose pods or cups that won't sit flat
If a cup rocks in the tray, check whether the wick is bunched underneath rather than hanging through cleanly. Also inspect the cup itself for cracks along the rim, even a hairline crack can prevent the cup from seating properly. Replace cracked cups; Click & Grow sells replacement sets of three cups with lids, domes, and wicks.
Mold on the soil surface
Surface mold (usually white and fuzzy) is almost always caused by the dome staying on too long after germination. Remove the dome immediately and increase airflow around the garden. Wipe the visible mold off with a damp cloth, being careful not to disturb the seedling. If mold is recurring, check that the room has reasonable airflow and that the garden isn't positioned in a dead corner with no air circulation.
Green algae in the water tank
Algae in the tank happens when light reaches the water. The most common cause is placing the garden in direct sunlight, which also heats the tank. Move the garden away from windows and direct sun. When the tank is empty, rinse it out with clean water and give the inside a gentle wipe. Avoid soaps or bleach in the tank, they affect wick absorbency and leave residues that can harm plants.
Poor germination with third-party or DIY refills
The two most common reasons are seeds planted too deep and growing medium compacted too tightly. Seeds for herbs like basil and lettuce should barely be covered, 2 to 3mm of medium over them is plenty. If you've packed the coir or peat firmly, the wick can't draw water through it effectively. Try a fresh cup with a lighter fill. Also double-check that your third-party growing medium doesn't contain slow-release fertilizer; high nutrient concentrations at germination stage can inhibit sprouting.
The kit doesn't seem to recognize the refill
Current Click & Grow Smart Garden models (SG3, SG9, SG27) don't use electronic sensors to detect pod type or presence, recognition issues are actually physical, not digital. If the lamp cycles correctly and the water-level float behaves normally, the garden is working fine regardless of what pod is installed. If the lamp won't come on at all, unplug and re-plug to reset the timer; if the issue persists, check the Click & Grow support page for your specific model.
Warranty and quality implications of third-party refills
Using third-party pods in your Smart Garden does not void the warranty on the garden unit itself (the two-year hardware warranty covers the lamp, tank, and electrical components). However, Click & Grow's refund and warranty policy for plant pods specifically states that pod replacement eligibility requires pods to have been grown in a Click & Grow Smart Garden using original accessories, meaning original plastic cups and original wicks. If you're using third-party cups or wicks alongside third-party pods and something goes wrong, you won't be covered for pod replacement. The hardware warranty remains intact regardless.
In practice, this means you can experiment with compatible third-party refills without risking your garden's hardware warranty. Just know that if the pods fail to germinate, you're on your own for replacement. Given that official Click & Grow pods cost roughly the same as or less than many third-party alternatives when bought in multi-packs, the value case for third-party refills comes down to variety (wanting plants Click & Grow doesn't offer) rather than savings.
DIY refill alternatives, and the honest trade-offs
The DIY approach is genuinely viable if you want to grow plants not available in Click & Grow's catalog. If you're considering alternative growing media, also see Dansand 'No Grow' instructions for their specific guidance on non-soil mixes. The basic method is: fill the plastic cup with a 50/50 mix of fine coconut coir and perlite (or use fine horticultural coir alone), add 2 to 3 seeds from a reliable seed supplier, cover lightly, add the dome, and follow the same priming and water-fill steps as above. For an alternate commercial refill system, see MaxSea Grow instructions for setup and compatibility details. The risks are uneven wicking (coir can be inconsistent if not fine-grade), nutrient deficiency (Smart Soil includes built-in nutrients; plain coir does not), and slug germination rates compared to pre-tested pods. You can address the nutrient gap by adding a dilute liquid fertilizer to the water tank once seedlings are established, but keep concentrations low, as the passive wicking concentrates nutrients at the soil surface over time. For step‑by‑step dosing and dilution advice, see how to use Spray‑N‑Grow (ref: 772566fe-1c7d-4dc2-99d0-c9faa49fe740). If you plan to add a concentrated product, see a short guide on how to use LA Colors Mega Grow for dosing and dilution.
Where to buy refills and how to store them
The most reliable source for official Click & Grow pods is the company's own website, where pods are sold in 3-packs by plant variety. They're also available through major retailers and Amazon. When buying from third-party sellers, check the pod batch code and expiry date if visible; pods sold in multi-variety bundles by marketplace resellers sometimes include stock that's close to or past the one-year shelf-life recommendation. For third-party compatible refills, look for sellers who explicitly list their pod dimensions and state compatibility with Click & Grow Smart Garden cups.
Store unopened pod packs in a cool, dry, dark location, a kitchen cupboard away from the oven or dishwasher is ideal. Avoid the fridge for Click & Grow pods specifically, as condensation when the pack warms back up can pre-activate the seeds. For loose seeds used in DIY refills, a sealed container in the fridge extends viability considerably and is the standard recommendation for most vegetable and herb seeds.
Disposing of spent pods responsibly
Click & Grow's pod casing is biodegradable, and the Smart Soil inside is coconut coir and peat-based, both compostable. If you have a home compost bin, spent pods can go straight in. Remove any visible plastic (the U-shaped lid and cup are reusable, not compostable). The white wick is typically a synthetic fiber and should go in general waste rather than compost. If you don't compost, the spent pod can go in food/garden waste collection where available. Avoid putting plastic cups in general recycling without checking your local authority's guidelines for small plastic items.
A quick comparison: official pods vs. pre-formed third-party vs. DIY fills
| Refill type | Fit reliability | Germination consistency | Variety range | Pod warranty coverage | Relative cost | Skill needed |
|---|---|---|---|---|---|---|
| Official Click & Grow pods | Excellent — designed for the cup | High — pre-tested and pre-calibrated | 100+ varieties from Click & Grow catalog | Full coverage with original accessories | Mid-range per pod | None |
| Pre-formed third-party compatible pods | Good — varies by seller | Moderate — depends on seed quality and medium | Wider — any plant the seller stocks | Not covered | Similar or lower | Minimal |
| DIY (loose seeds + coir/peat fill) | Variable — depends on fill technique | Lower — more variables to manage | Unlimited — any seed you can buy | Not covered | Lowest (seeds only) | Moderate |
For most people, official Click & Grow pods are the right starting point. They're foolproof, they come with germination backing, and the range covers most herbs, salad greens, and flowering plants a home grower would want. If you want to grow something specific that Click & Grow doesn't offer, certain chilli varieties, unusual herbs, or edible flowers, that's when the DIY route makes real sense. Just go in knowing the trade-offs.
FAQ
What primary authoritative sources must I collect before writing Click & Grow refill instructions?
Collect Click & Grow’s official Quick Start Guide, model-specific setup manuals (Smart Garden 3, 9, 27, etc.), product pages for Plant Pods and Plastic Cups, ‘All about wicks’, cleaning/maintenance, warranty/refund policy, and the company’s sprouting/plant replacement guidance. Save the official support URLs and the Smart Garden 9 setup video (for screenshot/frame references). These pages supply exact wording for reservoir fill, sprouting timelines, spare-part compatibility, wick function and warranty conditions.
Which model-specific technical details are required for accurate compatibility guidance?
For each model (SG3, SG9, SG27 and other common units) gather: plastic cup/pod footprint and cup shape/dimensions, tray/pod layout (how many pod slots and spacing), reservoir location and max-fill/float indicator position, lid/dome and U-lid design, wick insertion points and replacement SKU references, power/lamp cycle specs (typical 16h/8h), and official cleaning limits (dishwasher temp). These come from the model PDF manuals and the product manuals index.
What pod/cup compatibility mapping should I verify and cite?
Verify official Smart Garden Plastic Cup product page and ‘Where to get new plastic cups?’ support article which list compatible cups for SG3, SG9 and SG27. Use those pages to build a visual table that maps: official Plant Pod packs and official Plastic Cups (3‑pack) to models that accept them, and note which models require the same cup vs model‑specific cups. Quote Click & Grow’s spare‑parts SKU pages for exact compatibility.
What step-by-step actions must be authoritative and cited for removal and installation of pods?
Cite the Quick Start and model manuals for steps: power off/unplug device, remove dome/U-lid, grip old pod/cup and lift straight up, remove used wick if present and dispose or clean, prepare new pod or insert a new official pod into the plastic cup (align shape), insert wick (if required) ensuring it seats through the cup’s wick hole, place cup into the garden slot, replace U-lid/dome, fill reservoir to model’s float/indicator and plug in. Use the product ‘How to use the plant pods’ and model setup guides for exact phrasing and images.
What preparation and priming steps are essential to include and where do they come from?
Include: check pod expiry/pack date and storage condition (product pages), confirm wick is present and soft (support wick article), fill water tank to model’s max-fill/float indicator per Quick Start and model manual, prime new wicks by moistening before insertion if manufacturer recommends, plug in and allow lamp cycle (typically 16h on / 8h off). Cite Quick Start Guide, plant pod product pages and ‘All about wicks’ article.
What visual assets and permissions are required for publication?
Required assets: labeled photos/annotated diagrams for cup/pod orientation, wick seating, reservoir fill line/float, dome removal, and a quick ‘before/after’ of pod removal and new pod seated. Use screenshots from the official Smart Garden 9 setup video for reference and request high-resolution images or permission from Click & Grow press ([email protected]) if you intend to reproduce official stills or diagrams. Keep an asset log with source URLs and permission notes.