To use a wick and grow self-watering system, thread the wick through the bottom of your pot so one end sits in the water reservoir below and the other end is buried in the grow media near the root zone. Fill the reservoir, prime the wick by soaking it before planting so water actually starts moving, then plant as usual and let capillary action do the work. Refill the reservoir when it runs low, and you're done, no pumps, no timers, no guesswork.
How to Use Wick and Grow a Self-Watering System

Marcus Thornfield
27 Apr 2026

What a wick self-watering system actually does
The whole system runs on capillary action, which is the same physics that makes paper towels soak up spills. This works because capillary action transfers liquid through narrow spaces in porous materials, absorbing liquid from a reservoir at a rate that decreases over time blank" rel="noopener noreferrer">capillary action transfers liquid through porous materials. A porous wick material, whether it's a braided nylon cord, a felt strip, or something like Costa Farms' specially designed Waterwick®, absorbs water from a reservoir and pulls it upward into the soil above. The plant's roots take moisture out of the soil, which creates a slight drying effect, and the wick responds by pulling more water up from below to replace what was used. It's a closed feedback loop: the plant tells the system how much water it needs by how fast it drinks.
This passive process requires no electricity, no pumps, and no sensors. That's exactly why it works so well in consumer grow kits, self-watering planters, seed-starting trays, and terrariums. The system naturally moderates itself, when the plant is thirsty and actively growing, water moves faster. When the plant slows down in winter or low light, the wicking slows down too. Once you understand that basic logic (reservoir at the bottom, wick in the middle, moist soil at the top), troubleshooting and maintaining your kit becomes a lot more intuitive.
Parts overview and where the wick should go in your kit
Most wick and grow kits share the same basic anatomy, even if the branding and exact shapes are different. Getting familiar with each part before you start will save you a lot of frustration.
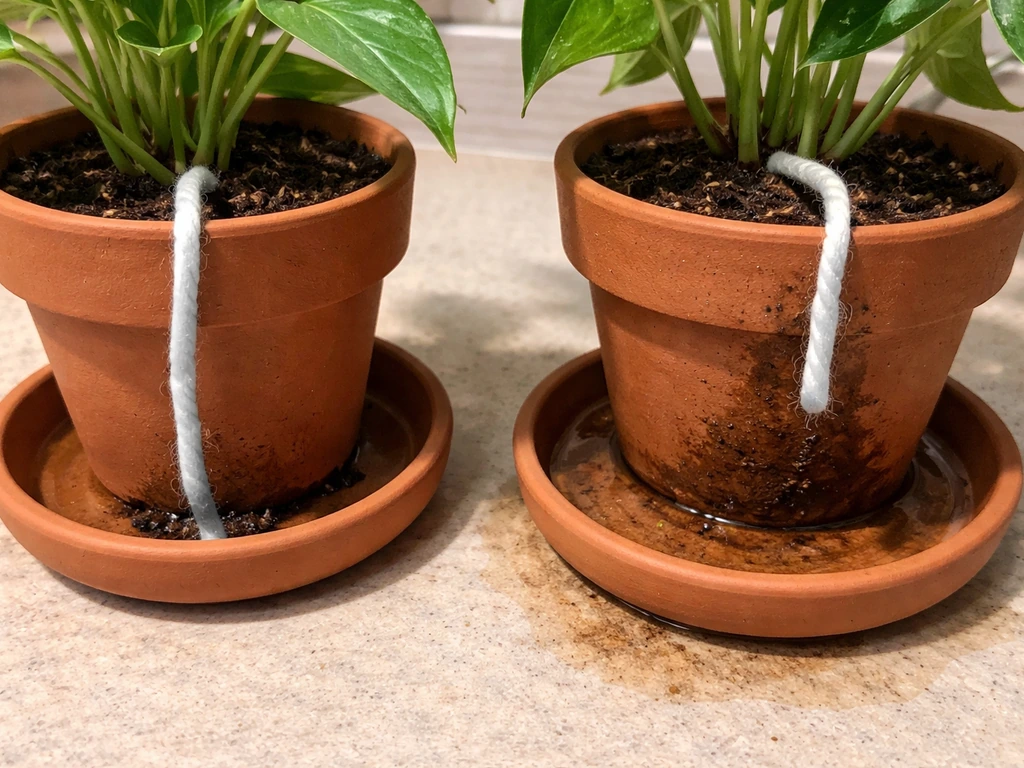
- Reservoir: The lower container or tray that holds the water supply. It sits below or around the base of the growing pot. In some kits (like Costa Farms Wick & Grow), this is a decorative outer pot. In others it's a simple plastic tray or a chamber molded into the base of the planter.
- Inner pot or grow container: The upper section where your soil or grow media lives. This pot usually has a hole, slot, or channel at the bottom specifically designed for the wick to pass through.
- Wick: The porous connector between the two. It might be a braided rope, a flat felt strip, a foam plug, or a proprietary piece like a Waterwick®. In kits that include a wick, it's usually white, grey, or blue and looks like a cord or a sponge strip.
- Water level indicator: Many kits include a float or a transparent window on the reservoir so you can see how much water is left without lifting the pot.
- Grow media: What you plant into — potting mix, coco coir, perlite, or a pre-mixed bag included with the kit.
The wick should always have one end submerged in the reservoir water and the other end sitting at least 2 to 3 inches into the grow media. If your kit came with a pre-drilled wick hole at the center of the inner pot's base, that's the correct placement point, thread the wick straight through that hole. If you're building your own setup or your kit has multiple holes, use the center hole when possible, since that positions moisture delivery closest to the root zone as roots spread outward.
How to install and prime the wick for reliable water flow
This is the step most people skip, and it's the number one reason wicks fail to work right away. A dry wick sitting in water won't automatically start pulling, you need to prime it first. Priming just means pre-wetting the wick so the capillary path is already established before you plant anything. These self-watering grow kit instructions will help you install and prime the wick correctly for reliable water flow.
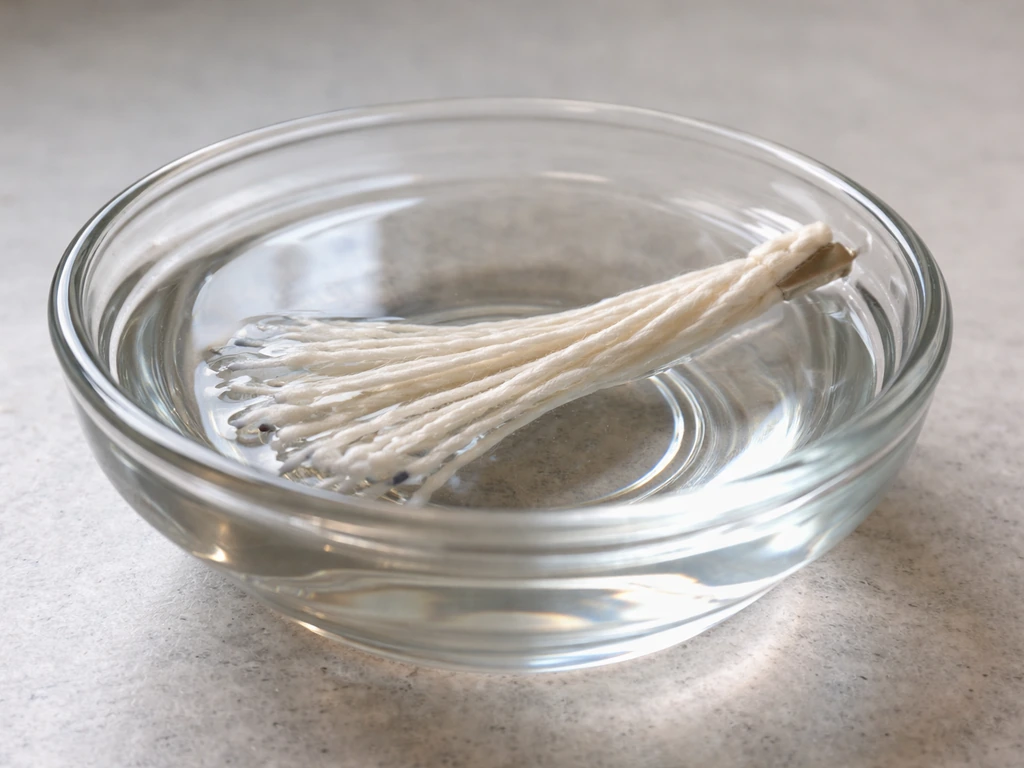
- Before assembly, soak the wick in a bowl of water for at least 5 to 10 minutes. You want it completely saturated, not just damp on the outside.
- Thread the wet wick through the wick hole at the bottom of the inner pot. Pull it through so about 3 inches hang out below the pot and at least 3 inches remain above the bottom of the pot interior (more if your pot is tall).
- Tie a loose knot on the exterior end of the wick, or fold it back on itself so it can't slide back up through the hole. This keeps it in contact with the reservoir water.
- If your kit uses a reservoir tray, set the inner pot into the tray before filling. If it's an outer pot/inner pot design, nest the inner pot inside the outer pot now.
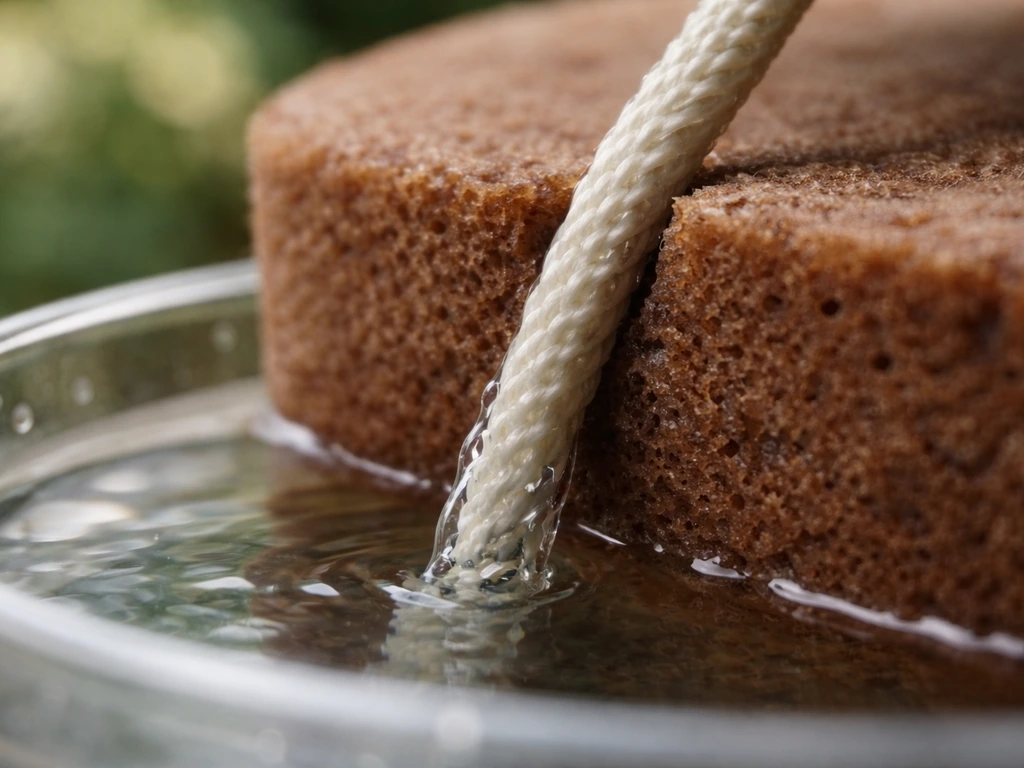
- Pour water into the reservoir. The exterior wick end should dangle into or rest on the bottom of the reservoir. If the wick is just barely touching the water surface, that's enough — capillary action will pull it up. Submerged is better, though.
- Press a small pinch of moist potting mix around the top of the wick inside the pot to anchor it upright while you plant. This small detail helps the wick maintain contact with the growing medium from day one.
One quick test before you plant anything: after priming and installing the wick, leave it for 15 to 20 minutes and then touch the top of the wick inside the pot. It should feel damp. If it's still bone dry, check that the bottom end is actually reaching the water and that there are no air gaps in the wick material itself (a fold or tight knot in a braided wick can block flow). Re-soak and try again if needed.
Filling, placement, and initial setup for the grow media and planting
Once your wick is primed and in place, you can fill the inner pot with grow media and plant. The type of media you use here matters more than most people realize. Heavy, dense soils with very small pore sizes can slow or stop wicking entirely. Lighter, more open mixes work best because they allow water to spread through the medium more freely once it arrives at the wick's top end.
- Best media for wicking: perlite-heavy potting mixes (at least 30% perlite by volume), coco coir, or any pre-mixed media included with your specific kit.
- Avoid: dense garden soil, pure peat, or tightly compacted mixes straight out of the bag — these restrict capillary spread and can lead to dry spots even when the wick is working fine.
- If using the potting mix that came with your kit, use it as-is. Kit manufacturers test their wick systems against their included media, so swapping in a different soil can throw off the balance.
When filling the pot, add a thin layer of media first (about an inch), then place your plant or seeds, then fill around and above. As you add each layer, press lightly to ensure good contact with the wick material, you don't want air pockets between the wick and the surrounding soil. After planting, water from the top once with a gentle pour. This initial top-watering ensures the entire soil column is moist and connected to the wick, which helps the wicking system take over without leaving any dry zones stranded above the wick's reach.
For placement, keep the assembled system out of direct intense sunlight for the first week. High heat and strong light increase evaporation from the soil surface, which can pull the system out of balance before it's fully established. A bright indirect spot works well for most kits to start. Once the plant is settled and you can see healthy new growth, you can move it to its final location.
Maintenance and how to adjust watering over time
Day-to-day maintenance with a wick system is genuinely minimal, but there are a few habits that will keep things running smoothly long-term.
Refilling the reservoir
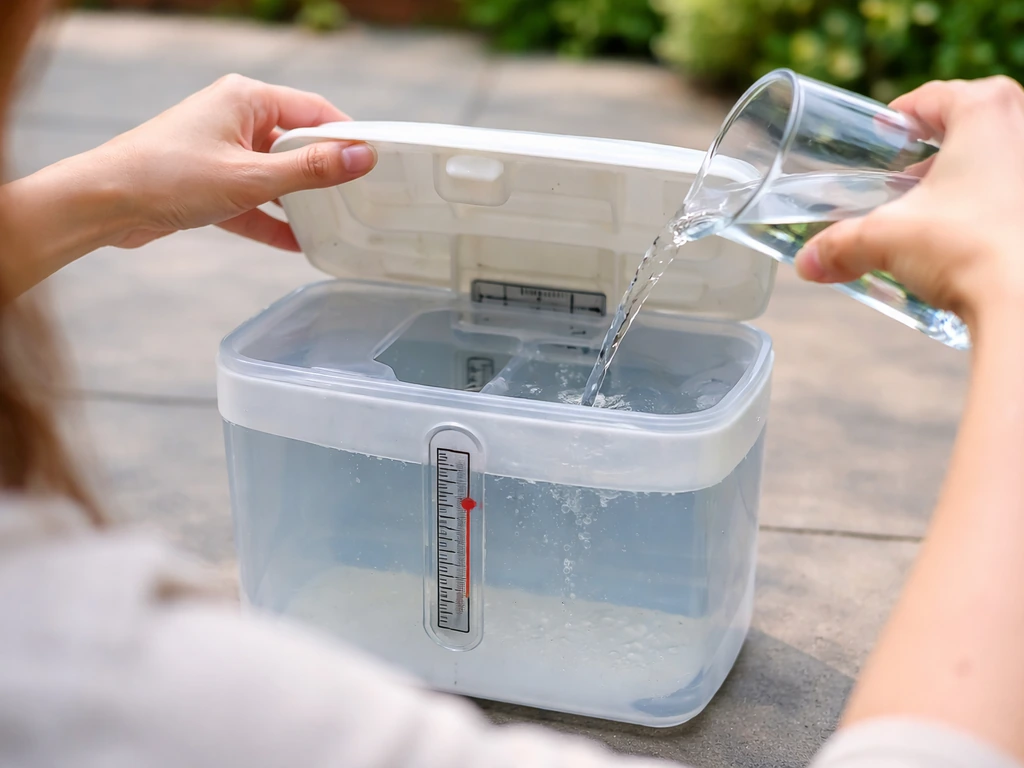
Check the reservoir every 3 to 7 days to start. Most kits have a water level indicator, aim to refill before the reservoir completely empties, because once the wick dries out completely, you'll need to re-prime it. Leaving about a half-inch of water in the reservoir at all times prevents that. Once you've been running the system for a few weeks, you'll know your plant's actual pace and can stretch check-ins to whatever interval makes sense.
Preventing algae and mosquitoes
Standing water in an open reservoir will grow algae and, in warm weather, attract mosquitoes. A few easy fixes: use a reservoir with an opaque outer wall (most kits already have this), keep the water level opening covered or plugged when you're not refilling, and if you notice a green film building up inside, rinse the reservoir with a weak dilution of white vinegar every month or so. Never use bleach or strong cleaning agents, residue can harm your plant's roots.
Adjusting for plant stage and season
A seedling uses much less water than a mature plant, and a plant in winter uses less than one in active summer growth. You don't really need to adjust the wick itself, that's the beauty of the passive system. But you should watch the soil surface for clues. If the top inch of soil is constantly soggy and the plant looks droopy with yellowing lower leaves, the system is delivering more water than the plant can use. In that case, try using a longer wick (which adds flow resistance), or reduce the reservoir level slightly so the wick has less head pressure to work against. If the top inch feels bone dry and the plant is wilting between refills, check that the wick is still intact and contacting the media correctly, then consider switching to a more absorbent wick material.
Troubleshooting: wick not wicking, dry spots, overwatering, leaks and odors
Here are the most common problems people run into with wick systems and exactly how to fix each one.
| Problem | Most Likely Cause | Fix |
|---|---|---|
| Wick not pulling water at all | Wick was never primed, or has an air gap/dry section | Remove the inner pot, re-soak the wick for 10 minutes, reinstall, and confirm the bottom end is submerged |
| Dry spots in the soil even though wick is wet | Dense soil blocking lateral spread, or wick is too thin for the pot size | Top-water once to reconnect moisture throughout the pot; switch to a perlite-heavy mix or use 2 wicks for larger pots |
| Plant is overwatered (soggy soil, yellow leaves, mushy stem) | Wick is too thick or too short, delivering water faster than roots can use it | Switch to a thinner or longer wick, or lower the reservoir water level by 1 to 2 inches |
| Reservoir empties faster than expected but soil is dry | Wick is touching the inside of an outer pot wall and wicking sideways, or the reservoir has a crack/leak | Reposition the wick to hang straight down; inspect reservoir for cracks |
| Bad smell from the reservoir | Stagnant water with algae or root rot debris | Empty and rinse the reservoir with diluted white vinegar; check roots for rot and trim any brown mushy sections |
| Wick slipped out of the media | Wick wasn't anchored before planting | Pull the wick back up through the pot hole, tie a small knot or fold on the exterior end, and repack soil firmly around the top of the wick inside the pot |
One thing worth knowing: a wick system that worked great for three months and suddenly stops is almost always a case of salt buildup in the wick. Fertilizer minerals accumulate in the wick material over time and reduce flow. You can often fix this by removing the wick, soaking it in plain water for 30 minutes, rinsing well, and reinstalling. If the wick is crunchy or discolored brown-yellow, just replace it entirely, braided nylon cord from a hardware or craft store works perfectly and costs almost nothing.
Quick checklist and next steps to finish setup today
Run through this list right now while your kit is in front of you. It covers every make-or-break point from first setup through the first two weeks. Once the wick is installed and primed, you can fine-tune your planter setup so it delivers the right amount of moisture over time wick system. If you want the step-by-step on priming, wick placement, and early maintenance, see these wick and grow self watering system instructions as a related guide while you fine-tune your planter setup.
- Wick is fully soaked before installation (at least 5 to 10 minutes in water)
- Wick passes through the designated center hole at the base of the inner pot
- At least 3 inches of wick extend below the pot into the reservoir area, and at least 3 inches extend up inside the pot
- Exterior end of the wick is secured so it won't pull back through the hole (knotted or folded)
- Reservoir is filled and the bottom of the wick is touching or submerged in the water
- Pot is filled with a light, well-draining media (ideally the kit's included mix or a perlite-heavy blend)
- Soil was pressed gently around the wick interior to eliminate air pockets
- You did an initial top-water after planting to connect the soil column
- Reservoir lid or cover is in place to prevent light and mosquitoes
- You tested the wick is drawing water by touching the top of the wick after 20 minutes — it should feel damp
If you're using a specific branded kit, the wick placement and reservoir design may have small quirks worth knowing. Costa Farms Wick & Grow, for example, uses a proprietary Waterwick® that's sized specifically for their outer pot reservoir, so the general sizing tips here still apply but the wick itself isn't interchangeable. If you're working from a set of written instructions for your exact kit model, those should take priority over general advice for anything brand-specific. If you're looking for grow kit specifics like grow west vape pen instructions, always follow the manufacturer’s written steps first written instructions for your exact kit model. You might also find it useful to compare notes with how other self-watering grow kits handle the same wick logic, since many share nearly identical reservoir and wick path designs even under different brand names. Those self-watering grow kit instructions typically cover the same reservoir and wick path basics, even when the packaging uses different names for the parts self-watering grow kits.
Once your setup passes that checklist, you're done with the hard part. Check the reservoir in three days, make sure the soil feels consistently moist a couple of inches below the surface, and watch the plant for any signs of stress in either direction. Most people find that after the first two weeks of small adjustments, their wick system runs reliably on its own for months.
FAQ
How do I know the wick is the right length for my pot depth?
If the wick top never gets damp after priming (even after 20 minutes), it usually means the bottom end is not reaching the water or the wick is too short for your reservoir-to-root distance. Add a longer wick or re-route it so the top end sits 2 to 3 inches into the media, with no tight kinks that reduce flow.
Should I use fertilizer or liquid nutrients in a wick self-watering system?
You can, but expect faster salt buildup. Use weaker dilution than you would for hand-watering, and every few weeks flush the reservoir and wick with plain water (or rinse the wick) to prevent mineral crust that slows wicking.
Can I leave tap water in the reservoir long-term?
Often yes, but mineral-rich water can accelerate the “wick stops suddenly” issue. If you see white or crusty deposits near the wick or reservoir openings, switch to filtered water or periodically rinse the reservoir and soak the wick.
What’s the best way to prime a wick if the kit is already assembled?
Remove the wick if it’s not clearly dampened, then fully soak it until it holds water evenly. Reinstall without compressing it, fill the reservoir, and wait 15 to 20 minutes before planting, then confirm the wick inside the pot feels damp.
My plant is wilting, but the top soil is wet. What should I check first?
Wet top soil with wilting often points to roots not getting the right oxygen, or the wick delivering too much consistently. Confirm the media is not overly dense, press-check for air pockets around the wick (loose contact can create uneven delivery), and consider reducing reservoir level slightly or using a longer wick to add flow resistance.
What if the top of the soil never stays moist even when the reservoir is full?
Check for contact and continuity issues first, ensure one end stays fully submerged and the other end is truly embedded in media, then inspect the wick for folds or knots that can block capillary paths. Also verify the media is not too fine or compacted, very dense mixes can resist wicking.
How much water should I keep in the reservoir, can it run dry?
Try not to let it fully empty. Keeping at least about a half-inch of water helps avoid re-priming. If it does run dry and the wick dries out, you will typically need to soak and re-test before expecting normal flow.
Will algae or mosquitoes be a problem, and how do I prevent it without harming plants?
Use an opaque reservoir, keep the fill opening covered when you are not topping up, and if algae appears, rinse with a weak white-vinegar dilution and rinse again thoroughly. Avoid bleach or strong cleaners because residue can reach the root zone through wicking.
Can I adjust how fast the wick delivers water without rebuilding everything?
Yes, you can fine-tune delivery by changing wick length (longer usually slows flow due to added resistance) and by lowering the reservoir level slightly to reduce head pressure. Also consider soil aeration, a lighter more open mix often increases moisture spreading once water reaches the top end.
Is it safe to move the system into brighter sun after setup?
Do it gradually. Direct intense light increases evaporation from the top, which can upset balance before the plant and soil column stabilize. A good approach is to keep it in bright indirect light for about a week, then move to its final spot once you see consistent new growth.
How often should I check moisture in the soil surface vs. the reservoir?
Start with reservoir checks every 3 to 7 days, then learn your plant’s pace. For a quick diagnostic, use the top inch and also feel a couple of inches down, if only the very top is dry repeatedly, it can indicate poor wick-media contact or overly fast evaporation at the surface.
What should I do if the wick worked for months and then suddenly stops pulling water?
Most often it is mineral or salt buildup. Remove the wick, soak in plain water for about 30 minutes, rinse well, and reinstall. If the wick looks crunchy, stiff, or brown-yellow, replace it rather than trying to clean indefinitely.