The best beginner grow kit is the one that matches your space, your goals, and your actual budget, not the flashiest bundle on the shelf. If you want the short answer: for most first-timers, a complete tent kit in the 2x4 or 4x4 range that includes a light, inline fan, carbon filter, and a timer is the right starting point. Everything else in this guide is about helping you dial that choice in, set it up without headaches, and actually get to a harvest.
Beginner Grow Kit Guide: Choose, Set Up, Troubleshoot

Marcus Thornfield
17 Apr 2026
What makes a grow kit actually good for beginners
Not every kit marketed as "beginner-friendly" deserves that label. The ones worth buying share a few honest traits. First, they include the core environmental control pieces you actually need: a grow light matched to the tent size, an inline fan, a carbon filter, and ducting. Second, they give you a way to monitor your environment, meaning a digital thermometer/hygrometer (thermo-hygrometer) that reads both temperature and humidity in one device. Third, they include a 24-hour programmable timer so your lights run on a consistent schedule without you manually flipping a switch every morning. AC Infinity documents controller schedule behavior, including daily scheduling and separate ON-duration and OFF-duration options a 24-hour programmable timer.
Beyond the hardware checklist, look for kits that come with decent documentation or manufacturer support. A brand that publishes a real setup guide, and ideally a troubleshooting reference, will save you hours of frustration during your first run. Kits from AC Infinity, VIVOSUN, and similar brands have moved in this direction by bundling smart controllers that coordinate the fan and filter together, which cuts down on the mixed-vendor compatibility headaches that trip up beginners.
Here is a quick checklist of what to verify before you commit to any kit. If a product page cannot answer these questions, that is a red flag.
- Does the included light cover the full footprint of the tent at the right intensity?
- Is there an inline fan sized appropriately for the tent volume, with a CFM (cubic feet per minute) rating listed?
- Does it include a carbon filter, and are filter and fan from the same brand or confirmed compatible?
- Is a timer included, or will you need to buy one separately?
- Is a temperature and humidity sensor/meter included?
- Does the brand publish a setup guide and a troubleshooting reference?
- What is the warranty and return policy if parts arrive damaged or missing?
Grow kit types explained
The term 'beginner grow kit' covers a surprisingly wide range of products. Understanding the main categories will help you avoid buying something that does not fit your actual goal.
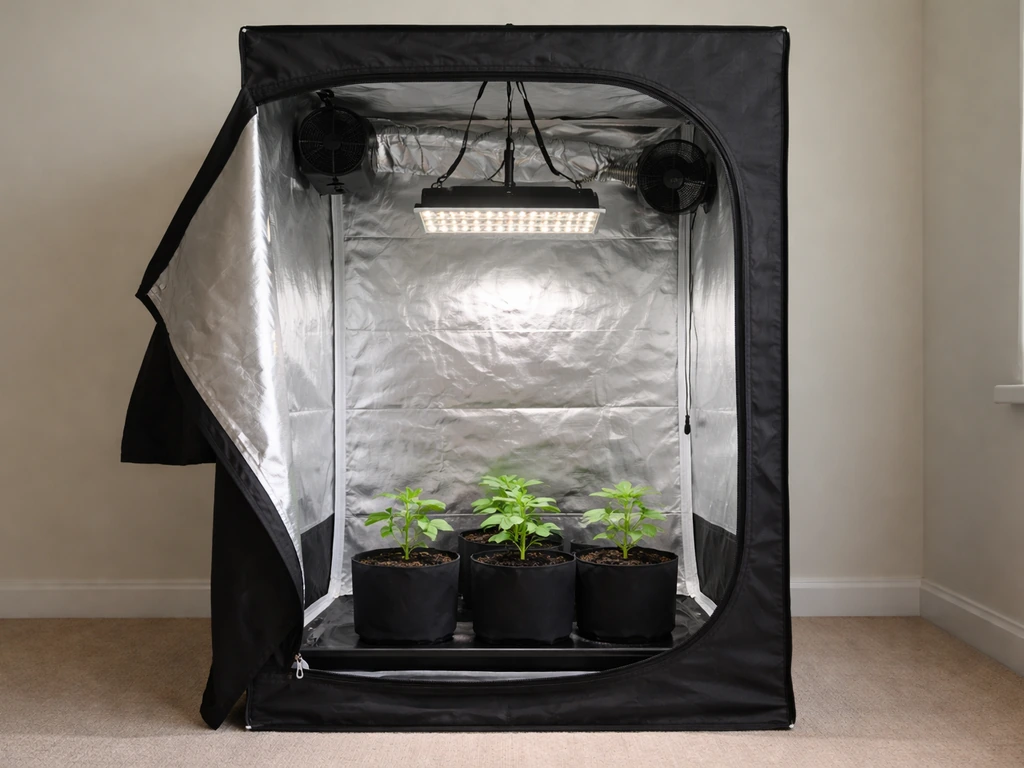
Grow tent kits
A grow tent kit bundles a fabric-walled, reflective-interior tent with the environmental control hardware needed to run it. This is the most common type of beginner kit sold for indoor plant cultivation. The tent creates a contained space you can fully control for light, temperature, humidity, and airflow, which is exactly what beginners need because it removes the variables of a whole room. A solid modern example is the VIVOSUN GIY 4x4 kit, which ships with the tent frame, two LED lights, an inline fan, a carbon filter with prefilter, ducting, an EC/automation controller, grow bags, a trellis net, rope hangers, and duct tape. That level of completeness is what you want to see.
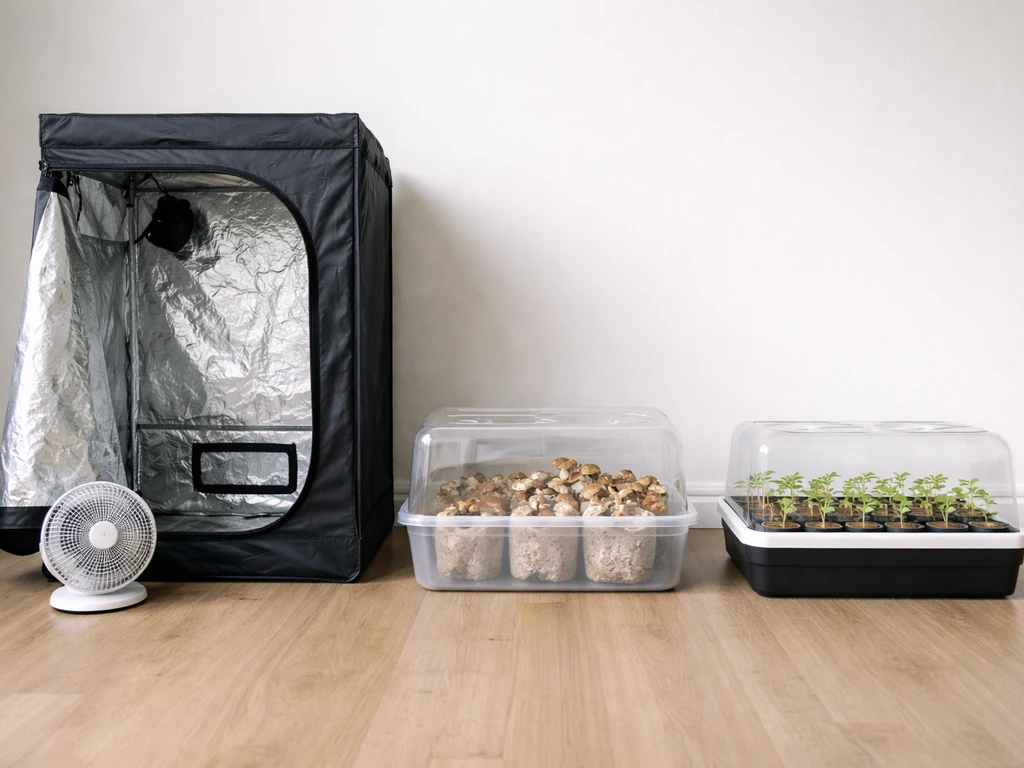
Mushroom grow kits
Mushroom kits are a completely different animal. They typically include a pre-inoculated substrate block or bag, a humidity tent or spray bottle, and instructions for misting and fruiting. No lights, no fans, no complicated assembly. They are arguably the easiest grow kit category for absolute beginners because the hard biology (inoculation and colonization) is already done for you. If you are curious about this path, checking out a mycelium grow kit guide is a great place to start since those kits hinge on understanding how the mycelium works before you expect to see mushrooms.
Seed-starting and hydroponic kits
Smaller countertop kits, like the popular hydroponic pod systems, are designed for herbs and leafy greens and require minimal space and almost no setup. They are great for absolute beginners who want to learn about light cycles and watering without committing to a full tent. The tradeoff is that they are not scalable and will not teach you the environmental control skills needed for a larger grow.
| Kit Type | Best For | Complexity | Typical Cost Range | Space Needed |
|---|---|---|---|---|
| Grow Tent Kit | Plants, herbs, vegetables indoors | Medium | $150 to $600+ | 2x2 ft to 4x8 ft |
| Mushroom Kit | Edible/gourmet mushrooms | Low | $20 to $80 | Countertop shelf |
| Hydroponic Pod System | Herbs, lettuce, microgreens | Low | $60 to $250 | Countertop |
| Automated Monotub Kit | Mushroom cultivation (larger scale) | Low-Medium | $50 to $150 | Shelf or closet |
For most people reading this who want to grow plants indoors and searched for a 'starter grow tent kit,' the tent kit category is the right answer. The rest of this guide focuses there, with notes on mushroom kits where relevant.
How to choose the right kit size for your space and goals
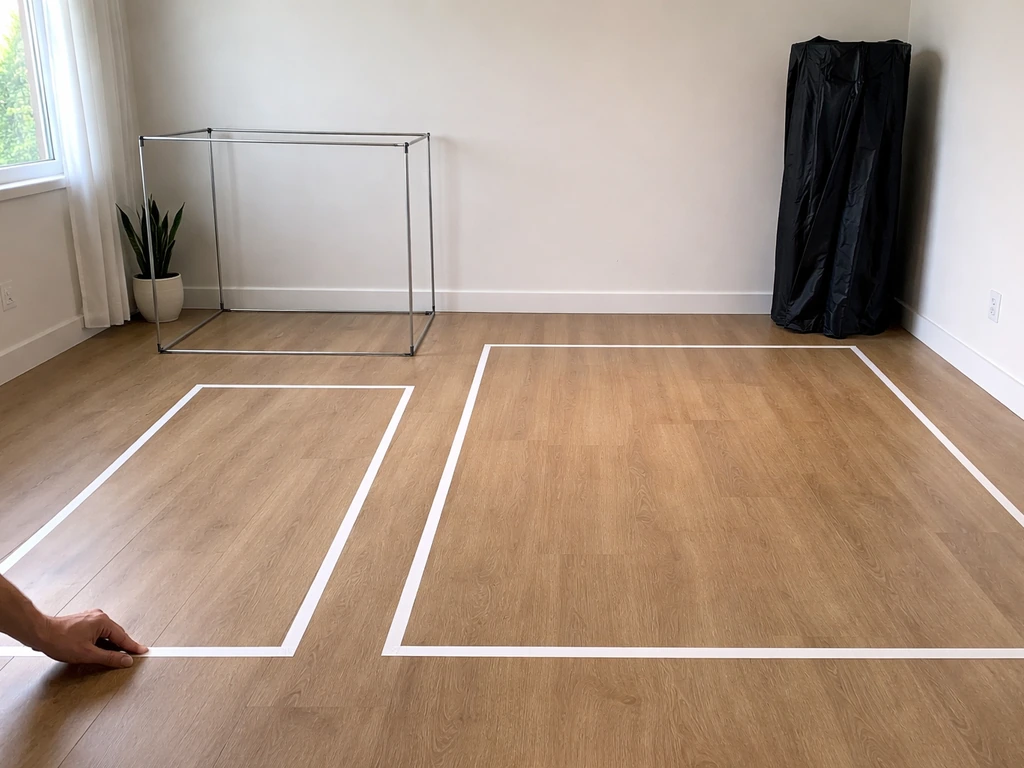
Size is where most beginners either over-buy or under-buy. The two most practical starter sizes are 2x4 feet and 4x4 feet. A 2x4 tent fits in a spare closet or against a wall and gives you enough room for 2 to 4 plants. A 4x4 is the most common recommendation for a first serious setup because it balances yield potential with manageable complexity, and most beginner LED lights are sized for a 4x4 footprint.
Here is the practical sizing math you need to know: to figure out the minimum fan size for your tent, calculate the tent's volume in cubic feet (length x width x height), then double it to get your target CFM. That doubling accounts for the airflow reduction that happens when you run a carbon filter, which every beginner tent setup should include. A 4x4x7 tent has 112 cubic feet of volume, so you want a fan rated for at least 224 CFM. Most kits in this size range ship with a 4-inch or 6-inch inline fan, and you should verify the CFM spec matches before buying.
Think honestly about your goals too. If you want to grow a few herbs or do a casual first run to learn the process, a 2x2 or 2x4 is plenty. If you want a real harvest and plan to do multiple grows, start with the 4x4. Upgrading tents mid-season is genuinely annoying. It is better to start slightly bigger than to outgrow your space after your first successful crop.
What's included vs. what you'll need to buy separately
This is the section most product listings gloss over, and it is where beginners get surprised. Even kits advertised as 'complete' often leave out a few essentials. Here is how to think about it.
Usually included in a good complete kit
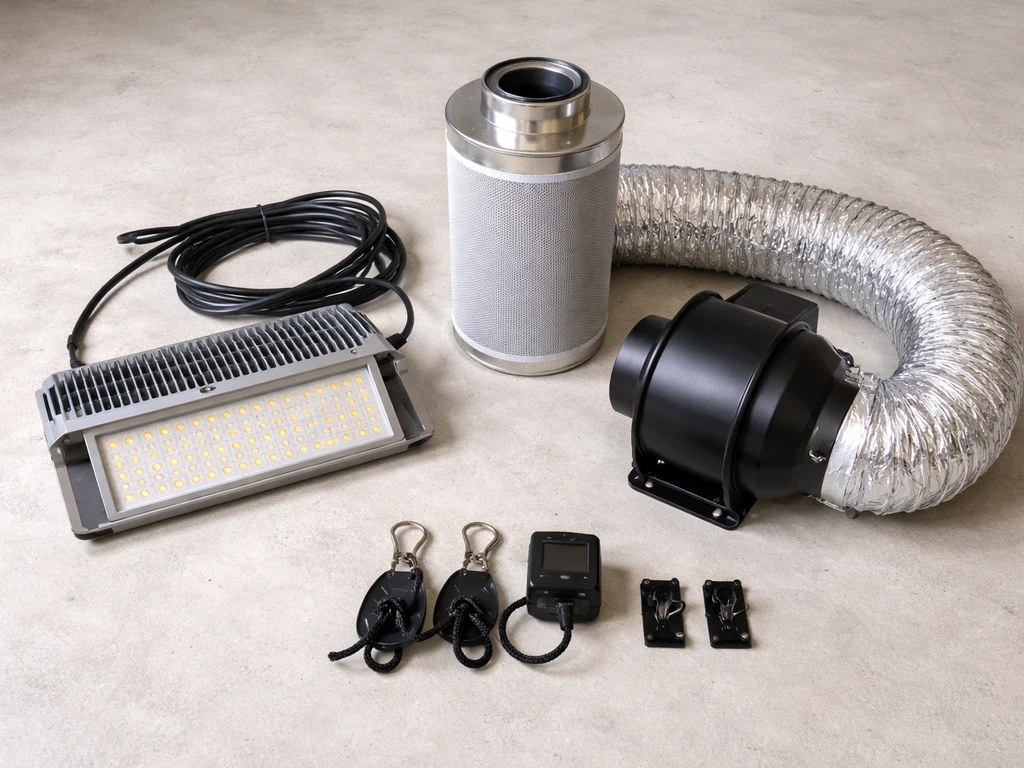
- Tent frame and canvas with reflective interior
- LED grow light (check wattage and coverage area match the tent size)
- Inline exhaust fan
- Carbon filter and prefilter sleeve
- Flexible ducting and duct clamps
- Rope ratchet hangers for light and filter
- Some form of timer or smart controller
Commonly missing even from 'complete' kits
- A standalone digital thermometer/hygrometer (many kits skip this or include a cheap one)
- Growing medium (soil, coco coir, or hydroponic medium)
- Pots or fabric grow bags (sometimes included, often not)
- Nutrients or fertilizer
- pH meter and pH adjustment solutions
- A dehumidifier or small humidifier depending on your climate
- Extension cords or power strips with surge protection
Before you finalize your purchase, add up the cost of the missing pieces. A kit priced at $200 that requires $150 in add-ons is not cheaper than a $320 kit that includes most of them. Budget realistically: a solid beginner tent setup with all the necessary add-ons typically runs $250 to $500 depending on size and brand. If a kit price seems too low, check the components list carefully.
If you are on the mushroom cultivation side of things, the math is much simpler. Most Mondo grow kit instructions walk you through a kit where everything is pre-loaded, and extra purchases are minimal, usually just a spray bottle and clean water.
Setting up your kit step by step
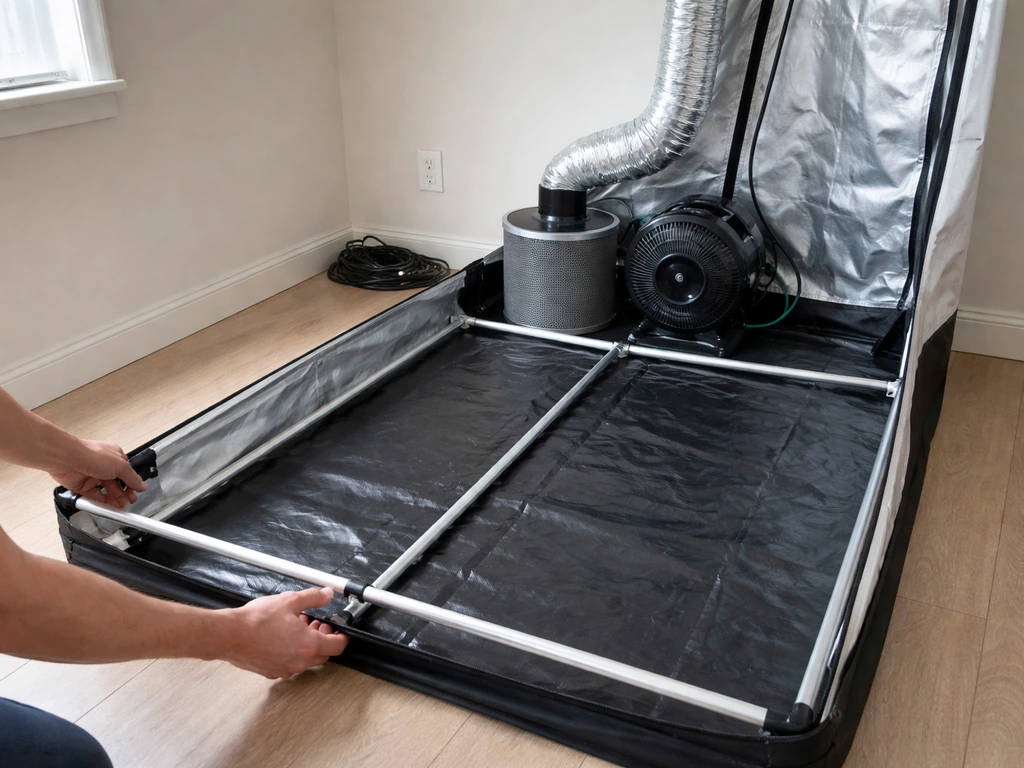
Before you open a single package, pick your location. Your tent needs a flat, level floor, access to at least one electrical outlet, enough overhead clearance to open the tent fully, and ideally a floor you can wipe down easily. Avoid placing it directly against an exterior wall in cold climates, as temperature bleed-through can affect your grow environment.
- Unbox everything and inventory against the included parts list before assembly. Note any missing or damaged items immediately and contact the manufacturer before proceeding.
- Assemble the tent frame first, following the manufacturer's diagram. Most modern frames use push-button pole connectors and go together in under 20 minutes. Do not force any joint.
- Hang the carbon filter inside the tent near the top. The flange (the open collar end) should face toward the inline fan. Connect the fan to the filter using a duct clamp, and run the ducting from the fan out through a tent port to exhaust outside the tent.
- Secure all duct connections with the included duct tape or clamps. A loose connection at the filter-to-fan joint is the number one cause of odor escaping the tent.
- Hang your grow light using the rope ratchet hangers from the top crossbars. Set the initial height according to the light manufacturer's recommendation, which is typically 18 to 24 inches above the canopy for LED lights during vegetative growth.
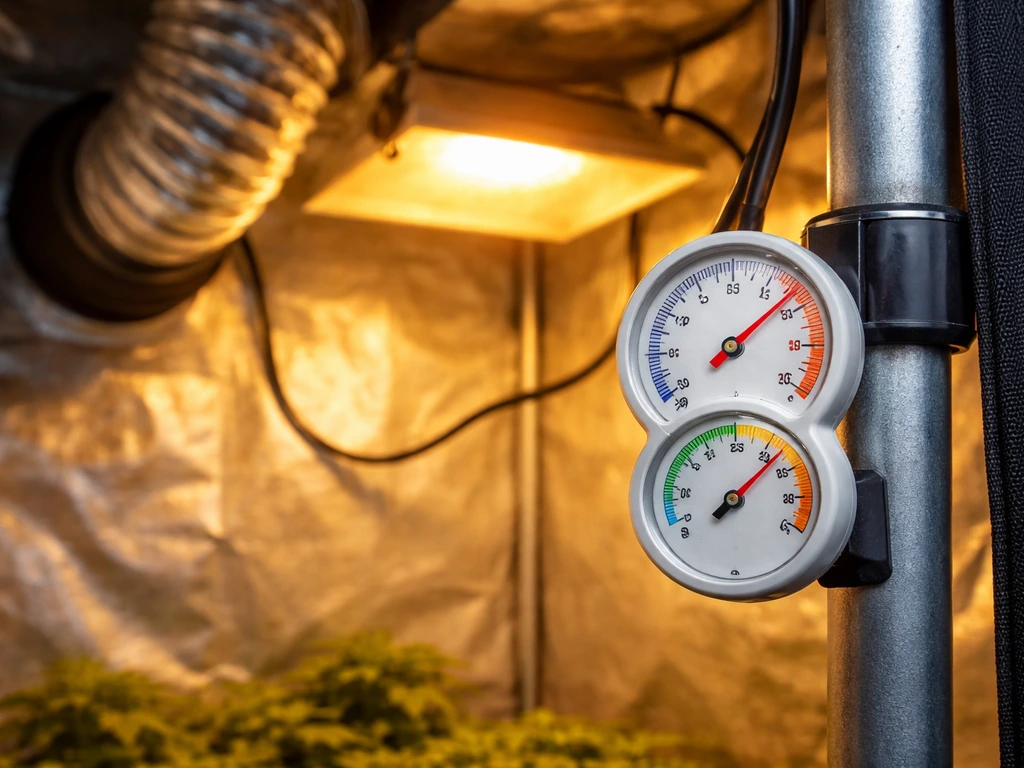
- Place your temperature and humidity sensor at canopy height, not up near the roof or clipped to a pole. Readings taken at roof level will be significantly different from what your plants are actually experiencing. VIVOSUN's setup guide specifically calls this out as a critical placement decision.
- Connect your fan, light, and any other devices to your timer or smart controller. Set your light schedule before turning anything on.
- Power everything on and run the tent empty for 24 to 48 hours. Check that the tent walls pull slightly inward, which means you have negative pressure (more air leaving than entering). If the walls bow outward, your exhaust is not working correctly.
- Verify temperature and humidity readings fall within your target range before introducing any plants. For most plants during the vegetative stage, aim for 70 to 78°F with lights on and 65 to 70°F with lights off, with relative humidity around 50 to 70%.
- Once environmental targets are stable, introduce your plants or seeds and begin your grow log.
That inward wall bow in step 8 is a quick sanity check that experienced growers use constantly. Negative pressure keeps odors inside the tent, prevents unfiltered air from leaking out, and helps maintain a stable internal climate. If you are not getting it, check that your intake (passive or active) is smaller than your exhaust opening.
Beginner troubleshooting: the most common early problems
Almost every beginner hits at least one of these in their first run. Most are fixable in under an hour once you know what you are looking at.
Temperature is too high or too low
High temps are usually caused by too much heat from the light, poor exhaust airflow, or the tent being in a warm room with no air conditioning. Check that your exhaust fan is actually running, that the ducting has no sharp bends choking the airflow, and that your duct connections are not leaking hot air back in. If the ambient room temperature is already above 80°F, you may need an air conditioning unit or at minimum a way to pull cooler air from another room. Low temps are more common in winter and are solved with a small space heater on a controller so it does not overheat the tent.
Humidity out of range
High humidity is one of the most common early issues, and it invites mold. The fastest fix is increasing ventilation, either by running the exhaust fan at a higher speed or by opening a passive intake port. If your local climate is very humid, a small dehumidifier placed near the tent's intake is one of the most effective solutions available. High humidity is often caused by recent watering, too many plants in the space, or water sitting in trays under pots. Low humidity (common in dry climates or winter) is fixed with a small ultrasonic humidifier, but do not place it directly inside the tent pointing at your plants.
Odor escaping the tent
If you can smell your grow outside the tent, the carbon filter is not doing its job. The most common causes are a loose duct connection at the filter-to-fan joint, a carbon filter that is saturated (replace or refill the carbon media), or negative pressure failing because an intake port is too large. Recheck every duct clamp and tape joint. Carbon filter replacement cadence depends on how hard you run your fan; higher speeds and continuous operation wear it out faster.
Slow or no growth
If plants or mushrooms are not developing on schedule, temperature and light are the first things to check. For plants, confirm your light is actually in the correct spectrum and intensity for your growth stage, and that your timer is running the right schedule. For mushroom kits specifically, slow or absent fruiting almost always traces back to temperature being outside the target range or not enough fresh air exchange. The troubleshooting quick reference in most kit manuals flags these same two variables as the most common culprits.
Mold or contamination
Mold on soil or substrate is a sign of high humidity combined with poor airflow. For plant grows, increase ventilation and reduce watering frequency. For mushroom kits, visible green, black, or pink mold on the substrate usually means contamination, and the safest call is to remove and dispose of that block rather than risk spreading it. If you need to clean the tent, wiping surfaces with 3% hydrogen peroxide solution or a diluted bleach solution is effective. Let everything dry completely before starting a new run. If you are working through a branded mushroom kit and are unsure whether what you are seeing is normal mycelium growth or contamination, the Zamnesia mushroom grow kit instructions include a visual reference that can help you tell the difference.
Missing or incorrect parts
This happens more often than brands would like to admit. Before you contact support, fully inventory everything against the parts list in the manual, because some parts are easy to miss in packaging. When you do reach out, have the following ready: the exact kit model name and SKU, the order number and purchase date, and a photo of what you received. Most reputable brands will ship replacement parts within a few days if you have this information ready.
Maintenance, harvesting basics, and when to think about upgrading
Ongoing maintenance
A grow tent is not a set-it-and-forget-it setup, but the routine is not complicated once you are used to it. Check temperature and humidity readings at least once a day, especially during the first two weeks. VIVOSUN’s support guide also explains how to connect the Temperature/Humidity sensor to the kit controller system via the AUX port. Inspect your duct connections monthly and re-tape any joints that show signs of loosening. Clean the tent between grows: wipe down all interior surfaces, wash grow bags or pots, and check the carbon filter. Powdery mildew and other fungal issues are encouraged by humidity fluctuations between grows, so a thorough clean is worth the hour it takes.
Harvesting basics
For plants, harvest timing depends entirely on what you are growing, so follow the specific guidance for your crop. The general principle is to harvest based on visual and physical cues (trichome color, pod firmness, leaf yellowing at the right stage) rather than just calendar days. For mushroom kits, harvest just before or as the veil under the mushroom cap begins to tear. Waiting too long results in spore drop, which is messy and signals the flush is past peak. After your first flush, follow the kit's rehydration or resubstrate instructions to trigger a second flush. Most kits will produce two to three good flushes before the block is exhausted. The Wholecelium grow kit instructions walk through this rehydration process clearly if you are on that particular kit.
When to upgrade
You will know it is time to upgrade when you consistently hit the ceiling of what your current kit can produce. If you are harvesting everything your tent can hold and want more, the next step is usually a larger tent, a more powerful light, or adding CO2 supplementation. If you are interested in specialty mushroom cultivation, species like lion's mane have specific kit requirements worth researching before you invest, and looking at the best lion's mane grow kit options is a good way to understand what a species-specific setup looks like versus a generic beginner kit.
If you are just getting started and want to compare more options side by side before committing, browsing through a curated list of best grow your own kits can help you spot patterns in what the good ones include and what the underwhelming ones leave out. And if you are drawn to a more hands-off mushroom cultivation approach, the beginner automated boomr bin CVG monotub mushroom grow kit is worth a look as a step up from basic block kits without jumping into full tent complexity.
One last thought worth mentioning before you go out and buy: if you have ever wondered whether certain specialty kits actually deliver what they promise, it is worth reading honest user-experience breakdowns first. For example, the question of do morel grow kits work is one that surprises a lot of beginners once they dig into the details. That same skeptical, research-first mindset will serve you well for any kit you consider. Buy based on what the kit actually includes, what the documentation looks like, and what real users say about setup, not just the marketing headline.
FAQ
Do I need an exhaust fan even if my beginner grow kit includes a carbon filter and light?
Yes. The carbon filter only works when air is actively pulled through it, so you still need an intake and an exhaust path. If your kit lacks ducting clamps or a clear exhaust route, you may end up running at low airflow, which causes heat and humidity spikes even though all parts are present.
What tent height matters most for a beginner grow kit, the footprint or the volume?
For performance, volume matters because your minimum fan target is based on cubic feet, not just 2x4 or 4x4. Two tents with the same footprint but different heights will need different CFM, and using the smaller fan can quietly lead to odor leaks and unstable humidity.
How do I know if I bought the right grow light wattage for my tent?
Match the light to the tent’s usable footprint and your crop goal. Even when kits list “for a 4x4,” check whether the light’s coverage fits the reflective area and whether it offers adjustable dimming, otherwise you can end up with uneven growth or heat stress in the corners.
Should the timer control the lights only, or can it control the fan too?
In most beginner tent setups, the timer should control the lights, while the fan is usually left on continuously or on an environmental controller. Running the exhaust only when lights are on can trap heat buildup after lights change, which makes temperature swings more likely.
What is the easiest way to avoid accidentally overwatering in a beginner grow kit setup?
Use a simple dry-down check before watering again, for example, lifting pots to feel weight or using a moisture meter if you have one. Many humidity problems begin right after watering, so spacing water based on plant needs, not on a fixed schedule, reduces mold risk.
My tent smells even though I have a carbon filter. What should I check first?
Start with air balance: confirm negative pressure by verifying the intake is smaller than the exhaust opening, then re-check duct clamps at every joint. If smell persists after airflow checks, the carbon media may be saturated, especially if the fan runs at higher speed than expected.
How often should I replace the carbon filter, and what triggers shorter life?
Heavier or continuous fan operation shortens lifespan, and filters wear faster when humidity is high because it can reduce effective airflow through the media. If you notice odor returning sooner than expected, replace the carbon media or the whole filter rather than waiting for a full “scheduled” change.
Is it safe to use hydrogen peroxide or diluted bleach inside the tent for cleaning between grows?
It can be effective, but keep it controlled: wipe with a light application, avoid soaking electronics, and let everything fully dry before restarting. Residual odor or fumes can also affect the next run, so run the tent with fans on briefly before introducing plants or substrate.
What should I do if my temperature is low and my kit is already working, everything seems “on”?
First confirm heat source timing, the light schedule, and that the exhaust is not running more strongly than needed. If the room is cold, the practical fix is usually a small heater on a controller, but keep it away from directly blasting the tent walls where it can cause uneven microclimates.
Do I need to seal ducting with tape or is a clamp enough?
Use both if the kit expects it. Clamps secure the mechanical connection, but tape or sealant helps prevent small leaks that can ruin negative pressure. If joints loosen after shipping, re-check immediately, then inspect again after the first week of operation.
For mushroom grow kits, is fresh air exchange always required, or does the humidity tent handle it?
Fresh air exchange is still important, especially if fruiting slows. Humidity alone can promote stalled growth or off outcomes, so follow the kit’s venting guidance and avoid closing everything tightly for long periods.
What’s the most common “missing piece” that beginners forget to budget for with a grow tent kit?
Power and control accessories. Many kits provide core hardware but not the exact humidifier, dehumidifier, extension hardware, or proper plant support items, and you may also need extra ducting or additional hangers depending on your ceiling height.
When should I upgrade my beginner grow kit, after the first harvest or later?
Upgrade when your setup hits a consistent ceiling, meaning you regularly fill available space, your light cannot be positioned for even coverage, or you are repeatedly forced to compromise on airflow. If your first run is successful but yields are below your goals, a light upgrade or tent size change is usually more efficient than changing multiple things at once.