The Modern Sprout Lavender Grow Kit works through a passive wicking system: you fill the reservoir, drop in the net pot, sprinkle seeds about a quarter inch deep into the grow medium, and let the wick pull moisture up from below. If you are using a target strawberry grow kit, follow the included instructions for preparing the grow medium and maintaining the right moisture level during germination target strawberry grow kit instructions.
Modern Sprout Lavender Grow Kit Instructions Step by Step

Marcus Thornfield
1 May 2026
Seeds typically sprout in 7 to 28 days depending on your model and conditions. If you need the exact steps, follow the trowel and sprout organic grow kit instructions and match the lighting, watering, and germination timelines to your model. The single biggest mistake people make is overwatering or pouring water directly onto the seeds, both of which stall germination.
Follow the steps below for your specific kit, keep the temperature between 70°F and 80°F, give it at least 4 to 6 hours of direct sun daily, and you will have seedlings. If you are ready to start, use these lavender grow kit instructions to follow the exact setup and care steps for your model.
Which Modern Sprout Lavender Kit Do You Have?
Modern Sprout sells a few different lavender kit formats and the setup steps differ enough that it is worth identifying your model before you start. The two most common ones you will encounter are the Tapered Tumbler Grow Kit and the Pint Jar Grow Kit. There is also a Garden Vibes candle-planter version that converts a soy candle vessel into a grow kit. Check your packaging or the glass container shape to figure out which one you have.
| Kit Model | Container | System Type | Sprout Time | Transplant? |
|---|---|---|---|---|
| Tapered Tumbler (Lavender) | Smoked tapered glass planter + stainless steel net pot | Passive wicking / self-watering hydroponic | 7 to 14 days | Not needed |
| Pint Jar (Lavender Purple) | Small pint-sized jar + net pot | Immersion hydroponic with wick | 14 to 28 days | Not recommended |
| Garden Vibes Candle Planter | Converted soy candle vessel | Soil-based or compact wicking | 14 to 28 days | Optional |
The Tapered Tumbler is Modern Sprout's more polished desktop kit. The Pint Jar version is often sold through Target and is a great starting point for beginners. This guide covers both, and calls out where the steps differ.
Kit Overview and Parts Checklist
Open the box and lay everything out before you do anything else. Here is what you should find depending on your model.
Tapered Tumbler Kit Parts
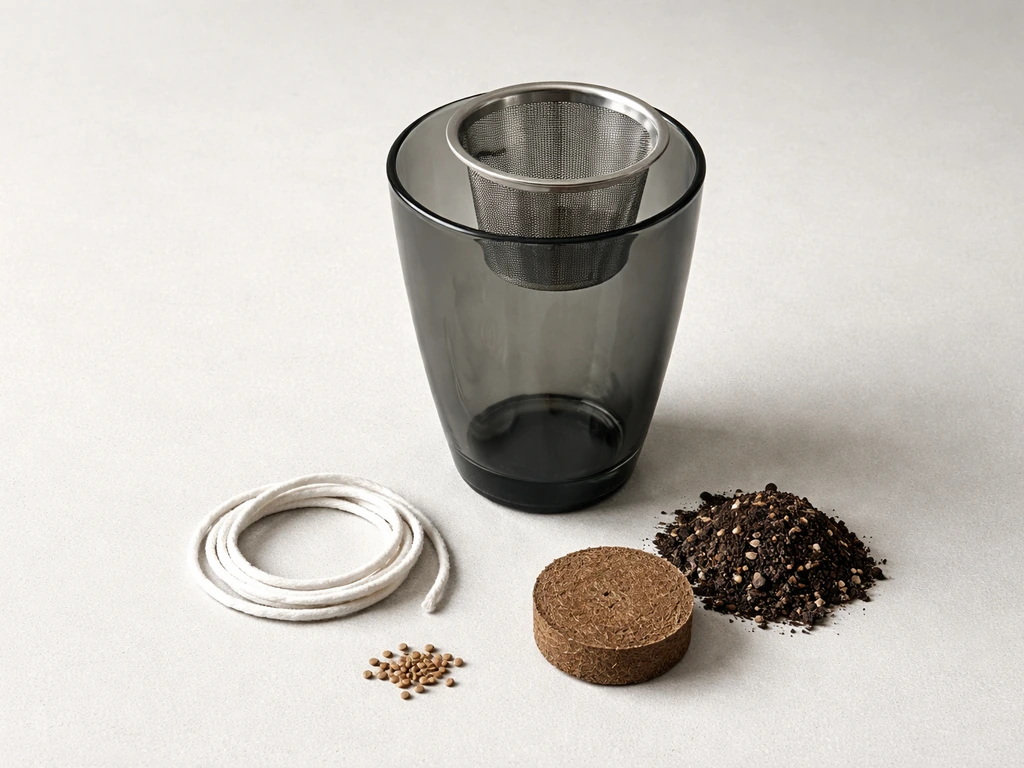
- Semi-opaque smoked glass planter (the reservoir)
- Stainless steel net pot (sits inside the planter opening)
- Grow medium (the material that goes in the net pot)
- Coco pith disk (expands when wetted, fills the net pot)
- Activated carbon (goes at the bottom of the net pot to keep the water fresh)
- Polypropylene wick (threads through the net pot and hangs into the water below)
- Lavender seeds
- Plant food packet
- Instruction manual
Pint Jar Kit Parts
- Pint-sized glass jar (the water reservoir)
- Net pot (fits snugly into the jar opening)
- Grow medium or coco disc
- Activated carbon
- Wick
- Lavender seeds
- Plant food
- Instruction sheet (or link to PintJar-Instructions-R2 PDF)
If you are missing any component, check the bottom of the box and inside the instruction booklet envelope before assuming something was left out. The seeds are sometimes tucked inside a folded paper insert. If something is genuinely missing, Modern Sprout's customer support is responsive and will resend parts.
Set Up Your Grow Location: Light, Temperature, and Airflow
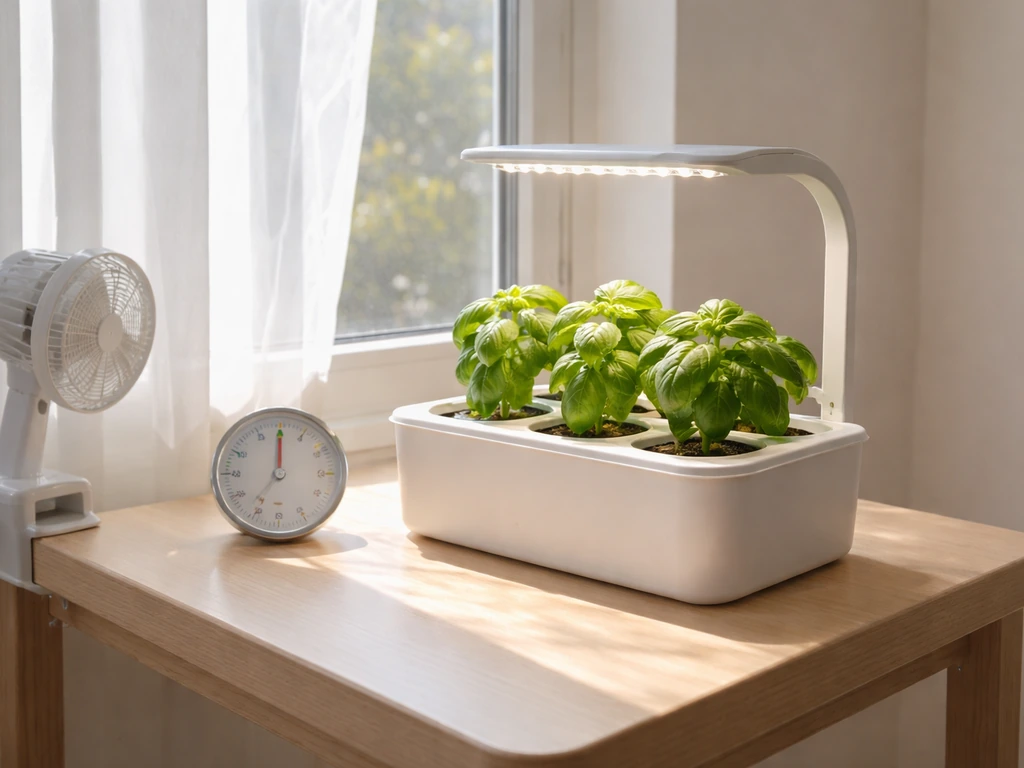
Lavender is a full-sun plant, and that is not a suggestion. Modern Sprout specifies at least 4 to 6 hours of direct sunlight per day for the Tapered Tumbler, and the Pint Jar instructions use the phrase "Full Sun" explicitly. A southwest-facing window is ideal, but south, west, or east-facing windows will all work as long as there is no obstruction like a screen or frosted glass cutting the light.
If your home does not get reliable direct sun, a grow light is not optional, it is necessary. Lavender grown under weak indirect light will get leggy and pale within days of sprouting. A simple clip-on grow light running 14 to 16 hours per day can substitute for a sunny window during germination. Once seedlings are established you can dial it back to 12 hours.
Temperature matters more than most people expect. Seeds germinate best between 70°F and 80°F. If the temperature near your window drops below 55°F at night (common in spring near drafty windows), pull the kit back from the glass after sunset. Cold stress at this stage can stall germination completely or kill tender seedlings. A consistent room temperature in the low-to-mid 70s is the sweet spot.
Airflow is less of a concern during germination but becomes important once sprouts appear. Stagnant, humid air near seedlings encourages mold. If you are keeping the kit in an enclosed space or using plastic wrap (more on that below), give the seedlings a few minutes of open air every day once they emerge.
Step-by-Step Planting Instructions for Lavender
These steps apply to both the Tapered Tumbler and Pint Jar kits. Where the kits differ, it is called out clearly.
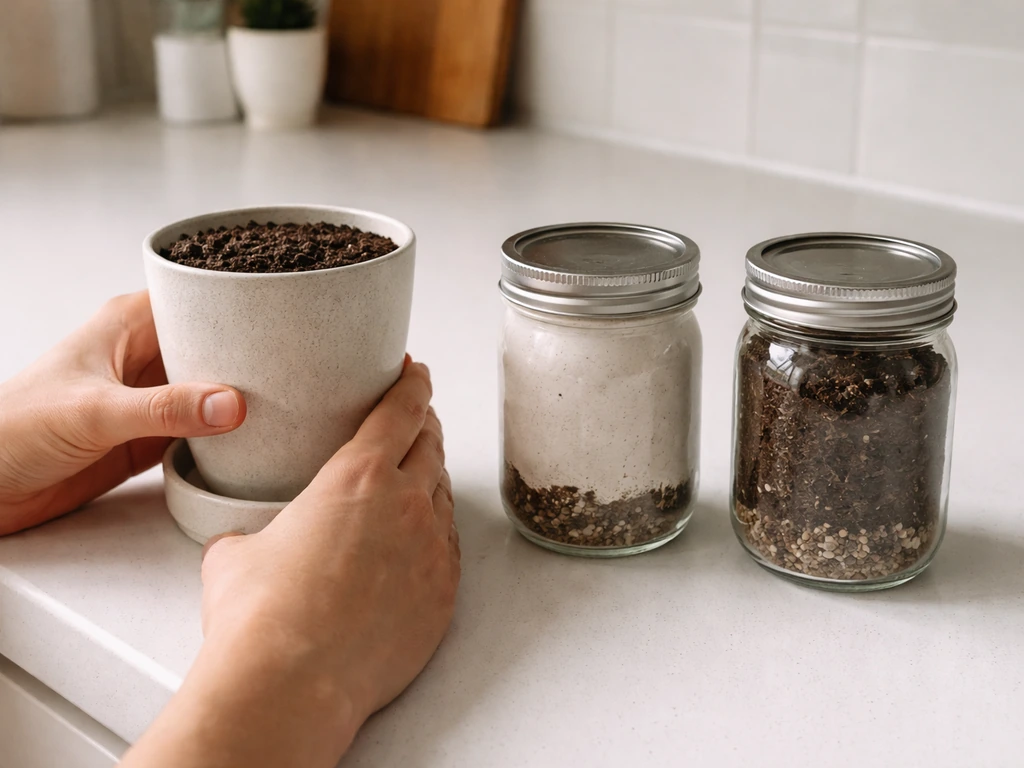
- Expand the coco pith disk: Place the coco disk in the net pot and slowly add a small amount of water (about 2 to 3 tablespoons). The disk will expand into a loose, soil-like growing medium in 5 to 10 minutes. Break it apart gently with your fingers until it fills the net pot evenly.
- Add the activated carbon: Sprinkle the activated carbon into the bottom of the net pot before or as you add the coco medium. It sits at the base and keeps the water in the reservoir from going stagnant.
- Thread the wick: The polypro wick should loop through the holes in the bottom of the net pot so that one end hangs down into the reservoir and the other end is buried in the grow medium. This is the passive wicking system. The wick pulls water up from below so you never need to water from the top.
- Fill the reservoir with water: For the Tapered Tumbler, add water to just below the base of the net pot. The wick does the work from here. For the Pint Jar, Modern Sprout specifies 1 and a quarter cups of fresh water for post-germination use, but for the initial fill, just bring the water level up to where the net pot base meets the water without submerging the entire medium. Do not let the level drop below the net pot.
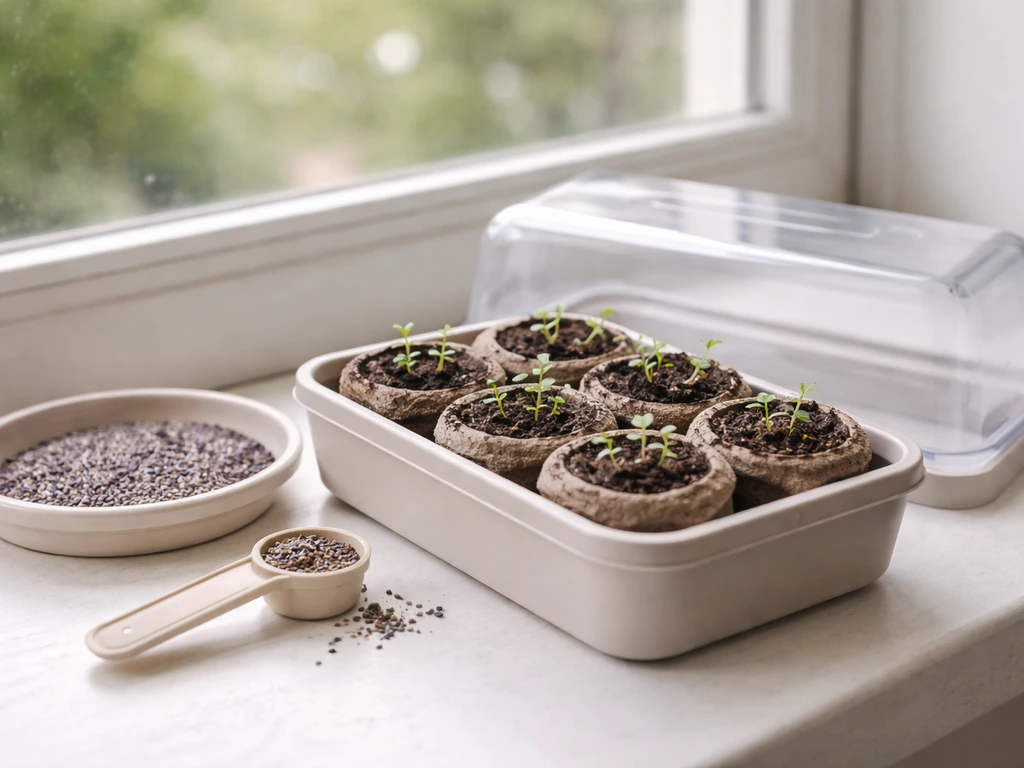
- Sprinkle the seeds onto the grow medium: Distribute the seeds evenly across the top of the coco medium. Then press or cover them to about one quarter inch deep (roughly 6 mm). You can use the tip of a pencil or your finger to nudge them under the surface. Do not compact the medium.
- Mist the surface gently: Use a spray bottle set to mist (not stream) to lightly dampen the surface where the seeds are. This is the only time you should add moisture from the top during germination. After this, the wick handles everything.
- Cover the top with plastic wrap (Pint Jar kit): The Pint Jar instructions specifically require covering the jar opening with plastic wrap for the first 3 to 5 days. This traps humidity and warmth to encourage faster sprouting. Poke two or three small holes in the wrap for minimal airflow. If you are in a dry climate, you can do this with the Tapered Tumbler too by loosely tenting plastic wrap over the top.
- Place in your chosen location: Set the kit in your sunny window or under your grow light. Do not move it around during germination. Lavender seeds need stability.
- Check daily without disturbing: Peek at the seeds each day. You should not need to add water during the first week if the wick is working and the reservoir is filled. Resist the urge to pour more water onto the seeds.
Daily Care: Watering, Misting vs. Soak, and Schedule
Lavender hates wet feet. Modern Sprout's own guidance calls out that lavender prefers very dry grow medium conditions, which is a bit counterintuitive for a hydroponic system, but the wick-based design actually handles this well because moisture is delivered from below in small amounts rather than flooding the roots.
During Germination (Days 1 through Sprout)
Do not add water from the top. The wick is doing the work. Check the reservoir every 2 to 3 days to make sure the water level has not dropped below the net pot base. Top it off if needed by carefully removing the net pot, adding water to the reservoir, and replacing the net pot. Never pour water directly over the seeds or seedlings. Even a gentle pour can dislodge seeds or introduce too much surface moisture, which invites mold.
After Sprouts Appear
Once you see the first green shoots (usually a small curved seedling arch breaking the surface), remove the plastic wrap and do a full water change. For the Pint Jar kit, this means emptying the jar completely, then refilling with 1 and a quarter cups of fresh water and approximately one eighth teaspoon of the included plant food. For the Tapered Tumbler, follow the same principle: empty the reservoir, rinse lightly, and refill with fresh water to the correct level.
Going forward, change the water completely once a week using fresh water. Add plant food only once a month, not every week. Over-fertilizing lavender seedlings causes more harm than good. The ratio stays the same: roughly one eighth teaspoon of plant food per 1 and a quarter cups of water.
Always remove the net pot from the jar or planter when changing the water. Set it gently on a plate or paper towel while you swap out the reservoir water. Do not let the net pot sit dry for more than 10 to 15 minutes.
Growth Milestones and What "Good Progress" Looks Like
Knowing what to expect at each stage takes a lot of the guessing out of it. Here is what a healthy germination and growth arc looks like for Modern Sprout lavender.
| Timeframe | What You Should See | Action Needed |
|---|---|---|
| Days 1 to 5 | Nothing visible yet, medium stays moist via wick | Check reservoir level, keep plastic wrap on, no top watering |
| Days 5 to 14 (Tapered Tumbler) | Tiny curved seedling arches or pale green sprouts breaking the surface | Remove plastic wrap, do first water change with plant food |
| Days 14 to 28 (Pint Jar) | First sprouts visible, possibly a few days later in cooler rooms | Remove plastic wrap, do first water change, move to full light |
| Weeks 3 to 4 | Seedlings have first true leaves (narrow, lance-shaped), 1 to 2 inches tall | Thin crowded seedlings by snipping extras at the base with scissors |
| Month 1 to 2 | Plant fills out, stems become slightly woody at the base, lavender scent noticeable | Continue weekly water changes, monthly plant food |
| Month 2+ | Compact bushy lavender plant, potentially small flower buds on long stems | Decide whether to keep in kit long-term or pot up to soil |
Lavender is not a fast grower. If your seedlings are small but green and upright at week three, that is a win. The Tapered Tumbler page specifically says the kit will be ready for harvesting in 1 to 2 months, so do not panic if it feels slow. Slow and steady with lavender is normal.
Troubleshooting: No Sprout, Mold, Leggy Seedlings, and Stalling
No Sprouts After Two Weeks
First, check the temperature. If your window drops below 60°F at night, germination can stall completely. Move the kit to a warmer spot and give it another week. Second, check that the seeds were not buried too deep.
Johnny’s Selected Seeds also recommends sowing lavender seeds about 1/8 inch deep when transplanting is part of the plan Lavender seeds 1/8 inch deep.
Lavender needs to be only a quarter inch under the surface. If you pressed them in deeper than that, the sprouts may not have the energy to push through. Third, make sure the grow medium has not dried out entirely. The wick needs consistent contact with water in the reservoir.
If the reservoir ran dry, refill it and add a small mist to the surface.
Modern Sprout themselves say to wait 3 to 4 weeks before declaring a germination failure and reaching out to their support team. Lavender is a notoriously slow germinator. A discussion thread on r/gardening notes lavender can be a notoriously slow germinator, with sprouting timelines that may stretch longer than expected Lavender is a notoriously slow germinator.. The Pint Jar kit lists 14 to 28 days as the expected window. If you are past 4 weeks with nothing, contact Modern Sprout for a seed replacement.
Mold or Fuzzy White Growth on the Surface
A little surface mold during germination is common and usually not fatal, but you do need to address it. The most likely causes are too much surface moisture (from over-misting or a sealed plastic wrap left on too long), stagnant air, or a water reservoir that was not changed frequently enough. Remove the plastic wrap immediately, let the surface dry out slightly, and improve airflow around the kit. If you see mold on the grow medium, scrape it off gently with a toothpick and let the surface dry for a day before resuming normal care. Lavender's preference for dry conditions means you actually have more room to let the surface breathe than you might with other herbs.
Leggy, Stretched-Out Seedlings

Leggy seedlings, where the stem is long and thin with small leaves at the top, almost always mean the seedlings are not getting enough light. They are stretching toward the nearest light source. The fix is more light, not more water or fertilizer. Move the kit closer to the window, or if it is already in your best window, switch to a grow light. The R2 guide specifies at least 6 to 8 hours of direct sunlight for germination. If you cannot provide that naturally, a grow light running 14 hours per day will correct leggy growth within a week or two.
Seedlings Sprouted But Stopped Growing
Stalling after germination is usually one of three things: not enough light, water that has gone stagnant in the reservoir (change it weekly, no exceptions), or plant food timing being off. If you have not added plant food yet and it has been more than two weeks since sprouting, add the one eighth teaspoon dose at your next water change. Also check that the wick is still properly in contact with the water below. If it slipped out of the reservoir it is no longer drawing moisture up to the roots.
Seeds Washed or Displaced
If you accidentally poured water over the seeds before they sprouted, they may have shifted or been buried too deep. This is why the instructions are so firm about never top-watering during germination. If you are growing something different, such as a mini sunflower grow kit, review the mini sunflower grow kit instructions so you know the right depth, light, and watering routine. If this happened, use a mist bottle to gently redistribute the surface and try to move seeds back to about a quarter inch depth. Then go back to wick-only watering and hope for the best. It is not always fatal, especially if it happened early.
Hardening Off and Long-Term Care for Your Lavender
Modern Sprout's hydroponic kits are designed so you do not need to transplant at all. The official guidance for both the Tapered Tumbler and the Pint Jar is that roots will eventually grow down through the net pot into the reservoir, and at that point moving the plant is not recommended because it can damage the root system and stunt growth. If your goal is a long-lived desktop lavender plant, keeping it in the kit is a completely valid choice.
That said, lavender is a perennial shrub that can live for years and grow quite large in the right conditions. If you want a garden plant rather than a desktop plant, you can pot it up, but do it early, before the roots have grown down through the net pot into the reservoir. The window is roughly weeks 4 to 6 after sprouting, when the plant has true leaves but before the roots are deeply established in the hydroponic system.
Potting Up to Soil
If you choose to move your lavender to a pot, use a well-draining mix. A cactus or succulent soil blend works well for lavender because it matches the dry conditions lavender prefers. A 4 to 6 inch pot is sufficient for the first year. Gently slide the net pot contents into the new pot without breaking the root ball, backfill with soil, and water just enough to settle the medium. From here, treat it like any outdoor lavender: full sun, infrequent but deep watering, and minimal fertilizer.
Moving Lavender Outside
If you are in late spring or early summer and want to move the plant outside, you need to harden it off first. This means gradually introducing it to outdoor conditions over 7 to 10 days. Start by putting it outside in a shaded or partially shaded spot for 2 to 3 hours on day one, then increase outdoor time by an hour or two each day while slowly moving it into more direct sun. Skipping this step can cause sunscald or transplant shock even on a plant that has been thriving in a sunny window, because window light and outdoor sun are very different in intensity.
Lavender is hardy in USDA zones 5 through 9, so if you are in that range and nights are staying reliably above 50°F, it can go outside permanently after hardening off. In colder zones, bring it back inside before the first frost.
What Success Actually Looks Like
A healthy Modern Sprout lavender at the two-month mark should be compact and bushy with multiple stems, narrow gray-green leaves, and a noticeable herbal scent when you brush the foliage. If you are seeing that, you have done it right. Flower spikes on small stems may start to form around this time as well, though it varies by light levels and temperature. If you enjoyed this kit, the same brand makes kits for other compact plants like cherry blossom, mini rose, and mini sunflower, which each have their own quirks compared to the drier, slower-growing lavender.
The most important thing to take away from all of this: lavender wants light and wants to be slightly dry. The passive wicking system in these kits is genuinely well-suited to lavender's needs, as long as you resist the urge to fuss with extra watering. Set it up correctly, put it in your sunniest window, change the water weekly, and then mostly leave it alone.
If you need mini rose grow kit instructions, check the kit’s specific seed depth and watering method so you do not accidentally overwater during germination. If you need a refresher on the back to the roots lavender grow kit instructions, follow the same core steps for light, moisture control, and setup before troubleshooting. That is when lavender thrives.
FAQ
Can I mist the grow medium to help lavender germinate faster?
No. During germination, the wick pulls moisture up from the reservoir, and watering from the top can dislodge seeds or keep the surface too wet. If the surface looks dry, refill the reservoir (after removing and reseating the net pot) rather than misting more than a light mist, and only if the medium has truly dried away from the wick.
How long should I keep plastic wrap on the kit during germination?
Leave the plastic wrap on only until you see emergence, then remove it right away. Wrapping too long traps humid air, which increases surface mold risk. If you already see a little fuzzy growth, remove the wrap immediately, increase airflow, and let the surface dry slightly before resuming your normal schedule.
What should I do if lavender won’t sprout but the kit seems to be staying moist?
Check seed depth first. Lavender seeds should sit about a quarter inch under the surface. If they are deeper, sprouts may not have enough energy to reach light and can stall for weeks. If you watered from the top before sprouting, the seeds may have shifted deeper, so next try wick-only moisture and verify the reservoir stays in the proper range.
The reservoir level looks fine, but growth is stalling. How do I check the wick?
If the wick slips out of contact with the water, moisture delivery stops even if the reservoir looks full. Inspect that the wick is seated so it touches the reservoir water and is not twisted or pulled away. Then resume wick-only care, and change the reservoir as scheduled.
When is it too late to troubleshoot germination and ask for seed replacement?
It is normal for lavender to sprout slowly, especially in cooler rooms. A practical threshold is to wait up to 3 to 4 weeks before calling it a failure, since some models have longer germination windows. If nothing appears after about 4 weeks, contact Modern Sprout for a seed replacement instead of repeatedly restarting.
How often should I fertilize lavender seedlings in a Modern Sprout kit?
Use the plant food timing, not intuition. Seedlings usually do not need frequent feeding, and too much fertilizer can damage tender growth. Follow the one eighth teaspoon dose per 1.25 cups water, and only add it about once a month after the full water change cycle, not weekly.
What counts as “full sun” for the kit, and will a bright indirect room work?
Not exactly. “Full sun” means direct light exposure, not just bright indoor lighting. If you cannot provide consistent direct sun, switch to a grow light with long daily exposure, then reduce hours once seedlings are established to prevent overly stretched growth.
My daytime temperature is warm, but nights are chilly. Does that affect germination?
Yes, night cold can matter more than daytime warmth. If the temperature near the window drops below about 55°F at night, move the kit away from the glass after sunset or to a warmer spot so germination does not stall. The goal is steady conditions in the low-to-mid 70s during the germination window.
Is any mold normal, and what should I do if it shows up?
If a small amount of surface mold appears, it is often correctable without replacing anything. Remove plastic wrap, improve airflow, and let the surface dry slightly. If mold spreads onto the grow medium, gently scrape it off and pause until that surface dries for about a day, then continue normal reservoir changes.
How can I improve airflow without drying the seedlings out?
Yes, but only after emergence and only with careful handling. Once seedlings appear, you can give brief open-air time each day to reduce humidity, but avoid leaving seedlings drying out or exposing them to extreme temperature swings. Use short intervals, then return the kit to its usual spot.
Can I transplant lavender once it gets a few true leaves, even if it’s still in the kit?
Do not. The kit is meant to be left in place as roots grow down into the reservoir, and moving it can disrupt the root system and stunt growth. If you want a garden plant, pot it up early, around weeks 4 to 6 after sprouting, before roots become deeply established in the hydroponic reservoir.
I accidentally buried seeds too deep. Should I keep adjusting them after sprouting?
Sometimes you will not want to “save” a disturbed seed bed. If seeds were buried too deeply and then you over-corrected, the safest approach is to return to correct depth going forward and wick-only watering, because repeated top adjustments can increase disturbance and moisture imbalance. Expect that the best results come from stable conditions rather than frequent tinkering.