The Discovery DIY terrarium grow kit (sold under both the Discovery and Discovery #Mindblown brand names, blank" rel="noopener noreferrer">model 1016797) is a seed-and-crystal project where you grow rye grass in a domed terrarium base while simultaneously growing crystals for display. The Macy’s product listing for the Discovery #MINDBLOWN light-up terrarium grow kit specifies the included components as a terrarium with geodome lid, two crystal growing containers, two crystal powder packs, two crystal stones, a stirring spoon, rye grass seeds, potting soil mix, small stones, a seed planter, and a spray bottle blank" rel="noopener noreferrer">Macy’s listing for the Discovery #MINDBLOWN light-up terrarium grow kit includes the full parts list. Setup takes about 30 to 45 minutes, germination starts within 3 to 5 days of planting, and the LED light stick in the center lights everything up once your grass and crystals are ready. This guide walks you through every step in plain language, from identifying each part to keeping things healthy long-term.
Discovery DIY Terrarium Grow Kit Instructions: Setup to Care

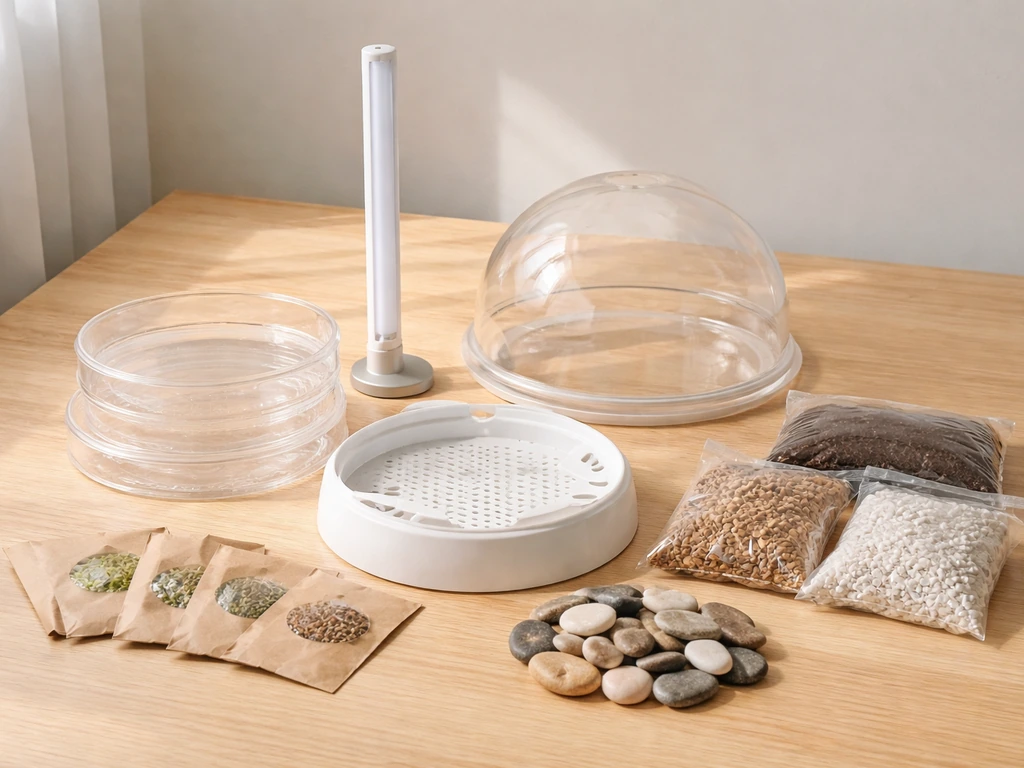
What's in the box and what each part does
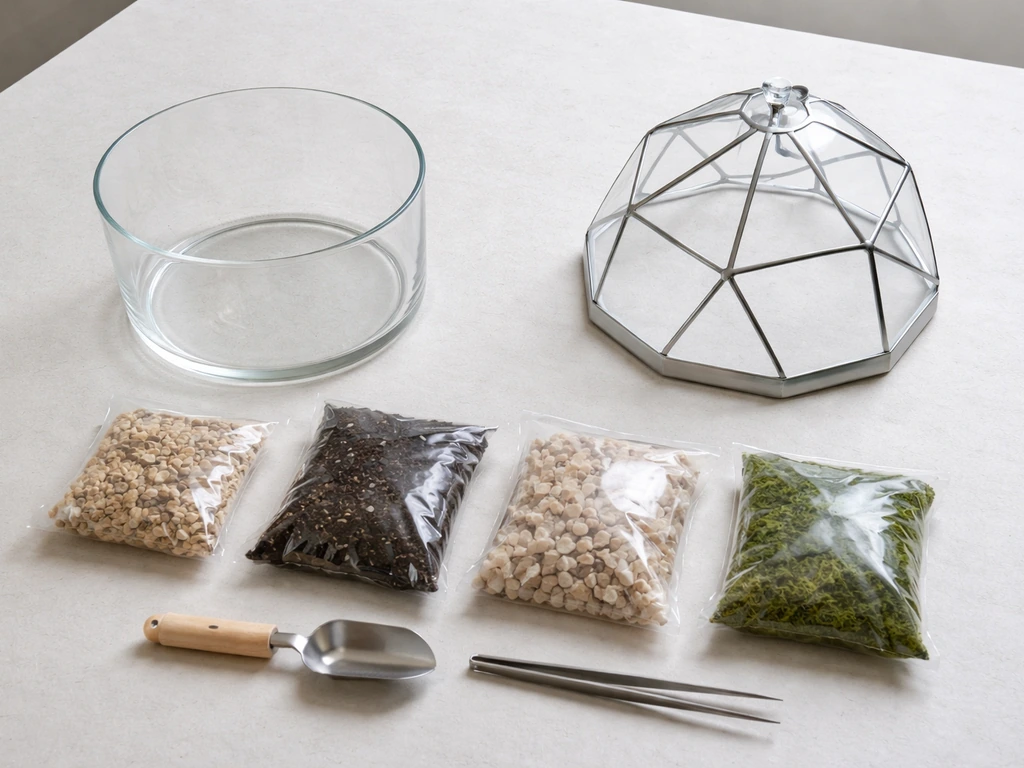
Before you start, lay everything out on a clean surface and match it against this list. Missing a piece is easier to catch now than halfway through assembly.
| Part | What it's for |
|---|---|
| Terrarium base | The main container that holds your soil and grass sections |
| Geodome lid | The clear dome that sits on top, traps humidity, and shows off the whole display |
| Central light stick | Battery-powered LED unit that mounts in the center and lights up the terrarium |
| Crystal display trays (x2) | Small containers that sit around the light stick to hold your growing crystals |
| Crystal powder packs (x2) | The dissolved powder you mix with water to grow crystals |
| Crystal stones (x2) | Starter stones that the crystals form around |
| Stirring spoon | For mixing the crystal solution |
| Rye grass seed pack | The seeds you plant in the soil sections of the base |
| Potting soil mix pack | Pre-measured soil to fill the planting sections |
| Small stones/rock pieces pack | Decorative stones to line the base or separate sections |
| Seed planter tool | A small tool to help press seeds into the soil evenly |
| Spray bottle/mister | How you water the seeds, gentle misting only during germination |
You will also need 3 AAA batteries (not included) and a small Phillips-head screwdriver to install them in the light stick. Have both ready before you start.
Plan before you build: light, space, and humidity
The Discovery terrarium grows rye grass, which is tough and fast-sprouting but still needs some light to stay green. Pick a spot near a window that gets indirect natural light for several hours a day. Direct blazing sunlight through glass can cook the grass and dry out the soil too fast, so a bright room without harsh direct rays is ideal. The LED light stick is decorative and a fun nightlight feature, but it does not replace natural light for the plants.
Think about moisture too. The geodome lid creates a mini humid environment, which is great for germination but can cause mold if there's zero airflow. A kitchen counter or a table in a ventilated room works well. Avoid putting it directly on a heating vent or next to a radiator.
One more thing: the manual specifically recommends doing the wet assembly steps (mixing soil with water, mixing crystal solution) over a kitchen sink with the drain plugged. This is genuinely good advice. Crystal solution and wet soil are messy, and working over a sink saves a lot of cleanup.
Step-by-step build instructions: unboxing through full assembly
Work through these steps in order. Don't skip ahead to planting before the light stick is installed, because the light stick sits in the center of the base and everything else is arranged around it.
Step 1: Install the batteries in the light stick
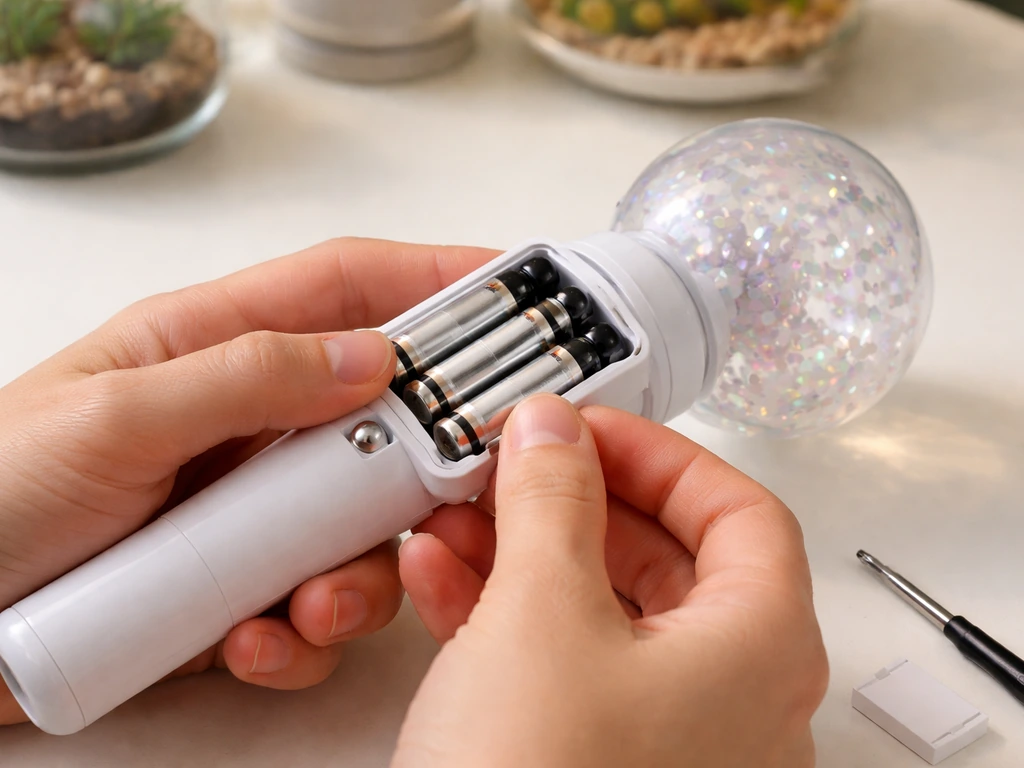
Use a small Phillips-head screwdriver to turn the battery cover screw counter-clockwise and remove it. Lift off the battery cover, insert 3 AAA batteries in the correct orientation (check the diagram inside the compartment), replace the cover, and tighten the screw back down. Press the gem button on the light stick to test it. If it lights up, you're good. Set it aside for now.
Step 2: Mount the light stick and crystal trays in the terrarium base
Place the terrarium base on your work surface. Fit the central light stick into its designated slot in the middle of the base. Then place the two crystal display trays around the light stick in their slots. These trays are where your crystals will grow and be displayed, so position them securely. The base should now have a central light stick flanked by two empty crystal trays, with the soil sections open around the outside.
Step 3: Prepare the potting mix
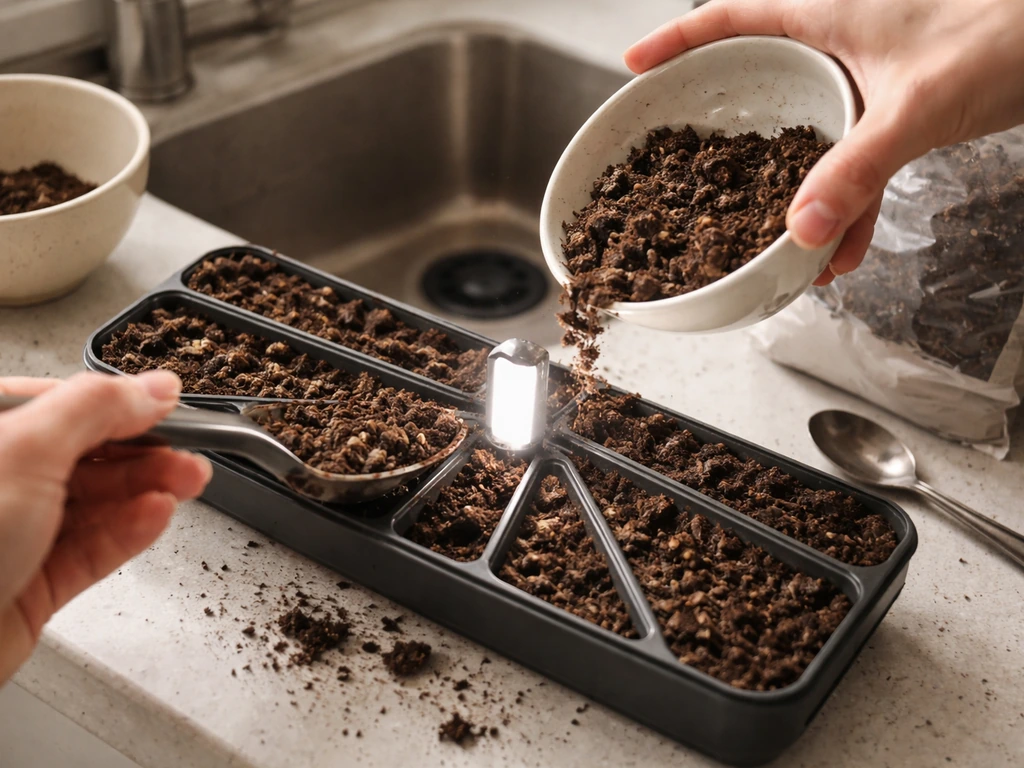
Move to your kitchen sink (plug the drain). Open the potting soil mix pack and pour it into a small bowl or directly into the planting sections of the base. Before adding the soil to the terrarium, add about half a cup of water to the soil and mix it well until it's evenly damp throughout. You're aiming for moist but not soggy. If you squeeze a handful and water drips out freely, it's too wet. Loosen it up and let some moisture evaporate, or add a tiny bit more dry soil if you have it.
Step 4: Fill the planting sections with moistened soil
Spoon or pour the moistened potting mix into the planting sections of the terrarium base around the light stick and crystal trays. Don't overfill. Leave a little room at the top so seeds and small stones have space. Press the soil down gently so it's firm but not packed solid.
Step 5: Add small stones

Sprinkle the small decorative stones over the base as directed in your specific kit layout. Some versions use them to separate sections or create a rocky border. Adjust placement to your liking as long as the soil planting area stays clear for seeds.
Planting the rye grass seeds
Rye grass is one of the fastest-sprouting seeds you can grow indoors, which is exactly why this kit uses it. Done right, you'll see tiny green shoots within 3 to 5 days.
- Open the rye grass seed pack and sprinkle seeds evenly over the moistened soil sections. Don't pile them all in one spot.
- Use the seed planter tool (or just a clean finger) to gently press each seed down into the soil. They should be lightly pressed in, not buried deep. Surface contact with moist soil is all they need.
- Fill the spray bottle with clean water and mist the seeds gently. You want the surface damp, not flooded. A few passes of the mister is enough.
- Do not put the geodome lid on yet. Leave the terrarium open at this stage so the seeds get a little airflow and don't rot before they sprout.
The key mistake beginners make here is overwatering right after planting. The mister is your only watering tool during germination, and there's a reason the kit provides it instead of a watering can. Rye grass seeds need moisture at the surface, not a flood below.
Setting up the crystal growing trays
While your seeds are germinating over the next few days, you can start the crystal growing process. Follow the crystal kit instructions included in your manual: place one crystal stone in each display tray, mix one crystal powder pack with the specified amount of water (still at the sink), stir well with the stirring spoon, and carefully pour the solution over the crystal stone in each tray. The crystals take a similar amount of time to form as the grass takes to sprout, so both should be ready around the same time.
Care schedule after setup
Once the seeds are planted, your main job is consistent daily misting and watching the environment inside the dome. Here's a simple routine to follow.
| Timeframe | Task |
|---|---|
| Days 1–5 (germination) | Mist seeds once daily with the spray bottle. Keep the terrarium open (no lid). Check that soil surface stays damp but not pooling. |
| Days 5–10 (early growth) | Once green shoots appear, continue daily misting. You can place the geodome lid loosely on top to increase humidity, but lift it briefly each day for airflow. |
| Week 2 onward (established grass) | Mist every 1–2 days depending on how quickly the soil dries out. Check condensation on the inside of the dome. If it's heavy, lift the lid for 15–20 minutes. |
| Ongoing | Press the gem button on the light stick for the glow display. Keep the terrarium near indirect light during the day. |
Humidity inside the closed dome will build naturally. That's normal and good for keeping the grass lush. The problem only starts when the inside is so wet that water pools on the soil surface or the dome fogs up completely every single day without clearing. If that's happening, increase airflow by propping the lid slightly or lifting it daily.
Light timing is simple: no special grow light schedule is needed. Natural daylight from a nearby window is enough. The LED light stick is for display, not plant growth, so you can press it on in the evening and off when you go to bed, or just leave it running on batteries until they need replacing.
Troubleshooting common problems
Mold or fuzzy white growth on the soil
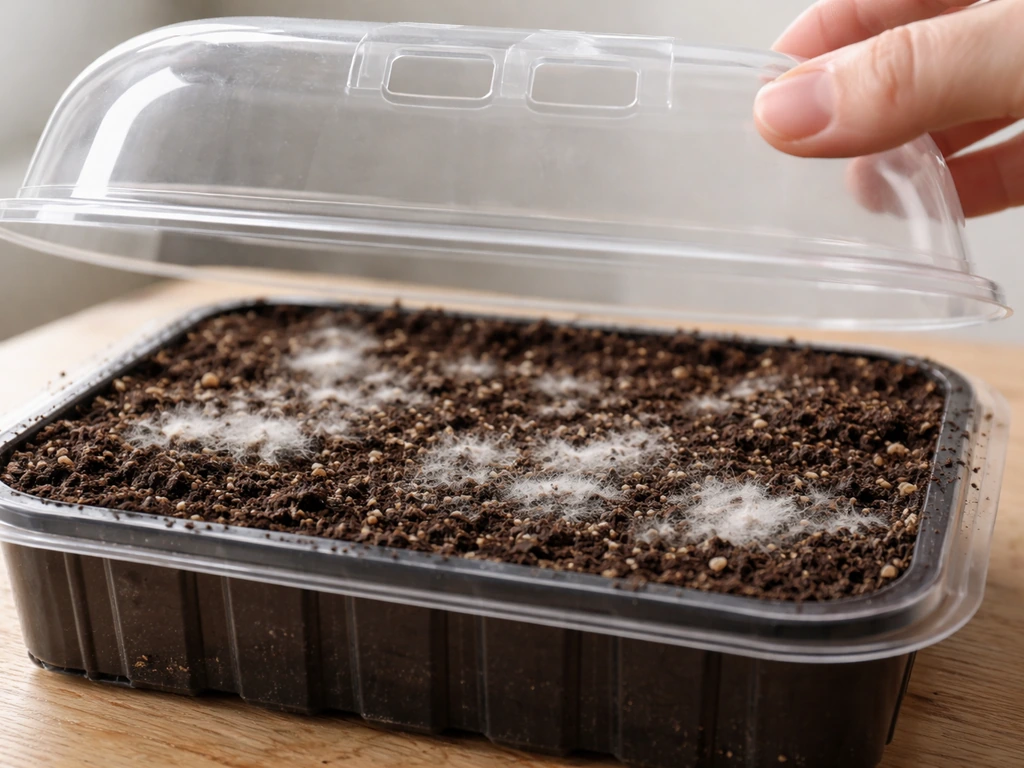
This almost always means too much moisture and too little airflow. Remove the geodome lid completely for a day or two to let the soil surface dry out slightly. Cut back misting to once every two days. If the mold is on the soil surface only and hasn't reached the seeds or stems, the grass will likely be fine. Scrape the moldy layer off gently and improve ventilation going forward.
Soil looks dry and grass is wilting
Increase misting frequency back to daily. If the kit is near a heat source, move it to a cooler spot. The geodome lid helps retain moisture, so if you've been leaving the lid off entirely for days, put it back on loosely to slow evaporation.
Green algae forming on the sides of the base or dome
Algae grows when there's water and light together with no air movement. It's not harmful to the grass, but it looks messy. Wipe the inside of the dome with a damp cloth and move the terrarium slightly away from very bright direct light. Lift the lid daily to disrupt the stagnant moist air that algae loves.
Heavy condensation on the dome
Some condensation is normal and actually a sign your terrarium ecosystem is working. Heavy fogging that doesn't clear by midday usually means you're overwatering. Skip a misting session, prop the lid open for a few hours, and then go back to every-other-day misting. The goal is visible moisture on the inside but not running droplets that pool at the base.
Seeds not germinating after 7+ days
Check three things: Is the soil actually damp at the surface where the seeds are sitting? Rye grass seeds need surface moisture, not just deep-down dampness. Are they getting any light? Even a dim corner can slow germination. Did the seeds get pressed into the soil? Loose seeds sitting on top without soil contact will struggle. Re-press any that look like they're just sitting on the surface and mist again.
Bad smell from the terrarium
A sour or rotten smell usually means organic matter (dead seeds, overwatered soil) is decomposing anaerobically. Take the lid off, remove any obviously dead or rotting plant material, let the soil dry out for 24 hours, and then restart with lighter misting. If the whole soil pack smells bad even when dry, the soil may have been contaminated before planting. Start fresh with new potting mix if needed.
Grass growing unevenly or very sparse
Uneven growth usually means seeds were clumped in one area during planting. Lightly sprinkle a few extra seeds from any leftover seed supply into the bare patches, press them in, and mist. Sparse overall growth after two weeks may just be a light issue. Move the terrarium to a brighter spot near a window.
Long-term care, replanting, and knowing when you've succeeded
Rye grass in a small terrarium grows fast but doesn't last forever indoors. After 3 to 4 weeks of healthy growth, the grass will start to yellow or thin out as the limited soil nutrients get used up. That's completely normal and not a failure. This is a natural cycle.
When and how to replant
When the grass starts to fade, lift the geodome lid, remove the old grass and spent soil, and wipe the terrarium base clean with a damp cloth. Fresh potting mix and new seeds (rye grass seeds are cheap and widely available at garden centers or online) let you run another full cycle. The light stick, crystal trays, and dome are all reusable. If your crystals have dissolved or crumbled, replacement crystal growing kits are also available separately.
Basic maintenance between cycles
- Wipe the inside of the geodome lid with a damp cloth to remove algae or mineral deposits
- Check the battery level in the light stick when the LED dims noticeably
- Rinse the spray bottle and let it dry between cycles to prevent mold buildup inside
- Inspect the crystal trays for residue and rinse before starting a new crystal grow
What success actually looks like
If your rye grass sprouts within 5 days, reaches a couple of inches tall in two weeks, and your crystals have formed visible structures in the display trays, you've nailed it. Press the gem button on the light stick, put the dome on, and enjoy the glow. That's the full Discovery terrarium experience working exactly as intended. Don't stress about perfection. A slightly uneven lawn and small crystals is still a win, especially for a first attempt.
If you're also looking at related Discovery kits, the Discovery Glow Grow and Discovery #Mindblown Glow Grow versions share a lot of this same setup logic but have some differences in their light components and crystal instructions. The Sharper Image Glow Grow Garden is another popular comparison kit that's worth checking out if you want something with more planting variety. If you are comparing kits, the Sharper Image Glow Grow Garden is a useful alternative to look at alongside these Discovery instructions. But for the standard Discovery DIY terrarium grow kit covered here, the steps above cover everything in the manual in a way that actually makes sense.
FAQ
How long do I keep the geodome lid on during the first few days after planting and crystals are started?
Keep the lid on for germination, but if the dome fogs so it never clears or water pools on the soil, prop the lid slightly or lift it daily to restore airflow. For most kits, you only start removing the lid for brief drying periods if condensation becomes consistently heavy.
What if I forgot to do the wet assembly steps over the sink, can I still continue the project safely?
Yes. Just take extra care to prevent crystal solution and saturated soil from getting onto surfaces you cannot wash easily. Wipe up spills immediately and allow any damp areas to dry before placing the terrarium back in its growing spot.
My rye grass looks uneven, but mold is not present. Should I add more seeds or only adjust misting?
First confirm surface moisture and seed contact. If patches are visibly bare after checking those two factors, add a small number of extra seeds to the bare spots, press them lightly into the soil, then mist. If everything looks moist and pressed but growth is patchy, reduce misting slightly and increase ventilation to avoid damping the surface.
Can I use tap water for the mister and the crystal mix, or does it need to be distilled?
For the mister and crystal solution, use normal water unless your manual specifies otherwise. If your tap water is very hard or leaves heavy residue, rinse the dome and trays after the crystal step and wipe the inside gently during maintenance to reduce buildup.
How do I know the soil is damp enough without overwatering during germination?
After mixing, the soil should feel evenly moist, not dripping wet. A practical test is to press a small handful, it should hold shape and feel damp, but you should not see water squeezing out. During the germination window, mist lightly and consistently rather than saturating.
Is it okay to run the light stick during the day and leave it on all the time?
Yes for display. It is intended to be decorative and does not replace natural daylight for the rye grass, so you can run it in the daytime if you want. If you notice the dome staying warmer than usual, move the kit away from heat sources and keep an eye on condensation.
Should I mist the dome walls or only the soil surface?
Focus on misting the soil surface area where seeds are located. Misting the dome walls can increase overall humidity and condensation without improving seed moisture at the right depth. If condensation is already heavy, skip misting and increase airflow instead.
What should I do if mold appears but it is only on the soil surface near the edges?
Remove the moldy surface gently so you do not disturb seeds. Then improve ventilation by propping the lid slightly and reduce misting frequency. If the mold keeps returning within a day or two, remove the lid for longer drying sessions and consider moving the kit to a cooler, better ventilated spot.
My crystals are not forming or are taking much longer, what are the most common causes?
The biggest issues are incorrect water amount when mixing the crystal powder, incomplete stirring before pouring, and disturbing the tray while crystals are forming. Make sure each tray gets one crystal stone and that the solution is poured carefully to cover the stone as directed, then keep the kit out of drafts that could cause frequent lid changes.
Can I reuse the trays and light stick for a second cycle, and do I need to clean them differently?
Yes, the light stick and dome are reusable. After removing spent grass, wipe the inside with a damp cloth and let everything dry fully before starting again. For the crystal trays, wash off any remaining residue and ensure they are completely dry before adding fresh stones and solution.
What if the terrarium starts smelling bad but I still see some green shoots?
Treat it as an overwatering or decomposition issue. Remove the lid, remove obvious dead material, then let the soil dry with the lid off for about 24 hours before resuming with lighter misting. You can keep any healthy shoots, but address the soil condition quickly so the odor does not worsen.