
Set your shiitake grow kit in a spot between 59–70°F (15–21°C), give the block a cold soak to trigger pinning, then maintain 80–90% humidity with fresh air twice a day. Pins usually appear within 5–14 days, and your first harvest follows about a week after that. The exact steps depend on your specific kit style, so this walkthrough will flag the decision points so you can match each step to what's in front of you.
Shiitake Grow Kit Instructions: Step by Step Setup to Harvest

Marcus Thornfield
6 Jul 2026
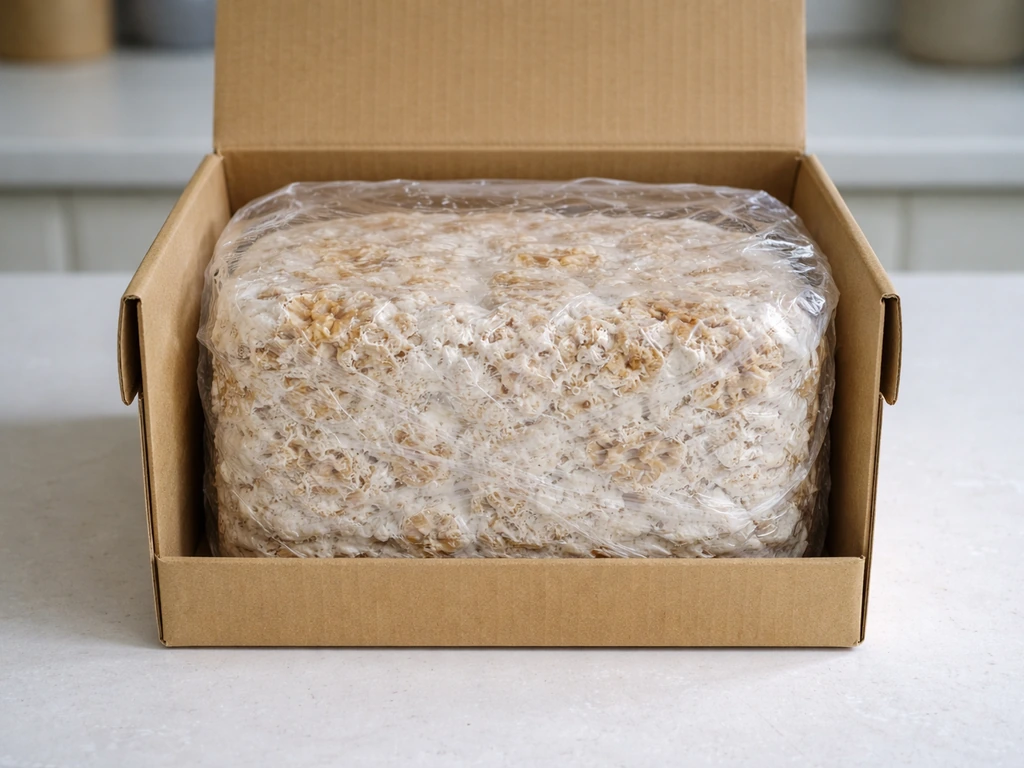
What's inside your shiitake grow kit
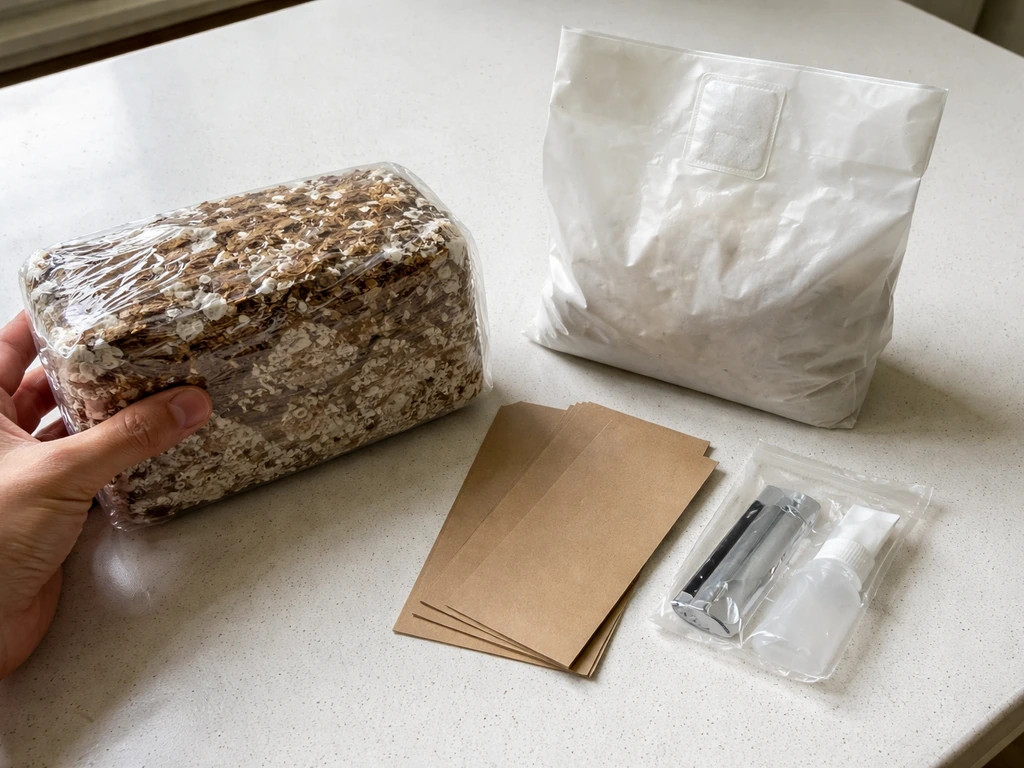
Before you touch anything, take everything out and identify what you have. If you also need a full walkthrough, you can follow bonsai grow kit instructions for general setup and care routines that translate to small-scale growing identify what you have. Most consumer shiitake grow kits center around a fully colonized fruiting block, which is a compressed log of hardwood sawdust (sometimes mixed with wheat bran or rice bran) that's already been inoculated with shiitake mycelium and left to colonize fully at the facility before shipping. That white, fuzzy, or cottony surface you see on the block? That's the mycelium doing its job. It's not mold.
Beyond the block itself, here's what different kits typically include:
- Fruiting block (the main substrate log, usually in a sealed plastic bag): this is where all the mushrooms will grow from
- Plastic grow bag or sleeve: keeps the block humid and protected during shipping and incubation; some kits fruit directly through a slit in this bag, others have you remove the block entirely
- Humidity tent or humidity dome: a clear plastic bag or dome that you place over the block during fruiting to trap moisture
- Spray bottle (not always included): used to mist the block surface and tent interior to maintain humidity
- Printed instruction sheet: always read this first, since the specific steps vary by brand and block type
- Some kits also include a small tray or drip pan to catch water runoff
Check whether your kit uses a bag-based fruiting setup (you cut the bag and fruit inside it), a remove-and-place setup (block comes out and goes into a humidity tent), or a pre-drilled container or bucket. Kits from brands like North Spore typically have you remove the block from the bag before fruiting, while some other brands instruct you to cut a small X or slit in the bag and fruit right through it. This single difference changes several steps that follow, so figure it out now before you do anything else.
Prepping the kit for fruiting
If your block just arrived and looks stressed
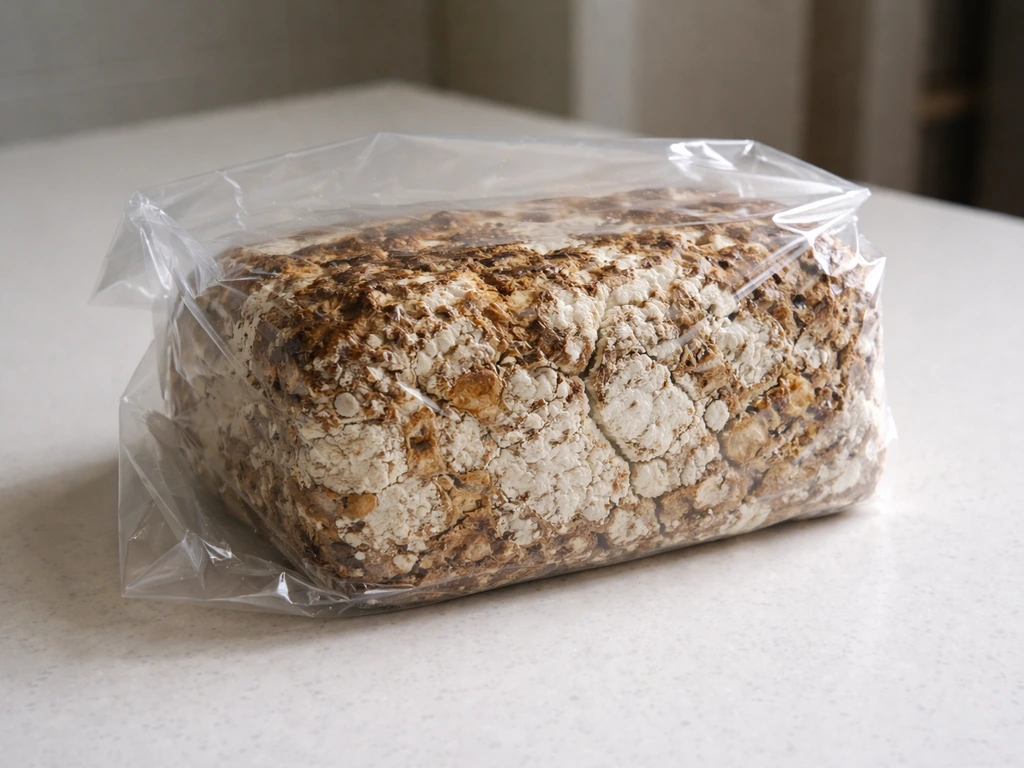
Shipping is rough on shiitake blocks. If yours arrived cracked, dented, or with patchy surface areas, don't panic and don't open the bag yet. Instead, unfold the top of the bag slightly to create some air space inside, but keep the block sealed and undisturbed. Leave it at room temperature (60–70°F) for up to 10 days. The mycelium needs time to recover from transit stress, and opening it up too early just invites problems. Once the block looks uniformly white and healthy again, move on to the next step.
The cold soak: how to trigger your first flush
Shiitake naturally fruit after a cold, wet period, like a rain event in the forest. Your kit replicates this with a cold soak. The specifics vary, but the two most common approaches are:
- Short soak (20 minutes): used for most modern fruiting-block kits; remove the block from its bag, submerge it completely in cool water for 20 minutes, then lift it out and let it drain cut-side down for about 10 minutes before moving to fruiting conditions
- Long soak (4 hours): used for some kit brands and for triggering second flushes; submerge the block (weighted down so it stays under water) in cold water for the full 4 hours, then drain thoroughly
After soaking, do not return a shiitake block to its original sealed bag. If you are following the Jonsteen Company bonsai grow kit instructions, make sure the steps line up with your kit type and the temperature, humidity, and airflow guidance in this article. The block needs airflow now. If your kit instructions say to fruit inside the bag, they usually mean a loosely arranged humidity tent or a bag with holes, not the original sealed packaging. Log-based kits follow a longer traditional cycle where logs are soaked for around 24 hours, and fruiting typically begins 7–10 days after that.
Where to place your kit
After soaking, placement matters a lot. Put the block somewhere with indirect light (a windowsill with filtered light or a spot near a grow light works great, but avoid direct harsh sunlight), a stable temperature between 59–70°F, and good airflow. Shiitake like temperatures on the cooler side. A kitchen counter, a basement shelf, or a laundry room are all solid options. Avoid spots near heating vents, radiators, or anywhere temperatures swing more than 10 degrees throughout the day, because temperature instability during the first week after cold shocking is one of the most common reasons pins abort before they form properly.
Incubation vs fruiting: what your block actually needs
Consumer shiitake grow kits usually arrive fully colonized, meaning the incubation phase is already done for you. You're starting at the fruiting phase. But it helps to understand the difference, because some kits do include a short rest or recovery period that resembles incubation.
| Phase | Temperature | Humidity | Light | Airflow |
|---|---|---|---|---|
| Incubation (pre-colonized, may not apply) | 65–75°F (18–24°C) | Not critical, keep from drying out | None needed (dark is fine) | Minimal, sealed bag is okay |
| Recovery after transit | 60–70°F (15–21°C) | Maintain bag seal | Indirect or none | Limited, bag mostly closed |
| Fruiting (active phase) | 59–70°F (15–21°C) | 80–90% RH | Indirect light 12 hrs/day | Moderate fresh air exchange, twice daily minimum |
During the fruiting phase, humidity and fresh air exchange (FAE) are the two levers you're constantly managing. High humidity without enough fresh air leads to CO2 buildup, which causes long, stringy stems and small caps. Too much airflow without enough humidity causes the block surface to dry out and pins to abort. You're looking for the balance: 80–90% humidity with regular fresh air exchanges every day.
How to trigger pinning and manage daily care
Setting up humidity without a fruiting chamber
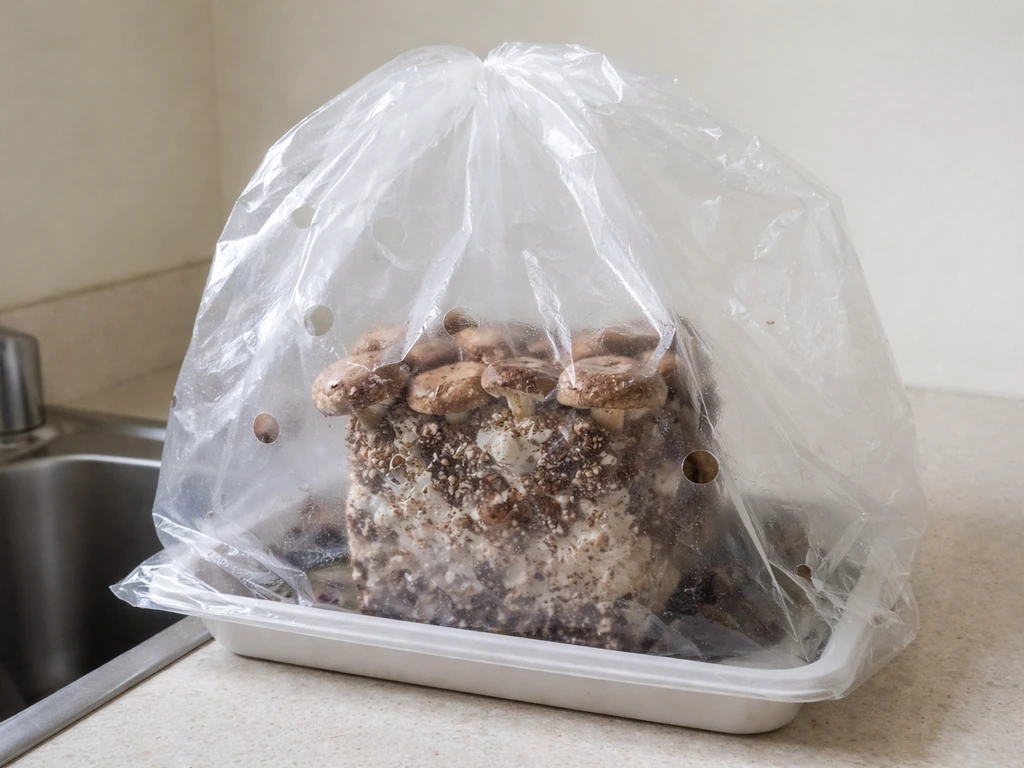
You don't need expensive equipment to fruit shiitake. One of the most reliable low-tech setups is a large plastic grocery bag with several quarter-sized holes poked into it. Place it loosely over the block like a tent. Twice a day, lift the tent off, spray the block and the inside of the tent generously with clean water from a spray bottle, then replace it. If you don't have a spray bottle, you can place a small container of water inside the tent and give the block a quick dip in cold water once a day instead.
If you have a Martha tent, an automated humidity chamber, or a monotub, the process is similar but dialed in differently. If your kit includes a desert rose bonsai hydro grow kit, the humidity tent style guidance can help you dial in conditions during fruiting. In an automated setup, keep the humidity running and let the fan cycle, then just wait about two weeks for new pins after a reflush. In a non-automated monotub, open it twice daily and spray generously. The core principle is the same regardless of setup: high humidity plus a regular dose of fresh air.
What to expect day by day
- Days 1–3 post-soak: The block surface may look slightly wet or tacky. This is normal. Maintain humidity and resist the urge to over-handle it.
- Days 3–7: Look for tiny white or tan bumps forming on the surface. These are primordia (the technical term for early-stage pins). They often appear first around the cut opening or scored surface.
- Days 5–14: Pins elongate and start forming recognizable mushroom shapes. Caps are small and domed. Keep humidity up and keep giving fresh air twice a day.
- Days 7–14 and beyond: If nothing is happening by day 14, that's your signal to try a re-soak (more on this in the troubleshooting section).
One thing beginners get tripped up on: the 'popcorning' stage, where the block surface looks bumpy or bubbly. This is the mycelium reacting to the change in conditions, not a sign that mushrooms are about to explode. The actual pins look like tiny dark dots or nubs, not foam. Be patient here.
Harvesting shiitake correctly
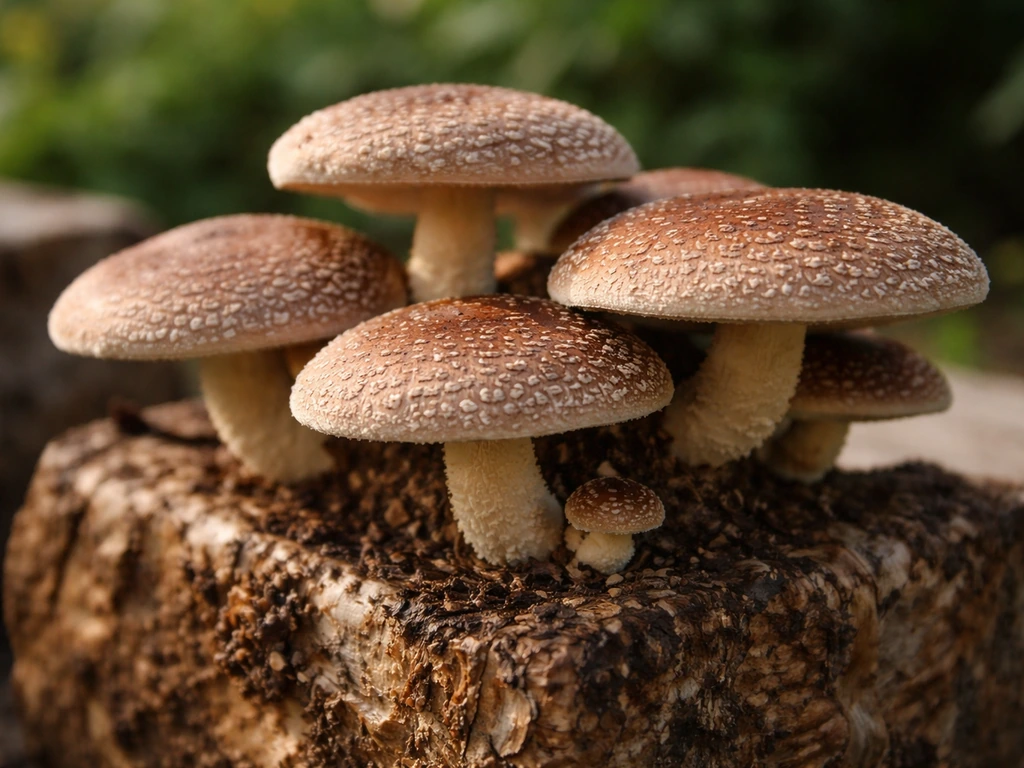
When to harvest
Timing your harvest well makes a real difference in flavor and yield. The window is when the cap has broadened and flattened out but the edge is still slightly curled under. The veil (the thin membrane that connects the underside of the cap to the stem) should have broken away, exposing the gills underneath. If the cap is fully flat or even cupping upward with the edges curling up, you've waited a bit too long. Harvest before that happens. Spore drop happens fast with shiitake, and you don't want a cloud of brown spores all over your kitchen.
How to remove them without damaging the block
You have two good options: twist the mushroom at the base with a gentle clockwise-counterclockwise motion until it releases, or cut it cleanly at the base with a sharp knife. Both work fine. What you want to avoid is yanking straight up with force, which can tear the mycelium in the block and create a wound that invites contamination. If a small stub remains on the block after harvesting, that's okay. It will dry up and fall off or get absorbed.
After harvesting, store your shiitake in a paper bag (not plastic) in the refrigerator and use them within a week. Always cook shiitake before eating, as they contain a compound that causes reactions in some people when eaten raw.
Getting a second flush (and beyond)
After the first harvest, remove any remaining stubs from the block surface and let it rest uncovered for about two weeks. This rest period lets the mycelium recover and rebuild energy reserves. After the rest, soak the block again in cold water for 4 hours (weigh it down so the whole block stays submerged), drain it thoroughly, then put the humidity tent back on and resume your twice-daily misting routine. Most shiitake blocks can yield two to three flushes total before exhausting the substrate. Yields typically decrease with each flush, which is normal.
Troubleshooting: when things go sideways
No pins after two weeks
This is the most common problem, and the fix is almost always another cold soak. If two weeks have passed since your initial soak and nothing is growing, remove the block from the humidity tent and submerge it in cold water for 20 minutes to 4 hours (depending on your kit brand's recommendation), then drain and return to fruiting conditions. Make sure your temperature is genuinely in the 59–70°F range, not creeping above it. Warmth is a growth suppressor for shiitake. Also check that your humidity is actually hitting 80–90% and that you're providing real fresh air exchanges, not just occasional peeking.
Pins forming but then dying or aborting
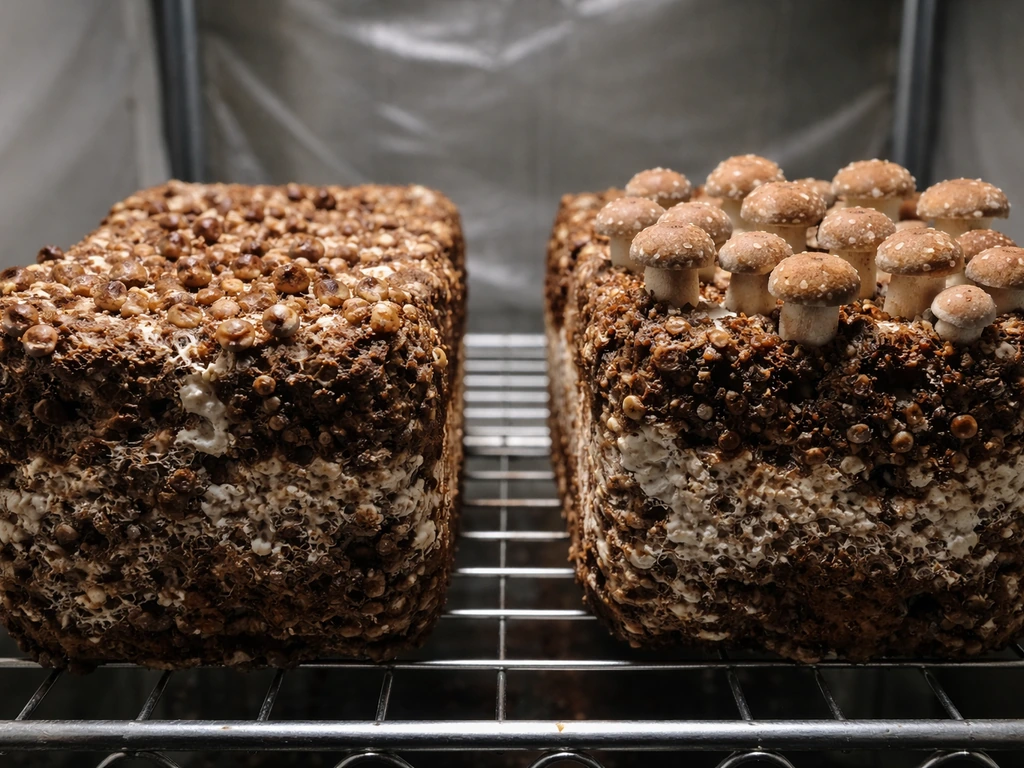
Pin abortion in the first week is almost always a temperature problem. A warm spot, a heating vent nearby, or a temperature swing of more than 10°F is enough to stall the process. Move the kit to a cooler, more stable location. Low humidity is the other culprit. If the block surface looks dry or the tiny pins look shriveled, increase your misting frequency and make sure your humidity tent is sealing in moisture properly.
Low yield or small mushrooms
Small caps and thin stems usually mean too much CO2 and not enough fresh air. Open the tent more often or add more holes to your humidity tent. Also check the block itself: if it's shrinking noticeably in size or feels very light, the substrate may be depleted, especially if this is the second or third flush.
Block drying out
If the surface of the block feels dry, rough, or cracked between mistings, your humidity tent isn't holding moisture well enough. Reduce the size or number of holes in the tent, mist more generously, or do a quick soak of the block surface by pouring a cup of cold water directly over it before re-tenting. A very dry block can also benefit from a short 20-minute submersion soak before returning to fruiting conditions.
Too much moisture or pooling water
If water is pooling under the block or the surface looks slimey and waterlogged, ease up on misting and increase airflow. Lift the humidity tent fully for 30–60 minutes during your fresh air exchanges to let excess moisture evaporate. Standing water at the base of the block is a contamination risk, so if you're using a tray, empty it regularly.
Weird or malformed growth
Long, skinny stems with tiny caps (called 'pins on stilts') almost always mean CO2 buildup from insufficient fresh air exchange. Caps that crack or look rough on top can indicate low humidity during the period the cap was forming. Mushrooms growing sideways or downward are responding to gravity and light, which is fine and doesn't affect flavor. If growth looks genuinely abnormal (no cap development at all, mushy tissue at the base), check for contamination.
Contamination and mold control
Wait before assuming it's mold
This is probably the most important thing to know: the mycelium on your block can look almost identical to white mold. A soft, white, fluffy or powdery coating on the block surface is very commonly just healthy mycelium doing its thing. Don't scrape it off, don't pour hydrogen peroxide on it, and don't throw the block out without investigating further. If you're unsure, take a clear photo and reach out to the kit manufacturer with it. Most reputable brands (North Spore, for example) will actually look at your photo and tell you what you're seeing.
Signs of real contamination
True contamination shows up in specific colors and textures that mycelium doesn't produce. If you see green, black, orange, or pink patches on the block, that's a serious warning sign. Green is almost always Trichoderma (a very common mold competitor), black and orange patches can indicate other mold species or transit damage. If you see any of these, photograph the block and contact the manufacturer. Do not try to cut out or ignore colored patches, as the contamination may already be deeper in the substrate than it appears.
What to do immediately if contamination is confirmed
- Move the block away from any other grow kits you have in the same space immediately
- Seal it in a plastic bag before disposing to avoid spreading spores around your home
- Wipe down any surfaces the block touched with a diluted bleach solution
- Photograph and document the contamination, then contact your kit's manufacturer for a possible replacement
Preventing contamination in future flushes
Prevention is mostly about hygiene and airflow management. Wash your hands before handling the block. Use clean water for soaking and misting. Remove any harvested stubs cleanly rather than leaving torn tissue behind. Avoid overwatering, because standing water at the base of the block is a prime contamination entry point. Also make sure the space you're fruiting in has decent air circulation and isn't in a corner where stale, humid air just sits. Between flushes, the rest period with the block uncovered also helps dry out any surface contaminants before the next soak.
Shiitake grow kits are genuinely forgiving once you understand the rhythm of soak, fruit, rest, repeat. Most problems trace back to temperature, humidity, or airflow being off, and all three are fixable with small adjustments. If you've been following kit instructions for a different style of grow kit (bonsai grow kits or seed-starting kits, for example), keep in mind that mushroom cultivation runs on completely different logic: it's less about soil nutrition and more about mimicking the specific environmental trigger that tells the mycelium it's time to reproduce. If you are using a grow kit meant for a buddha bonsai look, follow the grow buddha bonsai kit instructions for its specific soak, humidity, and timing. Get that environment right, and the mushrooms basically do the rest.
FAQ
Can I pause the process for a few days and then restart my shiitake grow kit instructions?
You can, but only if you keep the block in a clean, breathable humidity setup. If you store it in a sealed bag after you start fruiting, CO2 can build up and you may get stringy stems or aborted pins. If you must pause, move the block to the same 59 to 70°F range and mist only enough to prevent drying, then resume your usual twice-daily misting and fresh-air schedule when you’re home.
How do I know if I should change the number or size of holes in a DIY humidity tent?
Bigger holes usually mean more drying, so the timing changes. Start with fewer holes if you notice the block surface drying between mistings, then increase slowly only if you see CO2 symptoms like long thin stems with small caps. As a simple rule, adjust one variable at a time, keep humidity roughly 80 to 90%, and aim for fresh air exchanges that are frequent but not blasting.
What’s the best way to measure temperature correctly for shiitake fruiting?
Temperature swing matters more than absolute humidity in the first week. Use a thermometer that can be placed at block height, not just on the counter. If readings drift above about 70°F, pins can stall or abort, so choose a location away from vents and windows that warm up with sun.
What happens if I opened the bag too early or deviated from the kit steps during recovery?
If you accidentally open the original sealed packaging during recovery or cold shock, the block is not automatically ruined, but you may increase drying and contamination risk. Put it back into a fruiting method your kit supports (humidity tent or loosely arranged bag with holes). Keep it at 59 to 70°F and prioritize humidity plus fresh air, then watch for steady pin development rather than instant results.
Do shiitake need bright light to fruit, or can they grow in low light?
Yes, but avoid direct sun that creates hot spots or rapidly changes temperatures. Indirect light is fine, and mushrooms can fruit with minimal light. What matters most is consistent cool temperature, stable humidity, and regular fresh air exchange.
How can I tell whether my misting amount is too much or too little?
Use cold, clean water, and keep soaking consistent with your kit. For misting, spray enough to wet the surface but not so much that you see puddles forming. If you see water pooling at the base, reduce misting and extend your fresh-air exchange so excess moisture evaporates.
How do I harvest at the right stage to prevent excessive spore drop?
Stop harvesting when the veil has already broken and the gills are exposed, and the cap is flattened with edges still slightly curled under. If the caps are fully flat or edges are curling upward, you may have waited too long because spores can drop quickly. If you want to minimize spore mess, harvest promptly and remove mushrooms before they fully spread out.
Should I remove every tiny stub after harvesting, or can I leave some?
Yes, stubs are usually fine, but don’t leave large torn tissue. After harvesting, gently remove leftover stubs so you don’t create a wound that stays wet and attracts contamination. If a stub is stubborn, let it dry a bit during the uncovered rest, then remove only what easily releases.
If my mushrooms tear when I harvest, what should I change in the next flush?
Some kits work with either knife or a gentle twist, but what you should avoid is tearing the block surface. If mushrooms are stuck, harvesting too early or too wet can make tearing more likely. Aim to harvest at the veil-break stage, use a clean knife or gentle twist, and harvest in a way that removes the mushroom with minimal disruption.
My kit isn’t fruiting after the first cycle, what troubleshooting order should I follow?
If growth is stalled after a couple weeks, confirm it’s not just slowed rather than stopped by checking the block surface dryness and your actual fresh-air exchange. Then do the secondary cold soak your kit supports, keep the room truly in the 59 to 70°F range, and ensure humidity reaches 80 to 90% during the period you expect pins to restart.
Should I scrape or disinfect white fuzzy growth to prevent mold?
No, hydrogen peroxide can damage healthy mycelium and can also mask issues you should actually identify. Instead, verify whether what you see is normal mycelium (white, fuzzy, cottony) or true contamination (colored patches like green, black, orange, or pink). Take a clear photo and contact the manufacturer if you are uncertain.
How do I distinguish between healthy mycelium and true contamination?
Colored patches (green, black, orange, pink) are a stronger indicator of contamination. Also, contamination that looks slimy or spreads with unusual colors is more concerning than texture differences in white mycelium. If any of those colors show up, isolate the kit, photograph it, and contact the manufacturer promptly rather than cutting blindly.
How should I store and use harvested shiitake safely?
For food safety, store in a paper bag in the refrigerator and cook before eating. Raw shiitake can cause adverse reactions in some people, especially if eaten uncooked. Use within about a week for best quality and discard if they become overly slimy or smell off.
How can I tell whether low yield is from conditions or from substrate exhaustion?
You can run out across multiple flushes, and yields typically decline after each flush. If the block shrinks noticeably, feels much lighter than before, or you get fewer and smaller pins, that’s often substrate exhaustion rather than a humidity issue. The practical next step is usually a re-soak per the kit cycle, then accept that later flushes may be lower.