
Drop your grow-a-sloth toy into a container of room-temperature water, leave it alone for 24 to 72 hours, and watch it swell to several times its original size. That's the core of it. But the exact steps, timing, and what to watch for depend on which type of kit you have, a water-expandable foam or polymer toy, a seed or moss sprouter, or a small build-and-grow assembly kit. This guide walks you through all three so you can match the instructions to your specific sloth and get a good result the first time.
Grow a Sloth Toy Instructions: Step-by-Step Kit Guide

Marcus Thornfield
21 Jul 2026
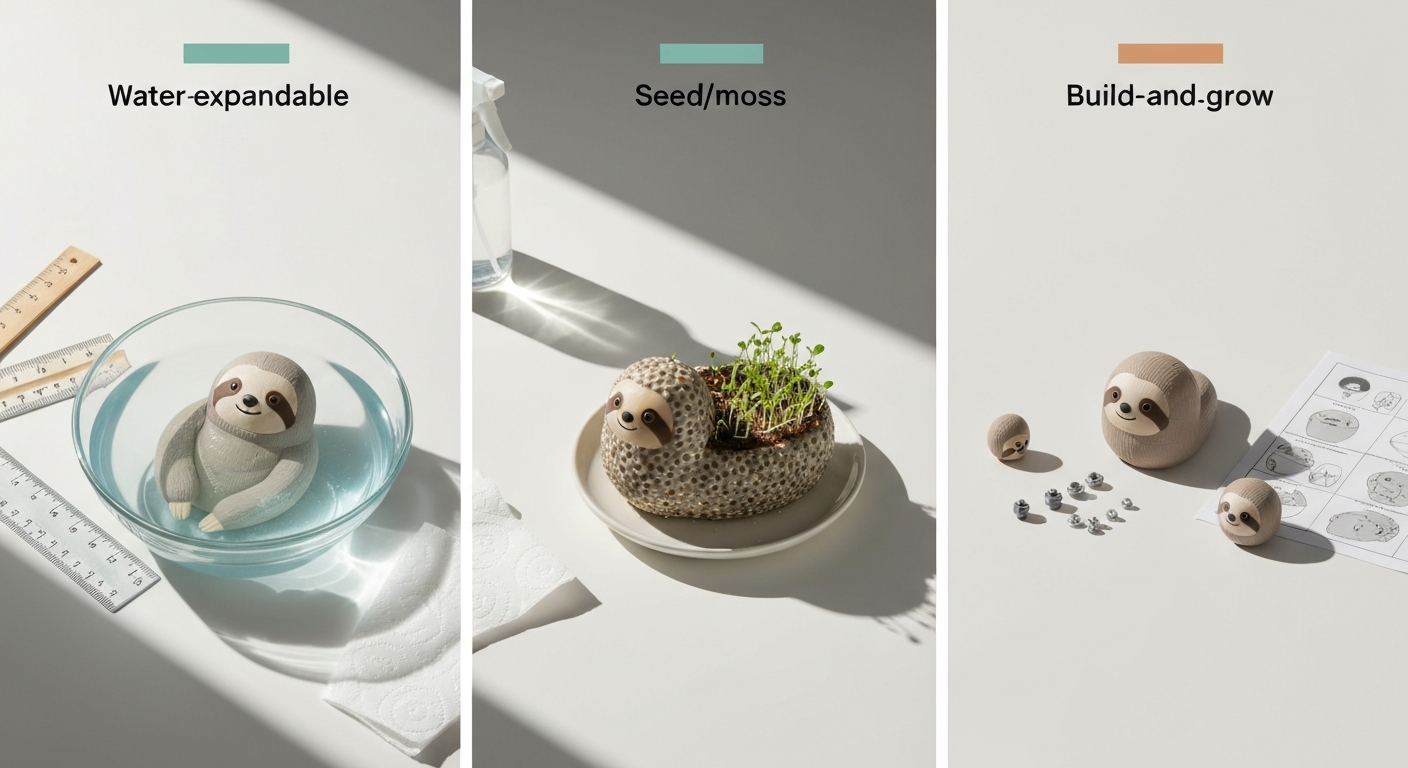
What 'Grow a Sloth' kits actually are
These are novelty grow kits sold as 'just add water' toys, the kind you find at science museum gift shops, party-favor sections, and online retailers like Amazon and TikTok Shop. Brands like Toysmith and Nature's Workshop Plus distribute them widely, and they show up in wholesale catalogs alongside similar items like Grow a Yeti and Hatch & Grow eggs. The appeal is simple: something small transforms into something noticeably bigger, and the process is visible in real time. Parents buy them for kids, teachers use them as science demos, and hobbyists collect them alongside other novelty grow kits.
This guide is written for anyone who has one of these kits in hand and wants to know what to actually do, step by step, without guesswork. If you've ever been confused by vague packaging instructions ('just add water!') or ended up with a soggy, misshapen result, you're in the right place. I've worked through all three main kit types and I'll share what works, what goes wrong, and how to fix it.
The three types of grow-a-sloth kits
Not every 'grow a sloth' product works the same way. Knowing which type you have before you start saves a lot of frustration.
Water-expandable foam or polymer toys
This is the most common type. The sloth figure, usually molded foam or a plush toy stuffed with a superabsorbent polymer (SAP) core, expands when submerged in water. SAP is typically sodium polyacrylate, a material that can absorb hundreds of times its own weight in water. See the MATERIAL SAFETY DATA SHEET – Superabsorbent Sodium Polyacrylate Polymer for supplier SDS details listing composition as acrylic acid polymer, sodium salt and noting the material is hygroscopic and swells on contact with water. The 'Ginormous Grow' series and most Toysmith-distributed grow animals fall into this category. These are purely novelty toys with no living component, nothing is actually growing in the botanical sense, but the size increase can be dramatic and genuinely surprising.
Seed or moss sprouting kits
These kits include a sloth-shaped planter or substrate mold alongside a seed packet or moss material. Chia seeds (Salvia hispanica) are the most common seed used, the same plant behind the classic Chia Pet. Some kits use grass seed or small herb seeds instead. Moss-based versions include live moss fragments or spores and a peat or soil substrate. With these kits, you're doing real gardening on a small scale: planting, watering, and waiting for germination. Chia seeds typically germinate in 1 to 7 days under warm, moist conditions, so results come fairly quickly.
Build-and-grow novelty kits
A smaller category, but worth knowing about. These require light assembly before any growing happens, snapping parts together, attaching a water reservoir, or inserting a seed pod. Think of them as a hybrid between a construction toy and a grow kit. If you've looked at similar products in this space, the assembly-first approach is similar to what you'd find in build-and-grow craft kits. The 'grow' element might still be water-expandable or seed-based, but assembly is the first real step.
What's in the box and how to identify your kit
Open your kit and lay everything out on a flat surface before you do anything else. Here's what you're likely to find, depending on the type:
| Kit Type | Common Contents | Key Identifier |
|---|---|---|
| Water-expandable foam/polymer | Molded foam or plush sloth figure, instruction card | No seeds, no soil; packaging says 'just add water' |
| Seed/moss sprouter | Shaped planter or substrate mold, seed packet or moss material, sometimes a gel binder or tray | Includes seeds or live moss; instructions mention 'germination' or 'sprouting' |
| Build-and-grow novelty | Pre-cut wooden or plastic parts, fasteners, small water reservoir or seed pod, instruction sheet | Includes parts to assemble; may have numbered steps before any growing begins |
The model name and manufacturer are usually printed on the box bottom or inside the lid. If yours is a Toysmith product, the model number is typically a five-digit code on the barcode label. If you're unsure whether your kit is water-expandable or seed-based, check the materials list on the back of the packaging, seed kits always list the seed variety, and SAP kits sometimes list 'superabsorbent polymer' or simply 'polymer material' as a component.
Supplies you'll need beyond the kit
Most grow-a-sloth kits are intentionally minimal in what they include, so a little prep goes a long way. Here's what I always have ready before I start:
- A clean container large enough to fully submerge the toy (for water-expandable types, allow extra room — the sloth will expand significantly, sometimes 3x to 6x its original size)
- Room-temperature tap water or filtered water — avoid hot water, which can damage the polymer structure or warp foam
- Paper towels for blotting and drying after the soak is complete
- Disposable gloves if you're handling the toy for extended periods, especially for SAP-based kits (SAP granules are very fine and slippery when wet)
- A small spray bottle for seed and moss kits, so you can mist without flooding
- A shallow tray or saucer to catch drainage under seed-based planters
- A ruler or tape measure if you want to track expansion over time (genuinely useful and fun for kids)
- Indirect natural light or a small grow lamp for seed and moss kits — a standard windowsill works fine for most
For seed and moss kits specifically, you may also want a small bag of potting mix or peat if the substrate provided in the box looks sparse. Moss especially benefits from a slightly acidic, moisture-retaining base, and sometimes the included substrate is thin.
Safety warnings you need to read first
I want to be direct here because this is genuinely important, especially for households with young children. Water-expandable toys that use superabsorbent polymer are not safe for children under 3, and in many cases the recommended minimum age is 5 or older. The reason is serious: SAP beads and polymer components can cause intestinal or airway obstruction if swallowed. Unlike food, these materials continue to expand inside the body. The CPSC has issued formal recalls and public warnings for water-bead-style toys (including the Chuckle & Roar Ultimate Water Beads Activity Kit recall in September 2023), and federal rulemaking that took effect in March 2026 now requires stricter hydrated bead diameter limits and acrylamide testing for water-bead toys. If your kit includes small loose polymer components or beads, check the packaging's age recommendation and treat it seriously.
- Keep all grow-a-sloth kits away from children under 3; for SAP-containing kits, supervise children under 5 at all times
- Never leave small polymer pieces, beads, or pre-expansion toy components unsupervised around young children or pets
- If a child swallows any part of a water-expanding toy, call Poison Control (1-800-222-1222 in the US) or seek emergency medical care immediately — do not wait to see if symptoms develop
- Seed kits may include chia or grass seeds that cause mild allergic reactions in sensitive individuals; wash hands after handling seeds and seed slurry
- Moss kits may contain trace soil fungi or mold spores — use gloves if you have respiratory sensitivities, and grow in a well-ventilated area
- Build-and-grow kits may contain small fasteners or parts that meet the CPSC small-parts definition (16 CFR Part 1501) — check age labels and keep parts away from toddlers
All toy grow kits sold in the US are subject to ASTM F963 safety standards enforced under the CPSA. A compliant kit will have age grading on the packaging. If yours doesn't, or if it arrived without any English-language labeling, that's a red flag worth noting.
Before you start: quick checklist and workspace setup
A five-minute setup check prevents 90% of the problems I see people run into. Go through this before you add any water or open any seed packets:
- Read the instruction card included in the box fully, even if it seems obvious — manufacturers sometimes include model-specific notes that override general advice
- Identify your kit type (water-expandable, seed/moss, or build-and-grow) using the table above
- Check all parts are present — a missing component is much easier to deal with before you start than halfway through
- Pick a workspace that's waterproof or covered with a towel; water-expandable and seed kits both involve moisture
- For water-expandable kits: confirm your container is large enough (a rule of thumb is at least 3x the starting volume of the toy in water capacity)
- For seed/moss kits: confirm your chosen location gets bright indirect light (not direct sun through glass, which scorches seedlings)
- For build-and-grow kits: sort and count all hardware pieces before assembly begins
- Have paper towels, gloves, and your spray bottle or water container ready before opening anything
Step-by-step: growing a water-expandable sloth
This is the most common type of kit and the one that confuses people the most, mostly because there's so little to do, and that makes it feel like you must be missing something. You're probably not. If you're also assembling small toys, check the micro mini 2 grow scooter instructions for a comparable step-by-step setup.
Step 1: Prep your container and water
Fill a clean container with room-temperature water, not cold, not warm. Cold water slows the swelling process significantly, and warm or hot water can break down the polymer structure or cause uneven expansion. Use enough water to fully submerge the sloth figure with at least an inch of water above it, because the toy will absorb a lot. I usually fill the container about two-thirds full to start and top it up after a few hours.
Step 2: Place the sloth in the water
Lower the sloth into the water gently. If it floats, that's normal, the polymer core will start absorbing water within minutes and the toy will gradually become denser and sink or sit lower. Don't weigh it down with anything heavy, and don't squeeze it to force it under. Just let it absorb at its own pace.
Step 3: Monitor over 24 to 72 hours
Check every 8 to 12 hours and top up the water as needed, the toy will absorb a surprising amount. Most water-expandable sloths reach their full expanded size between 24 and 72 hours. Some cheaper foam versions hit their limit in around 12 to 24 hours; higher-quality SAP-core plush toys take the full 72 hours. If you're tracking growth, measure length or width at each check. A typical result is 3x to 6x the original dry size, depending on the formulation. The packaging often says things like '600% growth', take that with a grain of salt, but significant expansion is real.
Step 4: Remove, drain, and dry
Once the toy has reached its full size and isn't noticeably changing between checks, carefully lift it out of the water. It will be heavy and squishy, handle it gently because the outer plush or foam layer is fragile when fully saturated. Set it on a thick layer of paper towels and blot the surface. If you want to display it expanded, leave it at room temperature on a dry surface and it will slowly firm up over a day or two as surface moisture evaporates, though the polymer core retains water for a long time. If you want to eventually return it to its compact size, leave it out to fully air dry, this takes days to over a week depending on size and humidity.
Troubleshooting water-expandable kits
- Not expanding or expanding unevenly: Check water temperature (should be room temp), make sure the toy is fully submerged, and confirm the container is large enough that the expanding toy isn't hitting the sides and deforming
- Outer layer tearing or falling apart: The plush or foam shell is a cosmetic layer only — if it tears, the polymer core is still functional; handle more gently next time and avoid squeezing the toy when wet
- Sliminess or gel leaking out: This is SAP gel — it's the same material used in diapers. It's not toxic to skin but is very slippery. Wear gloves and keep it away from drains (it can clog them). Don't let children mouth the toy if gel is visible
- Mold on the surface after expansion: This happens if the toy sits in warm standing water for too long. Remove it, rinse with clean water, and allow to dry fully. If mold is extensive, dispose of the toy
- Toy won't shrink back down: Full drying takes longer than most people expect. Place it somewhere warm and well-ventilated, and give it at least 3 to 5 days
Step-by-step: growing a seed- or moss-based sloth
Seed and moss kits require a bit more attention over a longer period, but the payoff is genuinely rewarding, you end up with a living, growing sloth planter that continues to change over days and weeks. The process is closer to microgreen gardening than toy play, which makes it a great entry point for anyone curious about real plant growing.
Step 1: Prep the substrate and planter
If your kit includes a terra-cotta, foam, or plastic sloth-shaped planter, rinse it under cool water first to remove any dust or residue. If the kit includes a dry substrate or a gel binder, mix the seeds into it according to the instruction card, for chia-style kits this typically means stirring seeds into water or gel to create a thick paste, then spreading that paste over the sloth's surface (this is the 'fur' area where sprouts will grow). Apply the seed mixture evenly, pressing gently so it makes good contact with the planter surface.
Step 2: Initial soaking and placement
Most chia-style kits ask you to do an initial soak of the planter (before applying seeds) in water for 10 to 15 minutes so the terra-cotta or substrate absorbs moisture. After applying the seed mixture, place the planter on its included drip tray or a saucer. Set it on a spot that gets bright indirect light, a north or east-facing windowsill works well, or a few feet back from a south-facing window. Avoid direct sun through glass, which can dry the seed layer too quickly and scorch young sprouts.
Step 3: Watering schedule and humidity
Consistency is the most important factor for seed kits. The seed layer or moss surface should never completely dry out between waterings. For chia kits, mist the surface lightly twice a day, morning and evening, using your spray bottle. If you have a moss kit, mist once or twice daily and consider placing a loose plastic wrap or a glass dome over the planter to trap humidity, since moss prefers a consistently moist, slightly enclosed environment. Check the drip tray and empty it if standing water accumulates, because waterlogged roots will rot.
Step 4: Germination timeline and what to expect
Chia seeds typically germinate in 1 to 7 days at room temperature (ideally 68 to 77°F / 20 to 25°C). You'll see tiny white root tips first, then a green shoot pushing up through the seed coat. By day 4 to 7, most seeds should show visible green growth, and by day 10 to 14 the sloth should have a decent coat of green sprouts that genuinely looks like fur. Moss kits take longer: expect 2 to 4 weeks for visible new moss growth, and the environment needs to stay reliably humid throughout. If you have a moss kit and you're losing patience, hang in there, moss just moves at its own pace.
Step 5: Ongoing light, humidity, and care
Once sprouted, chia-covered sloth planters benefit from continued bright indirect light and daily misting. If you want the sprouts to stay dense and upright rather than leaning toward the light, rotate the planter 180 degrees every few days. For moss kits, continue misting and keep the planter away from heating vents or air conditioning drafts that dry the air out. Neither chia sprouts nor moss needs fertilizer for the first few weeks, the seeds and spores carry enough nutrients for early growth.
Troubleshooting seed and moss kits
- Seeds not sprouting after 7 days: Check temperature (below 65°F significantly slows germination), make sure the seed layer isn't drying out between mistings, and verify the seeds were fresh — old or improperly stored chia seeds have reduced germination rates
- Mold appearing on the surface: White or gray fuzzy growth alongside seeds is almost always mold from overwatering. Remove moldy areas with a damp paper towel, reduce misting frequency, and improve airflow. A small electric fan on low nearby helps
- Sprouts growing sideways or collapsing: This usually means the planter isn't getting enough light — move it closer to a window or add a grow lamp. Also check that you haven't applied the seed layer too thick, which can cause the sprouts to smother each other
- Moss turning brown: Most commonly caused by too much direct light or the substrate drying out. Move to deeper shade and increase misting frequency. Some browning on the edges is normal if the moss is adapting; wait two weeks before giving up
- Standing water in the tray causing smell: Empty the tray daily. Root rot sets in quickly in a waterlogged base, especially in warm conditions
Comparing the three kit types side by side
If you're deciding which type to try, or explaining the difference to someone who just received one as a gift, this comparison covers the key practical differences.
| Feature | Water-Expandable Polymer | Seed/Moss Sprouter | Build-and-Grow Novelty |
|---|---|---|---|
| Time to visible result | 12 to 72 hours | 1 to 14 days (seeds); 2 to 4 weeks (moss) | Immediate after assembly; grow component varies |
| Ongoing effort required | Very low — just add water and wait | Medium — daily misting, light monitoring | Low to medium — assembly first, then varies |
| Living component | No | Yes | Sometimes |
| Reusable | Partially — dry fully and re-soak; repeat cycles degrade the polymer | No — one growing cycle per kit (can replant seeds separately) | Yes for the structure; seed/water component is single use |
| Best age range | 5 and up (SAP safety concern for younger children) | 6 and up with supervision; good for school projects | 6 and up; small parts may apply |
| Best for | Instant-gratification novelty, science demos | Beginner gardening, classroom projects, longer engagement | Craft-and-grow combination projects |
My honest recommendation: if you want something fast and low-maintenance, go with the water-expandable type. If you want something that teaches patience and basic plant science, especially for kids in the 6 to 10 range, the seed sprouter is genuinely more rewarding over time. The build-and-grow type is the most variable; quality differs a lot by brand and it really depends on the specific kit.
How this compares to similar grow kits
Grow-a-sloth kits are part of a wide novelty grow-kit category that uses the same basic mechanics across different themes. The water-expandable type works essentially identically to other grow-in-water animal toys, like grow-your-own dinosaur kits, which are some of the most popular in this space, same SAP chemistry, same soaking process, just a different shape. For step-by-step grow your own dinosaur instructions that use the same SAP soaking method, see the dinosaur guide. If you've already grown a dinosaur successfully, the sloth version will feel familiar. For other novelty 'grow' themes and step-by-step guidance, see grow your own boyfriend instructions for a similarly formatted how-to. Seed-based sloth planters also share DNA with grow-your-own novelty kits built around botanical surprises, where the fun comes from watching something living develop over days.
Build-and-grow sloth kits share the assembly-first approach you see in craft grow kits, where the hands-on building is part of the experience before any growing begins. The key difference with sloth-themed kits is usually the display, the sloth shape is designed to be hung or perched somewhere, so think about where you'll put it once it's done. For step-by-step assembly and care of a Grow N Up basketball stand, see grow n up basketball stand instructions.
Post-growth care, reuse, and disposal
Water-expandable toys
Once you're done with the expanded toy, you have two options: keep it expanded for display or let it dry back down. To dry it fully, place it on a wire rack or absorbent surface in a warm, ventilated spot, expect 5 to 10 days for full drying depending on size and humidity. Once dry, you can re-soak it for another cycle, but note that each successive cycle tends to produce slightly less expansion as the polymer degrades. After 3 to 5 cycles, most toys will no longer expand much. At that point, dispose of the toy in your regular trash. Do not pour SAP gel down the drain, it can form a solid blockage. Scoop any loose gel into a sealed bag before disposal.
Seed and moss kits
Chia sprouts can be eaten (they're the same plant used in microgreens) if the kit uses food-grade chia seeds and no non-food-safe coatings on the planter. Check the packaging, if it doesn't specify food-safe, don't eat the sprouts. Once the sprouts become leggy and start to decline (usually 3 to 4 weeks), you can trim them back and start a fresh planting if you have extra seeds. The terra-cotta or foam planter itself can usually be reused indefinitely with new seeds. Moss kits can be maintained long-term as small terrariums if you're enjoying them, just continue the misting routine and keep them in good indirect light.
Build-and-grow kits
The assembled structure is a keeper, it's designed as a display item. If it includes a water reservoir or seed pod, replace those components as needed. Some brands sell refill seed pods separately. If the kit has no refill option, the structure still works as a small planter if you add your own seeds or a small moss clump to the reservoir area.
FAQ
What types of "grow a sloth" kits are common and how do they differ?
Three common types: 1) Water‑expandable polymer ("water grow") toys — compressed plush/foam or polymer beads containing superabsorbent polymer (SAP) that swell when soaked. 2) Seed/moss sprout kits (Chia‑Pet style) — a shaped substrate or foam coated with seeds (chia/grass) or live moss fragments that develop green "fur" as sprouts grow. 3) Build‑and‑grow novelty kits — small assembly toys where you build a frame/skin and either plant seeds or insert a water‑expanding core. Differences: expansion mechanism (polymer swelling vs. biological sprouting), timeline (hours–days for SAP, days–weeks for seeds/moss), aftercare (one‑time expand vs. ongoing watering and light), and safety concerns (SAP ingestion/choking vs. seed spoilage/mold).
What supplies and setup do I need before starting each kit type?
Water‑expandable polymer kits: shallow bowl or container, clean tap water at room temperature, towel, adult supervision. Seed/moss sprout kits: container or saucer for excess water, spray bottle/mister, potting mix or provided substrate, seeds/moss, bright indirect light, thermometer (optional), and a tray to protect surfaces. Build‑and‑grow kits: basic tools listed by manufacturer (scissors, small screwdriver), watering supplies if seeds included, workspace, and adhesive if required. For all kits: read manufacturer instructions and have a trash bag and gloves handy for cleanup.
What safety warnings should parents and beginners know before growing a sloth toy?
Water‑expandable polymer (SAP) hazards: SAP beads can expand dramatically and are a choking/intestinal‑obstruction risk if swallowed — keep away from children under 3 and unsupervised children under 6. Never put SAP toys in mouths, ears or noses. Dispose of small polymer fragments responsibly. For seed kits: some seeds may be allergenic; avoid letting young children ingest raw seeds. For all kits: watch for mold — if heavy mold or foul odor appears, dispose of organic materials. Follow age recommendations on packaging and supervise assembly and watering.
Step‑by‑step: How do I grow a water‑expandable sloth ("just add water")?
1) Unwrap the compressed toy and check for defects. 2) Place in a shallow bowl large enough for final size. 3) Add room‑temperature tap water to fully submerge toy; avoid hot water. 4) Wait and monitor — most expand noticeably in 1–6 hours and reach near‑final size in 12–48 hours; turn or reposition once if edges resist water. 5) When fully expanded, remove excess water, blot gently with a towel, and let surface dry for 1–2 hours if plush; for foam cores, follow package finishing steps. 6) Keep away from pets/young kids; do not attempt to accelerate with heat or microwave.
Step‑by‑step: How do I grow a seed/moss sloth (Chia‑style)?
1) Prepare the sloth mold/frame and clean surface. 2) Mix seeds with the provided gel/adhesive (if applicable) or hydrate seeds per instructions. 3) Spread the seed slurry evenly over the area intended to sprout (avoid thick clumps). 4) Place on a tray and keep in warm (68–77°F / 20–25°C), bright indirect light. 5) Keep the surface consistently moist by misting 1–3 times daily; do not let it dry out. 6) Expect first sprouts in 2–7 days; fuller coverage in 7–21 days. 7) Once established, water lightly from below or mist to maintain growth and trim as desired.
Step‑by‑step: How do I grow a build‑and‑grow sloth toy?
1) Inventory parts and read the manual. 2) Assemble the frame/skin per instructions; secure small fasteners away from young children. 3) If the kit includes a water‑expandable insert, soak that insert per SAP steps above before inserting. 4) If seeds are included, apply and maintain moisture as for seed kits. 5) Follow the manufacturer’s recommended curing/setting time before play. 6) Seal or glue parts only if indicated — some models rely on interlocking pieces and should not be forced.