
Setting up a basil grow kit takes about 15 minutes and gets you from seed to first harvest in roughly 6 to 8 weeks. Hydrate or fill your growing medium, sow 1 to 3 seeds per cell at 1/8 to 1/4 inch deep, cover with the dome, keep the kit somewhere warm (65 to 75°F is ideal), and expect to see tiny green sprouts in 5 to 14 days. Once the cotyledons (the first little seed leaves) open, pull the dome off, move the kit into bright light, and water only when the top inch of mix feels dry. That is the whole arc. This guide walks you through every step in detail, covers the main kit types you will encounter, and helps you troubleshoot anything that goes sideways.
Basil Grow Kit Instructions: Complete Setup to First Harvest

Marcus Thornfield
26 Jul 2026
Who this guide is for and what it covers
If you just unboxed a basil grow kit and the included instructions feel thin, or if you are deciding between a Buzzy peat-pellet kit, a soil-pod system, or a countertop LED dome garden, this is the guide for you. I have set up and grown through all of these kit types, and I wrote this walkthrough to fill the gaps that manufacturer manuals tend to leave. You will find a quick-start checklist, a full step-by-step setup for each kit type, a care schedule, a troubleshooting table, guidance on harvesting and transplanting, and honest thoughts on whether these kits are worth your money. No prior gardening knowledge needed.
Quick-start checklist and timeline
Here is the end-to-end timeline for a typical basil grow kit. The exact dates shift slightly depending on your kit type and growing conditions, but this is what a healthy run looks like.
| Stage | Timing | What to do |
|---|---|---|
| Unbox and set up | Day 1 | Hydrate pellets or fill pods, sow seeds, attach dome or cover |
| Germination | Days 5–14 | Keep warm and moist under dome; do not disturb |
| Dome removal | Day 3–7 after sprouts appear | Remove dome once cotyledons open; introduce airflow |
| Seedling stage | Weeks 2–4 | Provide 14–16 h of bright light, water when top inch is dry |
| True-leaf thinning | When 2–3 true leaves show | Thin to 1 plant per cell or pellet; begin feeding |
| First fertilizer | Week 3–4 | Apply diluted general-purpose or hydroponic nutrient per label |
| Pinch and shape | Week 4–5 | Pinch growing tips above a leaf node to encourage bushy growth |
| First harvest | Weeks 6–8 | Cut stems just above a pair of leaves; never remove more than one-third at once |
Before you start, run through this checklist so nothing slows you down mid-setup.
- Locate a warm spot (65–75°F / 18–24°C) near a bright window or your LED light source
- Have clean, room-temperature water ready (filtered or tap water left to sit overnight)
- Check that all kit components are present before you open the seed packet
- Read any included instruction sheet before doing anything (Buzzy and other brands include model-specific depths and spacing)
- Set a reminder to check moisture daily during the germination window
- Plan where the kit will live long-term — basil needs 6+ hours of direct light or 14–16 hours under LED
What comes in a basil grow kit
Most consumer basil grow kits are packaged as complete, small-container seed-starting systems. The exact contents vary by brand and kit type, but the components below cover the vast majority of what you will find in the box.
Typical kit components
- Basil seed packet (one variety or a mix; check the packet for planting depth specifics)
- Growing medium: compressed peat pellet(s), pre-filled soil pod(s), or a small bag of seed-start mix
- Tray or container (plastic pot, window box, or hydroponic reservoir)
- Humidity dome or plastic cover to hold moisture during germination
- Plant markers or labels
- Printed growing instructions or a card with a QR code to online instructions
- Small starter fertilizer sachet (not always included; Buzzy recommends monthly fertilizer application)
What is typically in a Buzzy basil kit
Buzzy's basil and kitchen herb grow kits (their Windowsill and Organic Culinary Herb ranges) typically include an organic basil seed packet, a growing medium such as a compressed peat pellet or small soil block, a pot or tray, plant markers, and printed growing instructions. The kits are designed as complete seed-starting systems, you supply the water and a warm, bright windowsill. Buzzy's instructions note that fertilizer should be applied monthly and that you should always follow the fertilizer package directions rather than guessing at quantities. If you have the Buzzy Kitchen Herbs kit (which pairs basil with cilantro and chives), the setup steps are nearly identical across all three herbs, though germination timing varies by species. The Buzzy Basil and Buzzy Kitchen Herbs walkthroughs on this site go deeper on those specific models. For related setup steps and model-specific guidance, see the Buzzy mini rose grow kit instructions. See the Buzzy Kitchen Herbs grow kit instructions for model-specific planting depths, setup photos, and timing notes. For model-specific planting depths, photos, and step-by-step guidance, see the Buzzy basil grow kit instructions.
Choosing the right kit type
There are four main formats you will encounter when shopping for a basil grow kit. Each has real trade-offs, and picking the wrong one for your situation is the most common reason people struggle early on.
| Kit Type | How it works | Best for | Watch out for |
|---|---|---|---|
| Soil pods | Pre-filled compressed coir or peat cubes; just add water and seeds | Beginners who want minimal prep | Overwatering; pods stay wet a long time |
| Peat pellets | Dry compressed discs that expand in warm water to form a growing plug | Single-herb windowsill kits like Buzzy | Pellets drying out quickly; need consistent moisture checks |
| Wick/hydroponic tray | Reservoir below a tray; fabric or cord wicks water up into medium | People who travel or forget to water | Algae buildup; nutrients must be added after seedling stage |
| LED dome system | Enclosed countertop unit with built-in LED light and water reservoir | Low-light apartments; year-round growing | Higher upfront cost; light distance and timing must be managed |
My honest recommendation: if you are a first-timer and you have a south- or west-facing windowsill, a peat-pellet or soil-pod kit like the Buzzy range is the easiest entry point and cheapest to replace if something goes wrong. If your home is consistently low-light or you want to grow year-round without moving the kit around chasing sun, a countertop LED dome system is worth the extra cost.
Unboxing and safety: before you plant anything
I know it feels like overkill to talk about safety for a basil kit, but there are a few things worth doing before you touch a single seed. First, read the included instruction sheet completely. Manufacturers like Buzzy include model-specific planting depths and spacing that override general advice, including anything in this guide. If your kit sheet says 5 mm deep, plant at 5 mm. Second, check the kit contents against the listed components. If a seed packet is open, a pellet is crumbled to dust, or the dome is cracked, contact the retailer before you plant. Most consumer kits carry a satisfaction or defect warranty, and a cracked dome will hurt your germination rate. Third, if your kit includes an LED grow light or a powered reservoir pump (common in AeroGarden-style systems), treat the electrical components carefully. Unplug before cleaning, do not submerge any electrical parts in water, and keep the power cord away from moisture. Check the unit's electrical rating label to make sure your outlet matches. None of this is scary; it just takes two minutes to check.
Step-by-step setup: preparing your medium and planting seeds
Peat pellets (Buzzy and similar kits)
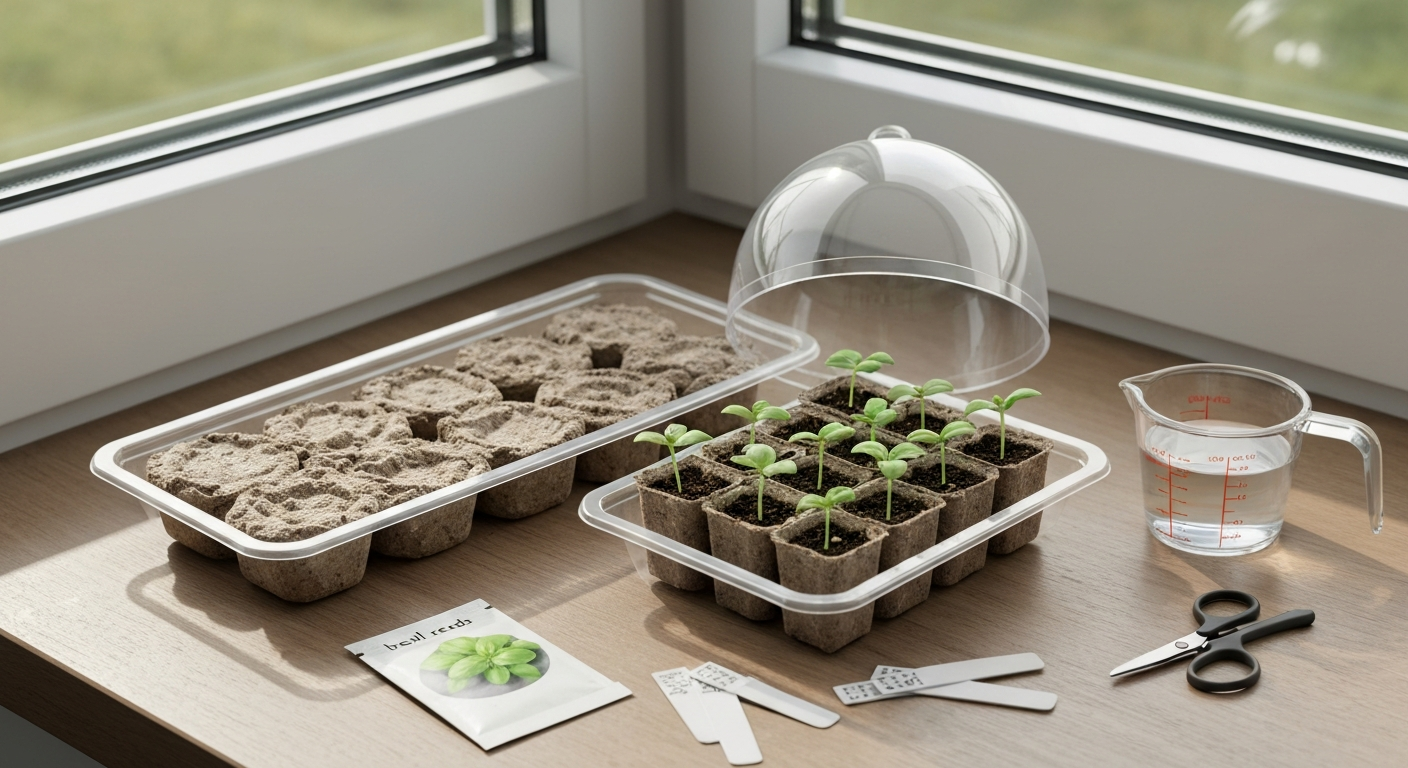
- Place your compressed peat pellet(s) in the included tray or a bowl.
- Pour about 1/2 cup of warm (not hot) water over each pellet and wait 5 to 10 minutes. The pellet will expand from a flat disc into a 1.5 to 2-inch tall plug. Add a little more water if any dry compressed material remains in the center.
- Set the expanded pellets in the tray. Gently open the top netting if it is bunching and restricting the top surface.
- Use a pencil or toothpick to make a shallow indent, about 1/8 to 1/4 inch deep (3 to 6 mm), in the center of each pellet.
- Drop 2 to 3 basil seeds into each indent. Basil seeds are small enough that 2 to 3 per pellet gives you insurance against non-germinating seeds; you will thin to one later.
- Gently pinch or brush the peat surface closed over the seeds. Do not press hard.
- Place the dome or plastic cover over the tray.
Soil pods (pre-filled compressed coir or soil)
- If the pod is dry-compressed, add water per the kit instructions until it expands and feels evenly moist throughout, not soggy.
- If the pod is pre-moistened from the factory, check the moisture level by pressing gently — it should feel like a wrung-out sponge.
- Place pods into the tray or pod holder.
- Poke a 1/8 to 1/4 inch (3 to 6 mm) deep hole in the center of each pod.
- Sow 1 to 3 basil seeds per pod, cover lightly with the surrounding medium, and place the dome over the tray.
Wick/hydroponic trays and LED dome systems
For wick-based and hydroponic kits, your growing medium is usually a pre-formed sponge, rockwool plug, or coconut-fiber pod that already sits in a pod holder above the reservoir. Fill the reservoir to the indicated start line (usually labeled 'Fill' or 'Max') with plain water for germination. Do not add nutrients yet; seedling roots are too delicate for concentrated nutrients right out of the gate. Drop 1 to 2 seeds into the hole in each pod or plug, cover loosely with the included seed-starting cover or dome, and plug in the LED light unit. The system will manage bottom moisture delivery automatically.
Germination: the first 7 to 14 days
Basil germinates in 5 to 14 days at 65 to 75°F (18 to 24°C). Warmer conditions (toward the 75°F end) tend to push emergence closer to 5 to 7 days. Below 65°F, germination slows noticeably and seeds may rot before they sprout. Do not place your kit on a cold windowsill in winter; a kitchen counter away from drafts or the top of a refrigerator (which throws off gentle heat) works well.
Dome management
Keep the dome on until you see the first cotyledons (the tiny rounded seed leaves) fully open. Research protocols for basil plug production remove humidity domes around day 3 after visible emergence, and that is a reasonable rule of thumb for home kits too. Leaving the dome on too long after the first leaves open traps moisture on the leaves and stems, which is the main cause of damping off (a fungal collapse of seedlings at soil level). Once the dome is off, give the seedlings a little air movement if you can. Even a nearby ceiling fan running on its lowest setting helps.
Moisture during germination
The surface of your growing medium must stay consistently moist during germination, never bone dry, but also never waterlogged. Check daily. For peat pellets, if the surface looks light tan and feels dry to the touch, mist lightly with a spray bottle. For soil pods, pour a small amount of water into the tray so the pod absorbs from the bottom. For hydroponic kits, just keep the reservoir at its Fill line. You are aiming for the feel of a wrung-out sponge throughout the medium.
Thinning seedlings
Once your seedlings develop 2 to 3 true leaves (the leaves that come after the first rounded cotyledons), thin each cell or pellet to just one plant. Use small scissors to snip weaker seedlings at the surface rather than pulling them out; pulling can disturb the roots of the seedling you want to keep. One strong plant per pod or pellet will outperform a crowded clump every time.
Lighting: natural light, LED setups, and daily schedules
Basil is a sun-hungry herb. Getting the light right is the single biggest factor between a stocky, productive plant and the lanky, stretched-out disappointment that most beginners encounter when they grow indoors.
Natural light
A south-facing windowsill is the gold standard for indoor basil. West-facing works reasonably well in the afternoon. East-facing gives you morning light but is often not enough for strong growth on its own. North-facing windows are not suitable for basil without supplemental lighting. Basil wants at least 6 hours of direct sun per day once the seedling stage is underway. If your windows are partially blocked by buildings or trees, the plants will tell you fast by leaning hard toward the light source and developing thin, weak stems.
LED dome systems and countertop grow light kits
If your kit includes a built-in LED grow light, keep the light close to the seedlings during the early stages. AeroGarden-style manuals recommend maintaining roughly 3.5 to 4 inches between the LED panel and the top of the plants, adjusting the arm upward as the plants grow. Many LED dome units ship preset to a 10-hour on, 14-hour off cycle, which is adequate for keeping seedlings alive but on the low end for vigorous basil growth. If your unit lets you adjust the cycle, a 14 to 16-hour photoperiod (light on period) is a better target for basil seedlings and young vegetative plants. Research protocols for basil seedling production back this up, with controlled-environment trials using 16-hour photoperiods and light intensities around 180 to 231 µmol/m²/s (a light-measurement unit you do not need to worry about for kit use; just follow the distance guidelines and the extended photoperiod advice). Virginia Tech CEA guidance recommends a 16-hour photoperiod with PPFD targets near 231 µmol·m⁻²·s⁻¹ for basil seedling/microgreen production and advises preparing nutrient stock to reach about EC 1.0 mS·cm⁻¹ (pH ≈5.9) for hydroponic seedlings blank" rel="noopener noreferrer">Virginia Tech CEA guidance recommends a 16-hour photoperiod with PPFD targets near 231 µmol·m⁻²·s⁻¹ for basil seedling/microgreen production and advises preparing nutrient stock to reach about EC 1.0 mS·cm⁻¹ (pH ≈5.9) for hydroponic seedlings.. blank" rel="noopener noreferrer">Basil seedling production environment influences subsequent yield and flavor compound concentration (peer-reviewed CEA research).
Timers and daily schedules
If your LED kit does not have a built-in timer, a cheap outlet timer (around $8 to $12) is one of the best investments you can make. Set it to turn the light on when you wake up and off after 14 to 16 hours. Consistent light-dark cycles help basil grow evenly and reduce stress on the plant. Inconsistent lighting, like leaving the light on 24 hours for weeks, can actually slow growth and cause leaves to look washed out.
Watering and nutrients after the seedling stage
Once your basil has its true leaves and is growing in a pot or soil-pod kit, switch from keeping the medium consistently moist to watering when the top inch of potting mix feels dry. Basil hates sitting in wet soil for extended periods, and root rot is a common failure point that looks identical to underwatering (wilted, sad leaves) until you check the roots. Bottom watering (pouring water into the tray and letting the pot absorb it) is generally gentler than pouring onto the surface and reduces the risk of splashing soil onto leaves.
Fertilizing
Most retail kits, including Buzzy, include little or no fertilizer for ongoing production. Buzzy's instructions recommend applying fertilizer once a month and following the fertilizer package directions rather than guessing at rates. For soil-based kits, a balanced liquid fertilizer (like a 10-10-10 or a general-purpose herb fertilizer) applied monthly is a sensible approach. For hydroponic or wick-based kits, you need a dedicated hydroponic nutrient solution rather than a soil fertilizer. A target electrical conductivity (EC) of 1.0 to 1.6 mS/cm with a pH of 5.5 to 6.0 in the reservoir is the range most hydroponic research and commercial growers use for basil. If those numbers mean nothing to you yet, simply buy a hydroponic nutrient kit designed for herbs and follow its dilution chart; it will get you into the right zone without needing measuring tools.
Basil care schedule at a glance
| Task | Frequency | Notes |
|---|---|---|
| Check moisture (germination) | Daily | Medium must stay consistently moist; never dry, never waterlogged |
| Check moisture (post-dome) | Every 1–2 days | Water when top 1 inch of medium is dry |
| Light (LED kit) | 14–16 h/day | Use a timer; maintain 3.5–4 in between LED and plant tops |
| Light (natural) | 6+ h direct sun/day | South or west window preferred |
| Thin seedlings | Once at true-leaf stage | Cut to 1 plant per cell; do not pull |
| Fertilize | Monthly (soil kits) | Follow fertilizer label; start after 2–3 true leaves appear |
| Fertilize (hydro kits) | Per nutrient label; refresh reservoir every 1–2 weeks | Target EC 1.0–1.6 mS/cm, pH 5.5–6.0 |
| Pinch and harvest | Starting week 4–5 | Pinch above leaf nodes; never remove more than 1/3 of plant at once |
| Remove flower buds | As soon as they appear | Flowering turns basil bitter; pinch flower stems off immediately |
Troubleshooting common problems
| Problem | Likely cause | Fix |
|---|---|---|
| No germination after 14 days | Too cold, seeds too deep, or medium dried out | Move to warmer spot (70–75°F), re-moisten medium, check seed depth (1/8–1/4 in max) |
| White fuzzy mold on surface | Too much surface moisture, dome left on too long | Remove dome, improve airflow, let surface dry slightly between checks |
| Damping off (seedlings collapse at base) | Fungal disease from oversaturation and poor airflow | Remove affected seedlings, reduce watering, add gentle air movement, sanitize tray if reusing |
| Leggy, stretched seedlings | Not enough light | Move closer to light source or extend LED period to 14–16 h; add supplemental light if on a dim windowsill |
| Yellow lower leaves | Overwatering or nitrogen deficiency | Check drainage and watering frequency first; if medium is dry, begin monthly fertilization |
| Pale or washed-out leaves under LED | Light too far away or photoperiod too short | Lower LED arm to 3.5–4 in from plant tops; increase photoperiod |
| Brown leaf edges | Low humidity, salt buildup in medium, or underwatering | Mist leaves occasionally; flush soil pods with plain water monthly to clear salts; check watering frequency |
| Fungus gnats (tiny flies around soil) | Overwatered soil; gnat larvae live in wet medium | Let top inch of soil dry out between waterings; use yellow sticky traps near the kit |
| Stunted growth in hydro kit | Nutrient solution depleted or pH out of range | Refresh reservoir; check pH (target 5.5–6.0) and EC (target 1.0–1.6 mS/cm) |
Harvesting basil from a grow kit
Your first harvest can happen as early as week 6, but week 7 or 8 usually gives you more material to work with. The key rule is to always cut just above a pair of leaves, leaving that pair (and everything below it) intact. The two nodes just below your cut will each grow into a new branch, which means every harvest actually makes the plant bushier and more productive over time. Never strip a basil plant bare; removing more than about one-third of the plant at once causes stress and slows regrowth significantly. Regular harvesting every 7 to 10 days also delays flowering, which is what you want because flowering makes the leaves taste bitter.
Transplanting when your kit is outgrown
Most basil grow kits are sized for seed starting or short-term production. When you see roots poking out of the bottom of the pellet, out of the drainage holes in a soil pod, or circling the base of a hydroponic plug after 4 to 6 weeks, it is time to move up. For peat pellet kits, transplant the whole expanded pellet into a 4 to 6-inch pot with fresh potting mix; the netting around the pellet can stay on since roots will grow through it. For soil pods, gently ease the root ball out and pot it up into a larger container. For hydroponic plugs, you can pot them into soil (use a good potting mix, not garden soil) or move them into a larger hydroponic reservoir. The 5 to 6-week seedling period before transplanting is the standard timing used by professional herb growers, and it lines up well with what most kit-grown basil needs.
Cleaning and reusing your kit
Most of the hard components in a grow kit (trays, domes, pot holders, reservoir bodies) can be reused for multiple growing cycles. The key step before reuse is sanitation. Rinse trays and domes thoroughly, then wash with a diluted bleach solution (1 tablespoon of household bleach per gallon of water) or a gentle dish soap, rinse again completely, and let them air dry. This kills fungal spores and gnat eggs that can cause damping off and pest problems in your next cycle. You cannot reuse expanded peat pellets or spent soil pods; replace those with fresh ones. For hydroponic reservoirs, flush with plain water, clean any biofilm off the interior walls, and rinse the pump or wick material before refilling with fresh nutrient solution.
Do Buzzy grow kits actually work?
Yes, with a few caveats. Buzzy kits are straightforward, well-packaged seed-starting systems that perform well when conditions are right: a warm germination spot, a bright windowsill with 6 or more hours of direct light, and consistent moisture management. Where people run into trouble is treating them as set-and-forget products. Peat pellets dry out faster than larger containers, basil really does need strong light, and the small included growing medium does not provide much nutritional buffer after the first few weeks. Following Buzzy's monthly fertilizer recommendation matters more than it sounds. Overall, as entry points into herb gardening, Buzzy kits do exactly what they promise. If you are growing the Buzzy Basil kit specifically, the Buzzy Basil Grow Kit walkthrough on this site has model-specific photos and timing notes. The Buzzy Kitchen Herbs kit (which bundles basil with cilantro and chives) and the Buzzy Aloe and Buzzy Mini Rose kits follow a similar setup flow with herb-specific differences worth knowing before you start.
When to upgrade beyond a starter kit
If you find yourself re-buying peat-pellet kits every season and wishing for a longer productive window, a countertop LED hydroponic system is the natural next step. These units handle light, water, and spacing all in one footprint and let you grow basil year-round without chasing the sun. The trade-off is cost (entry-level LED dome units run $80 to $150) and a learning curve around nutrient management. For most people who enjoyed their first Buzzy kit and want to grow more, moving to a dedicated countertop herb garden is a genuinely satisfying upgrade. If you are on the fence, the 'do Buzzy grow kits work' deep-dive on this site walks through performance expectations and honest upgrade timing.
FAQ
What core source material do I need to convert 'basil grow kit instructions' (including Buzzy guides) into a single practical walkthrough?
Collect: 1) The OEM instructions and product pages for each kit model (Buzzy kit pages and PDFs) — these list included parts, seed germination windows, and any model-specific steps. 2) University extension seed-start and disease-prevention guidance (temperature, planting depth, moisture, damping-off prevention). 3) CEA/hydroponic lighting and nutrient references for PPFD, photoperiod, EC/pH targets (Virginia Tech, Michigan State, Johnny’s, peer-reviewed basil trials). 4) Consumer-LED and AeroGarden manuals for lamp distance, preset photoperiods and electrical/safety notes. 5) Practical peat-pellet/plug-tray workflows used by retailers and propagation research on seeding density. Use OEM manuals for safety and model-specific mechanical steps; use extension/CEA literature for numeric targets (temp, light, EC/pH), disease control, and transplant timing. Key example links to gather: Buzzy instructions page and product PDFs (buzzyseeds.com), AeroGarden manuals, Virginia Tech microgreen/CEA guide, Michigan State basil/seedling studies, Johnny’s hydroponic seedling guidance, NC State greenhouse disease-prevention guidance.
What should be in the quick-start checklist and timeline (unboxing to first harvest)?
Quick-start checklist: kit contents inventory, clean workspace, warm water, small hand mister, pH/EC meter (optional for hydroponics), general-purpose fertilizer (if not supplied), small fan (optional), scissors/harvest snips. Timeline (typical consumer kit expectations): Day 0 — unbox, hydrate medium, sow seeds shallow (≈3–6 mm), cover/dome, place under lights or bright warm spot. Days 5–14 — germination (Buzzy lists 7–14 days typical). Day 3–7 after cotyledons — remove dome, increase airflow and light. Week 2–4 — true leaves appear; begin light feedings (follow fertilizer directions) or add hydroponic nutrient when roots visible. Week 4–6 — ready for first cut/harvest for small basil; transplant if moving to larger pots when 4–6 true leaves and roots reach pellet edge or are pot-bound. Adjust timeline for slower germination in cool conditions.
Step-by-step setup for soil pods and peat pellets
1) Inventory kit; sanitize tray if reused. 2) Hydrate pellets/trays with warm water until fully expanded; place in tray. 3) Sow basil seeds very shallow (≈1/8"–1/4" / 3–6 mm); retail peat-pellet kits often suggest 1–3 seeds per pellet — sow that number then thin to one seedling per pellet after true leaves. 4) Cover with clear dome and keep medium consistently moist (not waterlogged). 5) Keep warm: target ≈65–75°F (18–24°C) for best germination. 6) After cotyledons expand (3–7 days), remove dome or vent; provide bright light (LED dome or grow light ~14–16 h/day). 7) When roots show at pellet edge and plants have several true leaves (≈3–6 weeks), pot up or transplant to larger container or garden.
Step-by-step setup for wick/hydroponic trays and small LED dome hydroponics
1) Assemble kit per OEM manual; place trays on a level surface and fill reservoir with water. 2) Insert seed pods or plugs per kit instructions; for hydroponic seed-start, you may pre-sprout in damp paper towel or moist plug. 3) Use a gentle light schedule: consumer dome 14–16 h photoperiod; follow manufacturer height guidance (many recommend ~3–6 in above seedlings) and raise as plants grow. 4) Start nutrients when seedlings have 2–3 true leaves or when roots contact reservoir; begin with weak solution and follow product directions — target hydroponic EC ≈1.0–1.6 mS·cm⁻¹ and pH ≈5.5–6.0 for basil (use extension/Johnny’s guidance to convert your nutrient product). 5) Keep reservoir topped up, change solution every 1–2 weeks for small consumer units, and follow OEM safety (unplug before cleaning).
Lighting, watering and nutrient care schedule for kit-grown basil
Lighting: 14–16 hours/day for vegetative growth; seedling PPFD targets for best uniformity are ~100–200 µmol·m⁻²·s⁻¹, but for consumer kits follow distance/preset schedules if you lack a meter. Watering: during germination keep medium consistently moist (surface not dry); after establishment water when top ~1" of potting mix is dry for pots; avoid prolonged saturation to prevent damping-off/root rot. Nutrients: retail kits usually include limited starter fertilizer — begin feeding when seedlings have 2–3 true leaves; for hydroponics aim EC ≈1.0–1.6 mS·cm⁻¹ and pH ≈5.5–6.0; for soil use a balanced general-purpose fertilizer per label (Buzzy recommends monthly application on their instructions page). Pruning/harvest: pinch/harvest from the top to encourage bushiness once 4–6 true leaves present; cut no more than one-third of plant at a time to allow regrowth.
How do I prevent and troubleshoot common problems (mold, damping-off, leggy seedlings, pests, nutrient signs)?
Mold/damping-off: causes — over-wet surface, poor air circulation, contaminated medium. Fix/prevent — use sterile medium, avoid continuous surface saturation, remove dome after cotyledons open, add gentle air movement, discard infected seedlings, sanitize trays before reuse (NC State guidance). Leggy seedlings: causes — insufficient light or too warm/distant lamps. Fix — move lights closer (follow dome/manual distance), increase photoperiod to 14–16 h or add supplemental light, gently reduce temperature if possible. Pests (aphids/fungus gnats): monitor leaves and root zone; treat small indoor infestations with sticky traps, manual removal, or insecticidal soap per label. Nutrient deficiency/toxicity signs: pale yellowing cotyledons/slow growth may signal low N; marginal burn/dark tips may indicate salt build-up from overfertilizing — for hydroponics maintain EC targets and refresh solution; for soil flush container and follow label rates. Use extension diagnostic pages for visual symptom matching; if persistent, compare symptoms with EC/pH readings.