Fill the outer ceramic planter with water, sow 5 to 7 basil seeds pressed gently into the surface of the hydrated growing medium and covered with about a quarter inch of that same medium, rinse the inner pot with its wick under warm water for 30 seconds, then set the inner pot back inside the planter and place the whole thing on a sunny windowsill between 65°F and 75°F. That is the core setup for the Buzzy Seeds Basil Green Ceramic Self-Watering Herb Kit. Everything below fills in the details so you don't make the common mistakes that cause seeds to rot, mold to appear, or seedlings to flop over before you ever get to harvest.
Buzzy Basil Grow Kit Instructions: Setup to Harvest Guide

Marcus Thornfield
8 Jun 2026
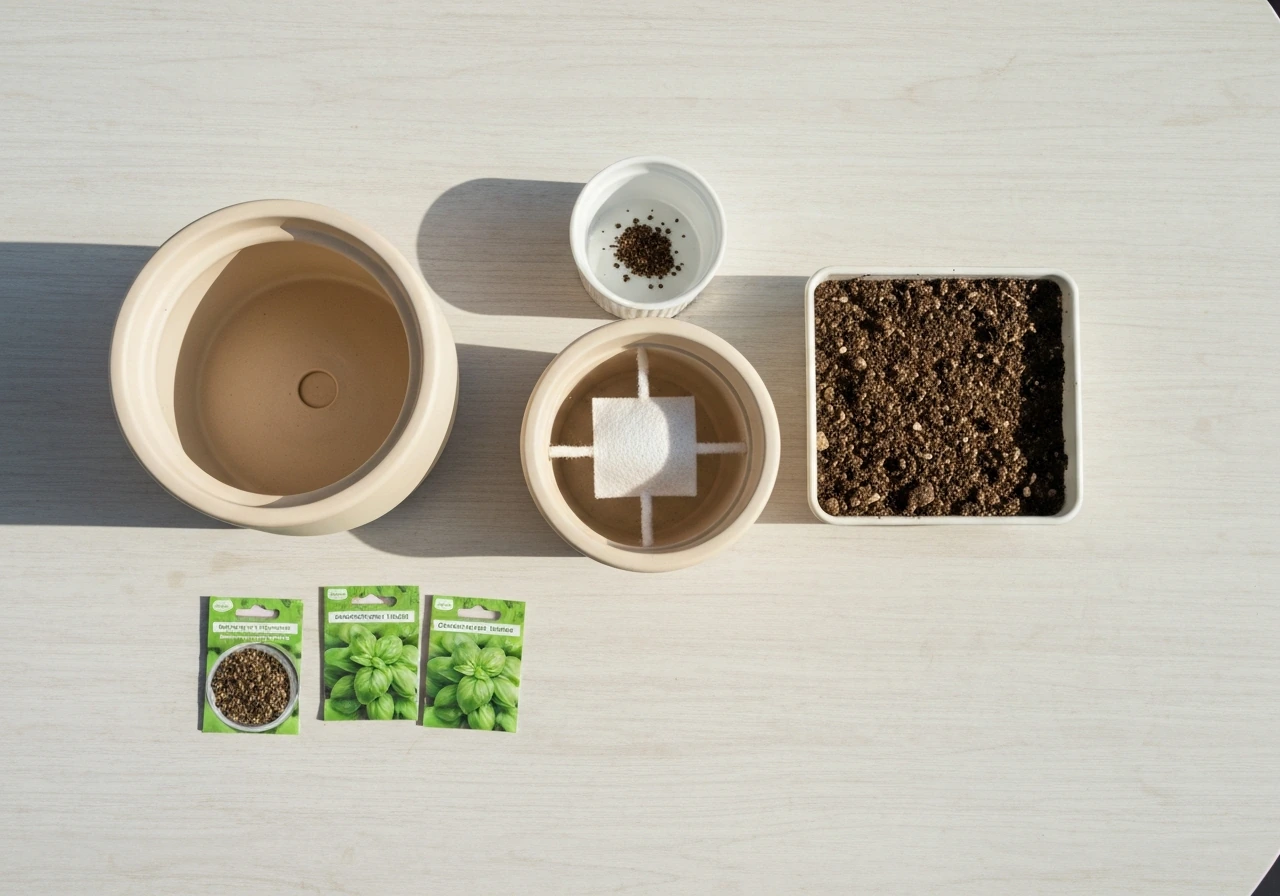
Figure out which Buzzy kit you actually have
Buzzy makes a surprisingly wide range of kits and the instructions differ enough between them that it matters. The most commonly searched version is the Buzzy Seeds Basil Green Ceramic Self-Watering Herb Kit, sold at Target and similar retailers. Buzzy’s official Instructions page describes the Buzzy Grow Kit as including seeds, a pot, and its special growing medium, along with easy step-by-step instructions and support [the Buzzy Seeds Basil Green Ceramic Self-Watering Herb Kit](https://buzzyseeds.
com/pages/instructions-page). It uses a two-piece ceramic planter: an outer pot that holds water and an inner pot with a cotton wick at the bottom that draws moisture up into the growing medium automatically. If you have that setup, the instructions in this article are written directly for you. If you have that setup, double-check the basil grow kit instructions in this article so you match the self-watering planter and wick correctly.
If your kit does not have an inner pot or a wick, it is a standard (non-self-watering) Buzzy grow kit, and you will water it manually from the top. The seed-planting steps are the same, but the watering routine is different. There are also Buzzy kits for flowers, grass, aloe, and a full kitchen herb collection, and those have their own specific seed and care requirements.
If you picked up one of those by mistake, or if you are comparing options, the instructions here will still give you the right framework, but the germination timing and plant behavior will differ. If you are wondering whether do Buzzy grow kits work for reliable sprouting and healthy seedlings, the short answer is yes when you match the watering and light to the specific kit you have.
What you need before you start
Buzzy kits are designed to be nearly self-contained, which is one of the reasons they are so popular as beginner setups. Still, gather a few things before you open the box so you are not hunting around mid-setup.
- The Buzzy kit box with all included components: ceramic outer planter, inner pot with wick, growing medium pellet or loose medium, and basil seed packet
- A bowl large enough to hydrate the growing medium
- Warm water (not hot, not cold)
- A small spoon or your finger for creating the seed indent
- A sunny windowsill or a spot near a grow light
- Optional: a small spray bottle for gentle top watering during germination
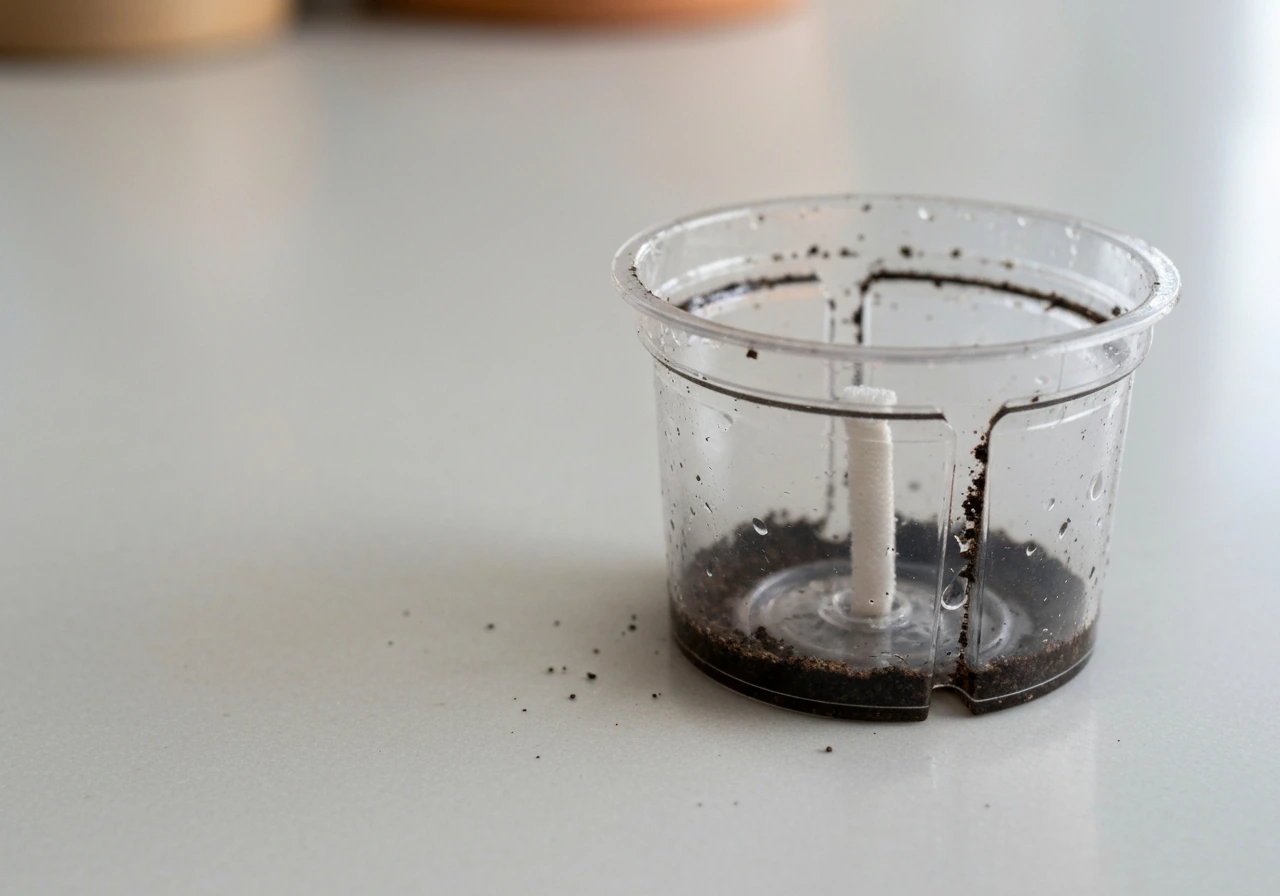
Check that your inner pot has a wick already threaded through the drainage hole before you do anything else. On some kits it comes pre-installed; on others it is tucked inside the box separately. If the wick is missing or has slipped out, the self-watering system will not function and your medium will dry out faster than expected.
Planting your basil seeds step by step
The order of these steps matters. Basil seeds are tiny and the growing medium needs to be fully hydrated before you place them, otherwise the medium swells after planting and can push seeds around or bury them too deep.
- Place the growing medium pellet (or loose medium) in a bowl and pour warm water over it. Let it absorb fully and expand. If it came as a compressed pellet, this can take a few minutes. Break apart any clumps until you have a loose, evenly moist mixture with a texture like a wrung-out sponge.
- Fill the inner pot with the hydrated growing medium. Leave a little space at the top, about half an inch, so seeds and their light covering of medium do not overflow when you water.
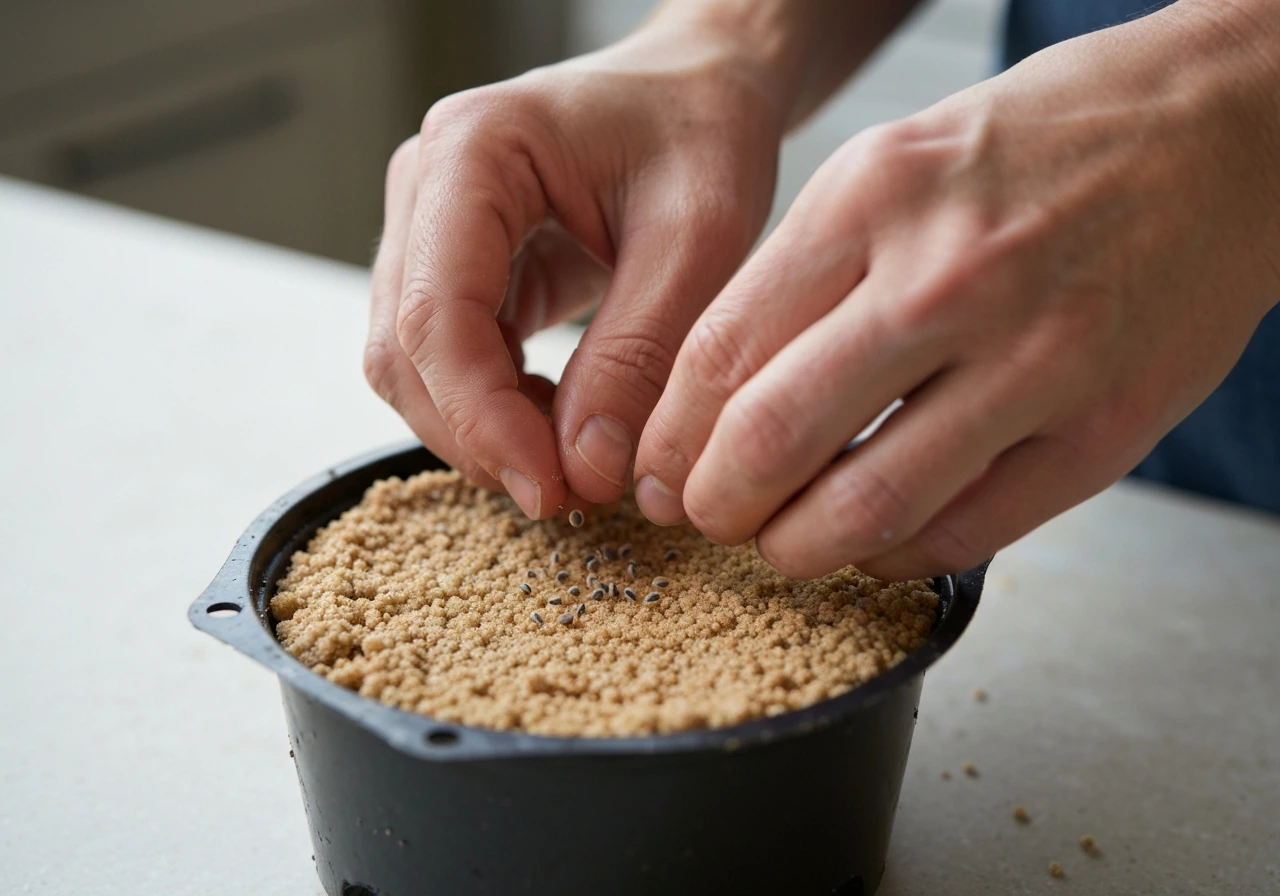
- Sow 5 to 7 basil seeds by gently pressing them into the surface of the medium. Do not bury them deep. Basil seeds need light to germinate well, so a shallow placement is correct here.
- Lightly cover the seeds with about a quarter inch of the remaining growing medium. That's it. Do not pack it down.
- Rinse the inner pot (with the wick and any included pebbles or rocks already in place) under warm running water for about 30 seconds. This saturates the wick and gets the self-watering system primed.
- Set the inner pot into the outer ceramic planter.
- Add water to the outer planter until it reaches a reasonable level below the base of the inner pot. The wick will draw moisture up from there.
Place the assembled kit somewhere bright and warm right after setup. The growing medium should feel evenly moist when you touch it. If it feels wet or you see water pooling on the surface, you used too much. Let it air out for an hour before covering.
Getting the self-watering system right (and avoiding overwatering)
The self-watering wick does most of the work, but you still need to manage the water level in the outer planter and refresh it periodically. The most common mistake is letting the outer planter sit with old, stagnant water for too long or, on the flip side, topping it up so much that the wick is constantly pushing excess moisture into the medium.
When it is time to refill the outer planter, remove the inner pot first and set it aside. Discard any remaining water from the outer planter rather than simply topping it up. This prevents mineral buildup and stagnation that can cause algae growth or a sour smell. Then add fresh water and place the inner pot back in.
For non-self-watering Buzzy kits, you skip the wick entirely and water from the top. Check the surface of the medium daily. When it starts to feel dry to the touch (not just cool, but actually drying out), add a small amount of water. The goal is that wrung-out-sponge feeling throughout. If water drains freely out the bottom every time you water, you are using too much at once. If the medium feels soggy and stays that way, you are watering too frequently. Basil roots need air as much as moisture, and soggy conditions are a fast track to root rot.
Light, temperature, and where to put your kit
Basil is a heat-loving plant and it is not shy about showing you when it is unhappy with its spot. Keep the kit in a room between 65°F and 75°F. Below 60°F, germination slows dramatically or stops. Above 80°F without good airflow, you risk leggy, stressed seedlings.
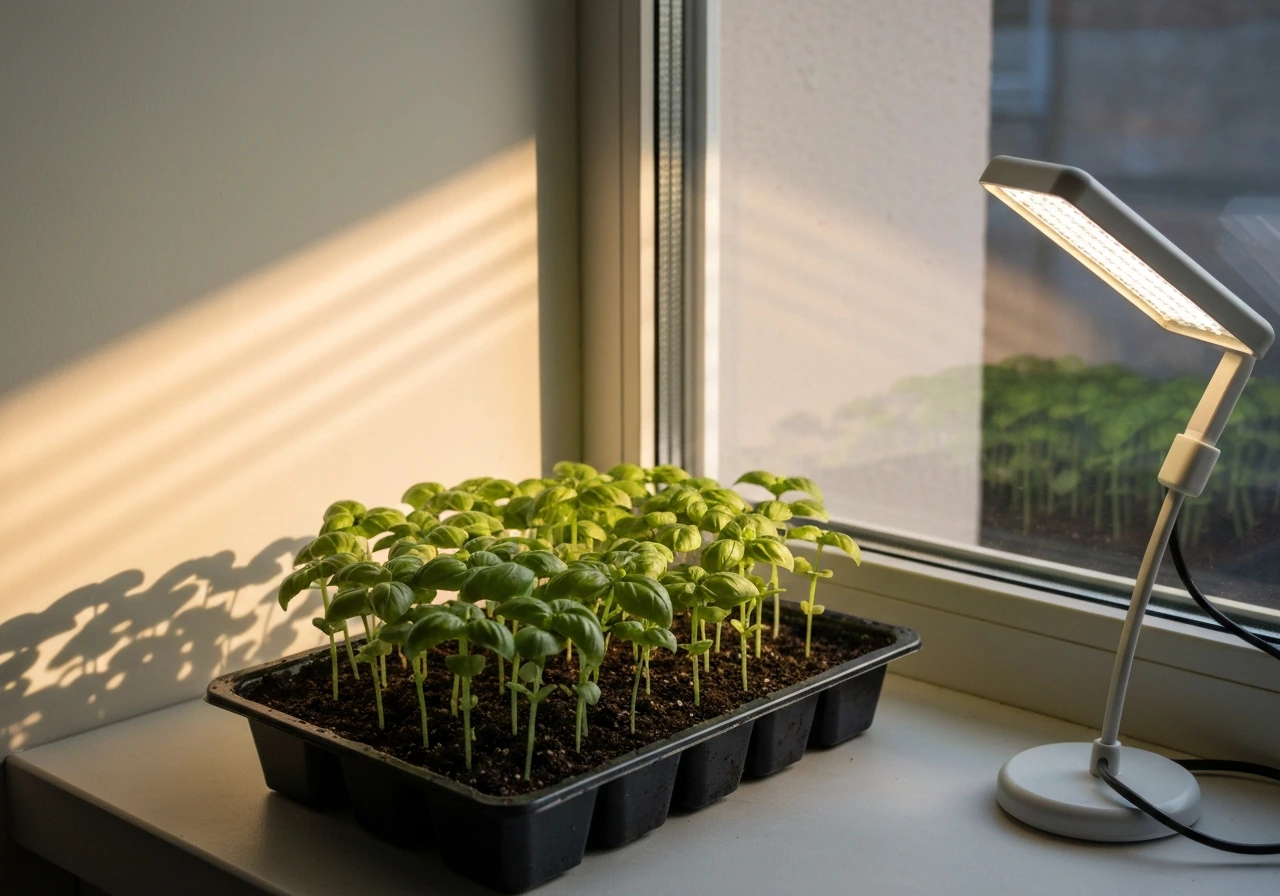
For light, a south- or east-facing windowsill that gets several hours of direct morning or afternoon sun is ideal. Bright, indirect light works during germination, but once seedlings emerge, basil wants as much sun as it can get. If your windows do not offer at least four to six hours of decent light, a small LED grow light placed a few inches above the kit will make a real difference. Basil grown in low light will sprout but stretch toward the light source and end up weak and spindly, which is the main cause of that frustrating leggy seedling problem.
Avoid placing the kit on a windowsill where it will sit in a cold draft at night, especially in air-conditioned rooms during summer or near single-pane windows in cooler months. The ceramic planter does not insulate well, and cold roots are almost as bad as cold air.
What to expect from seed to harvest
Buzzy's own guidance is honest here: some seeds sprout in a few days, others take a couple of weeks. For basil specifically, you can expect to see the first tiny sprouts emerge somewhere between 5 and 10 days after planting if temperatures and moisture are in the right range. Do not panic if nothing appears by day 5. Keep the medium consistently moist and resist the urge to dig around checking on the seeds.
The first leaves you see are called seed leaves (technically cotyledons). They look simple and rounded and are not the true basil leaves. The second set to emerge, the true leaves, is when things get interesting. These have the classic basil shape and a little more of that distinctive smell. Once you see the true leaves, two things should happen: first, thin the seedlings if more than two or three are crowded together in the pot (snip extras at the base with small scissors rather than pulling, which disturbs roots). Second, this is the point where you can start feeding with a balanced liquid fertilizer at half the recommended strength, roughly once a month.
From true leaves to first harvest is typically another three to four weeks. Harvest by pinching off the top sets of leaves just above a leaf node. This encourages the plant to branch out and produce more leaves rather than going straight to flower. If your basil starts producing tall flower spikes, pinch those off too. Once basil flowers and sets seed, leaf production slows down and the flavor becomes more bitter.
| Stage | Approximate Timing | What to Do |
|---|---|---|
| Seeds planted | Day 0 | Hydrate medium, sow 5–7 seeds, prime wick, set in warm bright spot |
| First sprouts visible | Days 5–10 | Keep medium moist, do not disturb, maintain 65–75°F |
| Seed leaves (cotyledons) | Days 7–14 | Increase light, watch for mold, continue light watering |
| True leaves emerge | Days 14–21 | Thin to 2–3 seedlings, begin half-strength fertilizing monthly |
| First harvest | Days 35–50 | Pinch top leaves above a node, harvest regularly to prevent flowering |
When things go wrong: common problems and fixes
Nothing has sprouted after two weeks
First, check temperature. If the kit has been sitting below 65°F, germination may have stalled without failing completely. Move it somewhere warmer and give it another week. Second, check moisture. If the medium dried out even once during the first two weeks, seeds may not have germinated. Re-moisten carefully and wait. If the medium has been wet the whole time but no sprouts have appeared, the seeds may have rotted from oversaturation. Start fresh with the remaining seeds from the packet if you have them, and this time aim for moist but not soaked.
White fuzzy spots or green algae on the surface
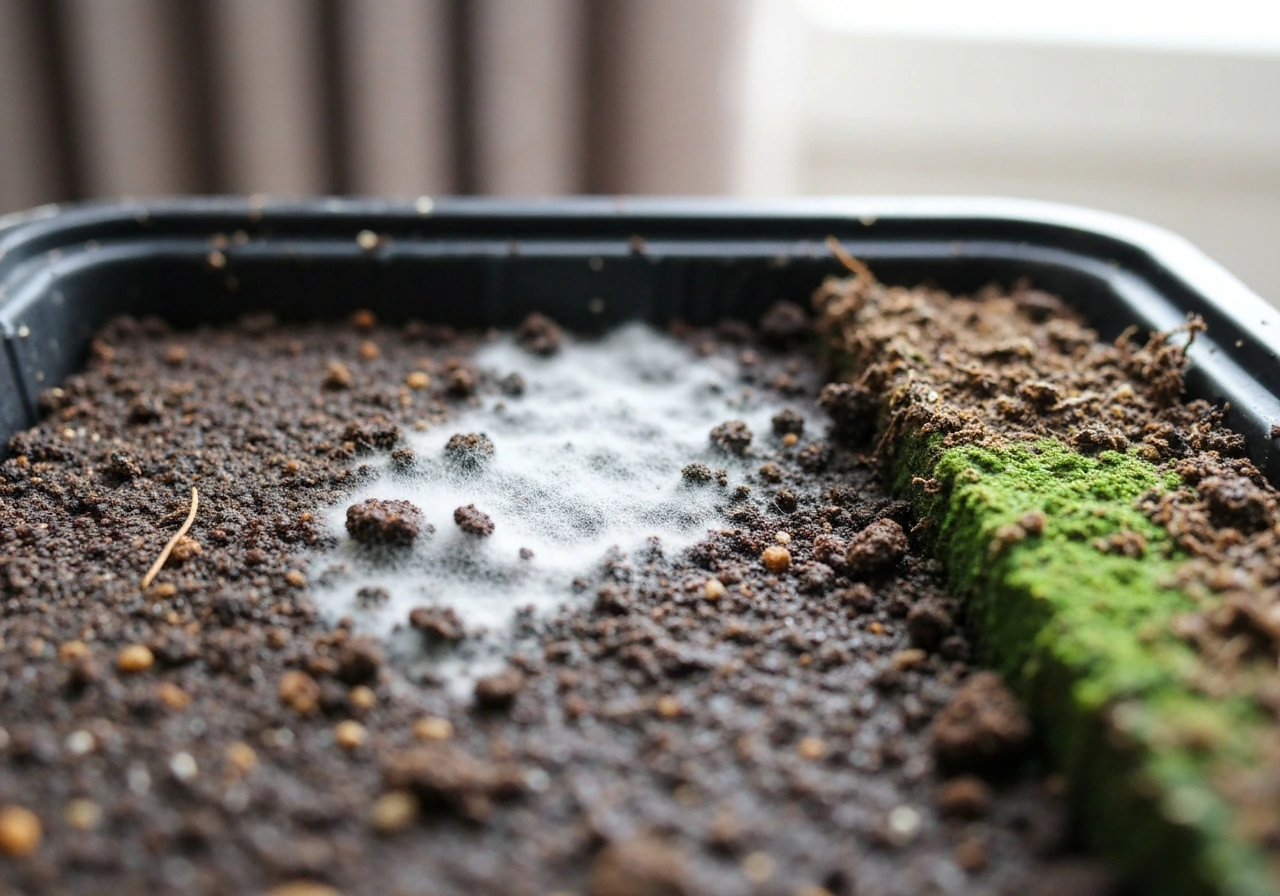
White fuzz is usually surface mold, a sign that the medium is staying too damp with too little airflow. To address it, let the surface dry out slightly between waterings, open a nearby window for a few hours a day, and try watering in the morning so evaporation can do its work during the day. Scrape off any visible mold gently and do not cover the kit with a dome or plastic bag unless seeds have not yet sprouted.
Green algae growing on the sides of the ceramic or on the medium surface is a light and moisture combination issue. It does not usually harm the plant but scraping it off and reducing how much direct light hits the water reservoir helps prevent it from coming back.
Seedlings are tall and thin (leggy growth)
Leggy seedlings are almost always a light problem. The plant is stretching toward a light source it cannot reach. Move the kit closer to the window, or if you are using a grow light, lower it to about three to four inches above the seedlings. You can gently add a little extra growing medium around the base of a leggy seedling to give it more support while it strengthens, but fixing the light is the only real solution.
Leaves are turning yellow
Yellow leaves on young basil usually point to one of three things: overwatering, underwatering, or nutrient deficiency. If the medium feels consistently wet and the lower leaves are yellowing first, ease back on watering and make sure the self-watering reservoir is not overfilled. If the medium has been dry and the whole plant looks pale and limp, give it a good drink of room-temperature water. If the plant has been in the kit for more than a month and has not been fed, yellowing is a sign it has used up the nutrients in the growing medium. Start the half-strength fertilizer routine to bring it back.
A few notes if you're comparing Buzzy kits
If you are deciding between this basil kit and other Buzzy options, it helps to know that the setup process is similar across the line but the plant behavior differs significantly. Basil is fast-growing and harvest-focused, which makes it satisfying for beginners who want results they can actually use in cooking.
If you chose the Buzzy Kitchen Herbs grow kit instead of the basil-only kit, the same setup basics apply, but the included herbs can have slightly different germination timelines Buzzy Kitchen Herbs kit. The Buzzy Kitchen Herbs kit follows a similar process but usually includes multiple herb types with different germination timelines. The Buzzy Aloe kit is a very different experience since it involves a succulent that needs much less water and much more patience.
The Buzzy Aloe kit is its own setup, so you should follow the specific aloe grow kit instructions for watering and light needs. The Buzzy Mini Rose and flower/grass kits use the same basic setup steps but are grown for ornamental purposes rather than culinary ones, so the lighting and harvesting approach changes.
If you searched for general Buzzy grow kit instructions and landed here on a basil search, these comparisons should help you confirm you are following the right guide.
FAQ
Can I cover the kit with plastic to speed up basil sprouting?
Unless the kit specifically includes a germination cover, avoid putting plastic or a dome over the planter. That traps moisture and airflow problems, which can worsen mold and oversaturation, especially if the surface stays wet for long periods. If you want extra warmth, move the kit slightly closer to light instead of sealing it.
My basil seedlings are alive but they look small and slow, what should I adjust first?
If seedlings are up but small, the fix is usually light and not more water. Increase direct sun exposure or raise the grow light height target to the upper leaves, then let the top surface of the medium dry slightly between waterings. For self-watering kits, also confirm the outer reservoir level is not being overfilled, which can keep the medium too damp.
If only a few seeds sprout, can I re-sow in the same kit?
Yes, you can replant if germination is poor, but do it cleanly. Remove the inner pot, discard any obviously sour-smelling or slimy medium, hydrate fresh medium, then sow seeds again at the same shallow depth (about a quarter inch) so they are not buried too deep.
When exactly should I start fertilizing, and what strength is safest?
Starting fertilizer is safer only after you see true leaves. Cotyledons are not a good sign to begin feeding. When you do fertilize, use half strength, and stop feeding if the plant looks burned at leaf tips.
What should I do if my basil starts producing flower spikes?
If your basil starts flowering early, pinch off the flower spikes promptly and continue regular top harvests. Once it flowers and sets seed, leaf flavor often turns bitter and production slows. Also check for low light, which can increase stress and early bolting.
How do I thin basil seedlings in this kind of kit without damaging roots?
Thin by snipping extras at the base rather than pulling. Pulling can tear the root mass and create gaps, which slows the remaining plants and can cause uneven growth. If you used five to seven seeds, thinning to about two or three strongest seedlings typically works well for this type of planter.
How do I tell whether I hydrated the growing medium too much or too little?
After you hydrate the medium, it should feel evenly moist, not dripping. If it looks like it needs to be watered right away after setup, you likely overfilled water before planting. Let the kit air out briefly, then monitor touch moisture before watering again.
My ceramic sides or reservoir keep growing algae, what can I change?
For self-watering kits, scrape off visible algae and reduce the time light hits the water reservoir. Use warm water for refills and replace stagnant reservoir water at each refill cycle instead of topping up repeatedly, since minerals and stagnation can re-feed algae.
How can I tell whether my basil problem is oversaturation versus underwatering?
Check at the root and drainage level. Basil in these kits often fails from consistently soggy medium, so confirm the outer reservoir is not kept too high and that excess water is not constantly pushing up through the wick. If the surface repeatedly stays wet and you smell sourness, it is time to refresh medium rather than trying to “wait it out.”