
The basic sow and grow process for a consumer grow kit is this: prep your media (soil plugs, sponges, or hydro pods), blank" rel="noopener noreferrer">place seeds at a depth of roughly twice their diameter, keep things warm (65–75°F / 18–24°C) and moist but not soggy, and follow your kit's light and feeding schedule until plants are ready to harvest. The details vary depending on whether you have a soil-based seed starter, a hydroponic unit like an AeroGarden or Click & Grow, or a water-based terrarium-style kit. This guide walks through every stage so you know exactly what to do today. If you are trying to figure out how to use a Sensi Grow kit, follow the kit’s specific light, water, and nutrient schedule step by step.
Sow and Grow Instructions: Step-by-Step Grow Kit Guide

Marcus Thornfield
9 Jul 2026
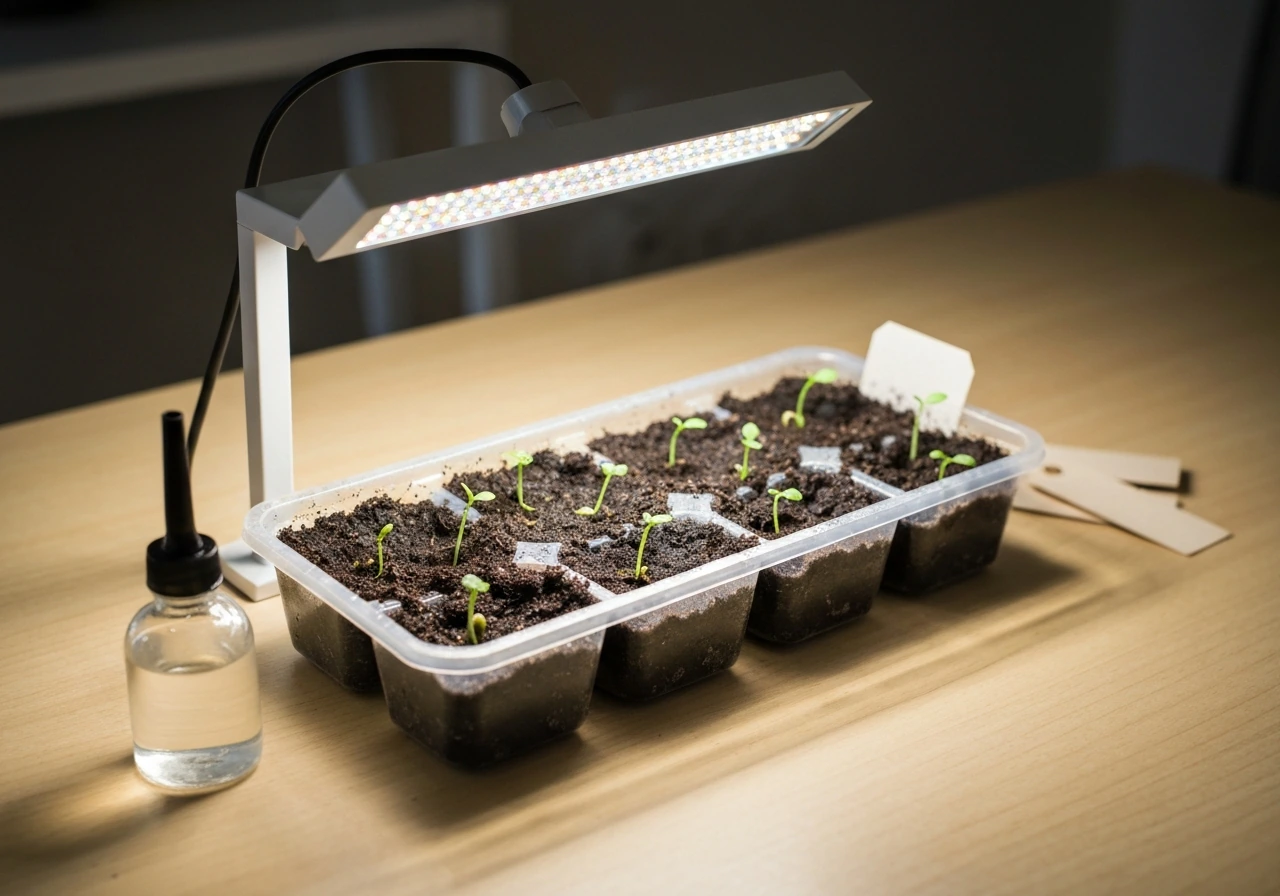
Pick the right kit and ingredients
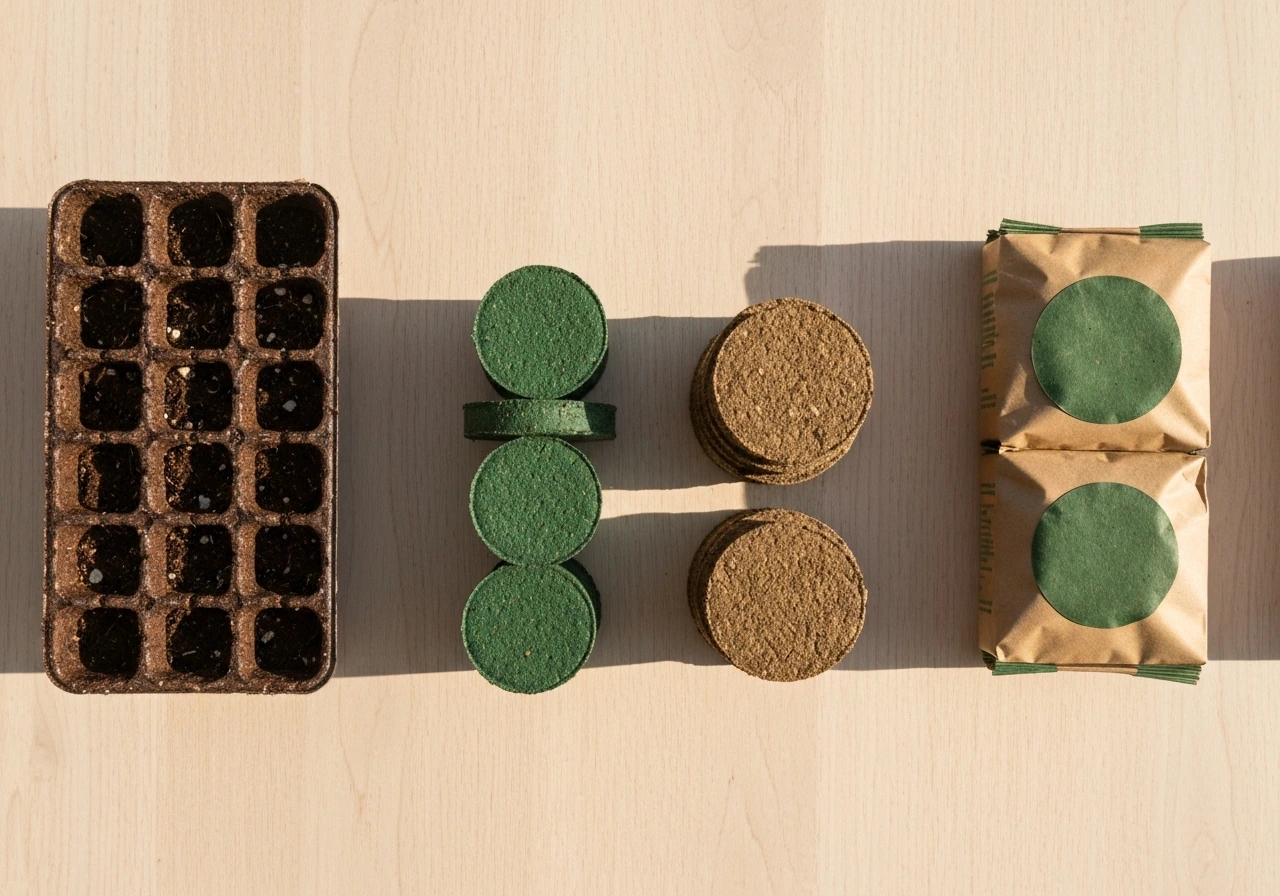
Before you sow a single seed, make sure you have the right kit for what you want to grow. Consumer grow kits fall into three broad types: soil-based seed starters (like the Gurney's Seed Starting Kit, which comes with a water reservoir tray, grow plugs, a humidity dome, and a small bottle of seedling boost fertilizer), all-in-one hydroponic gardens (like AeroGarden or Click & Grow, which handle most of the setup for you), and water-based or terrarium-style kits designed for novelty or display growing.
Match your plant variety to the kit. Click & Grow pods, for example, are pre-loaded with "smart soil" and specific seed mixes, so you just pick the pod you want to grow. To get more practical results, follow the pod-specific instructions and adjust light, water, and nutrients as the seedlings grow Click & Grow pods.
If you're using an AeroGarden "Grow Anything" setup, know that root crops like carrots and radishes are generally not a good fit unless you plan to transplant very soon after germination. Soil starter kits are more flexible but require you to source seeds separately. Whatever kit you have, dig out the instruction manual and find the specific model number before you start. A lot of frustration comes from following generic instructions for the wrong kit model.
For nutrient and water ingredients, hydro setups are the most demanding. You'll want to know your tap water's starting EC (electrical conductivity) and pH. Most hydroponic grow kits, including systems following the HydroGarden AQUA approach, target a pH of around 5.5 to 6.5 and measure EC additions on top of your water's baseline (expressed as EC+ at 0.0 EC baseline, 25°C). If you're unsure about your water quality, a basic pH and EC meter is worth the investment, and it costs about as much as a replacement pod pack. For soil kits, a pH around 6.0 to 6.5 is your sweet spot.
- Soil seed-starter kits: seeds, growing plugs or cell trays, a humidity dome, seedling fertilizer, and clean trays
- Hydroponic gardens (AeroGarden, Click & Grow): kit-specific seed pods or grow sponges/baskets, pH-balanced water, and the kit's nutrient solution
- Water-based/terrarium kits: seeds, a spray bottle, and the kit's included growing medium (usually a compressed soil disc or wool plug)
- All kit types: labels or a marker so you know what is growing where, and a thermometer to check ambient temperature
Sow setup: prep, timing, and spacing
Good prep before sowing saves you a lot of trouble later. For plug-based media (Rapid Rooter plugs, stone wool, grow sponges), pre-soak them in water or a very mild nutrient solution at around 200 ppm (roughly 0.4 mS EC) until they are completely saturated, then let them drain until they are moist but not dripping. The Hydrofarm CK64050 instructions are specific here: use pH-balanced water in the 5.5–6.5 range, and do this 12–24 hours before you plant seeds. That window gives the media time to stabilize. For complete nature's blossom sow and grow seed starter kit instructions, follow the setup and timing guidance for your specific plug or soil system.
For soil cell trays and plug flats, moisten the growing medium before you fill the cells, not after. Dry medium repels water and creates air pockets that leave seeds stranded. Fill cells to within about a centimeter of the top, and use a spray bottle to mist the surface rather than pouring water directly, which can displace seeds.
Seed depth: aim for roughly twice the seed's diameter. If you are using a stop-and-shop grow and learn seed pod, follow the pod instructions for seeding depth and keep the medium consistently moist during germination stop and shop grow and learn seed pod. A tomato seed goes in about 3–5 mm deep. A large seed like a bean might go 2–3 cm deep.
For tiny seeds like basil or lettuce, pressing them lightly against the surface of a moist plug and covering with a thin pinch of medium is enough. In stone wool or Rapid Rooter plugs, the pre-drilled hole is your guide. Place 1–2 seeds into the center hole, then use your finger or a toothpick to close the plug material over the top so the seed sits in darkness.
Spacing matters most in soil trays. One seed per cell is the rule for crops like tomatoes, peppers, and eggplants, which you'll thin and move to more space 2–3 weeks after germination. For smaller herbs and greens in shared trays, allow at least 2–3 cm between seeds. In hydroponic pod systems, the kit does the spacing math for you since each pod slot is fixed. With Click & Grow's Grow Anything pods, you drop seeds into the pod's pre-formed cavity and the smart soil handles the rest.
Timing: most vegetable and herb seeds germinate best between 65–75°F (18–24°C). Water-based and novelty kits perform well in the 68–80°F range (20–27°C). Germination for most kits takes 4–14 days depending on variety and conditions. The Hydrofarm CK64050, for instance, lists that exact window. Write the sow date on your labels when you plant. If nothing has sprouted by day 14, that is your cue to troubleshoot rather than wait.
Step-by-step growing routine (light, water, nutrients)
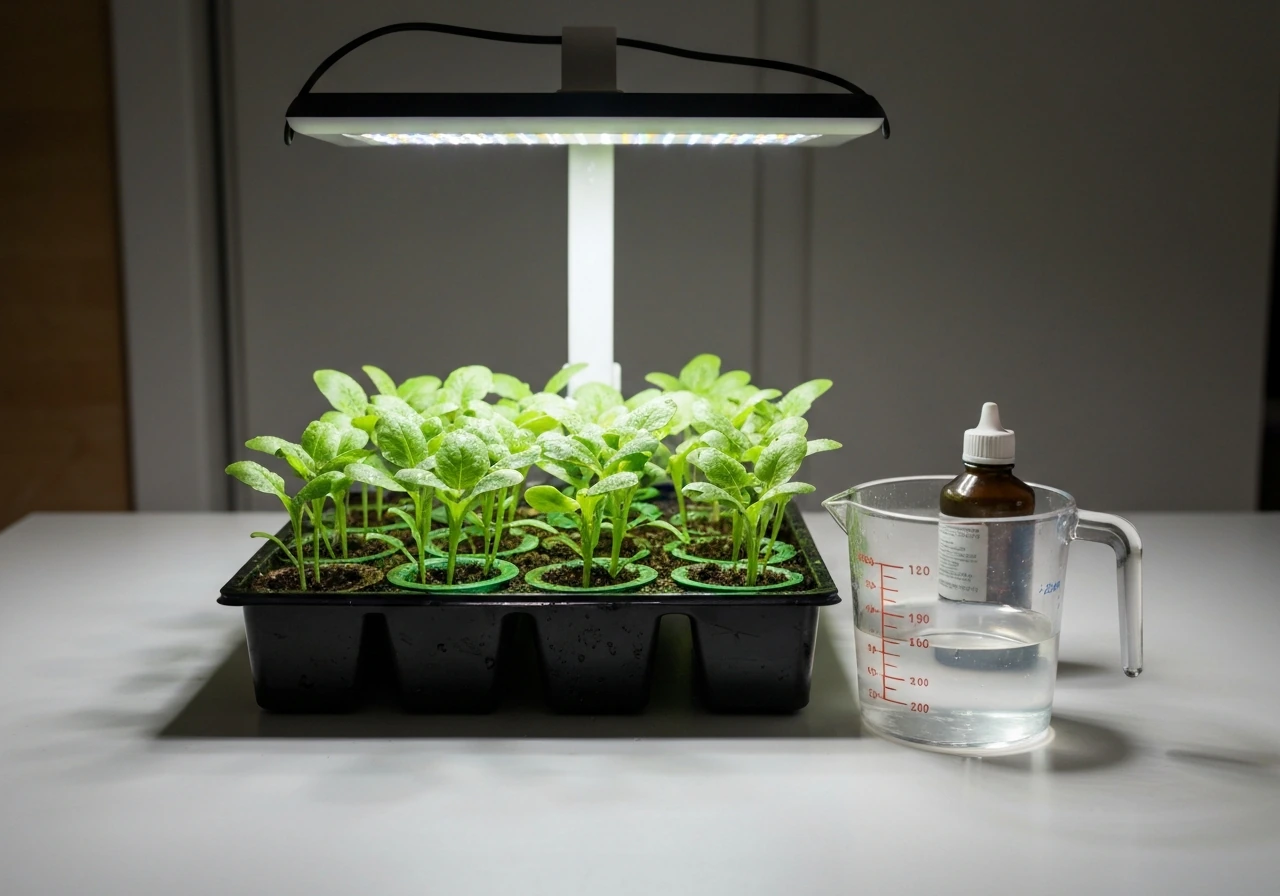
Light
All-in-one hydroponic kits like AeroGarden and Click & Grow come with built-in LED grow lights, so you just plug in and follow the kit's timer recommendation (usually 16 hours on, 8 off for seedlings and herbs, and 14–16 hours on for fruiting plants). Position the light as close to your seedlings as the kit allows during early growth to prevent leggy, stretched stems. AeroGarden hoods are height-adjustable, so raise them as plants grow. For soil starter kits that don't include a light, place them in the brightest south-facing window you have or add a dedicated seedling light strip 2–4 inches above the tray.
Water
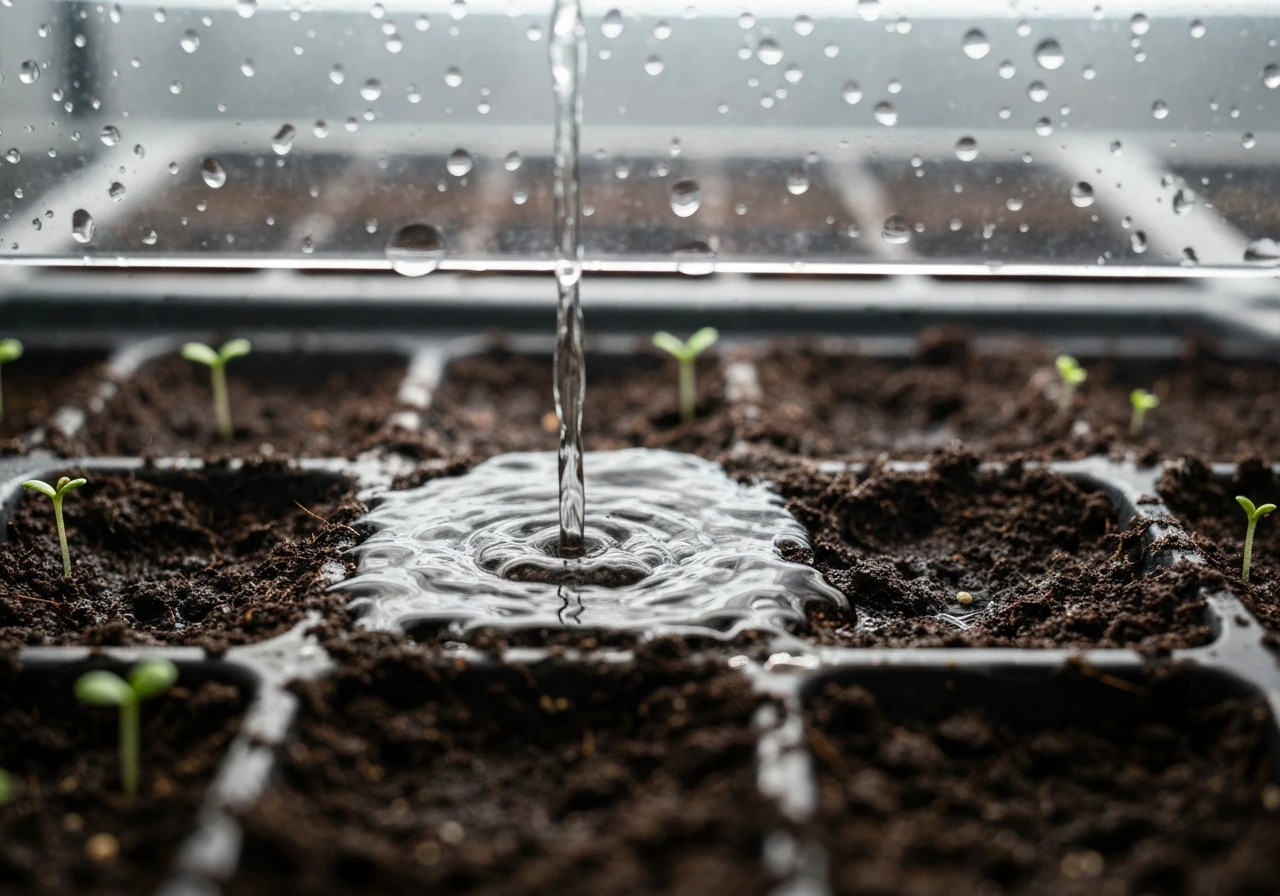
Overwatering kills more seedlings than underwatering. The goal is to keep growing medium consistently moist, not saturated. For soil trays with a humidity dome, mist the surface and check daily by pressing a finger into the medium. For reservoir-based kits (AeroGarden, Click & Grow Smart Garden 9 with its 1.
2 L / 40 oz tank), top up water when the indicator shows low and change it fully between grow cycles. AeroGarden specifically recommends adding fresh water along with nutrient solution at each refill to reset the pH environment for germination. If you are working with Sensi Grow A and B, you can add the nutrients after germination and follow the recommended mixing ratio for each bottle reset the pH environment for germination.
Nutrients
Most pod-based kits include all the nutrients the plant needs in the pod's growing medium for the first week or two. After that, hydroponic kits use a liquid nutrient solution added to the water reservoir. Follow the nutrient bottle instructions precisely because the amounts are small and easy to overdose. For more detailed sensi grow instructions, follow the nutrient, water, and timing steps listed for your specific kit phase.
For hydro setups, start with a lower EC during the seedling/rooting phase and increase during the vegetative stage (refer to your kit's phase-specific targets). For soil plug kits like Gurney's, use the included seedling boost fertilizer at the recommended dilution starting around week two. Skip it earlier than that because newly sprouted roots are sensitive.
Temperature and airflow
Keep your kit away from cold windowsills (below 60°F slows most seeds down significantly) and away from heating vents, which dry out plugs rapidly. A small fan on the lowest setting running for a few hours a day improves airflow, strengthens stems, and reduces mold risk. Remove humidity domes once seedlings have their first true leaves, or if you see condensation building up with no airflow, prop a corner open.
Troubleshooting common failure points (germination to transplant)
No germination after 14 days
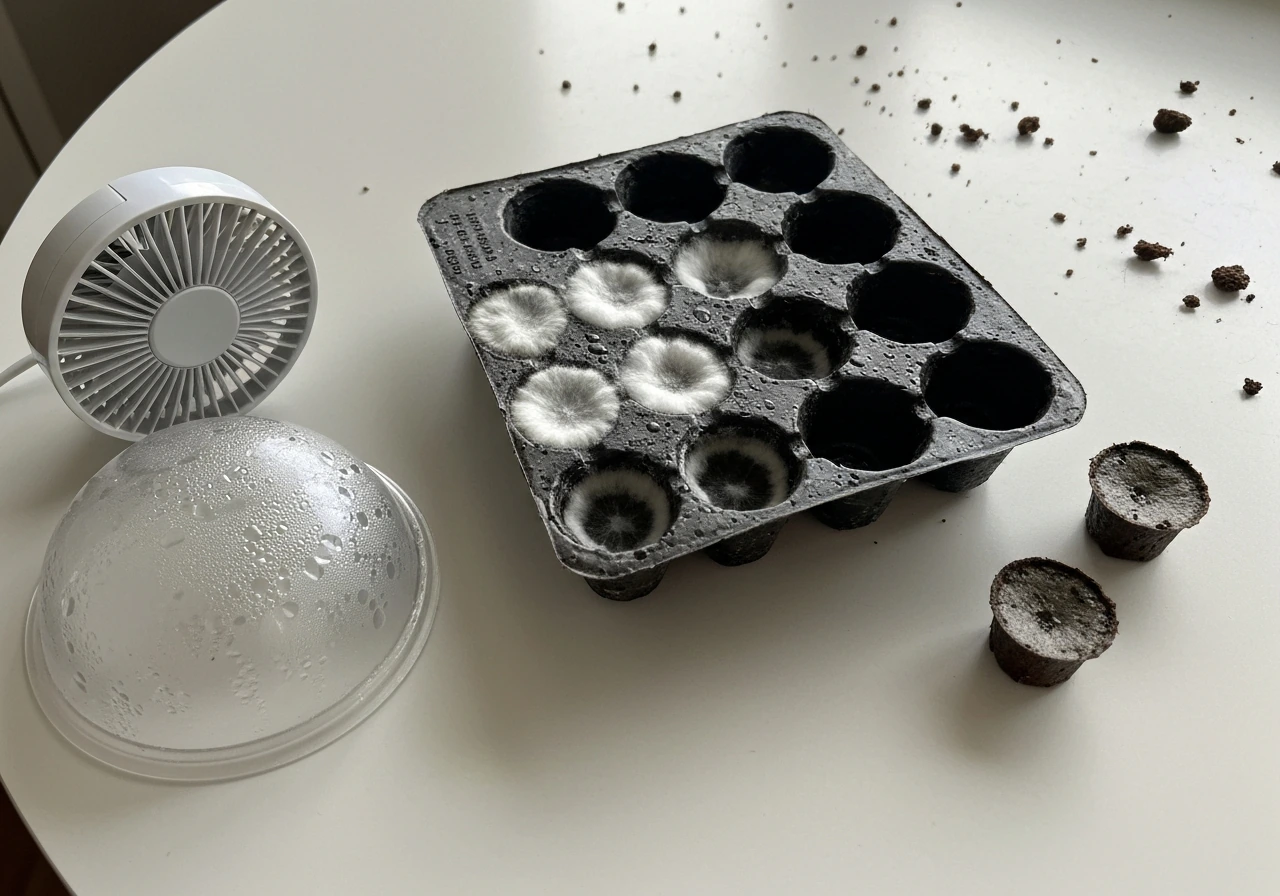
Check temperature first. If the room is below 65°F, seeds may just be very slow. Move the kit to a warmer spot. If you are using Click & Grow pods that are past their one-year shelf life (the company notes declining success rates after that point), the seeds may simply be too old. Check the pack date on the back. For plug-based media, confirm the plug was moist all the way through when you sowed, and not just damp on the surface.
Mold and damping-off
White fuzzy mold on plugs usually means too much moisture and too little airflow. Remove the humidity dome, add some air movement, and remove the worst-affected plugs so the problem doesn't spread. Damping-off is different: seedlings that were fine yesterday suddenly collapse at the soil line. That is a fungal problem caused by overwatering and poor drainage. There is no saving collapsed seedlings, but you can stop it spreading by improving drainage, reducing watering frequency, and removing affected plants immediately.
Leggy seedlings
Leggy, stretched seedlings are almost always a light problem. The plant is reaching for more light than it is getting. Move soil trays closer to your light source or switch your grow light schedule to 16–18 hours on. For all-in-one hydro gardens, lower the lamp hood as close as the kit allows for young plants. You cannot reverse the stretch that already happened, but you can bury some of it when you transplant (especially with tomatoes, which root along their buried stem).
Yellowing leaves
Yellow leaves on young seedlings usually point to one of three things: overwatering, a nutrient deficiency (most common around week 3–4 in kits without added nutrients), or a pH problem in hydro setups. For soil kits, let the medium dry slightly before the next watering. For hydro kits, check your water pH and aim for 5.5–6.5. If you're already adding nutrients and seeing yellowing, check the EC isn't too high (nutrient burn looks like yellowed or browning leaf tips).
Roots tangling or seedlings outgrowing the kit
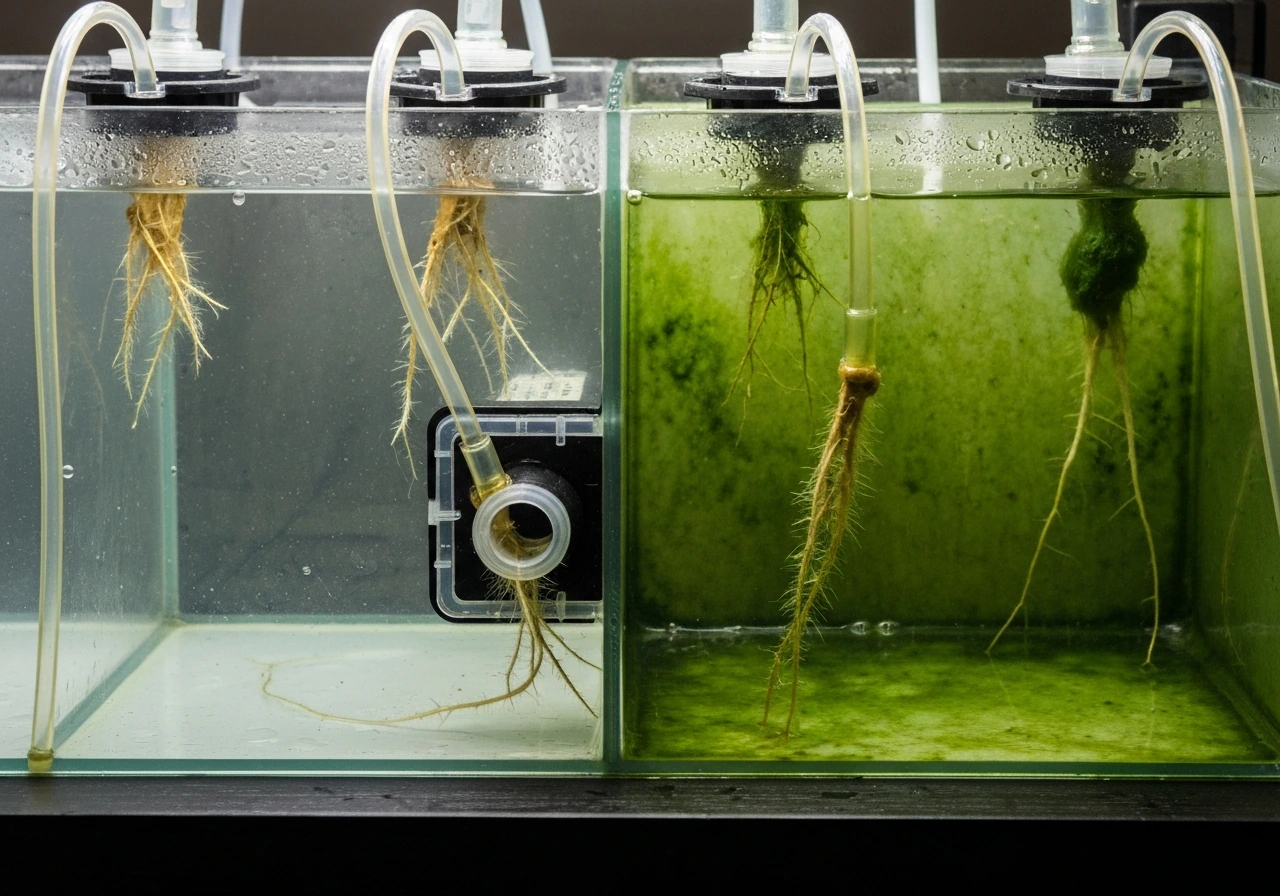
In hydro pod systems, roots naturally extend into the reservoir. That is normal. If roots are visibly blocking pump intakes or tangling across multiple pods, it is time to harvest the plant or move it to a larger container. For soil trays, when you can see roots poking out of cell bottoms or circling at the base of a plug, transplant soon. The AeroGarden user guide suggests thinning seedlings to one per pod when plants reach about 2 inches tall (by cutting or pinching extras at the base rather than pulling, which disturbs roots).
Algae in the reservoir (hydro kits)
Green slime in the water tank is algae, and it competes with your plants for nutrients and oxygen. It grows when light reaches the water. Cover any exposed water surfaces with the kit's light-blocking pods or a piece of dark tape. AeroGarden recommends fully cleaning the unit before starting each new grow cycle for exactly this reason. A clean reservoir at the start prevents most algae problems.
Harvesting and post-harvest care
The most useful harvesting rule for any grow kit is the one-third rule: never remove more than one-third of a plant at a single harvest. The remaining leaves do the photosynthesis work that keeps the plant alive and productive. For lettuce and leafy greens in AeroGarden systems, a practical routine is harvesting every 2–3 days, taking outer leaves and leaving the center growth point intact.
Each Seed Pod Label in AeroGarden’s herb-series guide includes information and tending and harvest instructions tailored to AeroGarden pod systems Seed Pod Label includes tending and harvest instructions.
Click & Grow's herb pods like Italian kale are typically ready in 5–6 weeks, and oregano in 5–12 weeks depending on conditions. Check the specific pod pack or product page for your variety.
For a "haircut" harvest (cutting the whole plant back), leave at least two-thirds of the plant height so it can regrow. Herbs like basil and oregano will push out new growth from nodes below the cut. After harvesting herbs, rinse them briefly in cool water, pat dry, and store loosely wrapped in a slightly damp paper towel in the fridge for up to a week. Leafy greens are best used immediately after harvest.
If your kit grew seedlings that are meant for outdoor transplanting (tomatoes, peppers, flowers started indoors), you need to harden them off before moving outside. Start by placing the tray outdoors in a sheltered spot for one hour on day one, then increase the outdoor time by an hour each day over 7–10 days. This gradually acclimates seedlings to direct sun, wind, and temperature swings that would otherwise shock them. After hardening off, transplant in the early evening rather than midday to reduce transplant stress.
After a complete grow cycle, clean your hydro kit's reservoir with warm water and a small amount of white vinegar or the manufacturer's cleaning solution before starting fresh. For soil trays, discard used plugs (or compost them) and wash trays with diluted dish soap. Starting a new cycle with clean equipment makes a noticeable difference in germination rates.
Care schedules for different kit types (soil, hydro, seed-starting)
The day-to-day routine really does differ based on the kit you have. Here is how the three main types compare across the key care tasks.
| Care Task | Soil Seed-Starter (e.g. Gurney's) | Hydroponic Garden (e.g. AeroGarden, Click & Grow) | Water-Based / Terrarium Kit |
|---|---|---|---|
| Watering frequency | Check daily, water when surface feels dry (every 1–2 days) | Top up reservoir when low indicator triggers (every 3–7 days) | Mist with spray bottle daily or as needed to maintain moisture |
| Light hours | 16–18 hrs under grow light, or brightest window available | Follow kit timer (typically 16 hrs on / 8 hrs off for seedlings and herbs) | Bright indirect light; avoid direct harsh sun which dries out faster |
| Nutrients | Add seedling fertilizer from week 2–3 at recommended dilution | Add kit nutrient solution to reservoir per bottle instructions; increase EC as plants mature | Most novelty kits need no extra nutrients; check included guide |
| Temperature target | 65–75°F (18–24°C) | 65–75°F (18–24°C); avoid placing near heating vents | 68–80°F (20–27°C) for best germination |
| Thinning | Thin to 1 seedling per cell after first true leaves appear | Thin to 1 seedling per pod at 2 inches tall (cut, don't pull) | Remove weakest seedling if 2 sprout in same spot |
| pH monitoring | Not usually needed for plug kits; target 6.0–6.5 for soil | Monitor water pH; target 5.5–6.5; adjust if yellowing appears | Check if kit instructions specify; many pre-buffered |
| Typical harvest window | 6–10+ weeks depending on variety | 4–12 weeks depending on pod type (e.g. kale 5–6 wks, oregano 5–12 wks) | Varies; follow kit-specific guide |
| Post-cycle cleanup | Discard used plugs; wash trays with diluted soap | Full reservoir clean before new cycle; manufacturer cleaning solution recommended | Rinse and dry container; replace growing medium for next use |
If you are using a nutrient-focused hydroponic setup where you are mixing your own A and B solutions (rather than a pre-filled pod system), the routine becomes more technical. If you are following dutch nutrients grow a and b instructions, mix each part separately and keep your reservoir measurements consistent A and B solutions. You will be managing EC and pH at each water change, and the targets shift between the rooting, vegetative, and generative phases. Nature's Blossom seed starter kits and other seed-starting systems have their own specific step sequences that are worth following closely for the best results, especially around timing the first fertilizer application.
Whatever kit you are using, the single most common mistake is impatience. Germination takes up to 14 days in many kits. Growth in the first two weeks looks slow because the plant is building roots you cannot see. Stay consistent with your light, water, and temperature routine and the visible growth will come. If you want nature's blossom results, follow the specific sow and grow instructions that match your kit and plant variety. When it does, the one-third harvest rule keeps it going for weeks or months longer than if you cut plants too hard early on.
FAQ
What should I do if seeds germinate but seedlings stop growing after sprouting?
Check the basics in order: temperature first (aim to keep it in the kit’s germination range), light distance second (move closer if stems are stretching), and moisture third (medium should be moist, not saturated). If you already started nutrients right away, pause feeding until the plant has at least its first true leaves, since many kits and young roots are sensitive to early fertilizer strength.
How can I tell the difference between under-watering, over-watering, and nutrient issues in a grow kit?
Under-watering usually shows as dry, shrinking medium and slower germination. Over-watering often leads to constant wet plugs, fungal spots, or damping-off at the soil line. Nutrient issues show more like persistent yellowing or leaf-tip burn, and in hydro setups they often correlate with incorrect pH or EC being too high, especially after refills or partial water changes.
Do I need to soak seeds before sow and grow, or is that only for special cases?
Most kit seeds do not require soaking beyond keeping the medium consistently moist. Soaking can be helpful only when the seed instructions explicitly recommend it (often for older or very slow varieties). If you soak, shorten the time to prevent mushy or mold-prone seeds, and sow promptly into already-prepared, fully saturated plugs that are draining but not dripping.
How do I adjust sowing depth when my seeds vary in size within the same pack?
Use the rule of thumb, twice the seed diameter, but sort by size if the pack includes noticeably different seed sizes. Larger seeds can go deeper, tiny seeds should be barely covered, and if the kit uses pre-drilled plug holes (stone wool or Rapid Rooter), follow the depth guidance that hole geometry implies rather than forcing all seeds to the same depth.
What temperature should I use if my room swings day to night?
Try to keep the growing area stable, especially during the first 4 to 10 days. If nights drop below about 60°F (15 to 16°C), seedlings may still emerge, but germination can stall and damping-off risk can rise from slow drying. Use a consistent warm spot, not a heater vent, and consider insulating the sides of the tray if your nights are cold.
Can I reuse old plugs or seed-starting medium?
In general, reused plugs are a gamble because disease organisms and residue can remain even after rinsing. For the best results, discard used plugs and start with fresh media each cycle, especially if you had mold or damping-off. If the kit calls for specific media reuse rules, follow those instead.
When should I remove the humidity dome, and what if condensation keeps coming back?
Remove the dome once you see the first true leaves or once humidity is so high that droplets constantly form and fall back onto plugs. If condensation resumes after you remove it, increase airflow slightly (low fan, a bit more spacing) rather than re-sealing the dome for longer periods, since persistent moisture plus still air is a common mold trigger.
How do I prevent mold without overcorrecting the watering schedule?
Aim for moist, not wet, and give daily checks. If you see white fuzzy mold, increase airflow and remove the dome rather than watering more, then remove the worst-affected plugs so it does not spread. Also avoid misting so aggressively that water pools, especially in trays with poor drainage.
What is the correct way to thin seedlings, cut or pull?
If the kit and setup allow cutting, snip extras at the surface because pulling can disturb neighbors and damage roots. Use the kit’s pod or cell spacing guidance, and thin when seedlings have enough size to identify the strongest ones, commonly a couple of weeks after germination or when they reach the kit’s recommended height.
My hydro kit shows algae, but I still need the lights for growth. What’s the safest fix?
Block light from reaching the water surface, do not just lower light intensity. Keep reservoir components clean, cover exposed surfaces with kit-approved light blockers, and fully clean the reservoir at the start of a new cycle. Also avoid leaving the tank uncovered during refills or maintenance.
Do I harvest earlier if plants look smaller than expected?
Size can vary with light level and nutrient phase timing, but harvesting too early can reduce yields in repeat-harvest crops. Use the kit’s pod-specific readiness window and the plant’s appearance, if the plant is clearly healthy and reached the variety’s target days, harvest using the one-third rule. If growth is stunted, troubleshoot first rather than cutting more heavily.
How should I store harvested herbs and leafy greens from a grow kit?
Herbs often do best lightly rinsed, then patted dry, stored loosely wrapped with a slightly damp paper towel in the fridge for about a week. Leafy greens are best used sooner because they lose texture quickly. For anything that wilted during storage, trimming ends and using a cool, clean rinse can help revive some stems before use.
What should I do with seedlings intended for transplant, if they look hardened off but are still fragile?
Extend hardening off by 2 to 3 days if plants are pale, floppy, or showing leaf stress. Transplant in the early evening as planned, keep them shaded the first day if the weather is very sunny, and water at transplant so roots establish quickly. This is especially important for tomatoes and peppers that were started indoors under different light intensity.