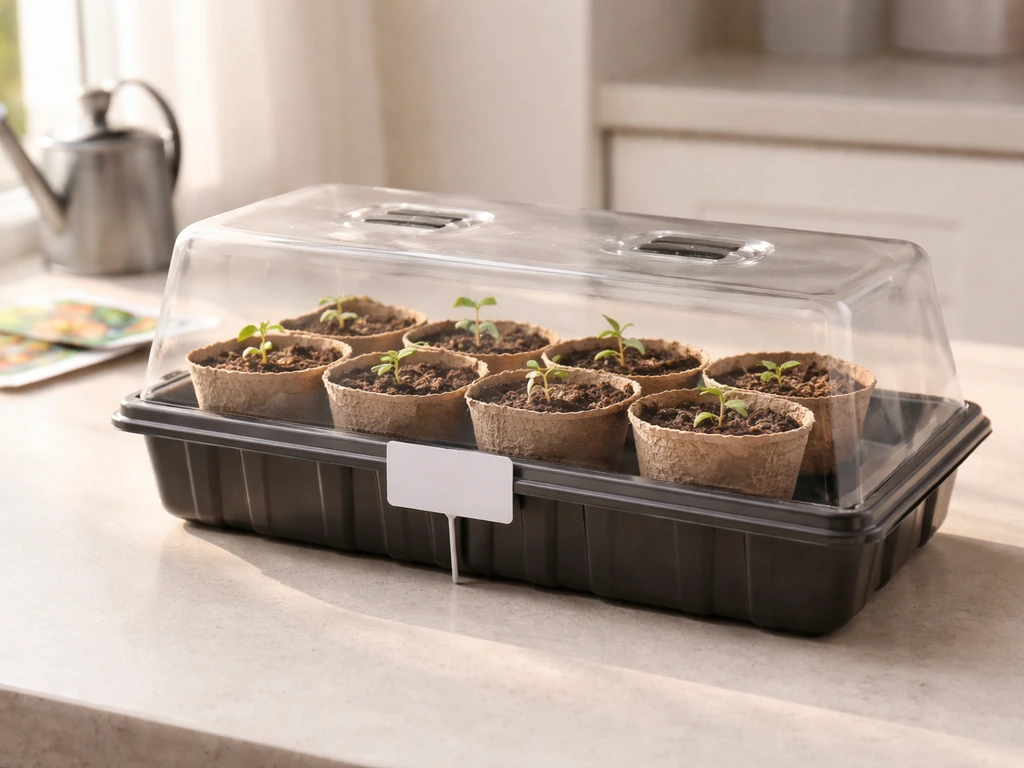
The Stop & Shop Grow and Learn seed pod kit is a beginner-friendly seed-starting system that comes with biodegradable peat pots, compressed soil pellets, plant markers, seed varieties, and an activity guide. If you want a nature-forward approach, follow nature's blossom sow and grow seed starter kit instructions to start seeds with the right setup and timing seed-starting system. You add water to expand the soil pellets, press seeds into the peat pots, set them somewhere with at least 6 hours of direct sunlight, and keep the soil consistently moist. Sprouts should appear within 1 to 2 weeks. That's the whole loop. The sections below walk you through each step in detail, including what to do when things go wrong.
Stop and Shop Grow and Learn Seed Pod Guide: Setup to Harvest

Marcus Thornfield
26 Jun 2026
What the Stop & Shop Grow and Learn kit actually is
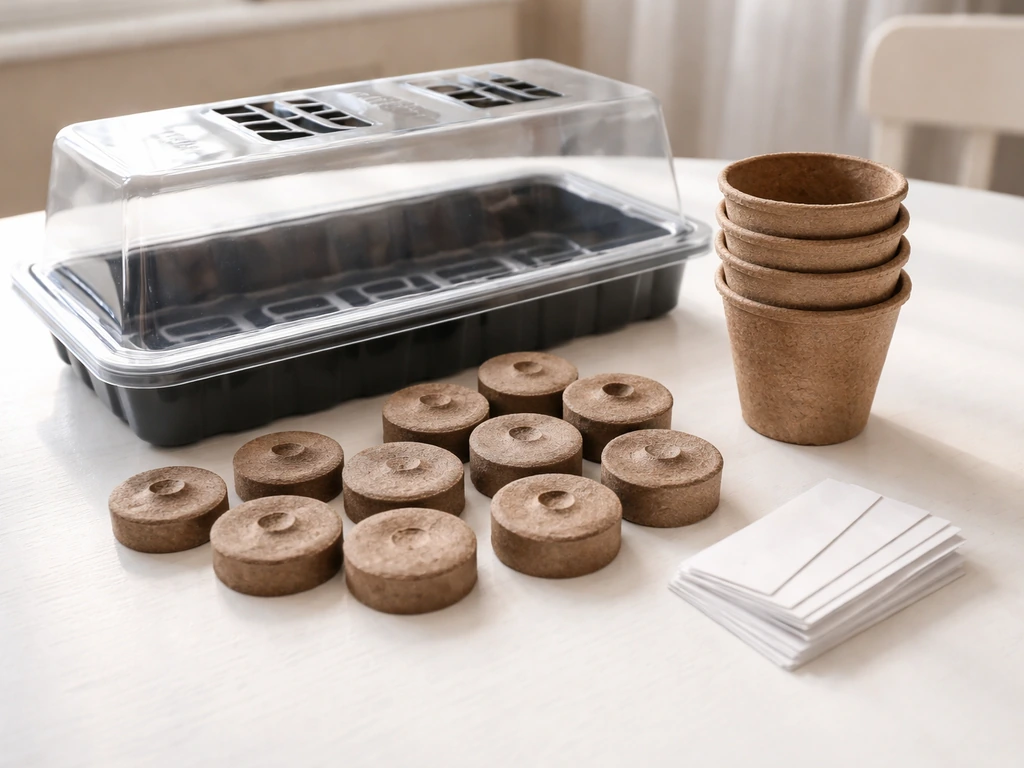
Stop & Shop launched the Grow and Learn program as a seasonal educational growing kit, originally aimed at families and kids but genuinely useful for any beginner gardener. The kit includes up to 20 varieties of quick-growing vegetable and herb seeds, biodegradable peat pots (which double as your planting containers), compressed soil pellets that expand when wet, plant markers so you know what's growing where, and an activity guide that walks through the basics. The peat pots are the key component: they're made from compressed peat moss and act as both the container and part of the growing medium once hydrated.
If you're trying to identify what you have, look for small, flat, disc-shaped compressed pellets or pre-formed pot shapes that are light brown and feel dry and firm. Those are your peat pods. The seed packets or pre-seeded pods should be labeled with the plant variety, and there should be small wooden or plastic plant markers included. If your kit came with an activity booklet, that's part of the original Grow and Learn packaging. Some versions of the kit were distributed as free seed pods through in-store promotions, so you may have a partial kit without all components. That's fine: the core setup only requires the peat pots, seeds, water, and sunlight.
The kit was available at Stop & Shop locations across Massachusetts, Connecticut, and Rhode Island during spring and early summer windows, so availability is seasonal. If you're setting yours up now, you're working in a good growing season, especially for herbs and fast-maturing vegetables.
What you need before you start
The kit is designed to be as close to plug-and-play as possible, but there are a few things worth gathering before you begin so you're not running back and forth mid-setup. For sow and grow instructions, follow the kit's seed and watering steps closely so the peat pots stay warm and moist until germination.
- A tray or shallow container to hold your peat pots. The pellets will expand and the pots will absorb water, so you need something waterproof underneath. A basic seedling tray, a baking dish, or even a foil roasting pan works perfectly.
- Room-temperature water. Cold water can shock young seeds and slow germination. Tap water is fine; if your tap water is heavily chlorinated, let it sit in an open container for an hour before using.
- A sunny windowsill or outdoor spot with at least 6 hours of direct sunlight daily. South-facing windows are ideal indoors. If you don't have strong natural light, a basic grow light set 2 to 4 inches above the pots will work.
- A spray bottle or small watering can with a gentle pour spout. Heavy watering can wash seeds out of the medium or compact the surface too much.
- Optional but helpful: a clear plastic bag, plastic wrap, or a humidity dome to cover the pots during germination. This traps moisture and warmth and speeds up sprouting significantly.
- Your plant markers and a pen. Label everything before you plant. Once seeds are in soil, they all look identical and you will forget what's what.
On temperature: most herbs and vegetables in kits like this germinate best between 65 and 75 degrees Fahrenheit. A spot near a warm window but away from air conditioning vents is ideal. Avoid placing pots on a cold stone or tile surface directly, which can keep the soil too cool for good germination.
Step-by-step setup and planting
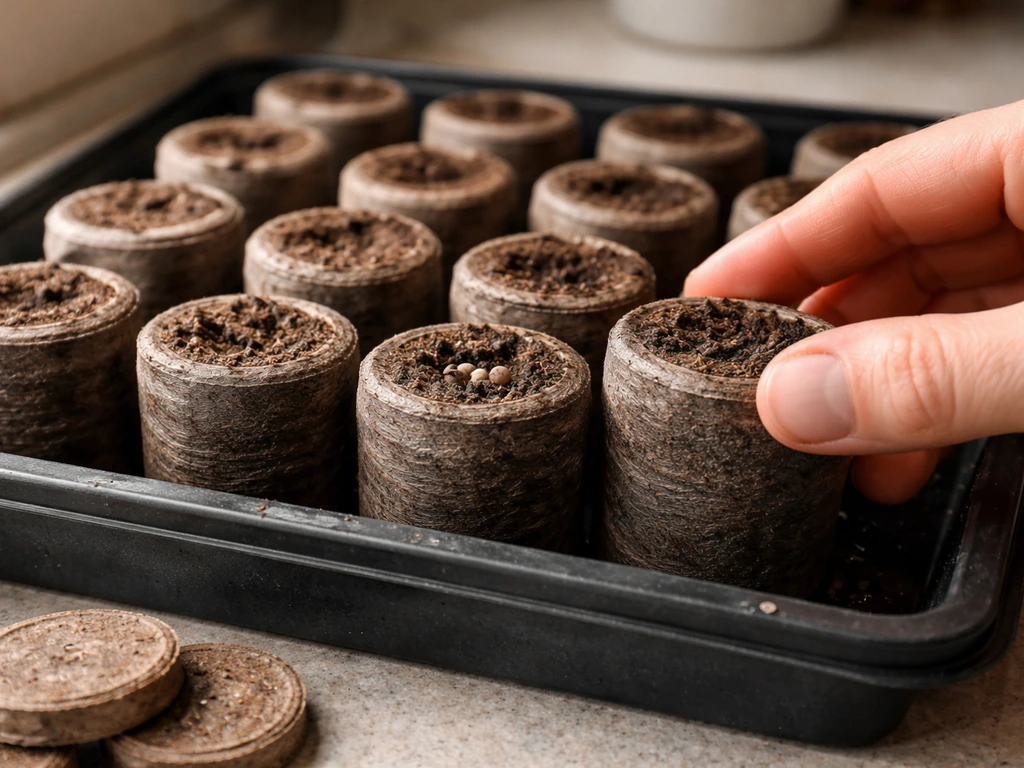
- Set your peat pots or compressed pellets in your tray. Keep them grouped together so they support each other upright and retain moisture more evenly.
- Add room-temperature water directly to the tray. Pour slowly and let the peat pots absorb water from the bottom up. Compressed pellets will expand significantly, roughly 3 to 4 times their dry height, within a few minutes. Give them 5 to 10 minutes to fully hydrate before doing anything else.
- Drain any excess water sitting in the tray after the pots have fully expanded. You want the medium moist throughout, not waterlogged. If you can press the side of a peat pot and water runs out freely, it's too wet. Tip the tray gently to drain.
- Use a pencil or your fingertip to make a small indentation in the center of each pot, about a quarter-inch to half-inch deep. Check your seed packet for the specific planting depth for that variety. Herbs are usually shallower; larger vegetable seeds may go a little deeper.
- Place 2 to 3 seeds per pot. More than one seed per pot improves your odds of germination. You'll thin to the strongest seedling later.
- Gently press the seeds against the growing medium to ensure good contact. Seeds that sit loose on the surface without touching the medium often fail to germinate. This is one of the most common mistakes with pod systems.
- Cover the seeds with a thin pinch of the expanded peat from the top of the pot, or leave them lightly exposed if the variety calls for light to germinate (check your guide). Don't bury them deeply.
- Label each pot immediately using your plant markers. Write the plant name and the date you planted. This sounds overly cautious but you will thank yourself when everything is a tiny green sprout in week two.
- Cover the tray loosely with a clear plastic bag, plastic wrap, or a humidity dome if you have one. This keeps moisture in and creates a warm microclimate that speeds germination. Leave a small gap for some airflow to reduce mold risk.
- Place the tray in your warm, bright spot. If using a humidity cover, check daily and remove it once you see the first sprouts poking through the surface.
Daily care once seeds are planted
The biggest thing to manage every day is moisture. Peat pots dry out faster than plastic containers, especially near a sunny window. Check the surface of each pot once in the morning. It should feel damp to the touch, not wet and not dusty-dry. If the surface feels dry, add a small amount of water to the tray (bottom watering is gentler than pouring from the top) or use a spray bottle to mist the top lightly. If you’re also using dutch nutrients grow a and b, follow the bottle’s dosing and mixing instructions before feeding seedlings dutch nutrients grow a and b instructions.
Once sprouts appear and you've removed the humidity cover, aim for direct or very bright indirect light for at least 6 hours per day. For instructions on using Sensy Grow A and B with your starter plants, follow the product label and start with the recommended dilution Sensi Grow A and B. Seedlings that don't get enough light will stretch upward with long, thin, floppy stems. That's called etiolation, and it means the plant is reaching for more light. If you see this happening, move the tray closer to the window or lower your grow light.
Temperature matters more than most beginners realize. Keep pots between 65 and 75 degrees Fahrenheit during the day. Nighttime temperatures can drop slightly, but avoid anything below 55 degrees, which will stall growth for most herbs and vegetables.
Troubleshooting the most common problems
| Problem | What's causing it | Fix it by doing this |
|---|---|---|
| No sprouts after 2 weeks | Seeds too deep, soil too cold, or poor seed-to-medium contact | Replant fresh seeds at correct depth, move tray to warmer spot, press seeds firmly into medium |
| White fuzzy mold on peat pot surface | Overwatering or poor airflow under humidity dome | Remove cover, let surface dry slightly, improve air circulation, water only from bottom |
| Green algae on pot or tray | Too much moisture plus light hitting the soil surface | Reduce watering frequency, block light from reaching the tray base with a piece of cardboard |
| Sprouts are tall and thin (leggy) | Not enough light | Move closer to window or lower grow light to 2 to 4 inches above seedlings |
| Peat pot drying out and cracking | Underwatering or very dry indoor air | Water more frequently, add water to tray so pot absorbs from bottom, check twice daily in summer |
| Seeds washed to pot edge or surface | Watering too hard from top | Use a spray bottle or water tray from below only; replant displaced seeds |
| Seedlings wilting despite moist soil | Root rot from overwatering | Drain tray completely, allow medium to partially dry before watering again, ensure tray has drainage |
How long this takes and what success looks like
Here's a realistic week-by-week picture of what to expect, assuming decent light and consistent moisture.
| Timeframe | What you should see | What to do |
|---|---|---|
| Days 1 to 3 | Nothing visible yet; peat pot stays moist and dark | Keep humidity cover on, check moisture daily, don't disturb seeds |
| Days 4 to 7 | Tiny white root tips or first seed coat splits visible at soil surface for fast germinators like basil | Keep cover on, continue moisture checks |
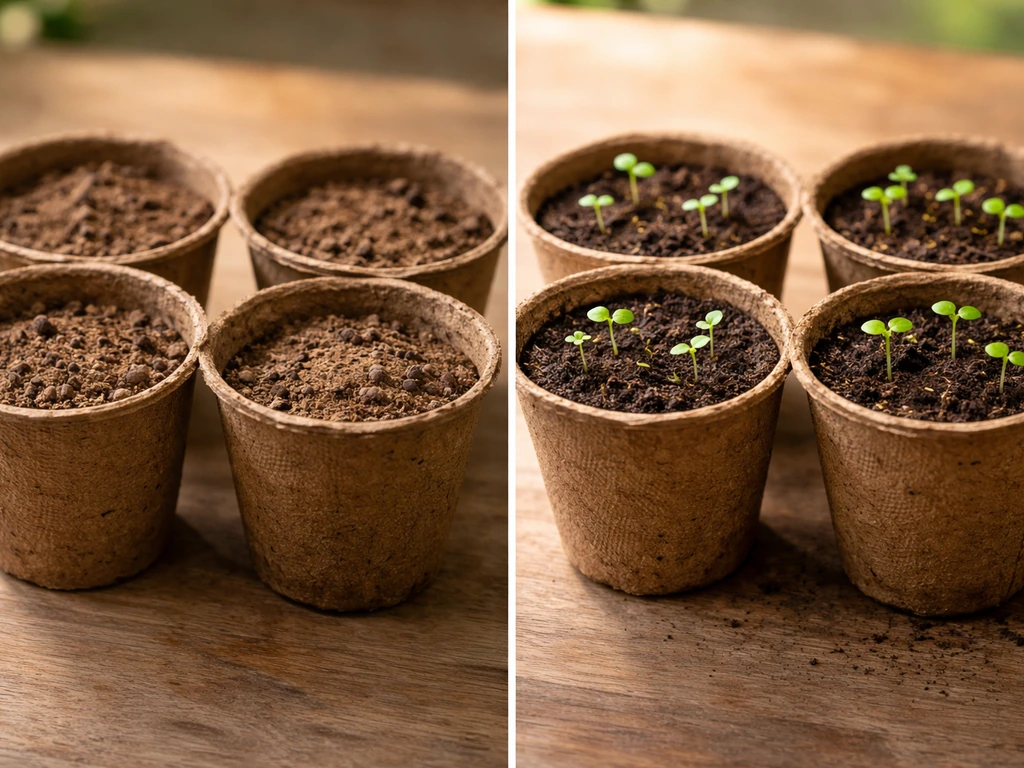
| Days 7 to 14 | First green sprouts pushing through surface on most varieties | Remove humidity cover when first sprouts appear, move to full light |
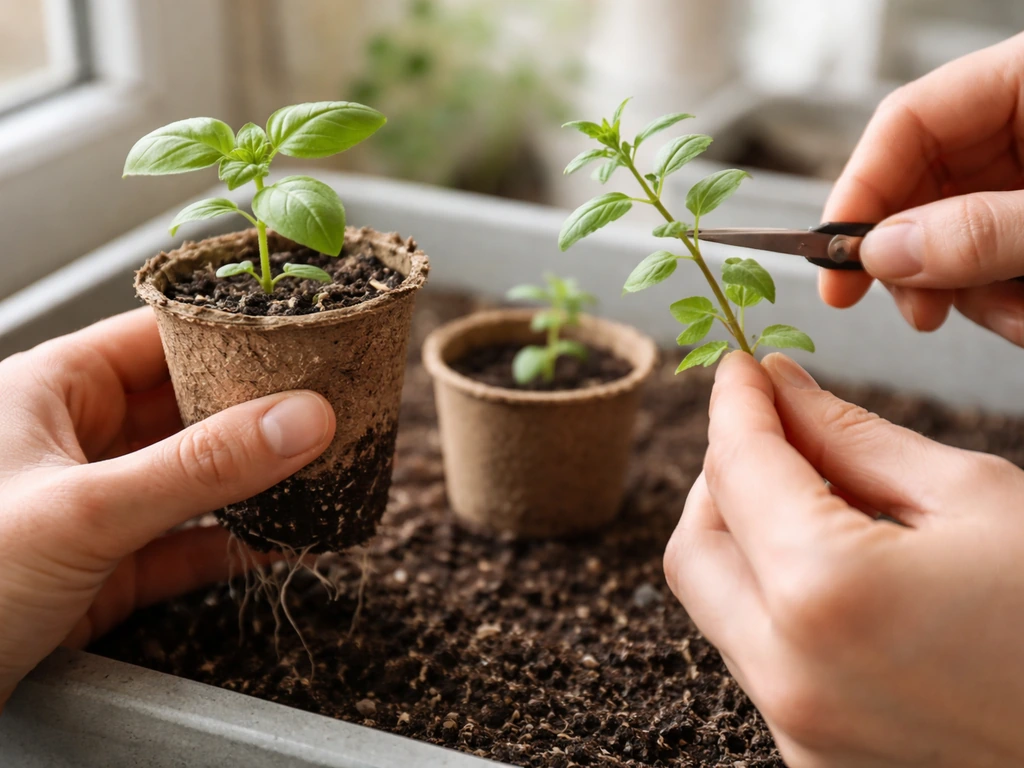
| Weeks 2 to 3 | First set of true leaves appearing above the seed leaves (cotyledons) | Thin to one strongest seedling per pot by snipping extras at soil level with scissors |
| Weeks 3 to 5 | Established seedlings with 2 to 4 true leaves, visibly healthy and upright | Begin considering transplanting to larger containers or outdoor beds |
| Weeks 6 and beyond | Herb varieties ready to harvest; vegetable seedlings large enough to transplant or harvest depending on type | Harvest herbs by snipping above a leaf node; transplant vegetables to garden |
The activity guide in your kit may show slightly different timelines depending on the specific seed varieties included, since some herbs germinate in as few as 5 days while some vegetables take closer to 14. Don't panic if a pot hasn't sprouted by day 10. Give it the full two weeks before replanting.
Harvesting, transplanting, and what to do with the pots after
For herbs, harvesting is simple: once the plant has at least 4 to 6 true leaves and looks bushy, snip the stems above a leaf node (the point where a leaf meets the stem). Never take more than a third of the plant at once. This encourages the plant to branch out and produce more growth rather than shutting down.
For vegetable seedlings, the Grow and Learn kit is really a seed-starting system rather than a full grow-to-harvest setup. Once seedlings have 2 to 4 true leaves and the outdoor temperature is reliably above 50 degrees Fahrenheit at night, they're ready to transplant into a larger pot or garden bed. Because the pots are made from biodegradable peat, you can plant the entire pot directly into the soil. The roots will grow through the peat walls over time. One thing to know: tear or score the bottom and sides of the peat pot slightly before planting it in the ground. Peat can sometimes dry out and form a hard barrier that slows root expansion more than you'd expect, especially in drier conditions. Seeds 'n Such notes that a peat-pot risk is slow peat-pot degradation that can act like a container and limit root expansion for some plants Peat can sometimes dry out and form a hard barrier that slows root expansion more than you'd expect. Tearing it open a little gives roots an easier path.
If you're not transplanting and want to reuse the tray or container, empty out any spent pots and compost the peat material since it's organic and breaks down easily in a compost bin or garden bed. Rinse the tray with a diluted bleach solution (1 part bleach to 9 parts water), let it air dry, and it's ready for the next round. If your kit came with plastic plant markers, wash and save those too.
For responsible disposal, the peat pots and expanded soil medium are fully compostable. Don't throw them in the trash if you can avoid it. Even if you don't have a compost bin, you can dig them directly into a garden bed or large outdoor planter where they'll break down and add organic matter to the soil.
Quick answers to common questions
Can I use this kit indoors without a grow light? Yes, if you have a genuinely sunny south-facing window that gets 6-plus hours of direct sun. Following nature's blossom sow and grow instructions can help you plan timing, depth, and aftercare for the best chances of healthy sprouts. In a north-facing room or during cloudy stretches, seedlings will get leggy without supplemental light. A cheap T5 or LED grow light strip solves this completely.
My peat pot grew mold before anything sprouted. Did I ruin it? Probably not. blank" rel="noopener noreferrer">Surface mold on peat is usually white fuzzy mycelium from the organic material in the pot reacting to moisture, not a sign your seeds are dead. Remove the humidity cover, let the surface dry slightly, and water only from below going forward. If you're following sensi grow instructions, keep an eye on moisture control and adjust watering from below as needed water only from below going forward. If sprouts were already forming, they'll push through fine.
I got multiple sprouts in one pot. Which one do I keep? Keep the thickest, most upright one. Snip the others at soil level with small scissors. Don't pull them out, as that disturbs the roots of the seedling you're keeping.
Nothing is happening and it's been 16 days. Should I start over? Check the soil temperature first. If it's been below 60 degrees, germination stalls hard. Move the tray somewhere warmer for a few days before giving up. If conditions have been right the whole time, yes, replant with fresh seeds pressed firmly into the medium.
Can I start a second round in the same peat pots? No, peat pots are single-use. Once a seedling has grown in one, the structure is spent. For a second round, you'd need fresh peat pots or pellets. The tray and markers are reusable. You can also review how to use grow pods if you want a simple step-by-step for the whole process.
If you're interested in going deeper on pod-based growing systems, comparing how these peat pods work versus other plug and pod formats is worth exploring, especially if you want to scale up from a starter kit like this one. The general mechanics of keeping seeds moist, warm, and well-lit carry over to nearly every seed-starting system out there, so the habits you build here will serve you well. If you want a quick walkthrough, follow the guidance in our how to use sensi grow article step by step.
FAQ
What’s the best way to water, so I keep moisture but avoid soggy peat?
Yes. Place the pots on a tray or shallow saucer so water can reach from the bottom, and remove any excess water after 10 to 20 minutes. Avoid leaving standing water in the tray, since overly wet peat can encourage damping-off before seedlings emerge.
How do I know if I’m watering too much or too little?
Use the “damp, not wet” touch test. If water is pooling on the surface or the surface feels cool and squishy, let it dry slightly and switch to less frequent bottom watering. For misting, do it lightly, too much spray keeps the top layer constantly wet.
Can I harvest herbs early, or will cutting them too soon stunt growth?
Most varieties are fine with light pruning, but if your kit includes very small, slow herbs (like some lettuces or specialty herbs), wait until they’re a bit sturdier. When in doubt, harvest conservatively and never cut more than one third of the plant at once, otherwise regrowth can be delayed.
Do I need to harden off seedlings before planting them outdoors?
For transplanting, move the seedlings outdoors gradually over 3 to 7 days (start with an hour or two in shade, then increase sun and time). This “hardening off” reduces shock, especially if your outdoor nights are cooler than your indoor setup.
If a few pots fail to germinate, can I reuse them for a second attempt with the same seeds?
If you only need to restart the failing seeds, replace peat pots rather than reusing the same ones. Since peat pellets and pots are designed as a single-use growing medium, pressing new seeds into an already wet, cooled, or mold-affected pot often gives slower and less reliable germination.
What should I do if the seed packets say a different planting depth than I expected?
A common mistake is pressing seeds too deep or fully burying seeds that should be surface-sown or only lightly covered. If your packets specify different depth instructions, follow those over general timing, then keep the surface evenly moist until germination.
My seedlings keep getting mold, can I reduce it without changing everything?
Yes, but manage airflow. If you see persistent dampness or recurring mold, improve ventilation around the tray (for example, run a gentle fan in the room). Do not place the seedlings where strong direct airflow will dry the peat too fast.
How do I prevent mixing up varieties during setup and transplanting?
Keep markers with each pot during the whole cycle, then only add variety names to a separate notepad after sprouting. Plant labels often fade or tip, and mixing pots is one of the most common reasons people harvest the wrong herb or transplant the wrong seedling spacing.
Is it really necessary to tear or score the peat pot bottom before putting it in the ground?
If you want to avoid tearing peat, score it lightly with scissors or a utility knife before planting, then plant at the same depth the seedling was growing. Tearing or scoring helps roots pass through a drier peat barrier, but you should be gentle to avoid damaging the stem.
What if my outdoor nights are just around 50 degrees, can I transplant anyway?
For vegetable seedlings, if nights are hovering near 50 degrees Fahrenheit, wait a few extra days or plant into a sheltered spot. Cooler nights slow root establishment after transplant, so even when daytime feels warm, you may get better results once nighttime temperatures are consistently above your target.