If you searched for 'Sensi Grow instructions,' it's worth knowing upfront that Sensi Grow is not a physical grow kit with hardware like pods, pumps, or reservoirs. Advanced Nutrients’ product-category page classifies Sensi Grow as a nutrient (as opposed to grow-kit components such as pods, reservoirs, pumps, or controllers) Sensi Grow as a nutrient product. It's actually pH Perfect Sensi Grow Part A and Part B, a two-part liquid nutrient system made by Advanced Nutrients. So if you're holding bottles of Sensi Grow A and B and wondering how to use them inside your hydroponic or soil-based grow setup, you're in the right place. This guide walks you through identifying exactly which version you have, mixing and feeding correctly, troubleshooting problems, and keeping your system running clean.
Sensi Grow Instructions: Setup, First Weeks, Troubleshooting

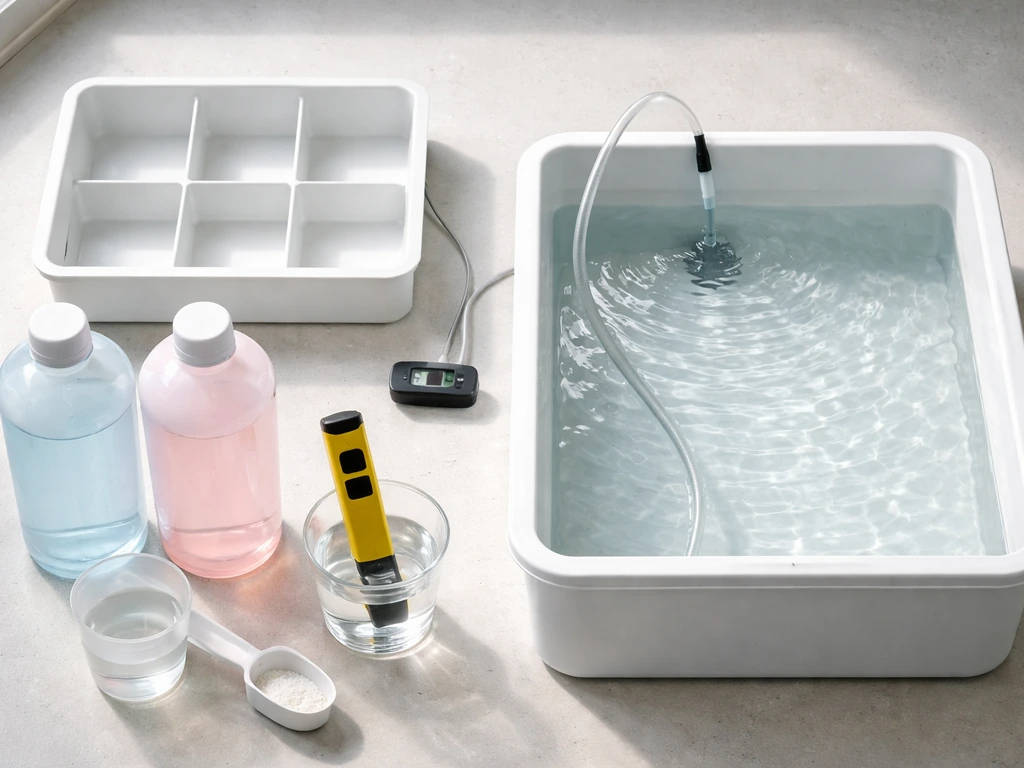
Figure Out Which Sensi Grow Product You Actually Have
Advanced Nutrients makes a few variations of Sensi Grow, and knowing which one you have matters because the mixing ratios and application methods differ slightly. Check your bottle label carefully before doing anything else.
| Product Name | What It Is | Grows Best In | Key Feature |
|---|---|---|---|
| pH Perfect Sensi Grow Part A + B | Two-part vegetative base nutrient | Hydro, coco, soil | Auto pH-adjusting formula |
| Sensi Grow (non-pH Perfect) | Older two-part base nutrient | Hydro, coco, soil | Manual pH adjustment required |
| Advanced Nutrients Starter Kit | Bundle including Sensi Grow A+B plus additives | Hydro, coco, soil | Comes with Voodoo Juice, B-52, Big Bud |
The pH Perfect version is the most common one sold today. You'll see 'pH Perfect' printed prominently on the label. If your label doesn't say pH Perfect, you have the older formula and you'll need to test and adjust pH manually after mixing. Everything in this guide covers both, but I'll call out where the process differs.
What Should Be in the Box (and What You'll Need to Supply)
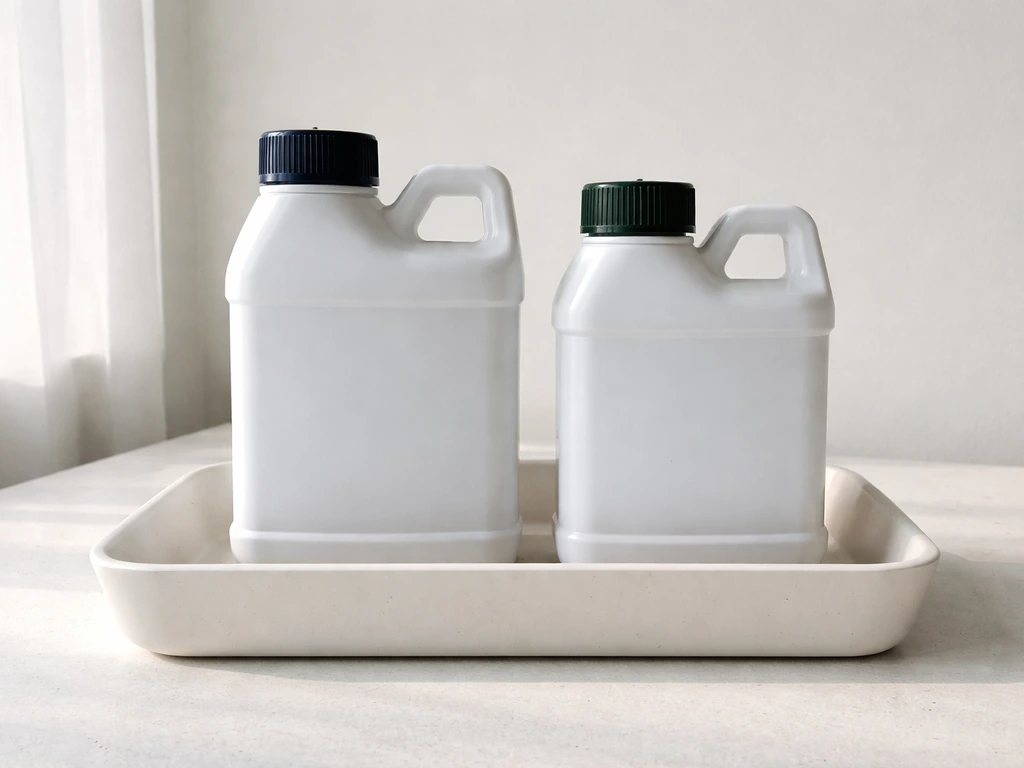
Sensi Grow ships as two separate bottles: Part A and Part B. That's it. There's no hardware, no grow medium, no pods. Here's what you'll need to supply yourself to actually use it.
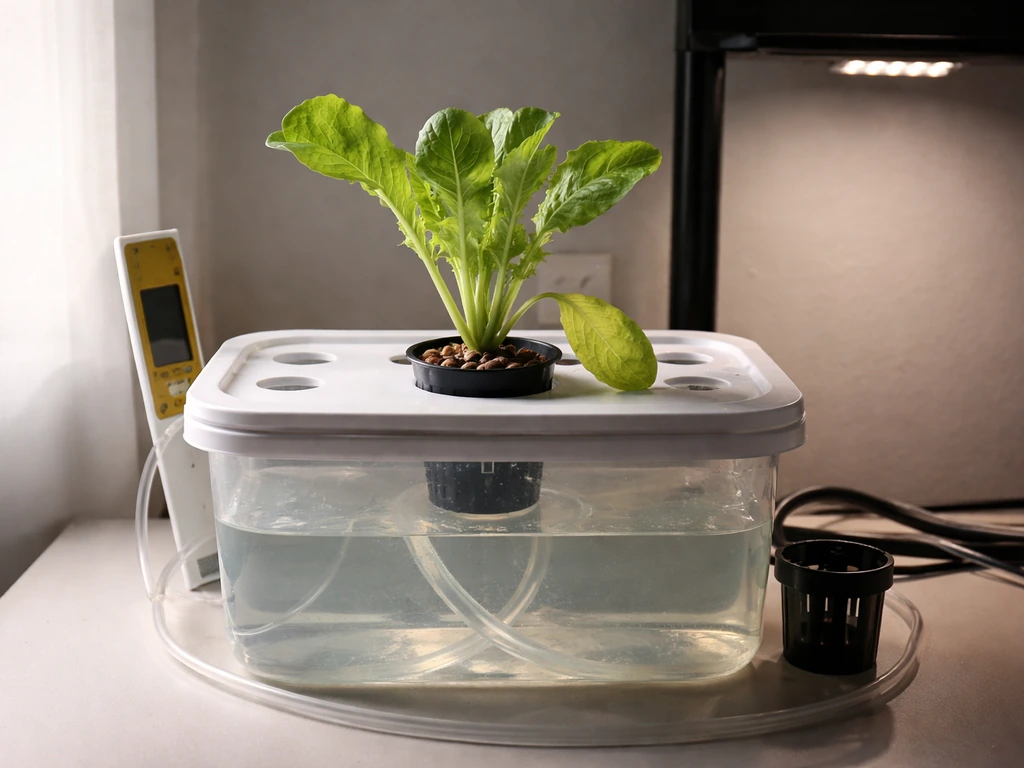
- A grow system: hydroponic reservoir, DWC (deep water culture) bucket, coco coir pot, or soil container
- Reverse osmosis or tap water (RO water is ideal; if using tap, let it sit 24 hours to off-gas chlorine)
- A measuring syringe or pipette (milliliter-accurate, not tablespoons)
- A digital pH meter (required for non-pH Perfect; strongly recommended for pH Perfect too)
- A TDS or EC meter to measure nutrient concentration
- pH Up and pH Down solutions if you're not using the pH Perfect formula
- A clean mixing container or bucket
One thing that trips up a lot of beginners: people try to eyeball the nutrient amounts or use household measuring spoons. Don't do it. Nutrient burn from slightly too much is a real problem, and a cheap syringe fixes that completely. Grab one before you start.
Mixing and Setup: Step-by-Step for First-Timers
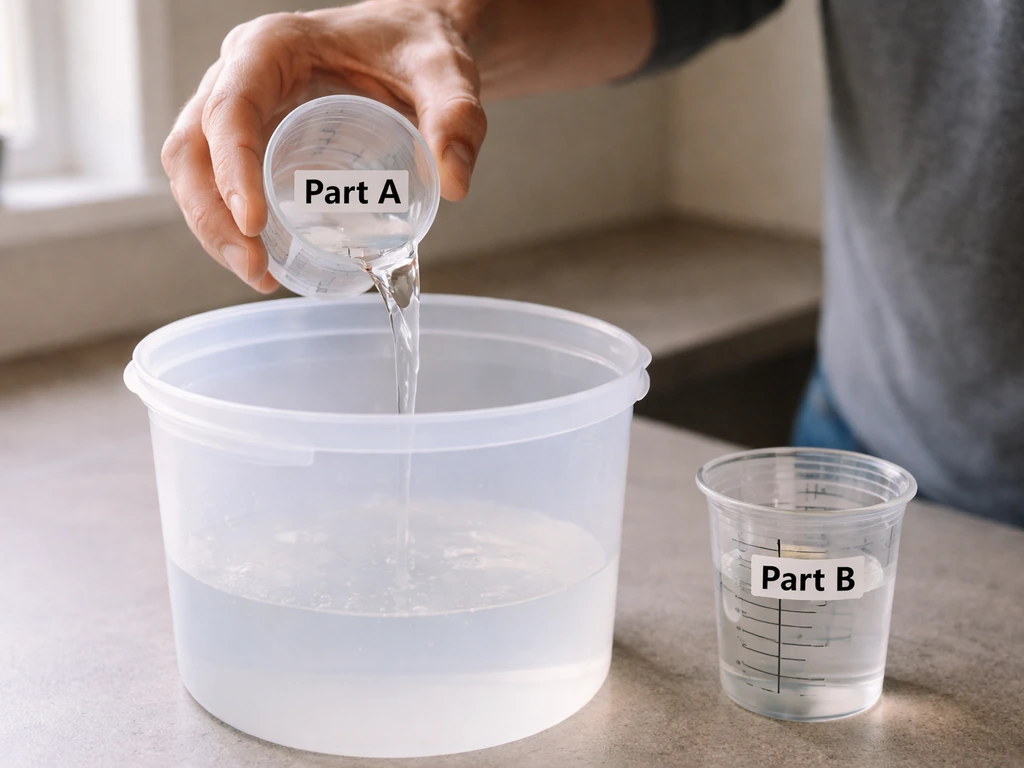
Mixing Sensi Grow correctly is straightforward once you know the order of operations. If you follow this how-to, you’ll be ready to use Sensi Grow Part A and Part B in the right order and concentration Mixing Sensi Grow correctly. Always add nutrients to water, never water to nutrients. And always add Part A before Part B. If you mix A and B together directly without diluting in water first, they can precipitate (form a cloudy clump) and you'll lose potency. Follow these Sensi Grow A and B mixing instructions, then measure the nutrient dose per part to avoid problems like precipitation or nutrient lockout.
- Fill your reservoir or mixing bucket with the full volume of water you intend to use. Start with room-temperature water, ideally between 65–75°F (18–24°C).
- Shake Part A bottle well, then measure your dose. The standard starting rate is 4 mL per liter (about 15 mL per gallon) for each part, but start at half strength (2 mL/L) if your plants are seedlings or if this is your first time mixing.
- Add Part A to the water and stir or swirl for 30 seconds until fully dissolved.
- Shake Part B bottle well, then measure your dose (same amount as Part A).
- Add Part B to the water and stir again for 30 seconds.
- If you're using the pH Perfect formula, check the pH now — it should read between 5.5 and 6.5 on its own. If it's outside that range, your source water may have extreme mineral content and may need adjustment.
- If you're using the non-pH Perfect formula, test pH now and adjust to 5.5–6.2 for hydro/coco or 6.0–6.8 for soil using pH Up or pH Down, adding a few drops at a time.
- Check EC/TDS. A half-strength mix should read around 0.8–1.2 EC (400–600 ppm). Full strength should be around 1.5–2.0 EC (750–1000 ppm).
- Add the nutrient solution to your reservoir or water your plants directly. For hydro systems, fill the reservoir and confirm your pump/airstone is running before adding plants.
Lighting, Feeding Schedule, Water, and Environment
Feeding Schedule
Sensi Grow is a vegetative-stage nutrient, meaning you use it from seedling establishment through the growth phase, before your plants start flowering or fruiting. Advanced Nutrients’ Starter Kit (EU) bundles pH Perfect Sensi Grow Part A and Part B as the vegetative base nutrients for growth phase feeding Sensi Grow is a vegetative-stage nutrient. Advanced Nutrients recommends using it at 4 mL/L per part during the vegetative phase, but I always suggest starting at 2 mL/L for the first two weeks, especially with young plants or sensitive varieties. You can step up to 3 mL/L in week two and hit full strength by week three once you see your plants handling it well.
For hydroponic systems, top off with plain water between full reservoir changes, and do a complete reservoir change every 7–10 days. For soil, feed every second or third watering rather than every time, alternate plain water with nutrient solution to avoid salt buildup in the medium.
Water Temperature and Quality
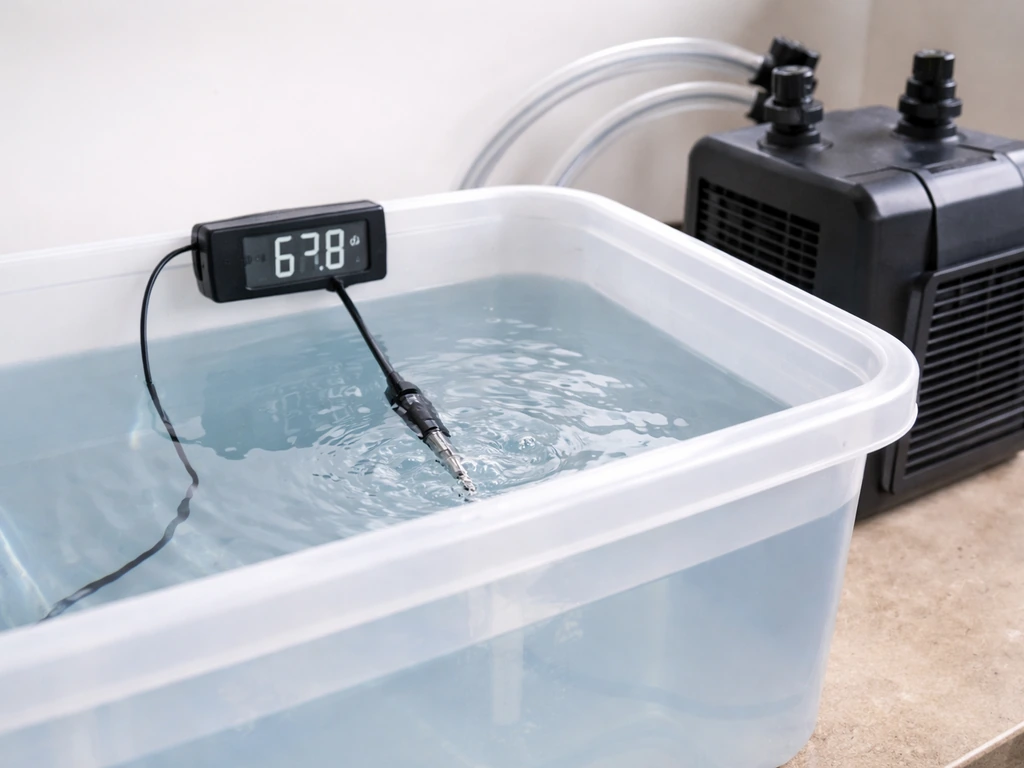
Keep reservoir water between 65–72°F (18–22°C). Warmer water holds less dissolved oxygen and encourages root rot. If you're growing in a warm space, a small aquarium chiller or even frozen water bottles rotated into the reservoir can help. Always use water with low baseline EC (under 0.4 EC ideally) so the nutrients you're adding are what's actually feeding the plants, not whatever's already in the tap water.
Lighting
Sensi Grow doesn't include a light, so you're working with whatever grow light you have. For the vegetative stage, most plants want 18 hours of light and 6 hours of darkness per day. Intensity matters: aim for at least 200–400 PPFD at the canopy level for leafy greens and herbs, and 400–600 PPFD for heavier feeders like tomatoes or peppers. Keep LED lights 18–24 inches above seedlings to avoid light stress, then adjust closer as the plants mature.
Environment
Target temperatures of 70–80°F (21–27°C) during the light period and 60–70°F (16–21°C) during dark. Relative humidity around 50–70% works well for seedlings and young vegetative plants. Good airflow from a small fan prevents stagnant air pockets and strengthens stems, but don't point it directly at tiny seedlings, indirect circulation is the goal.
Your First 1–2 Weeks: What to Do and What to Watch For
The first two weeks are when most problems either get caught early or snowball into bigger headaches. Here's a practical day-by-day mental model for what to check. Follow the nature's blossom sow and grow instructions to time your seedlings and keep your plants on track through early growth.
Week One
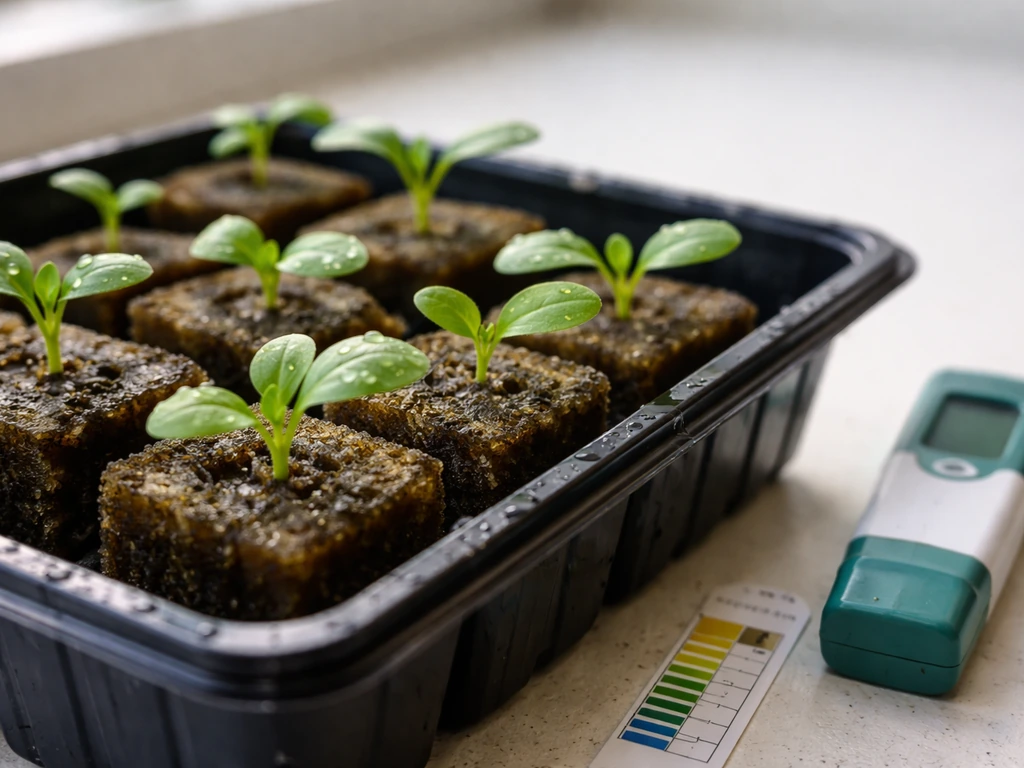
Start seeds in a propagation medium (rockwool cubes, rapid rooters, or a moist seed-starting mix) before introducing Sensi Grow. Plain water or a very dilute nutrient solution (1 mL/L of each part) is all seeds need until they've sprouted and have their first set of true leaves. Check daily for moisture levels and ensure the propagation medium stays damp but not waterlogged. In hydro, your water level should be just below the net pot or cube, roots need to search downward, not sit in standing water from day one. If you are trying to use grow pods, make sure you place the roots correctly in the pod and follow the same nutrient mixing and feeding steps for Sensi Grow.
Week Two
Once you see the first true leaves (the second set of leaves after the seed leaves), bump nutrient concentration to 2 mL/L per part. Check pH every other day at minimum. For the pH Perfect formula, pH can drift if your source water is very hard or if the reservoir temperature fluctuates significantly, don't assume it's always perfect. Also check root development if you can: white, healthy roots should be growing actively. Slimy or brown roots at this stage signal a water temperature or oxygen problem, not a nutrient deficiency.
Troubleshooting Common Problems
No Growth or Very Slow Growth
The most common culprits are pH being out of range (even slightly), water temperature being too cold or too warm, or light intensity being too low. Check pH first, nutrient lockout at the wrong pH is the single most common reason plants don't grow even when fed correctly. If pH is fine, check your light distance and intensity. Cold water below 60°F (15°C) also dramatically slows root activity and growth.
Yellowing Leaves
Yellowing in the first two weeks is usually one of three things: nitrogen deficiency (rare this early if you're feeding correctly), pH lockout preventing nutrient uptake, or overwatering in soil setups. In hydro, yellowing in early seedlings often means the nutrient solution is too strong for plants that haven't built a root system yet, dial back to half strength and see if new growth comes in green within a few days. If older leaves are yellowing from the bottom up, that's a nitrogen signal; check your EC and make sure you're feeding enough.
Wilting
Wilting in hydro when water levels look fine usually means root rot from warm water or low oxygen. Check water temperature and make sure your airstone or pump is running. In soil, wilting almost always means either too dry (underwatered) or too wet (overwatered). Lift the pot, a very light pot needs water; a heavy, wet pot needs to dry out before the next watering.
Leaks (Hydro Setups)
Check all fittings at reservoir bulkheads and tubing connections first. Most slow leaks come from fittings that weren't hand-tightened all the way or rubber grommets that shifted during assembly. Dry the area, tighten each connection by hand, and watch for 10–15 minutes. If a bulkhead is leaking through the threading rather than around the gasket, remove it, dry the threads, and apply a thin wrap of plumber's tape before reinstalling.
Pump or Airflow Problems
If your air pump seems weak or isn't producing bubbles, first check that the airline tubing isn't kinked or pinched. Then check the airstone, they clog with mineral deposits over time and should be soaked in a 1:10 white vinegar solution for an hour and rinsed. If your water pump isn't moving water well, debris may be clogging the intake screen. Remove the pump, rinse the screen under running water, and clear any root or medium fragments.
Bad Smell or Mold
A sulfur or rotten smell from your reservoir is almost always pythium (root rot), caused by warm water and low dissolved oxygen. A musty, earthy smell in a soil grow could be mold on the medium surface from overwatering. For root rot: lower water temperature to below 70°F, increase airstone output, and consider a beneficial bacteria product like Voodoo Juice (part of the Advanced Nutrients lineup) to help restore root health. For surface mold in soil, let the top layer dry out between waterings and improve air circulation. Don't reuse a contaminated medium without sterilizing it first.
Keeping Things Running: Ongoing Maintenance and Safe Operation
Regular Tasks
- Check and top off reservoir water every 2–3 days (use plain water for top-offs to replace what evaporated, since nutrients don't evaporate)
- Full reservoir change every 7–10 days in hydro to prevent salt and bacteria buildup
- Check pH and EC every 2–3 days for the first month until you understand how your system drifts
- Rinse airstones monthly in a dilute vinegar solution to prevent mineral clogging
- Inspect pump intake screens weekly and clear any debris
- Wipe down reservoir walls during water changes to remove algae or biofilm buildup
Cleaning Between Grows
At the end of each grow cycle, do a full system flush. Run plain water through the reservoir and all tubing for 24–48 hours, then drain completely. Mix a dilute hydrogen peroxide solution (3% H2O2, about 3 mL per liter of water) and run it through the system for another 24 hours to sanitize. Rinse with clean water, disassemble what you can, and let everything dry fully before storing or starting the next grow. This prevents carryover contamination and keeps your system performing well long-term.
Safe Handling of Nutrient Solutions
Sensi Grow Part A and Part B are concentrated liquids. Wear gloves when handling undiluted product and avoid getting it in your eyes. Store bottles away from freezing temperatures, the chelated minerals in the formula can precipitate and become less effective if frozen. Keep caps tightly sealed between uses and store out of direct sunlight. Mixed nutrient solution should be used within 10–14 days; don't store it indefinitely.
When Results Still Aren't Improving
If you've checked pH, EC, water temperature, lighting, and airflow and still aren't seeing healthy growth after two weeks, start over with fresh water and a clean reservoir. Sometimes bacterial contamination or persistent pH drift from hard water minerals is the issue, and a clean slate with RO or distilled water makes a visible difference within days. If you're working with a more complex multi-part nutrient system or a companion kit, checking how to use Sensi Grow A and B together with other Advanced Nutrients products in the right order can also help clarify whether an additive interaction is causing problems. If you're using other Advanced Nutrients products too, make sure you're combining Sensi Grow A and B in the correct order so the mix performs as intended.
FAQ
Do I need to adjust pH when using the pH Perfect version of Sensi Grow instructions?
You still should measure pH. pH Perfect tends to buffer pH drift, but it can change if your source water is very hard or if reservoir temperature swings. Check at least every other day, and if plants stall while pH readings are far from your target range, correct pH manually rather than assuming buffering will handle it.
What EC (or ppm) should I target after mixing Sensi Grow instructions?
Aim for a moving target based on growth stage and your water baseline EC. Because tap water often adds its own EC, measure baseline first, then calculate the contribution from nutrients. If you see consistent yellowing or slowed growth in early hydro, drop concentration and wait for new growth to green up before increasing again.
Can I mix Part A and Part B together before adding them to water?
Avoid mixing A and B directly. The safer workflow is add Part A to water first (after measuring), then add Part B, and only then fine-tune the final solution if you need to. Premixing concentrates can precipitate, leading to cloudy deposits and reduced nutrient availability.
Why is my solution cloudy after I follow sensi grow instructions for mixing?
Cloudiness often indicates precipitation, usually from wrong mixing order, insufficient dilution, or using very concentrated stock in the wrong way. Discard the mix, rinse the reservoir, then remake using the correct order (water in tank first, Part A first, then Part B) and ensure you measure carefully with a syringe or graduated cylinder.
How do I handle hard tap water when following Sensi Grow instructions?
If your baseline EC is high (over about 0.4), the “extra” salts will skew nutrient uptake and can destabilize pH even with pH Perfect. Consider blending with RO or distilled water to bring baseline EC down, then mix Sensi Grow to your intended dose.
What should I do if pH readings keep drifting upward or downward quickly?
Treat it as a water quality and system stability issue. Confirm probe calibration, then verify water temperature stability and check whether the solution is aging too long. If drift persists, switch to more consistent source water (RO or blended water) and remake fresh solution, since mixed nutrients are best used within 10–14 days.
How often should I change reservoir water using Sensi Grow instructions for hydro?
Use complete reservoir changes every 7–10 days, and top off only with plain water between changes. If you see rapid EC rise or strong smells, shorten the interval, because uptake imbalance and oxygen loss can develop faster than the schedule.
Can I use Sensi Grow instructions in soil, or is it only for hydro?
It works in soil, but feeding frequency and salt management matter more. Feed every second or third watering and alternate with plain water to reduce salt buildup. If the medium dries quickly and EC rises, you may need less frequent nutrient feeds, not a higher dose.
What’s the correct way to pre-start seeds before nutrients using Sensi Grow instructions?
Start in a moist propagation medium with plain water until sprouting and the first true leaves appear. For hydro, keep the water level just below the net pot or cube so roots grow downward, not into standing liquid from day one. This reduces stress from over-strong solution before roots are established.
My seedlings look stressed, but leaves are not burning. What else should I check besides nutrient strength?
First check light intensity and distance, since weak light can mimic nutrient issues. Also confirm temps during the light and dark periods, because cool water slows root oxygen exchange. If airflow is too strong directly on seedlings, reduce direct blast while keeping gentle circulation.
If wilting happens in soil, how do I tell underwatering from overwatering quickly?
Lift the pot to judge weight. A light pot usually means underwatering, while a heavy pot means excess moisture. In overwatering cases, let the top layer dry before the next watering and improve air movement to prevent surface mold.
What should I do if I suspect root rot while following Sensi Grow instructions?
Act on water temperature and oxygen immediately. Drop reservoir temperature below 70°F, increase aeration, and inspect the airstone and tubing for flow restrictions. If the smell is sulfur or rotten, treat the system as contaminated, then consider beneficial bacteria and sanitize after the episode rather than trying to “wait it out”.
Do I need to sanitize the system after each grow using Sensi Grow instructions?
Yes, especially if you had pests, root problems, or persistent funk in the reservoir. Flush with plain water first for 24–48 hours, then run a diluted 3% hydrogen peroxide solution through the plumbing and reservoir for another 24 hours, then rinse and dry fully before storage.
How should I store mixed nutrient solution made from Sensi Grow instructions?
Do not store mixed solution for long periods. Use it within 10–14 days, and keep it sealed away from sunlight. If you need to pause feeding for more than a day or two, remake fresh solution rather than topping off with “old” mix, since microbes and pH drift can build up.