
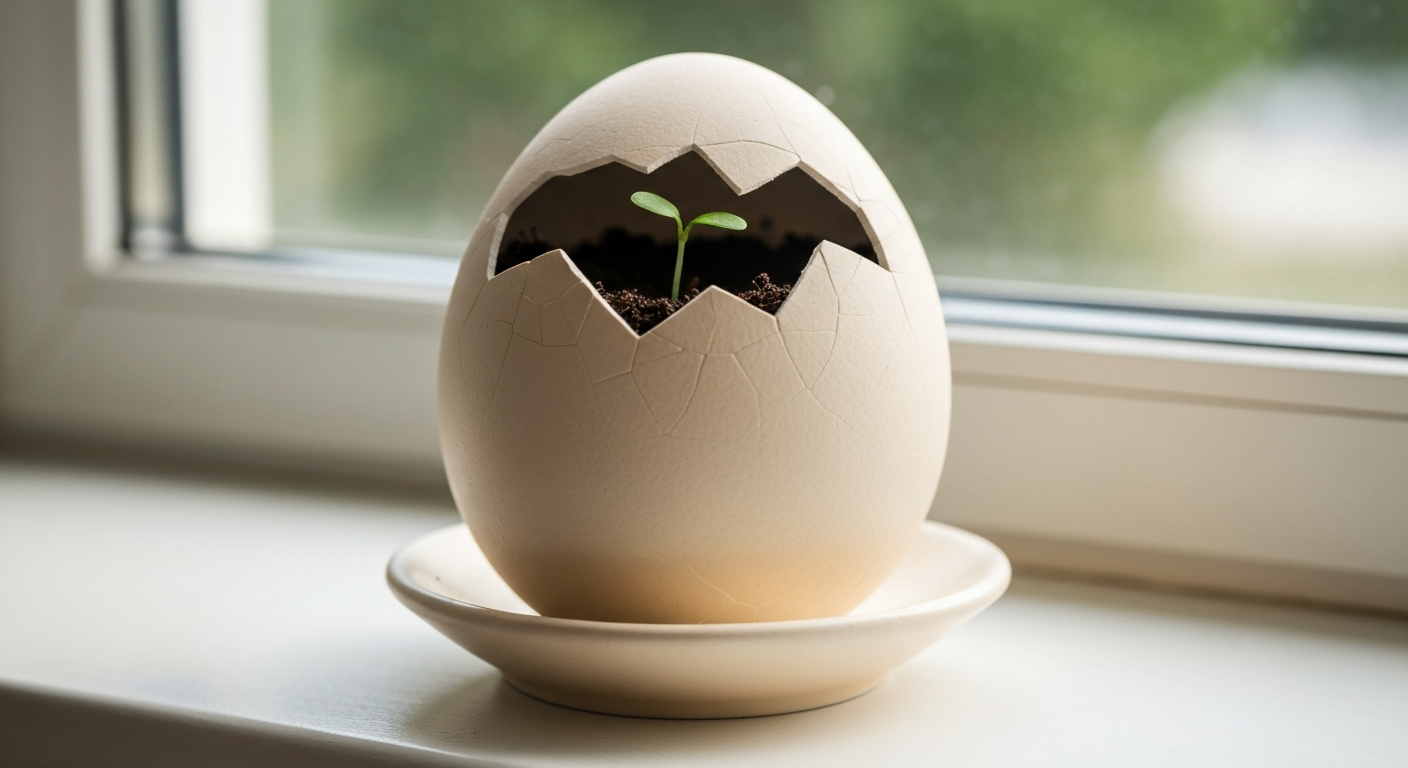
To start an Eggling or any similar crack-and-grow egg kit, tap the top of the ceramic shell with a spoon to crack it open, add about 30 ml of warm water slowly to the exposed soil, then set the egg on its saucer in a bright, warm spot indoors. Seeds typically sprout within 5 to 10 days at 20 to 25°C (68 to 77°F). For water-submerging character eggs like Dino Surprise, Dragon Mystery, or Unicorn Grow Eggs, you skip the cracking step entirely and place the whole egg in a bowl of room-temperature water, then wait 12 to 72 hours for it to hatch on its own.
Eggling Crack and Grow Instructions: Kid-Friendly Easy Guide

Marcus Thornfield
19 Jul 2026
Quick-Start Checklist (Week One at a Glance)
Before you do anything else, run through this checklist. Print it out or screenshot it so you can tick items off as you go. Everything on it is covered in detail further down the article.
- Read the safety rules below, especially if kids under 5 are involved.
- Unbox and identify every item in the kit (see prep list in the next section).
- Gather your extra supplies: a spoon, a small bowl or saucer, warm tap water, and a measuring cup.
- Choose a bright indoor spot away from cold drafts, between 20 and 25°C (68 to 77°F).
- For ceramic Egglings: tap the marked top with a spoon to crack it, then add 30 ml of warm water slowly.
- For water-submersion eggs (Dino, Dragon, Unicorn, Mega/Super): submerge in room-temperature water in a bowl deep enough to cover the egg.
- Day 1 to 2: Check water level; top up if the soil looks dry or the character egg is not fully submerged.
- Day 2 to 4: Watch for the shell to crack or split on water-based kits; mist soil-based kits gently if the surface looks pale.
- Day 5 to 7: Look for the first green tip pushing through the soil on Egglings; character eggs should be fully or mostly hatched by now.
- End of Week 1: Note what you see, take a photo, and compare to the timeline table below. If nothing has happened yet, consult the troubleshooting section.
What's in the Box and What You'll Need to Add
Kits vary, but here is what you should expect to find and what to have ready before you start. Missing a piece? Check the box carefully, small seed packets sometimes hide under foam inserts.
Ceramic Eggling-Style Kits (SEISHIN and similar)
- One ceramic egg shell with a marked cracking point on top (approximate size: W7.6 cm x D7.4 cm x H6.7 cm for EG-57 model)
- Pre-filled potting soil or expandable growing medium already packed inside the egg
- One seed packet (basil is the most common; some kits include tomato, herbs, or flowers)
- A small ceramic saucer or tray to catch drainage water
- An instruction card (often in Japanese with pictograms — this article is your translation)
- Extra supplies you need to add: a metal spoon (for cracking), approximately 30 ml warm tap water, a measuring cup or syringe, a gentle misting bottle for later watering, a sunny windowsill or grow light
Water-Submersion Character Eggs (Dino Surprise, Dragon Mystery, Unicorn, Hatch and Grow, Mega/Super Grow)
- One or more novelty eggs made of a dissolvable or pressure-cracking outer shell
- A toy figure or expanding character inside made from superabsorbent polymer (hydrogel)
- Sometimes a small instruction card with hatch-time guidance
- Extra supplies you need to add: a bowl large enough to submerge the egg, room-temperature tap water, a flat waterproof surface to place the figure on after hatching, paper towels for spills
A note on what these toys actually are: the growing part inside water-submersion eggs is made from superabsorbent polymer (SAP), the same hydrogel chemistry used in water beads. It absorbs water and swells dramatically, marketing claims of 'grows up to 6x' are based on this. It is impressive to watch, but please read the safety section before handing one to a young child.
Safety Rules Before You Start
I want to be upfront about this section because the risks are real, especially for young children. The rules are simple, but they matter.
Choking and Ingestion Hazards
- Keep all grow eggs and their contents away from children under 3 years old. Small ceramic pieces from cracked shells are a choking risk.
- Superabsorbent polymer toys (Dino, Dragon, Unicorn, Mega/Super Grow) must never be eaten. If swallowed, they continue to absorb fluid and expand inside the body — medical literature documents cases of intestinal obstruction requiring endoscopy or surgery in children.
- If you suspect a child has swallowed any part of a water-growing toy or polymer bead, call Poison Control immediately (US: 1-800-222-1222) and go to an emergency department if symptoms appear. Do not wait to see if symptoms develop.
- Polymer figures that have fully expanded can look like candy or food to toddlers. Store them out of reach after use.
- Ceramic eggshell fragments have sharp edges. Supervise children during the cracking step or do it yourself first.
Allergy and Skin Awareness
- Some kits include basil, herb, or flower seeds. If anyone in the household has plant or pollen allergies, check the seed variety before starting.
- Sodium polyacrylate (the polymer in growing toys) is listed as low-toxicity in safety data sheets, but rinse hands after handling the wet polymer, especially before eating.
- Avoid using very cold water. Cold water slows both seed germination and polymer expansion, and can shock seedlings.
Supervision Guidelines
- Children aged 3 to 7 should be supervised during setup and the cracking or hatching steps.
- The watering and daily care steps are great for kids 5 and up to do independently with a little coaching.
- Never leave expanding character toys soaking unattended around toddlers or pets.
Picking the Best Spot in Your Home
Location makes or breaks these kits. I have seen people set up an Eggling on a dark kitchen counter and then wonder why nothing sprouted after two weeks. Light and warmth do most of the work once you have watered correctly.
Light
Ceramic Eggling kits need a bright spot, ideally a south- or east-facing windowsill that gets at least 4 to 6 hours of natural light per day. If your home does not have a well-lit sill, a standard LED grow light set 15 to 30 cm above the egg for 12 to 14 hours daily works well. Avoid placing the egg in direct midday sun through glass in summer, ceramic heats up fast and can dry the soil in hours. Water-submerging character eggs do not need light during the hatching phase, but the polymer figure should be stored away from prolonged direct UV exposure once fully grown, as it can degrade the material.
Temperature
The germination sweet spot for most Eggling seeds is 20 to 25°C (68 to 77°F). A minimum of 16°C is cited by some retailers as the lower threshold for reliable sprouting, below that, germination slows dramatically or stalls. Keep the egg away from air-conditioning vents, cold windowpanes in winter, and exterior doors. For water-submerging character eggs, room-temperature water (roughly 18 to 22°C) gives the best expansion results. Very cold tap water measurably slows the polymer swelling.
Humidity
Most homes are fine as-is. If you live somewhere very dry (below 30% relative humidity in winter, for example), place the egg's saucer on a shallow tray of pebbles with a little water underneath. This raises local humidity around the seedling without wetting the roots. You do not need a humidifier or humidity dome for Eggling kits, just avoid placing them near heater vents that blast dry air directly onto the ceramic.
Step-by-Step Activation Walkthrough
These steps are split by kit type because the activation process is genuinely different. Pick the section that matches your egg. For detailed, step-by-step hatch n grow instructions, see the dedicated guide linked below.
Ceramic Eggling (SEISHIN and Similar Soil-Based Kits)
- Set the egg upright on its saucer on a stable surface. The saucer is important — it catches drainage water and prevents mess.
- Find the cracking point. Most Egglings have a small illustrated circle or arrow on the top third of the egg. If yours has no marking, aim for the narrowest part of the top.
- Hold the egg steady with one hand. With the other, tap the marked spot firmly with the back of a metal spoon. You want a sharp tap, not a smash. The goal is a clean crack about the size of a large coin — roughly 3 to 4 cm across.
- Photo callout: At this point you should see dark moist soil just beneath the crack. If the soil looks very pale and dry, that is normal — the expandable growing medium has not been hydrated yet.
- Measure approximately 30 ml of warm (not hot) tap water. Pour it slowly and directly into the cracked opening. Warm water matters here: cold water reduces germination rate and shocks the seeds.
- Wait 2 to 3 minutes and watch the soil expand to fill the cavity if your kit uses an expandable medium. If excess water pools on top, stop adding more — you have added enough. Overwatering at this stage can bury seeds and prevent germination.
- Place the egg on its saucer in your chosen bright, warm spot. Do not move it again unnecessarily for the first 48 hours.
- Photo callout: The surface of the soil should look dark and moist but not waterlogged. If it looks like a puddle, tip the egg very gently to drain a little water into the saucer.
- Ongoing watering: check the soil surface daily. If it looks light-coloured and dry, add a small mist from a spray bottle or add 5 to 10 ml of water carefully. Do not flood it. The goal is consistently moist, not wet.
Water-Submersion Character Eggs (Dino Surprise, Dragon Mystery, Unicorn, Hatch and Grow, Mega and Super Grow)
- Fill a bowl with room-temperature tap water. The bowl needs to be deep enough to fully or mostly submerge the egg.
- Place the egg in the water. It may float at first — that is fine. Gently push it down so it is submerged and leave it.
- Photo callout: You may notice fine bubbles or a slight softening of the egg surface within the first hour. This is normal.
- Check every few hours. The outer shell will begin to crack or dissolve (depending on the product) as the polymer inside absorbs water and expands. Typical crack time: 12 to 24 hours for most Dragon Mystery and Dino Surprise variants, up to 72 hours for larger or thicker-shelled eggs like some Unicorn and Mega Grow variants.
- Once the shell has cracked open, leave the figure submerging in the water to continue growing. Change the water if it becomes cloudy.
- Handling tip: when you take the expanded polymer figure out to examine it, do so with clean, dry hands. Wet hands make the figure slippery. Place it on a paper towel on a flat surface.
- The figure reaches maximum size when it stops expanding noticeably between checks — usually within 48 to 72 hours total soak time.
- To shrink the figure back down (they are reusable), simply remove it from water and allow it to air-dry. It will return to near its original size over 1 to 3 days.
Growth Timeline and Daily Care Schedule
Here is what to expect day by day for ceramic Eggling kits growing basil or herbs. Character egg hatching timelines are listed separately in the table below.
| Day | What to Expect | Your Job |
|---|---|---|
| Day 1 | Soil is moist and settled after initial watering. Nothing visible yet. | Check soil colour. If pale, add 5 ml warm water. Place in bright spot. |
| Day 2 to 3 | Soil surface stays dark. Seeds are absorbing water below the surface. | Mist lightly if the surface looks dry. Avoid disturbing the egg. |
| Day 4 to 5 | Possibly the first hairline root tip or pale shoot tip visible at the soil surface. | Keep temperature at 20 to 25°C. Do not add extra water unless soil is clearly dry. |
| Day 5 to 7 | First green cotyledons (seed leaves) push through. Typical for basil. | Celebrate this. Increase light slightly. Continue light misting. |
| Day 7 to 10 | Seedling stands upright. First true leaves may begin forming. | Start checking daily for leaning or crowding. Thin if multiple seedlings are competing. |
| Day 10 to 14 | Seedling has 2 to 4 true leaves. Growing steadily. | Consider a dilute liquid fertiliser at half strength if no nutrients in the soil mix. |
| Week 3 onward | Plant outgrows the egg cavity. Roots may show through drainage hole. | Prepare to transplant into a larger pot with fresh potting mix. |
| Kit Type | Shell Cracks At | Full Size Reached At | Reusable? |
|---|---|---|---|
| Dino Surprise Grow Egg | 12 to 24 hours | 48 to 72 hours | Yes (air-dry to reset) |
| Dragon Mystery Grow Egg | 12 to 24 hours | 48 to 72 hours | Yes (air-dry to reset) |
| Unicorn Grow Egg | 24 to 72 hours | 48 to 72 hours | Yes (air-dry to reset) |
| Hatch and Grow / Hatch N Grow | 12 to 48 hours | 48 to 72 hours | Yes (air-dry to reset) |
| Mega / Super Grow Egg | Up to 72 hours | 72 to 96 hours | Yes (air-dry to reset) |
| Ceramic Eggling (soil-based) | You crack it manually at setup | First sprouts in 5 to 10 days | No (single use) |
Environmental Care: Light, Temperature, Humidity and Ventilation
Once your Eggling has sprouted, the care shifts from activation to maintenance. This is where a lot of people accidentally undo their early success, usually by overwatering or by moving the egg somewhere dimmer because it looks tidier there.
Managing Light as the Seedling Grows
Once cotyledons are visible, light becomes the most important variable. A seedling that does not get enough light will stretch toward the nearest window, this is called etiolation, and the stem becomes thin and weak as a result. Rotate the egg a quarter-turn every other day to keep growth upright. If you are using a windowsill, make sure the glass is clean enough to let maximum light through. In winter at high latitudes, a small LED grow light for 12 to 14 hours per day makes a big difference.
Temperature Ranges to Maintain
After germination, most herbs in Eggling kits (basil especially) prefer 18 to 25°C during the day and can tolerate down to about 16°C at night. Below 16°C, growth slows noticeably. Above 30°C, the soil dries out very fast and seedlings can wilt between watering. If your home gets hot in summer, move the egg away from south-facing glass between noon and 3 pm.
Humidity and Ventilation
Good airflow actually helps prevent mould on the soil surface. Do not enclose the egg under a glass dome or in a sealed container unless your home is extremely dry. A gentle breeze from an open window (not a cold draft) strengthens young stems. If you notice white fuzzy growth on the soil surface, improve air circulation immediately and reduce watering frequency.
Handling, Support and Avoiding the Most Common Damage
The egg itself is ceramic, so it can crack if knocked. Once you have placed it, treat it like a full cup of water on a desk, stable flat surface, away from edges. Here is how to handle common physical problems as the plant grows.
Repositioning the Egg
If you need to move the egg after the seedling has emerged, always pick it up with both hands, supporting the saucer from underneath. Never grab the egg by the top near the cracked opening, the ceramic edges there are the weakest point. Move it only when the soil is slightly dry rather than waterlogged, so it is lighter and less likely to slosh.
Staking Tall or Leaning Sprouts
If a seedling grows tall and starts to lean (common in low light), insert a toothpick or thin wooden skewer into the soil next to the stem and loosely tie the stem to it with a small piece of thread or a twist tie. Do not tie it tightly. The goal is to guide growth, not clamp it. Once you transplant to a larger pot, the stronger root system usually supports the stem without help.
Avoiding Condensation Damage
If the egg sits on a cold surface (a stone windowsill in winter, for example), condensation can form on the outside of the ceramic and drip into the saucer, making it look like the plant is draining when it is not. Slip a small cork trivet or folded cloth under the saucer if you notice this happening. Standing water in the saucer for more than 30 minutes is a sign of overwatering.
Reading Overwatering Signs Early
- Soil surface stays dark and wet-looking 24 hours after watering
- White or grey fuzzy growth appears on the soil (mould)
- Seedling stem looks pale or translucent at the base (damping off)
- Standing water remains in the saucer for more than an hour
- A sour or musty smell comes from the egg
If you spot any of these signs, stop watering for 48 hours, move the egg somewhere with better air circulation, and gently remove any visible mould from the soil surface with a dry cotton swab. Most overwatered Egglings recover if you catch it early.
Troubleshooting: When Things Do Not Go to Plan
I will be honest, these kits do not always go perfectly on the first try, and that is okay. Seeds have a viability window and SAP toys can be affected by storage conditions. メーカーのよくあるトラブルでは、過湿による種腐敗やカビ、冷水による発芽遅延、古い種子、発芽後の光不足・低温が主な原因と対策として給水・保温・照度の調整と再テストが挙げられています。 blank" rel="noopener noreferrer">SEISHIN『よくあるトラブル』によると、過湿による種の腐敗や土表面のカビ、冷水での発芽遅延、古い/不適切保管の種子、発芽後の光・温度不足が主な失敗原因で、給水・保温・照度の調整や種子の再テストが推奨されています。. Here is a quick diagnosis table, followed by model-specific notes.
| Problem | Most Likely Cause | Fix |
|---|---|---|
| No sprouting after 10 days (Eggling) | Water too cold, overwatering, seeds too old, or temperature below 16°C | Check temperature, reduce watering, try a seed germination test on a moist paper towel at 21°C |
| Slow growth or pale seedling | Insufficient light | Move to a brighter spot or add a grow light for 12 to 14 hours daily |
| White fuzzy mould on soil | Overwatering combined with poor airflow | Reduce watering, improve ventilation, remove surface mould with a dry cotton swab |
| Shell cracked unevenly or broke in chunks (Eggling) | Tap was too hard or egg had a pre-existing hairline crack | Gently remove large loose pieces, leave smaller ones; the plant will grow around them |
| Character egg not cracking in water after 24 hours | Water too cold, egg not fully submerged, or thick shell variety | Change to warmer water, ensure full submersion, wait up to 72 hours total |
| Character figure looks wrinkled or smaller than expected | Insufficient soak time or hard water minerals coating the polymer | Continue soaking; try filtered or distilled water if hard water is an issue in your area |
| Seedling stretched and falling over | Not enough light (etiolation) | Add a grow light or move to the sunniest window; stake the stem with a toothpick |
| Uneven growth (one side sprouting, other side bare) | Egg positioned at an angle or light from one direction only | Level the egg on its saucer; rotate a quarter-turn daily |
Model-Specific Notes
Most Eggling-style kits follow the same crack-and-water process, but there are a few differences worth knowing. The SEISHIN Heartomato and similar 'germination jelly' kits use polymer spheres rather than soil, you soak these in plenty of tap water until they return to their spherical shape, then plant seeds once root tips and cotyledons are visible. Standard Egglings with potting mix skip this step. Dino Surprise and Dragon Mystery eggs are typically 5 inches or less in overall height, while Mega Grow and Super Grow Egg variants can be significantly larger and take up to 96 hours to fully expand. For step-by-step surprise mega grow egg instructions, consult the dedicated Mega Grow guide for activation and care tips. For step-by-step Dino Surprise grow egg instructions, see our dedicated Dino Surprise guide. Unicorn Grow Eggs sold through mass retailers like Walmart are listed as non-toxic and BPA-free by sellers, but the same polymer ingestion warnings apply regardless of labelling. For step-by-step unicorn grow egg instructions, consult the product insert or manufacturer's guide for the best activation and safety tips. Large observational analyses and poison‑center data confirm thousands of exposures and that water‑bead ingestions can cause vomiting, abdominal pain, and higher odds of moderate/major outcomes in children under age 2 blank" rel="noopener noreferrer">Large observational analyses and poison‑center data confirm thousands of exposures and that water‑bead ingestions can cause vomiting, abdominal pain, and higher odds of moderate/major outcomes in children under age 2.. Hatch and Grow and Hatch N Grow kits (covered in more detail in their own guides on this site) often come in multi-packs with varied shell thicknesses, so hatching times can differ even within the same pack.
Transplanting, Reusing and Disposing of Your Kit
At some point, a successfully-grown Eggling plant will outgrow its ceramic home. Roots appearing at the drainage hole or a plant that wilts within hours of watering are both signs it is time to move up.
Transplanting the Eggling Plant
To transplant, gently wrap the egg in a cloth, take it outside or over a sink, and carefully crack the lower half of the ceramic with the back of a spoon until the soil mass comes free as one block. Settle this root ball into a pot at least 15 cm in diameter filled with fresh potting mix. Water it thoroughly and keep it in the same bright spot for a week while it adjusts. SEISHIN supplies an extra seed packet in some kits so you can start again, check your box.
Reusing Polymer Character Figures
Polymer grow toys are reusable. To reset them, remove the figure from water and place it on a dry surface at room temperature. It will shrink back to near its original size in 1 to 3 days. You can repeat the grow cycle multiple times. Over many cycles, the polymer may become slightly smaller and the surface less smooth, this is normal degradation and not a safety issue for external use.
Disposal
Ceramic shell pieces go in general waste or recycling depending on your local council rules, check before tossing. Sodium polyacrylate polymer (the growing toy material) is classified as low-toxicity and non-regulated for transport, but most safety data sheets recommend disposing of it through your local solid waste authority rather than flushing it down the drain (it can cause blockages). When in doubt, seal used polymer material in a bag and place it in general household waste.
What to Try Next
If this kit has sparked an interest in grow eggs and hatching toys, there is a whole family of similar kits worth exploring. The Dino Surprise and Dragon Mystery eggs are great next steps if you want more character variety in the water-submersion style. For something larger and more dramatic, Mega Grow Egg and Surprise Mega Grow Egg kits stretch the format further. If you enjoy the soil-and-seed side of things and want to see how other egg-style kits compare on germination timing and care requirements, the Super Grow Eggs guide covers a different brand approach to the same concept. For step-by-step Super Grow Eggs instructions and brand-specific troubleshooting, see Super Grow Eggs instructions. Whichever kit you try next, the core skills you just built, cracking cleanly, watering carefully, managing light and temperature, and reading early problem signs, transfer directly.
FAQ
Quick-start checklist — what do I need to do first to crack-and-grow an Eggling-style kit safely and successfully?
Adult supervision ready; work on a washable surface or tray; gather the kit, warm tap water (20–25°C / 68–77°F), a small spoon or soft mallet (if not included), a cup for measuring ~30–100 ml water depending on model, paper towel, and a saucer/tray to catch overflow. Read the kit card. Keep small parts and any polymer beads away from children under 3 and pets. Plan 10–15 minutes for setup and a nearby bright, warm place for the next days.
Itemized prep list — what exactly should I have on hand before opening the egg?
1) Kit and instruction card; 2) Adult supervisor and timer/clock; 3) Warm tap water (20–25°C); 4) Measuring cup or graduated syringe (30–200 ml depending on model—see model notes); 5) Spoon or soft-tap tool for cracking (wooden spoon recommended); 6) Tray or plate to hold the egg and catch drainage; 7) Paper towel for drying hands/accident spills; 8) Fine mist spray bottle for later seedling care; 9) Optional: magnifier or phone camera for daily photos; 10) Access to local poison-control number if small children may ingest beads.
Step-by-step activation walkthrough with exact timing and handling tips — how do I crack-and-grow most Eggling-style kits?
1) Inspect the kit: confirm whether it is soil-based (expandable soil) or a water-grow polymer toy (character grow). Read label. 2) Crack: Place egg on tray. For ceramic planter kits (Eggling proper), tap top rim gently with spoon around circumference until a cap lifts; lift the cap. For novelty water-grow eggs (Dino/Dragon/Unicorn), fully submerge or set the egg upright in a cup of warm tap water per package. 3) Add water: For Eggling pot/soil cartridges, slowly add ~30 ml warm water into soil until it is evenly moist and excess drains to tray; do not flood. For germination-jelly types, pre-soak polymer spheres in plenty of water until they re-swell (several minutes to 30 min) then plant seeds on top per instructions. For grow-in-water novelty eggs, follow package: fully cover with water and leave. 4) First 12–48 hours: keep undisturbed in warm (20–25°C / 68–77°F) bright spot out of direct hot sun. Check daily and top up water slowly—soil should stay moist, not saturated. Novelty polymer toys will show expansion in 12–72 hours. 5) Germination window: herb seeds in Eggling soil typically sprout in 5–10 days; polymer bead toys finish swelling in 1–3 days. 6) After seedlings appear: move to bright indirect light, mist gently once daily if soil surface is drying. 7) Transplant: when plants outgrow the egg (visible roots at drainage or plant becomes top-heavy), transplant to a larger pot with fresh potting soil—usually after several weeks. Handling tips: use warm (not cold) water to speed germination; do small water increments to avoid overwatering; trim cracked ceramic shards from rim if needed and smooth edges with tape to avoid cuts.
Exact timing expectations — how long until I see results for common variants?
answer: Eggling ceramic planter with seeds (e.g., basil): cotyledons often in 5–10 days at 20–25°C. Germination-jelly kits: swell beads within minutes to 30 minutes, seed radicle emergence visible in ~3–14 days depending on species. Novelty grow-in-water toys (Dino/Dragon/Unicorn): full visible growth/swell usually 12–72 hours. If nothing visible in the expected window, follow troubleshooting steps.
Environmental care — what light, temperature and humidity conditions are ideal during and after germination?
During germination: bright, indirect light; stable temperature 20–25°C (68–77°F) is ideal. Avoid cold drafts (<16°C) and direct midday sun that can overheat the small container. After germination: increase light to a sunny windowsill with morning or late afternoon sun if possible, or use a grow light for 12–16 hours daily. Humidity: keep soil surface moist; use a fine mister for seedlings rather than soaking. For grow-in-water toys, room humidity is irrelevant—avoid placing where pets/children can access standing water.
Common problems and diagnosis — why did my kit not grow or grow slowly?
No or slow growth causes and fixes: 1) Water too cold — use warmer tap water (20–25°C). 2) Overwatering causing seed rot or mold — let surface dry slightly, reduce added water, increase airflow. 3) Underwatering — top up to keep soil moist. 4) Old or nonviable seeds — run a paper-towel germination test with seeds (keep moist, warm ~21°C) to confirm viability. 5) Temperature too low — move to warmer spot. 6) Insufficient light after sprout — provide brighter light or supplemental lamp. 7) Packaging confusion (polymer beads mistaken for soil) — identify model and follow appropriate soak/plant steps.