Most hatch n grow kits follow a simple two-phase process: you activate the kit by adding water (or placing seeds in a moist grow mix), keep it in a warm, well-lit spot, wait 48 hours to a week for hatching or sprouting, then shift into a steady routine of light, moisture, and feeding. The exact numbers differ by kit type, but the logic is the same across nearly all of them, and this guide walks you through every step. For surprise mega grow egg instructions, follow the same core setup logic, then adjust the timing and water temperature to the specific egg type you have.
Hatch N Grow Instructions: Step-by-Step Setup to Troubleshooting

Marcus Thornfield
7 Jun 2026
Quick start checklist for your exact hatch-and-grow kit
Before you do anything, figure out which category your kit falls into. Hatch n grow is a broad label used on water-based aquatic creature kits (like Aqua Dragons), seed-starting and microgreens kits, and novelty foam or polymer egg toys that expand in water. Each one has a different mechanism, so matching yourself to the right category first saves a lot of confusion later.
| Kit type | Activation method | Main hatch/sprout window | Key thing to get right |
|---|---|---|---|
| Aquatic creature kit (e.g., Aqua Dragons) | Add eggs pouch to bottled water in tank | 48–72 hours (up to 7 days) | Water temperature 21–27°C and strong natural light |
| Seed/microgreens grow kit | Moisten grow mix, sow seeds on top | 3–12 days depending on species | Consistent moisture: 3–5 tbsp water per day |
| Heat-mat seed tray kit (e.g., Heat n Grow) | Fill seed tray, plug in heat mat, spray to moisten | Varies by seed type, usually 5–14 days | Even soil moisture every 2 days, thermostatic warm-up |
| Water expansion egg toy | Submerge egg fully in water | 12–24 hours for shell to crack open | Full submersion in room-temperature water |
Once you know your type, run through this checklist before moving on:
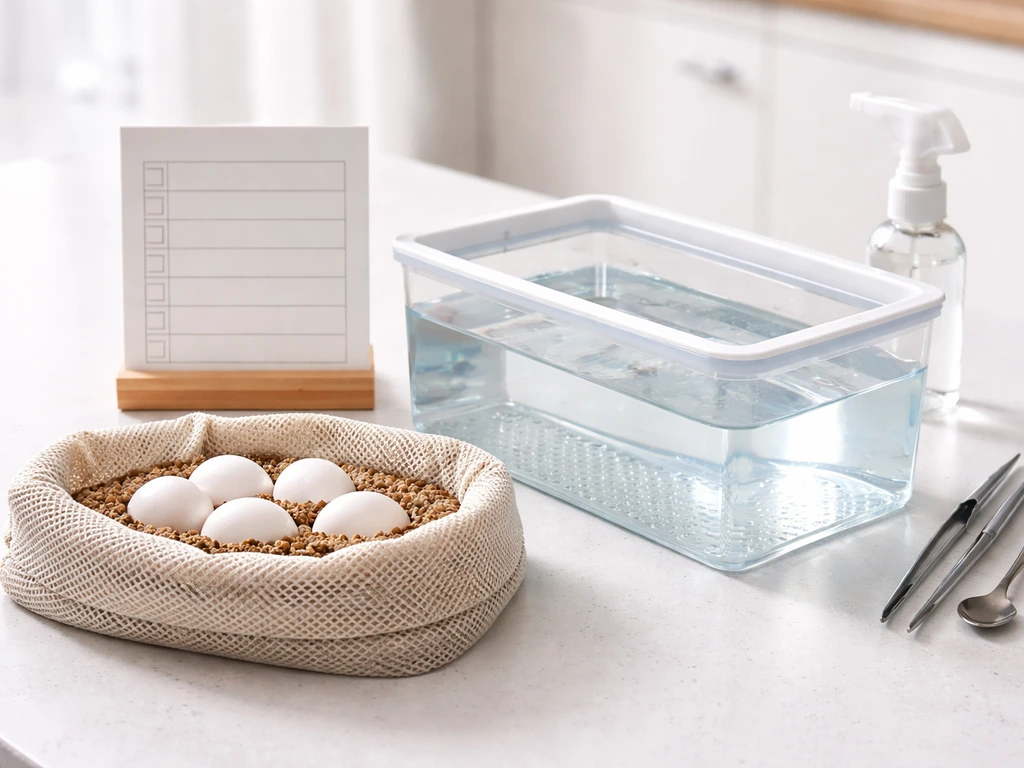
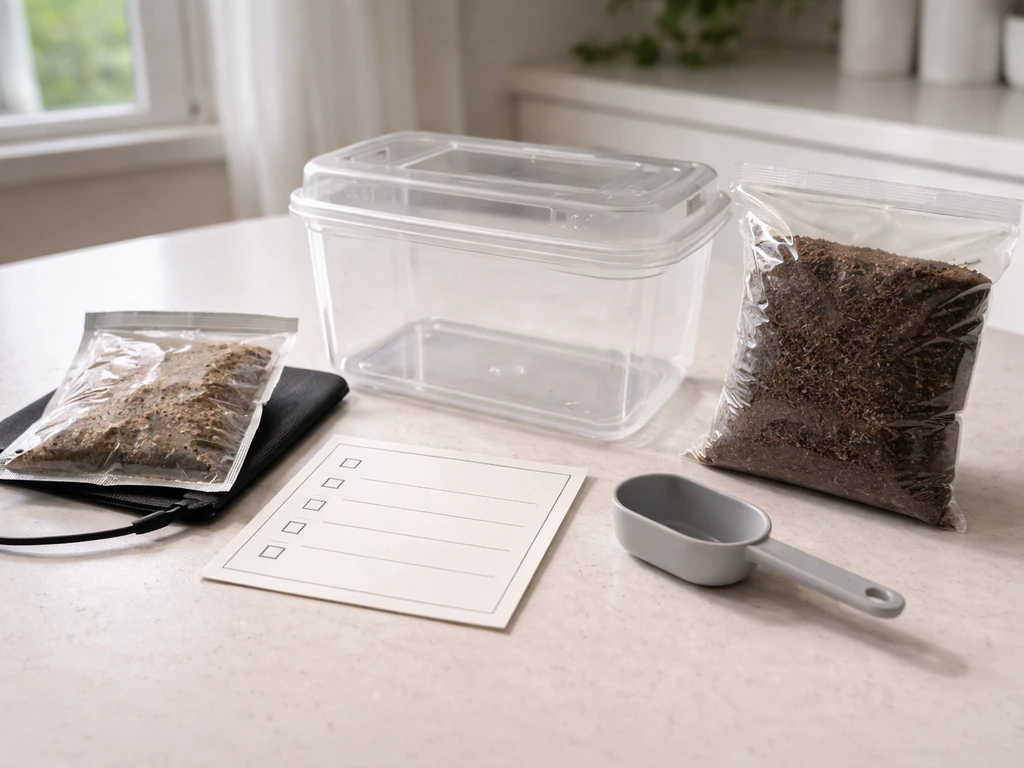
- Unbox everything and identify all components: eggs pouch or seeds, grow medium or tank, food sachet or nutrient pack, any tools like a pipette, feeding spoon, or spray bottle.
- Read the kit's own instruction sheet alongside this guide — especially note any specific temperatures or water types your brand recommends.
- Source the right water. Most aquatic kits require bottled still water (not tap, which has chlorine). Seed kits are usually fine with tap water that has been left to sit for an hour.
- Pick your location before you set up, not after. You need a spot with good natural light and stable room temperature — moving the kit mid-hatch disrupts conditions.
- Check the temperature at your chosen spot with a basic thermometer. Aquatic kits need 17–30°C (ideally 21–27°C). Seed kits generally want 18–24°C ambient temperature.
- Have your spray bottle or pipette ready. You will need to add moisture or oxygen regularly from day one.
Hatching phase: setup conditions, timing, and what to do day by day
Aquatic creature kits (Aqua Dragons and similar)
Fill the tank with bottled still water first, then add the eggs pouch. Do not shake or stir aggressively, gentle movement is fine. Place the tank somewhere that gets plenty of natural light throughout the day. Temperature is the single biggest variable: the water needs to stay between 17–30°C, with the sweet spot being around 21–27°C. Too cold and the eggs simply will not hatch. Too warm (above 30°C) and the environment becomes hostile. If your home runs cool, place the tank near a south-facing window but away from draughts.
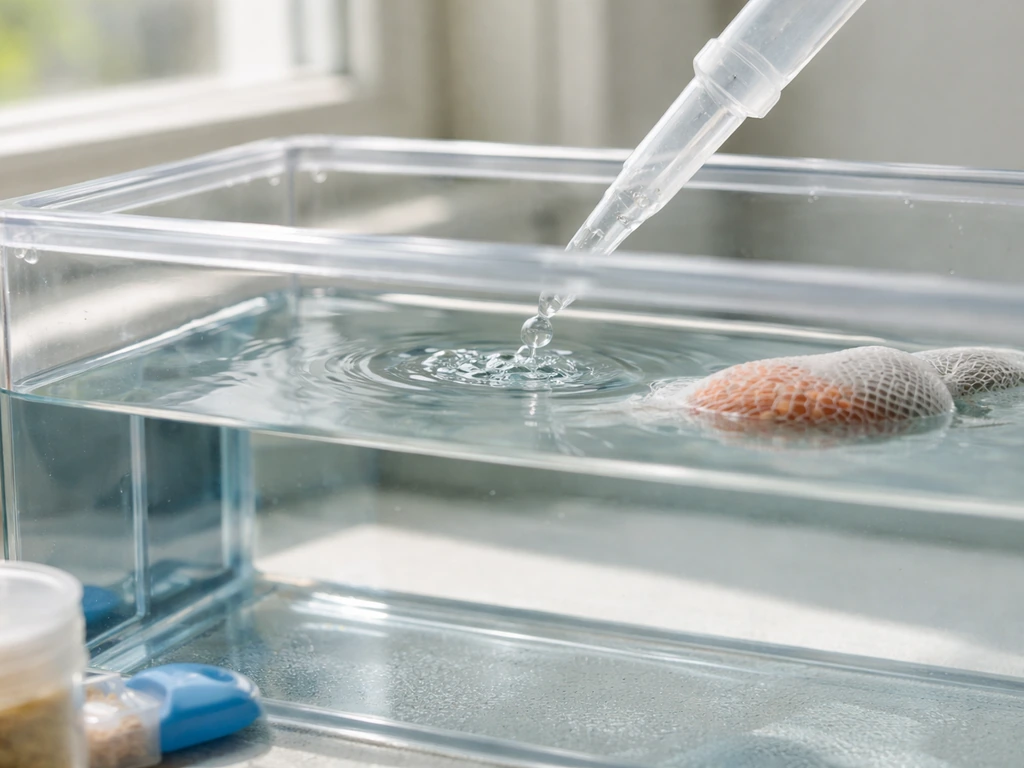
Use the pipette (air bubble tool) included in your kit to oxygenate the water by drawing water up and releasing it gently back in. Do this once or twice a day. The creatures need dissolved oxygen just as much as they need warmth and light, skipping the pipette step is one of the most common reasons hatched creatures do not thrive.
Expect to see tiny creatures swimming within 48–72 hours under good conditions. If your setup is on the cooler or dimmer end of the acceptable range, it can take up to a full week. That is completely normal and documented in Aqua Dragons' own FAQ. World Alive’s Aqua Dragons FAQ recommends keeping the water temperature in the target range, listing an ideal around 22°C and a safe range of about 21, 27°C Aqua Dragons' own FAQ. Do not add more eggs or change the water during this waiting period.
Seed and microgreens kits
Dampen the grow mix thoroughly before sowing, it should feel like a wrung-out sponge, not soggy. Scatter seeds on the surface or press them lightly into the mix as directed by your kit, then cover if a humidity dome or lid is included. Place in a warm spot with indirect light for the first few days. Once you see sprouts emerging (typically 3–12 days), move to a bright spot or under grow lights.
Heat-mat seed tray kits (Heat n Grow style)
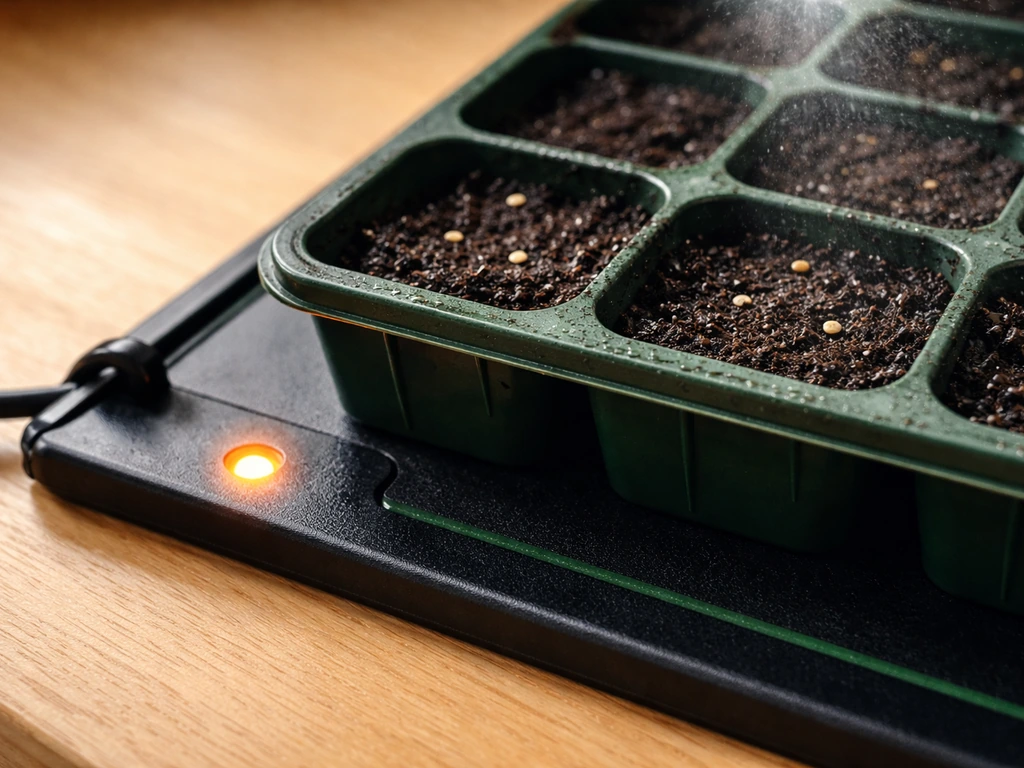
Plug in the heat mat and watch for the glow indicator, it stays lit while the tray warms to its set temperature. Fill the seed tray cells with grow mix, sow seeds, and spray with water. The moisture is not just for hydration: it transfers heat efficiently from the mat into the seed zone, which is the whole mechanism these kits rely on. Spray every second day during the germination window to keep that moisture level consistent.
Water expansion egg toys
Place the egg in a container large enough for it to expand, then completely submerge it in room-temperature water. Full submersion matters, partially submerged eggs hatch unevenly. The shell typically cracks and the figure inside expands within 12–24 hours. These are novelty items rather than living grow kits, but the 'hatch n grow' name gets applied to them often enough that it is worth covering. For dragon mystery grow eggs specifically, follow the included dragon mystery grow egg instructions to get the timing and water conditions right. If you’re looking for mega grow egg instructions, use these same hatch-and-grow principles, then follow the specific steps for your product type 'hatch n grow' name. Unicorn grow egg instructions will vary a bit by model, but the same water expansion idea usually applies.
Growing phase: light, water, and maintenance routines
Light requirements
Natural light is the preferred option for virtually every kit type. For aquatic kits, the tank needs consistent daylight exposure, a windowsill works well as long as it does not get direct midday sun that could overheat the water. For seed and microgreens kits, 6–8 hours of bright indirect light or direct morning sun is ideal. If your space is dim, a basic grow light placed 15–20 cm above the seedlings for 12–14 hours a day will do the job.
Watering and moisture
For aquatic kits: do not top up with fresh water unless evaporation has noticeably dropped the level. Change the water completely every 1–2 weeks to keep the tank clean and healthy. Always use bottled water for changes, not tap.
For seed and microgreens kits: a daily check is better than a fixed schedule. The target is a consistently damp (not wet) grow mix. If you see the surface starting to look pale or dry, add roughly 3–5 tablespoons of water and check again the next day. If there is visible condensation inside a dome lid, that is a good sign, you have enough humidity. Aim for around 70% ambient humidity if you can measure it, which is the general threshold most seedlings thrive in.
Feeding and nutrients
Aquatic kits include a food sachet and a small feeding spoon. Feed the creatures every two days, no more, no less. Overfeeding clouds the water fast and depletes oxygen, which is harmful to your critters. Use the spoon to portion out a small amount and drop it directly into the water.
Most seed starter and microgreens kits do not require any added fertiliser during the first grow cycle because the grow mix already contains what seedlings need for their first few weeks. If your kit includes a nutrient sachet, dissolve it in water as directed and apply it only after the first true leaves appear, feeding too early can burn fragile seedling roots.
What to expect: growth milestones and day-by-day signs
| Day range | Aquatic creature kit | Seed / microgreens kit | Heat-mat tray kit |
|---|---|---|---|
| Day 1 | Water looks clear; nothing visible yet — this is normal | Mix is damp; seeds sitting on surface | Heat mat warming up; indicator light on |
| Days 2–3 | Tiny creatures may appear if conditions are ideal | First signs of white root tips poking downward | Soil warming to target temp; moisture check needed |
| Days 4–7 | Creatures clearly visible and swimming; begin feeding | First sprout tips breaking surface | Germination beginning; spray again if surface is dry |
| Days 7–14 | Population growing; creatures visibly larger | Seedlings 2–5 cm tall with seed leaves (cotyledons) | Strong seedlings; thin overcrowded cells to one per cell |
| Days 14–30 | Full colony established; regular feeding and water changes | First true leaves; ready for transplanting or harvest (microgreens) | Ready to pot on or transplant outdoors after hardening off |
The most important mindset during days 1–3 is patience. Nearly every 'my kit is broken' message I have seen turns out to be someone checking too early or in conditions that are just slightly too cool. Give it the full week before concluding something is wrong.
Symptom-to-fix guide
No hatch after 7+ days
For aquatic kits: check the water temperature first. If it is below 17°C or above 30°C, adjust the location immediately. The room temperature should be at least 65–75°F (18–24°C) at all times. For seed kits: if there is no condensation inside your dome and the surface looks dry, the mix has dried out. Mist lightly, reseal the lid, and give it another 3–5 days before deciding seeds have failed.
Slow or partial hatch
This almost always comes down to temperature or light being on the low end of acceptable. Move the kit to a warmer, brighter spot. For aquatic kits, placing the tank near a warm lamp (not touching it) can raise the water temperature a few degrees. For seed kits, a heat mat under the tray speeds germination noticeably, this is exactly what Heat n Grow-style kits are designed for.
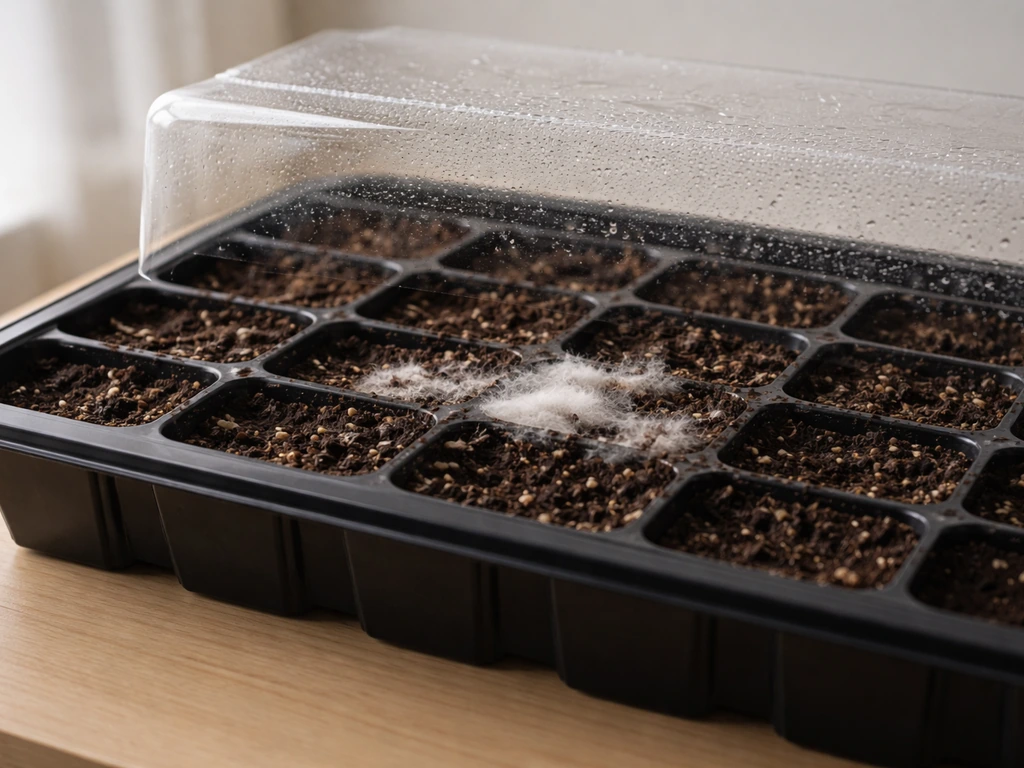
Mold or slime
White fluffy mold on a seed tray usually means too much moisture and not enough airflow. Remove the dome or lid for a few hours each day to let fresh air circulate. If mold is on the seeds themselves, remove affected seeds and reduce watering frequency. For aquatic tanks, a milky or slimy appearance in the water means it is time for a water change, use fresh bottled water and clean the tank gently before refilling.
Fungus gnats or small flies
These appear when the grow mix stays too wet for too long, especially in a warm room. Let the surface dry out between waterings more aggressively. Yellow sticky traps placed near the tray catch adults and break the cycle. Avoid watering from the top, if your kit allows bottom-watering (setting the tray in a shallow dish of water briefly), that keeps the surface drier and makes it less attractive to gnats.
Leggy or yellowing growth
Long, floppy stems that flop over are a light problem, not a water problem. Move the kit closer to a window or lower your grow light. Yellow leaves on seedlings that have been growing for more than two weeks usually mean the grow mix is spent, this is when a diluted liquid feed makes a real difference. Yellow cotyledons (the first rounded seed leaves) falling off is actually normal and not a sign of a problem.
Root problems
Brown or mushy roots on seedlings are caused by overwatering or poor drainage. If your kit tray has no drainage holes, you are at higher risk of this. Tip the tray slightly to drain excess water and let the mix dry before watering again. Healthy roots should be white and firm. For aquatic kits, root-type concerns do not apply, but creatures sitting at the bottom and barely moving can indicate low oxygen, use the pipette to aerate the water immediately.
Common mistakes and handling do's and don'ts
- Do not use tap water for aquatic creature kits. Chlorine and fluoride in tap water harm the eggs and hatchlings. Stick with still bottled water.
- Do not overwater seed trays. More water is not more care — soggy mix kills seedlings faster than dry mix.
- Do not skip the oxygenation step in aquatic kits. The pipette is not optional equipment.
- Do not move the kit to a new location every day. Temperature fluctuations during the hatch phase are one of the top reasons for failure.
- Do not place aquatic tanks in direct midday sun. Light is essential, but overheating the water above 30°C is fatal to the creatures.
- Do mist seed trays gently rather than pouring water in, especially during the first week.
- Do wash your hands before handling seed trays or feeding aquatic kits. Oils and contaminants affect both plant and aquatic environments.
- Do keep young seedlings away from cold windowsills overnight if outdoor temperatures drop below 5°C — press a piece of cardboard between the glass and the tray as insulation.
- Do label your kit with the setup date so you can track the timeline accurately instead of guessing.
How to adapt instructions when your manual is unclear or differs by model
Hatch n grow is not a single product from one brand. For eggling crack and grow instructions, start by matching your kit type to the right setup rules, then follow the hatching and growing phases step by step. It is a category name that dozens of manufacturers use, and the instructions packaged inside vary wildly in quality. Some manuals are a single folded sheet with five lines of text. If your manual leaves gaps, here is how to fill them in without guessing.
- Identify your kit type first (aquatic, seed-based, heat-mat, or water-expansion toy) using the table at the top of this guide. The mechanism tells you which defaults to apply.
- If no water type is specified, use still bottled water for aquatic kits and settled tap water for seed kits.
- If no temperature is specified, aim for 21–24°C as your universal default — it sits in the acceptable range for nearly every hatch n grow product.
- If no light guidance is given, treat a bright windowsill with several hours of natural light as the baseline. This works for both aquatic and seed systems.
- If no watering frequency is given, check daily and add moisture only when the surface looks dry or condensation is absent. For aquatic kits, aerate once daily with a pipette or gentle stir.
- If the kit has a branded name you can search (like Aqua Dragons, Heat n Grow, or similar), look up the manufacturer's website — official instruction PDFs or FAQ pages are usually available and more detailed than the printed sheet.
- If nothing is clearly hatching or sprouting after 10–14 days despite correct conditions, treat it as a failed activation and contact the retailer. Most hatch n grow products have a novelty guarantee and will replace faulty egg or seed pouches.
It is also worth knowing that the hatch n grow category covers a surprisingly wide range of products. If you came here after searching for instructions on an egg-shaped version specifically, there are dedicated guides for variations like dino surprise grow eggs, unicorn grow eggs, dragon mystery grow eggs, and mega grow eggs, each of which has its own quirks in the activation and grow phases. The core principles here apply across all of them, but species-specific or theme-specific guides will give you model-level detail where it matters.
The bottom line: if your kit is warm, well-lit, correctly moistened or oxygenated, and given enough time, it will almost always hatch or sprout. The vast majority of problems come down to one of those four variables being off. Run through this guide's checklist, fix the variable that is out of range, and give it another few days before concluding anything is wrong.
FAQ
Can I speed things up by changing the schedule or adding extra water?
Yes, but only within your kit’s category logic. For aquatic hatch n grow setups, don’t change water volume or add freshwater unless evaporation has dropped the level noticeably. For seed and microgreens kits, avoid “soaking” the surface, keep the mix wrung-out damp, then recheck the dome condensation before adding more water.
Is it okay to shake the tank or stir the water to help the eggs hatch faster?
In most hatch n grow kits, don’t. Overagitating can disturb settled materials and, for aquatic kits, increases cloudiness and lowers dissolved oxygen. Instead, use gentle daily pipette oxygenation for aquatic kits, and for seed kits mist lightly only when the surface looks dry.
What should I do if the creatures hatched but are barely moving or look weak?
Look for oxygen and temperature first. If aquatic creatures are sluggish or sitting at the bottom, the fastest fix is immediate pipette aeration and a water temperature check against the 17–30°C range. If they still seem inactive after the temperature is corrected, do a full water change and gently clean the tank before refilling with bottled still water.
My seed tray got mold, should I throw everything out or remove the dome right away?
For seed and microgreens, don’t remove the humidity dome too early. White fluffy mold is a moisture and airflow issue, so you can ventilate by removing the lid for a few hours daily rather than fully exposing the tray. Keep the grow mix damp but not wet, and only increase watering after mold risk is controlled.
How can I tell if my seed tray design will cause root rot, and what’s the workaround?
Confirm drainage before you add more water. If your seed tray has no drainage holes, excess moisture accumulates and leads to brown or mushy roots. If that’s the case, reduce watering frequency, keep the surface slightly drier between misting, and tilt the tray briefly to let excess drain if the kit design allows it.
How do I know whether seeds truly failed versus just needing more time?
Your best indicator is condensation and surface color, not the calendar alone. If there is no dome condensation and the mix looks pale or dry, add about 3–5 tablespoons of water, reseal, then wait 1 more check cycle (often another 1–3 days depending on conditions) before declaring failure.
When should I use the nutrient sachet, and can I add it earlier “just to help”?
Don’t add fertilizer during the first cycle unless the kit explicitly directs it. Even with a nutrient sachet, apply it only after first true leaves appear, and dose exactly as directed, because early feeding can burn fragile seedling roots.
What’s the correct way to adjust light if I think my kit is too dim?
If you suspect a lighting problem, adjust distance and duration rather than adding heat. For seed trays, place grow lights about 15–20 cm above and run 12–14 hours per day. For aquatic kits, avoid direct midday sun on the tank because it can push water above the safe range.
How do I maintain the right temperature if my room is cold at night?
For aquatic kits, aim for around 21–27°C when possible, and keep the tank away from drafts. If your home is cooler, use placement near a warm window region or a warm lamp positioned so it does not touch the tank, then monitor actual water temperature rather than room temperature.
Can I use tap water or distilled water if I run out of bottled water?
Yes, but be consistent and follow the “between waterings dries slightly” rule. For aquatic tanks, keep a partial evaporation allowance, top up only when the level drops noticeably, and do full bottled-water changes every 1–2 weeks. For seed trays, mist every second day during germination is typical, then move to more responsive checks based on surface appearance and condensation.
How often should I aerate, and is there such a thing as aerating too much?
Yes, for aquatic kits, pipetting once or twice daily is typically enough, but more isn’t always better. If water is already clear and creatures look active, don’t keep over-pipetting. If water becomes cloudy or oxygen seems low, then focus on aeration and correct temperature first.
Should I add extra eggs if nothing happened yet after 2 days?
Don’t remove or add eggs mid-cycle. The guidance for both aquatic and novelty expansion items is to allow the waiting period without changing conditions. Adding more eggs or reactivating early can overfill the environment and disrupt temperature and oxygen stability.