
To use a Wick & Grow planter, you thread the wicking cord through the drainage hole of the inner pot so it hangs into the water reservoir below, fill the reservoir to the marked window line (not above it), add a light peat- or coir-based potting mix around the wick, and then plant your seeds or transplants. The wick does the rest, pulling moisture up into the soil by capillary action as the plant drinks. Check the reservoir window every few days and refill when it reads low. That is genuinely all there is to the basic routine, but getting the details right, especially wick placement, substrate choice, and reservoir fill level, is what separates thriving plants from soggy, struggling ones.
How to Use Wick & Grow Planter: Complete Step-by-Step Guide.

Marcus Thornfield
27 Jul 2026
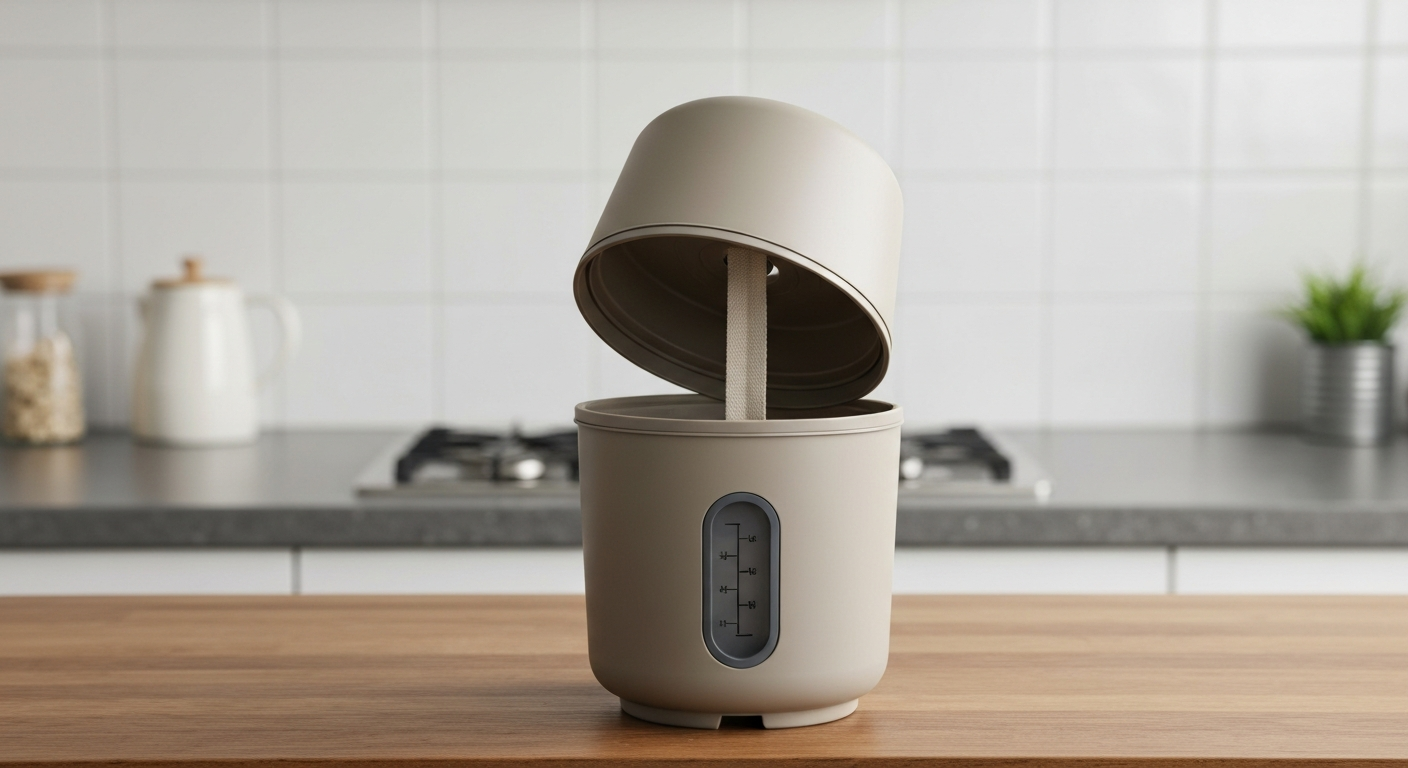
This guide is written for anyone who just unboxed a Wick & Grow planter and found the included instructions a little thin, or who is comparing wick-style self-watering kits before buying. It walks through every step from unboxing to first planting, covers daily and weekly care, explains what to do when things go wrong, and includes model-specific notes for Costa Farms Wick & Grow pots (the 4", 6", and 10" versions) as well as generic modular wick planters. Whether you are starting seeds, growing herbs on a kitchen counter, or keeping a houseplant alive during a busy week, the same core principles apply.
How wick-based self-watering systems actually work
Capillary action is the same force that makes water climb a paper towel when you dip one corner in a glass. In a wick planter, a strip or cord of absorbent material bridges the reservoir and the soil. As the plant transpires and the soil surface dries slightly, a moisture gradient forms. Water molecules in the wick are attracted to the drier soil above and pulled upward continuously, without any pump or timer. The system is passive, meaning it self-regulates to a degree: a thirsty plant in warm, bright conditions draws water faster, and a slow-growing plant in low light draws it more slowly.
The Costa Farms Wick & Grow system uses a blue-and-white plastic component called a Waterwick. It snaps through the drainage hole of the inner grower pot and hangs down into the decorative outer pot that serves as the reservoir. The fabric portion of the Waterwick sits in the water and the top portion is buried in the soil. That direct contact between damp wick and moist substrate is what keeps the whole circuit working. If the wick dries out completely, capillary action breaks and you have to manually rewet the soil to restart it, which is one of the most common rookie mistakes.
Parts checklist and tools you will need
Before you start assembly, lay everything out on a table so you can see what you have. Generic wick planters and Costa Farms kits share most of the same components, though the names and exact shapes vary by brand.
- Inner grower pot (with drainage hole or pre-cut wick slot)
- Outer decorative pot or reservoir tray
- Wick or Waterwick component (pre-attached on some kits, separate on others)
- Reservoir fill port or removable lid (on larger models)
- Water level indicator or window (a small transparent slot on the side of the outer pot)
- Rubber drain plug (included on 10" Costa Farms models to release excess water)
- Potting mix or seed-starting mix (not included, purchased separately)
- Watering can or measuring cup for first fill
- Liquid fertilizer (optional, water-soluble and suitable for your plant type)
- Seeds or a transplant start
You do not need special tools. A small wooden dowel or pencil is handy for poking the wick through a tight drainage hole, and a measuring cup helps you dose nutrients accurately. That is it.
Choosing your wicking material
If your kit came with a pre-formed Waterwick or braided cord, use it. The manufacturer designed the reservoir depth and pot geometry around that specific wick. If you are building a DIY wick planter, replacing a damaged wick, or adapting a generic self-watering pot, you have a few material options.
| Material | Absorption | Durability | Mold Risk | Best For |
|---|---|---|---|---|
| Cotton (non-woven bonded) | High (highest capillary rise in lab tests) | Moderate (degrades over months) | Moderate | Seed starting, herbs, houseplants |
| Cotton braided cord | High | Moderate | Moderate to high if stays wet | Budget DIY replacement wicks |
| Nylon braided cord | Medium | High (resists breakdown) | Low | Long-term planters, fruiting plants |
| Felt (polyester or wool blend) | Medium to high | Medium | Low to moderate | Wide flat-wick setups, modular planters |
| Polyester non-woven | Medium | High | Low | Planters in warm/humid conditions |
Research comparing multiple wick materials found that a bonded non-woven cotton wick achieved the highest capillary rise in controlled tests, reaching roughly 20 cm after three hours. That said, cotton can break down over a growing season in constantly wet conditions. Nylon and polyester hold up longer and resist biological breakdown, even if they absorb a bit less aggressively. For most indoor houseplant and herb setups, either works well. The key sizing rule: the wick should be long enough to sit at least 2 to 3 cm into the soil above and reach the bottom of the reservoir below, with no dry gaps in between.
Preparing the reservoir: water, nutrients, and initial fill
Use plain tap water or filtered water at room temperature. Cold water can shock roots in small pots. For the Costa Farms 4" and 6" kits, remove the inner grower pot, pour water into the outer reservoir, and fill only to the top of the small window indicator, not above it. Overfilling pushes water directly against the base of the grower pot, which saturates the entire soil column and can cause root rot. For the 10" Costa Farms model, the wick is built in and you fill by top-watering until the reservoir window shows full. That model also has a rubber drain plug at the base: if you overfill, remove the plug to drain the excess.
You can add liquid fertilizer directly to the reservoir. The wick will carry diluted nutrients up into the soil along with water. Keep the concentration very low for this delivery method. A practical target is around 70 ppm nitrogen, which works out to roughly one quarter teaspoon of a balanced soluble fertilizer per gallon of water. Higher concentrations in a reservoir that refills constantly can cause salt buildup in the soil over time. Start dilute and increase only if your plants show deficiency signs.
Step-by-step assembly for a Wick & Grow planter
These steps follow the general Costa Farms Wick & Grow pattern but are written to work with most consumer wick planters. Adjust for your specific model where the components differ.
- Rinse the outer reservoir pot and inner grower pot with clean water before first use.
- Locate the drainage hole at the base of the inner grower pot. This is where the wick threads through.
- If the wick is a separate piece, thread it through the drainage hole from inside the pot downward, leaving at least 5 to 8 cm hanging below the pot base to reach the reservoir water.
- For Costa Farms kits, snap the Waterwick onto the plastic spike and push it through the drainage hole until it clicks into place. The Waterwick should hang freely below the grower pot.
- Set the inner grower pot aside and fill the reservoir (outer pot) with water to the fill line on the indicator window. Do not exceed the marked line.
- Place the inner grower pot back into the outer reservoir pot. Check that the wick is hanging into the water and is not folded or kinked.
- Add potting mix to the inner pot (see substrate guidance below), pressing it gently around the wick so the wick is in contact with the substrate on all sides.
- Plant your seeds or transplant (see planting notes below).
- Water the soil surface gently from the top one time to settle the mix and ensure the wick gets its initial wetting. After this first top-watering, let the reservoir do the work.
- Label the pot with the plant name and planting date, then place it in its final location.
Wick placement and routing: the details that matter
Wick placement is where most assembly problems start. The wick needs full contact with moist substrate at the top and with standing water at the bottom. A wick that is kinked, too short, or not buried in soil will stall the capillary circuit within a day or two, and your plant will start wilting despite a full reservoir.
- The wick should enter the soil from the bottom, ideally running vertically through the center of the root zone where soil stays most consistently moist.
- If routing through a drainage hole, make sure the hole is not so tight that it pinches the wick flat. A slightly compressed wick has reduced capillary flow.
- Pre-wet the wick before assembly. Dip it in water for a few minutes so it is already saturated when you add soil. This avoids the air-lock that can happen when a dry wick meets dry soil.
- When adding substrate around the wick, press the soil gently against the wick so there are no air pockets directly surrounding it. The rest of the pot can be filled more loosely.
- If your kit uses a fabric wicking pouch (common in modular planters similar to the Glowpear range), compact the soil inside the pouch firmly while keeping the outer pot soil lighter. The pouch needs intimate soil contact; the broader root zone does not.
- Check after the first 24 hours that the soil in the middle of the pot has drawn up some moisture. If the upper inch is still bone dry but the reservoir level has not moved, the wick contact may have failed.
Picking the right substrate for a wick planter
Substrate choice makes or breaks a wick system. Heavy garden soil and dense potting mixes that compact over time both reduce capillary rise and cut off oxygen to roots sitting in a consistently moist environment. The goal is a mix that wicks water upward reliably while staying open and airy enough that roots do not suffocate.
A peat- or coir-based potting mix with added perlite or vermiculite is the standard recommendation from both extension horticulture sources and published wicking bed research. See Chapter 14: Houseplants – Washington State University Extension (PNW Gardener’s Handbook) for potting‑mix recommendations favoring peat- or coir‑based mixes amended with perlite or vermiculite for self‑watering/sub‑irrigated containers. A 50/50 blend of sphagnum peat or coco coir with perlite performs well in wick system trials, supporting both good capillary rise and root oxygenation. Many off-the-shelf indoor potting mixes already contain perlite. If yours does not, mixing in roughly 20 to 30 percent perlite by volume is a straightforward improvement.
For seed starting, use a dedicated seed-starting mix rather than standard potting mix. Seed-starting mixes are finer, which helps with germination, and they are light enough that the wick can keep the medium evenly moist without overwatering fragile seedling roots. Once seedlings are transplanted into a larger wick planter, you can switch to a perlite-amended potting mix. For edible crops like herbs and leafy greens, the same open potting mix works well. Avoid adding heavy organic amendments like uncomposted bark or dense compost directly around the wick. These can compress over time, blocking capillary channels in the substrate.
Planting: seeds vs. transplants
Starting from seed
Fill the inner pot to about 2 cm from the top. Sow seeds at the depth the packet recommends, then water the surface lightly from above. Keep the reservoir filled at this early stage so the wick maintains even moisture while seeds germinate. Most seeds germinate best with consistently moist (not wet) substrate, which is exactly what a functioning wick system provides. Do not add fertilizer to the reservoir during germination. Seedlings do not need supplemental nutrients for the first few weeks.
Using a transplant
Knock the transplant out of its nursery pot and shake off loose soil. Set it in the inner pot and fill around the roots with your prepared mix, pressing gently so there are no large air pockets. Water once from the top to settle the mix, then let the reservoir take over. Check the water level window after 48 hours: if the level has dropped noticeably, the wick is working.
Daily and weekly care routine
The whole point of a wick planter is that you do not need to water daily. In most indoor conditions, a full reservoir on a 4" or 6" Costa Farms pot will last roughly three to seven days depending on plant size, light intensity, temperature, and how actively the plant is growing. The 10" model holds up to about four cups of water and will last longer. Check the indicator window every two to three days and refill when it reads low.
Small reservoir pots can dry out in a single day if you have them in a hot sunny window in summer or near a heat vent. Fruiting plants and fast-growing herbs drink considerably more than a slow-growing houseplant. If you find yourself refilling daily, that is not a malfunction. It just means your plant is outpacing the reservoir capacity, and you may want to upgrade to a larger wick planter or supplement with occasional top-watering on very hot days.
On a weekly basis, check the soil surface. If it feels soggy rather than evenly moist, reduce the fertilizer concentration in the reservoir or check that you have not overfilled it. If the surface looks pale and powdery white, that is salt crust from fertilizer accumulation. Flush the soil with plain water from above once a month to push excess salts out through the drainage hole, then refill the reservoir with fresh water.
Troubleshooting common problems
Plant is wilting but the reservoir is full
This almost always means the wick has lost contact with the soil or water. Pull the inner pot out and inspect the wick. If it is dry and stiff, re-wet it thoroughly, check that it reaches the water in the reservoir, and re-press soil around it before reassembling. Also check that the wick is not kinked or pinched at the drainage hole.
Soil is waterlogged and roots look brown
Overwatering in a wick planter usually has one of two causes: the reservoir was filled above the window line so water is in direct contact with the pot base, or the substrate is too dense and is not draining excess moisture away from roots. Drain the reservoir to the correct level, check your mix, and consider replacing part of it with more perlite if the existing mix is clearly compacted.
Green or brown algae in the reservoir
Algae grow when the reservoir gets light. Many decorative outer pots block light well, but if yours is translucent or pale, wrap the outside with foil or a dark sleeve. Empty and rinse the reservoir every three to six months. For stubborn algae or odors, wash with warm soapy water, or use a diluted bleach solution (one part bleach to three parts water), rinse thoroughly, and air dry before refilling.
Reservoir water smells bad
A sulfur or swampy smell means bacterial growth in stagnant water. Drain the reservoir completely, clean it with the bleach solution above, and refill with fresh water. Cut back on fertilizer concentration in the reservoir, since excess nutrients feed the bacteria. Make sure the reservoir is emptied and refreshed at least once a month rather than just topped up.
Wick is clogged or discolored
Mineral deposits and organic matter from fertilizer and soil can block the wick over time. Remove the wick, soak it in warm water for 30 minutes, and rinse it well. If the wick is deteriorating or visibly mold-covered, replace it. A cotton wick may last one growing season. Nylon and polyester wicks typically last longer before needing replacement.
The plant is not getting enough water even with a working wick
A single thin wick may simply not supply enough water for a large, thirsty plant. You can add a second wick through another drainage hole if the pot allows, or switch to a thicker replacement wick. Also check that the substrate has not compacted around the wick. Gently loosening the top inch of soil with a fork can help restore upward capillary flow.
Which plants work best (and which to avoid)
Wick planters are excellent for plants that prefer consistently moist soil. Herbs like basil, mint, parsley, and cilantro thrive in wick setups. So do most tropical houseplants such as pothos, peace lily, spider plant, and ferns. Leafy salad greens and small edibles like lettuce and spinach do very well, and seed-starting for almost any vegetable or flower benefits from the even moisture wick systems provide.
Avoid using wick planters for plants that prefer a dry-out period between waterings. blank" rel="noopener noreferrer">Properly Watering Container Houseplants – Virginia Tech (Extension) notes that self-watering (sub‑irrigated/wicking) containers are not appropriate for succulents and similar plants that need a dry soil cycle and recommends checking and cleaning reservoirs periodically to prevent algae and pathogens. Succulents, cacti, and most Mediterranean herbs like rosemary and lavender can develop root rot in a system that keeps the soil continuously moist. For those plants, a standard pot with manual watering is a better match.
Model-specific notes for Costa Farms Wick & Grow pots
| Model Size | How to Fill Reservoir | Reservoir Capacity | Wick Setup | Drain Plug |
|---|---|---|---|---|
| 4" pot | Remove inner grower pot, pour water into outer pot to top of indicator window | Small (approx. 1–2 cups) | Waterwick threads through drainage hole, hangs into reservoir | No |
| 6" pot | Remove inner grower pot, pour water into outer pot to top of indicator window | Medium (approx. 2–3 cups) | Same as 4" model | No |
| 10" pot | Top-water until reservoir window shows full; do not continue past that line | Up to approx. 4 cups | Wick is built into the pot assembly | Yes, rubber plug at base to drain overfill |
One thing that trips up Costa Farms users across all three sizes is overfilling. The window indicator exists for a reason. Filling past the top of that window puts standing water directly against the base of the grower pot, which saturates the entire soil profile. This is particularly a problem for the 4" and 6" models where the reservoir is small and the gap between the water surface and the pot base is tight. If you have a 10" model and accidentally overfill, just remove the rubber plug, drain until the window reads correct, then replace the plug.
For more detail on the specific self-watering mechanism and step-by-step instructions tailored to the Costa Farms line, the Costa Farms Wick & Grow instructions page covers the manufacturer's own guidance in full. There is also broader context on how these systems compare to other passive self-watering designs in the guide to self-watering grow kit instructions, which covers similar modular planters from other brands. See the self-watering grow kit instructions for more on similar modular planters. For step-by-step setup and troubleshooting specific to the product, see wick and grow self watering system instructions. For unrelated device guidance, see grow west vape pen instructions.
Cleaning, winterizing, and storage
Every three to six months, or at the end of a growing season, do a full clean of the reservoir. Empty the remaining water, remove the inner pot, and hand-wash the outer reservoir pot with warm soapy water. For staining or odors, use a one-to-three bleach-to-water solution, let it sit for a few minutes, then rinse thoroughly and air dry. Do the same for the inner pot and wick if they are reusable.
If you are overwintering plants in the planter, reduce reservoir refill frequency in line with the plant's reduced water needs during low-light months. Many houseplants go semi-dormant in winter and need significantly less moisture. Keeping the reservoir full during this period can cause the very root rot you spent the growing season avoiding.
For storage when not in use, drain the reservoir completely, clean it as above, and store the components disassembled in a dry location. A damp reservoir stored with the inner pot in place is an invitation for mold. Inspect the wick before reassembly next season and replace it if it looks degraded, compressed, or discolored.
Quick setup checklist
- Rinse all components before first use
- Thread or snap the wick through the drainage hole with at least 5 to 8 cm hanging below
- Pre-wet the wick before adding soil
- Fill reservoir to the indicator window line only
- Use a light, perlite-amended peat or coir-based potting mix
- Press soil gently around the wick to ensure contact; keep the rest of the fill loose
- Water from the top once to settle and prime the wick
- Plant seeds at packet depth or seat the transplant and backfill
- Check reservoir level every two to three days
- Flush soil monthly with plain water to prevent salt buildup
- Clean the reservoir every three to six months
FAQ
What is a Wick & Grow (wick-based passive self-watering) planter and how does it work?
A Wick & Grow planter is a passive self-watering system with a bottom reservoir and a fabric or cord wick that runs from the soil into the water. Water moves up the wick by capillary action into the potting mix as the plant transpires, keeping the root zone evenly moist without frequent top-watering or pumps.
What parts and tools come with typical consumer wick planters, and what extra tools you might need?
Common parts: decorative outer pot with reservoir, inner grower pot (sometimes removable), a Waterwick (fabric or cord), reservoir fill window or indicator, rubber drain/plug on some models, and a small plastic spike or retainer for the wick. Useful extra tools: fresh soilless potting mix (with perlite/vermiculite), scissors, a small funnel or watering can with a narrow spout, gloves, a clean cloth or small brush for cleaning, and a diluted liquid fertilizer for reservoir dosing if desired.
Which wick materials work best and what are suitable DIY wick choices?
Effective wicks are wettable, porous materials such as non‑woven cotton, cotton/polyester blends, braided cotton cord, or purpose-made fabric wicking strips. Important qualities: good wettability, adequate width for flow, and durability. Avoid untreated bulky yarns that trap air or quickly rot; polyester wicking fabrics engineered for transport last longer but may wick differently than cotton.
What potting mix should I use for a wick-style planter?
Use a light, open soilless potting mix (peat- or coco-based) amended with perlite or vermiculite to increase porosity. Avoid heavy garden soils and mixes that compact, because poor porosity reduces capillary rise and oxygen to roots. For seedlings, use a fine seed-starting mix blended with some perlite for drainage and wicking contact.
Step-by-step: how do I assemble and plant a Wick & Grow planter (seed and transplant procedures)?
1) Wash components if new. 2) Place the grower pot inside the reservoir (or remove per model instructions). 3) Thread the wick through the drainage hole and secure with the spike/retainer so the wick hangs into the reservoir and contacts the inner potting mix. 4) Pre-wet the wick and the potting mix—moisture helps capillary contact. 5) Add potting mix around the wick, gently tamping so the wick has intimate contact with the substrate but don’t compact the whole root zone. 6) For seeds: sow per packet depth, keep a thin layer of moistened mix above seeds. For transplants: set plant at same soil level, fill and firm lightly. 7) Fill the reservoir per model directions (see indicator/window) so the wick end is submerged but avoid overfilling.
How much water do I put in the reservoir and how often should I refill it?
Fill to the model’s recommended level—many Costa Farms 4"/6" units instruct filling to the top of the small window (do not exceed it); some 10" models have a maximum indicator or a rubber plug. Refill frequency depends on plant size, light, temperature and pot size—commonly 3–7 days for many indoor plants, but small reservoirs and hot conditions may need daily refills. Use the reservoir window/indicator as the primary guide.