Setting up a Modern Sprout hydroponic grow kit takes about ten minutes, and the process is nearly identical across their most popular models: rinse the grow medium, add the right amount of water to the planter, drop in the net pot, scatter your seeds, and place the whole thing somewhere with good light. That said, the exact water amounts and a few other details differ between kit versions, so the first thing to do is confirm which kit you actually have before you fill anything up.
Modern Sprout Hydroponic Grow Kit Instructions Step by Step

Marcus Thornfield
19 May 2026
Before you start: confirm your Modern Sprout kit model and gather parts
Modern Sprout makes several hydroponic kits, and the instructions are not always interchangeable. The two most common ones you'll encounter are the standard model (kit number 121245845, which comes with Agave Seeds and is often sold as a succulent or herb kit) and the R2 Flower Grow Kit. Mixing up the water amounts or nutrient timing between these two causes most of the early confusion people run into.
To confirm your model, check the bottom of the box or the inside flap for a model number. If you see 121245845, follow the measurements labeled for that kit throughout this guide. The Modern Sprout hydroponic grow kit manual for model/number blank" rel="noopener noreferrer">121245845 also lists the kit’s included components, including the planter, agave seeds, net pot, grow medium, and plant food. If your packaging says R2 or R2 Flower Grow Kit, follow the R2 instructions. If you're not sure, look at what's in the box. blank" rel="noopener noreferrer">Both kits include a Planter, a Net Pot, Grow Medium, Seeds, and Plant Food, but the R2 kit's seed packet is typically labeled for flowers rather than agave or succulents.
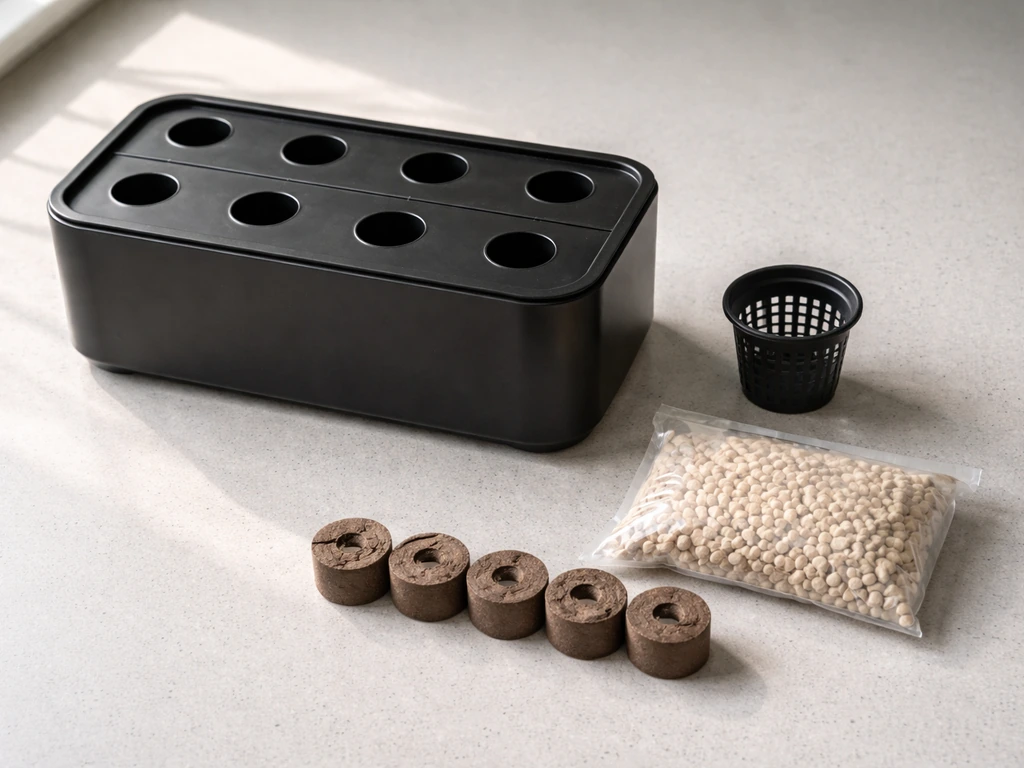
Before you do anything else, gather all the parts and lay them out on a clean surface. You should have:
- Planter (the outer water reservoir, usually ceramic or resin)
- Net Pot (the small plastic basket that holds the grow medium and seeds)
- Grow Medium (small clay pellets or similar porous material)
- Seed packet (agave for model 121245845, flower seeds for the R2)
- Plant Food packet (a small amount of powdered or liquid fertilizer)
If anything is missing, contact Modern Sprout directly before proceeding. It's also worth having a measuring cup and a small spoon on hand, since the nutrient amounts are small and precise.
Sanitize and set up the hydroponic system
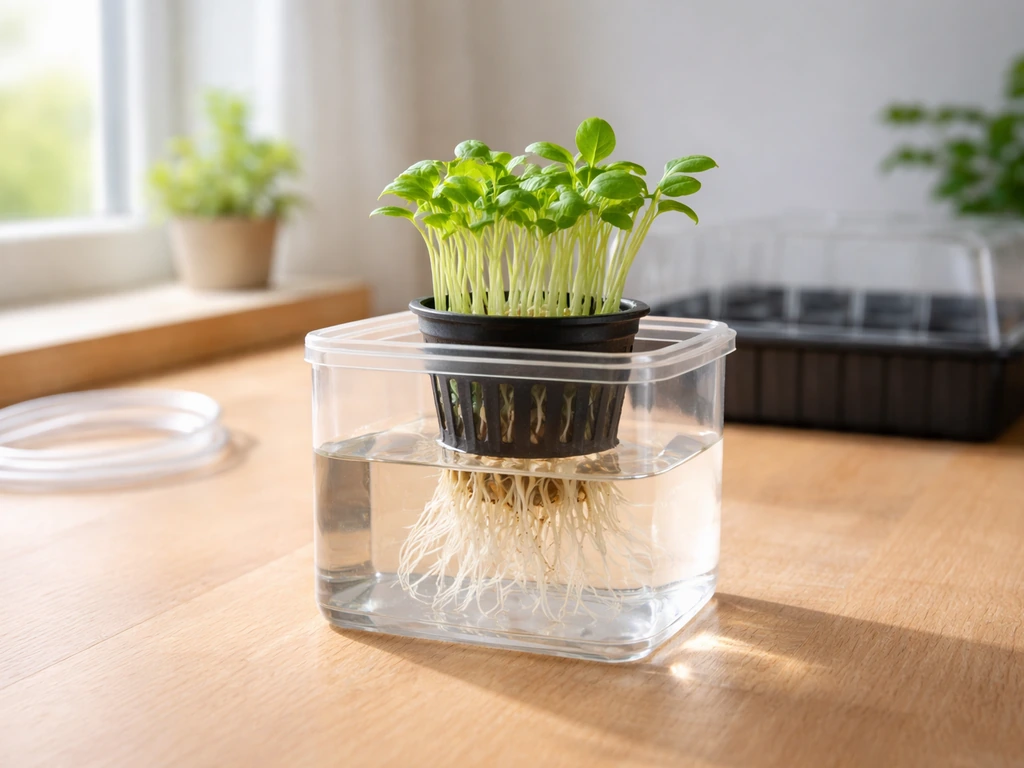
These kits don't come with a pump, tubing, or complex plumbing. The system is passive: the net pot sits inside the planter so the bottom of the grow medium touches the water below, drawing moisture up to the roots through capillary action. Simple is good here, but you still want to clean things before you start.
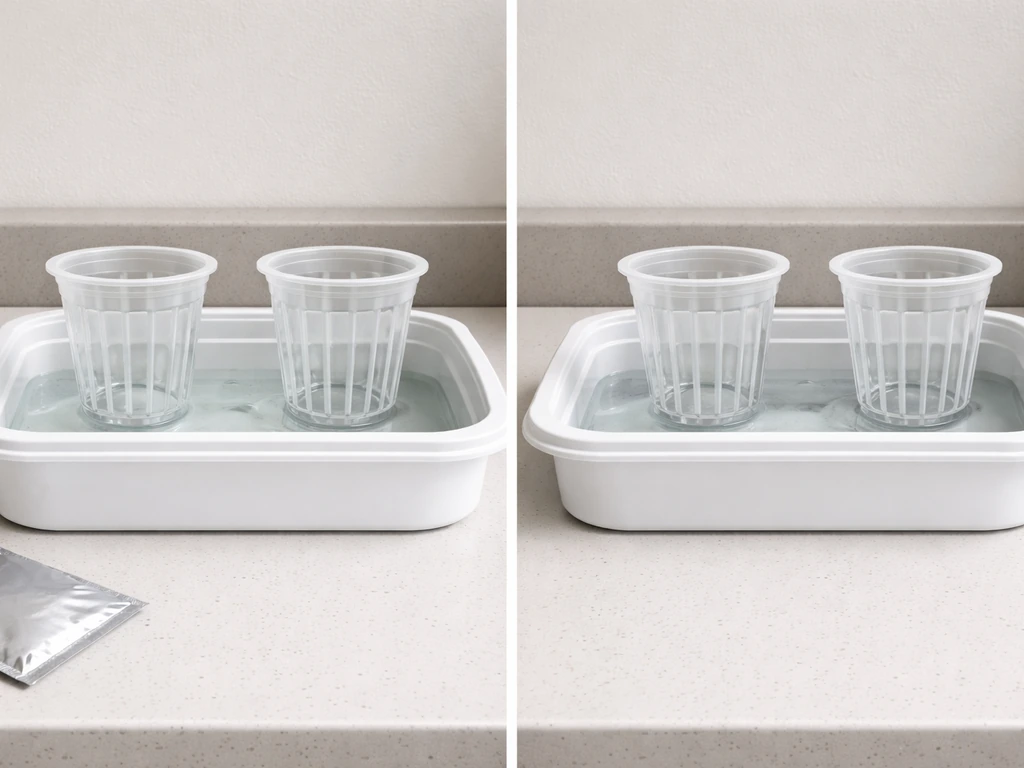
Rinse the planter with clean water before adding anything. If it sat in a warehouse or on a shelf for a while, a quick rinse removes any dust or manufacturing residue that could mess with your water chemistry. Don't use soap, because even trace amounts of dish soap can inhibit seed germination and harm young roots. Water only.
Next, prep the grow medium. Empty the bag of clay pellets (or whatever porous material is included) into the net pot, then hold the net pot under running water and rinse for about 30 seconds. You'll see dusty, brownish water run off. Keep rinsing until it runs mostly clear. Skipping this step is one of the most common first-timer mistakes, and it can make your water cloudy and smelly within days.
Once the net pot and grow medium are rinsed, set them aside. Now fill the planter with water, using the correct amount for your model. This is where model-specific measurements matter:
| Kit Model | Initial Water Fill | Water After Sprouts Appear |
|---|---|---|
| 121245845 (Agave/Standard) | 2 cups | 2 cups + ⅛ tsp Plant Food |
| R2 Flower Grow Kit | 2½ cups | 2½ cups + ⅛ tsp Plant Food |
Pour the plain water in first (no nutrients yet at this stage), then place the rinsed net pot with grow medium into the planter. It should sit snugly, with the bottom of the net pot just touching or slightly submerged in the water. That contact is what allows moisture to wick upward. If the net pot is floating freely or sitting too high above the water line, something is off with the planter-to-net-pot fit. Check that you're using the net pot that came with your kit, not a third-party substitute.
Seed and pod preparation: starting the sprout cycle
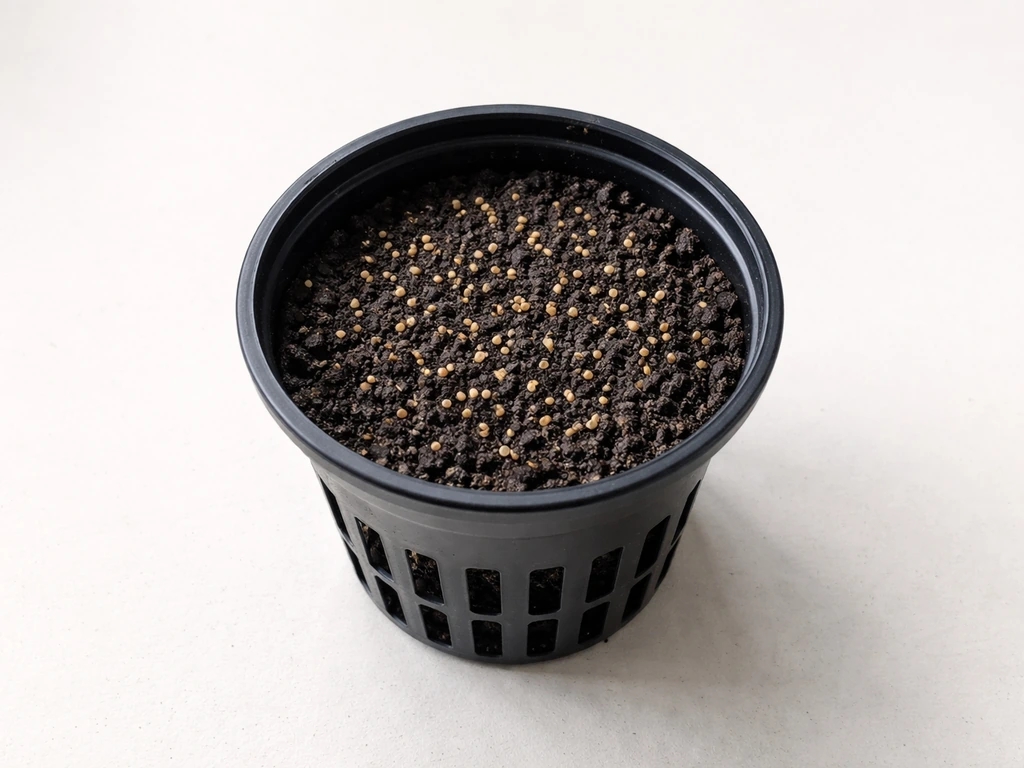
With the net pot in place and the grow medium damp from rinsing, you're ready to add seeds. Modern Sprout's kits use surface sowing, meaning you scatter seeds on top of the grow medium rather than burying them. Open the seed packet and distribute the seeds evenly across the surface of the pellets. You don't need to press them in or cover them. They'll settle slightly as they absorb moisture.
At this stage, no plant food goes in. The nutrient packet is held back until you actually see sprouts emerging. Adding nutrients before germination can create an environment that's too rich, encouraging algae growth before your seeds have a chance to get going. Plain water is all you need for now.
Place the assembled kit in its final spot (more on lighting below) and wait. Germination time varies by seed type. Flower seeds in the R2 kit typically sprout within 7 to 14 days. Agave seeds included with model 121245845 are slower, often taking 2 to 4 weeks to show any visible growth. Don't panic if nothing happens in the first week.
Daily and weekly care: water, light, temperature, and airflow
This is the section most people skip in the manual, and it's where most kits go wrong after a promising start. Maintenance is simple but needs to be consistent.
Water levels and nutrient changes
Check the water level every 2 to 3 days. The water in the planter will evaporate slowly, and you need to make sure it never drops so low that the bottom of the net pot is no longer in contact with water. If you lift the net pot out and the planter is almost dry, top it up. If you need the exact water-change timing and other steps for your setup, the grow up hydrogarden manual is a good companion to this guide. Use plain water for top-ups between full water changes.
Do a full water change every 7 to 10 days. To do this, remove the net pot and set it somewhere clean, empty the planter completely, then refill with fresh water plus the plant food. The nutrient amount is ⅛ tsp of Plant Food per the full water volume for your kit (2 cups for model 121245845, 2½ cups for the R2). Stir until the plant food dissolves before inserting the net pot again. For the R2 kit specifically, the instructions note to change the water every 7 to 10 days or as needed, so if it starts smelling off earlier than that, don't wait.
Lighting
Modern Sprout's tabletop kits don't include a grow light, so placement matters a lot. A south- or west-facing windowsill with 4 to 6 hours of direct sunlight per day works well for most of their seed varieties. If you're growing the R2 flower kit and your window doesn't get consistent direct sun, consider adding a basic LED grow light on a 14-hour-on, 10-hour-off timer. Agave seedlings are more tolerant of low light in the early weeks, but they'll stretch and lean toward the light source over time, so rotate the planter a quarter turn every few days to keep growth upright.
Temperature and airflow
Keep the kit in a spot where the temperature stays between 65°F and 75°F (18°C to 24°C). Avoid windowsills that get very cold at night in winter, since cool roots significantly slow germination and growth. Airflow matters too: stagnant, humid air around the seedlings encourages mold. A room that gets natural air circulation (or a ceiling fan set to low) is enough. You don't need a fan blowing directly on the kit.
Troubleshooting common problems
No germination after 2 to 3 weeks
First, confirm your seed type. Agave seeds are legitimately slow and some people give up on them before they've had a real chance. If it's been fewer than 4 weeks, keep waiting. If it's been longer, check whether the grow medium is actually staying moist. Lift the net pot: if the pellets feel bone dry, your water level dropped too low or the net pot isn't making contact with the water. Refill the planter so the water just touches the bottom of the net pot. Also check your temperature. Seeds sitting in a room below 60°F can stay dormant indefinitely.
Mold or algae
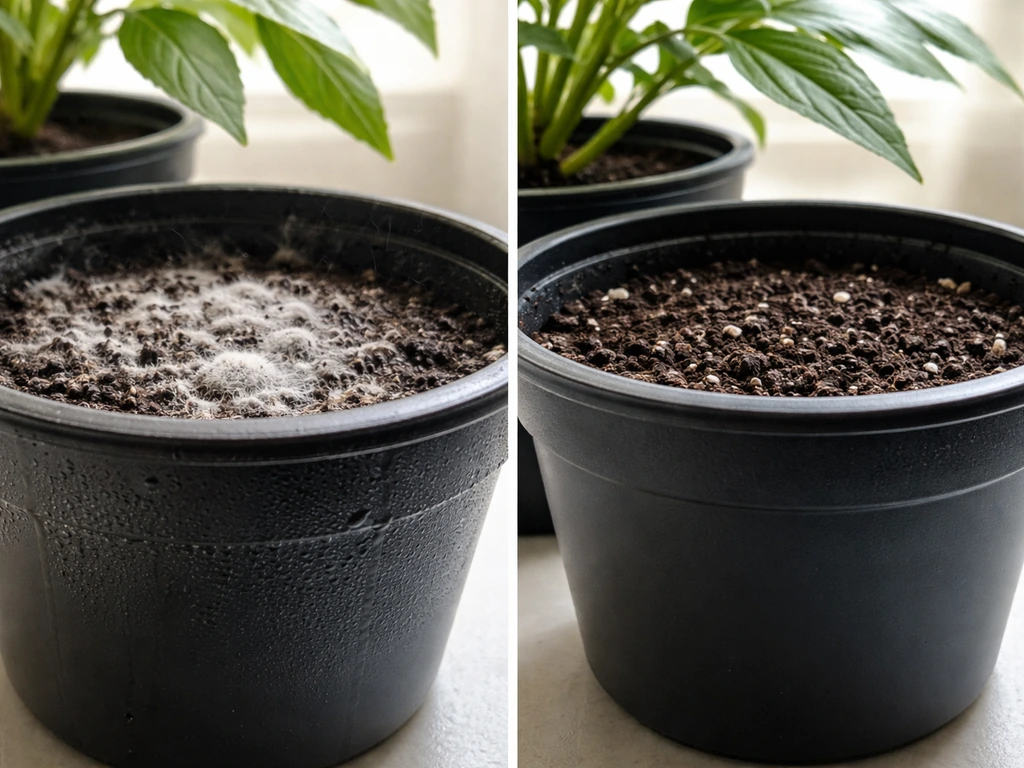
White fuzzy growth on the grow medium surface is almost always mold from excess moisture combined with poor airflow. Green or brown slime in the water or on the planter walls is algae, which forms when light reaches the water. For mold, improve airflow around the kit and make sure you're not overwatering (the net pot touching the water is enough; don't fill so high that pellets are fully submerged). For algae, cover the sides of the planter with something opaque to block light from hitting the water, or move the kit out of direct sunlight. Either way, do a full water change immediately and rinse the net pot and pellets under clean running water.
Bad smell
A swampy or sulfur-like smell almost always means the water has gone stale, algae has taken hold, or roots are beginning to rot. Don't just top up the water. Do a full empty, rinse the planter thoroughly, rinse the grow medium, and refill with fresh water plus the correct dose of plant food. If the smell returns within a day or two even after a full change, you may have algae embedded in the grow medium pellets. Soak them in a dilute hydrogen peroxide solution (1 part 3% hydrogen peroxide to 10 parts water) for 15 minutes, rinse well, and reassemble.
Low yield or slow growth after germination
If sprouts appeared but growth stalled, the most common culprits are insufficient light and skipped nutrient additions. Make sure you've started adding Plant Food at every water change (only after sprouts appear, not before). If the room is dim, give the kit more direct sun or add a grow light. Also make sure the water level hasn't been dropping between checks and leaving roots hanging in dry air.
Uneven growth
If sprouts are growing unevenly across the net pot, one side taller or denser than the other, it's almost always a light issue. The plants are leaning toward their light source. Rotate the planter a quarter turn every 2 to 3 days to encourage even growth. Also check that the seeds were distributed evenly across the grow medium surface when you initially planted them.
Leaks, pump issues, and 'my kit isn't behaving' quick fixes
Modern Sprout's tabletop hydroponic kits are passive systems with no pump, so you won't deal with pump failures or tubing clogs the way you might with a larger automated setup like a Vivosun or grow hub system. That simplicity is a feature. But there are still a few mechanical things that can go wrong.
Leaking planter
If water is pooling under the planter, check whether the planter itself has a crack (inspect the bottom and sides). Small hairline cracks can develop if a ceramic planter is dropped or receives a sharp impact. If you find a crack, the planter needs to be replaced. Modern Sprout's customer support can often send a replacement planter if the kit is relatively new. In the meantime, place the cracked planter inside a slightly larger bowl or container to catch the drips.
Net pot sitting wrong
If the net pot is tilted, rocking, or not sitting flush, it can cause uneven water contact and dry spots in the grow medium. Make sure you're using the net pot that came with the kit. Third-party net pots are usually sized differently and won't fit correctly. If the included net pot seems loose, try placing a small amount of additional grow medium around the rim to stabilize it.
Water level seems to drop too fast
In warm, dry rooms or near heating vents, evaporation can be rapid. If you're topping up more than every 2 to 3 days, consider moving the kit away from any heat source. You can also loosely drape a small piece of plastic wrap or a lid (with some air gaps) over the planter opening to slow evaporation, just make sure airflow still reaches the plants.
Grow medium falling through the net pot
Smaller pellets or crumbled grow medium can sometimes fall through the net pot holes and into the planter water. This is more of an annoyance than a serious problem, but loose material in the water can contribute to cloudiness. When you do your next full water change, rinse any debris from the planter and pick out any stray pellets from the water before refilling.
Harvesting, cleaning, and starting your next batch
Harvest time depends on what you've grown. For flower seedlings (R2 kit), you're typically harvesting or transplanting once the plants have several sets of true leaves and are showing signs of outgrowing the net pot, usually around 6 to 10 weeks. Agave seedlings from model 121245845 grow more slowly and can stay in the kit longer, but once they're visibly root-bound or the kit smells persistently despite regular water changes, it's time to transplant them into soil.
To harvest herbs or cut flowers, use clean scissors and snip what you need. For transplanting seedlings, gently lift the net pot and carefully separate the roots from the grow medium by rinsing them under lukewarm water. Plant immediately into potting mix suited for the species.
Once you've harvested or transplanted, it's time to clean and reset the kit for another batch. Here's the process:
- Remove the net pot and discard or compost any remaining plant matter and old grow medium pellets.
- Empty and thoroughly rinse the planter with plain water. If there's any algae residue or mineral buildup on the walls, scrub with a soft brush and a small amount of white vinegar, then rinse well.
- If you're reusing the grow medium pellets, rinse them under running water, then soak in a dilute hydrogen peroxide solution (1 part 3% hydrogen peroxide to 10 parts water) for 15 minutes to kill any lingering bacteria or mold spores. Rinse thoroughly afterward.
- Rinse the net pot under clean water and inspect it for cracks or warping.
- If you have a fresh seed packet, start from the beginning: plain water fill, seed scatter on rinsed grow medium, no nutrients until sprouts appear.
- If you're reordering seeds or grow medium, Modern Sprout sells replacement kits and individual components directly through their website.
One last thing worth knowing: Modern Sprout's passive hydroponic kits are intentionally minimal, which makes them great entry points but also means they have limits. If you find yourself wanting more control over lighting, nutrient dosing, or larger plant varieties, that's a natural sign you're ready to graduate to a more feature-rich system. Other brands covered on this site offer step-up options, and if you've ever looked at something like the Back to the Roots hydroponic kit or explored automated grow systems, the experience you've built with your Modern Sprout kit translates directly.
FAQ
Can I reuse the grow medium pellets and seed-starting kit for another batch?
For the planter, net pot, and any rinsable parts, yes. For the pellets, it is best to refresh instead of reusing indefinitely, because biofilm and salts can build up even after water changes. If you do reuse, do a full water change, rinse under running water, then soak the pellets for 15 minutes in the same dilute hydrogen peroxide mix (1 part 3% hydrogen peroxide to 10 parts water). Rinse thoroughly and let them dry briefly before starting the next batch.
What if my kit is passive, but I see bubbles or strange movement in the water?
Small bubbles can happen from stirring during nutrient dissolving or from the net pot contacting water. If you see active foaming or bubbling that continues, that can indicate contamination (soap residue, oily residue, or leftover algae). Stop adding nutrients, remove and rinse the planter and net pot, then restart with plain water only until the water clears.
Should I top up with plant food if I notice the water level dropped early?
No. For these kits, nutrients are intended to be added at full water changes after sprouts appear. If you only top up between changes, use plain water so you do not over-concentrate salts in the smaller remaining volume.
How do I measure the exact “cups” of water for the nutrient dose?
Use a dry measuring cup only for water, and measure at eye level. Fill the planter, pour that water into the measuring cup, and record the volume that matches your model. This avoids common errors from estimating by height. Once you know your planter volume, you can dose consistently at every 7 to 10 day change.
My seeds look like they sprouted, but growth is slow and stems look weak. What should I check first?
Check light timing and distance before anything else. These tabletop kits rely on window sun, and weak stems usually mean the seedlings are not getting enough direct light. Rotate the planter a quarter turn every 2 to 3 days and, if you cannot provide consistent direct sun, add an LED grow light on the same daily schedule you plan to use long term.
Is it okay if my seedlings touch the side of the planter or grow medium edge?
It can happen, especially with uneven early seed distribution. If you notice leaning, rotate the planter and lightly redistribute seeds only if they have not rooted into place. Once roots are established, avoid moving pellets around, because you can break root contact and slow recovery.
What should I do if I used the wrong kit’s nutrient amount by mistake?
If it is before any full water change, the safest move is to switch to the correct dosing schedule immediately and do a full water change at the next scheduled interval (or sooner if the water smells or looks slimy). For the period until then, do not add extra plant food. If you poured too much and the water looks algae-prone, do the full change right away to protect the young roots.
How can I tell whether mold or algae is the real issue from day to day?
Mold appears as fuzzy, white growth on the grow medium surface, and it is usually tied to excess moisture plus limited airflow. Algae tends to form as green or brown slime or residue, and it is more likely when light reaches the water. If the problem is mixed, do a full water change immediately and improve airflow first, then address light exposure on the water surfaces.
What humidity or airflow level is “enough” for preventing mold?
You do not need strong fans blowing directly at the seedlings, but you do need steady air exchange so the immediate area around the kit is not stagnant. If your room is very humid (for example, bathrooms or laundry rooms), consider moving the kit to a drier room or running a ceiling fan on low intermittently.
Can I start the kit outdoors or on a porch?
Only if conditions stay within the recommended temperature range and the kit is protected from heavy cold nights and direct rain exposure. Outdoors you can also get inconsistent sun and higher evaporation rates near winds. If you try it, monitor the water level every 1 to 2 days at first, and bring the kit inside if nights drop near or below 60°F (18°C).