The Vivosun Grow Hub Controller connects to the Vivosun app over 2.4 GHz Wi-Fi and Bluetooth, draws power directly from a compatible Vivosun device (or a power adapter), and lets you control grow lights, fans, and other gear from a single interface using schedules, grow recipes, or manual overrides. After connecting the controller to a 2.4G Wi‑Fi network and enabling Bluetooth on your phone, the Vivosun app lets you view remote, real-time data and enables additional functions like remote access to grow plan or historical data 2.4G Wi‑Fi connection and Bluetooth enabled. Getting it fully working takes about 20-30 minutes if you have the right network and the app installed. If you're stuck mid-setup or trying to reconnect after a disruption, the fix is almost always one of three things: wrong Wi-Fi band, Bluetooth not enabled, or a port that wasn't configured. This guide walks through every step in plain language.
Vivosun Grow Hub Controller Manual: Setup and Troubleshooting

What the Vivosun Grow Hub Controller actually does
Think of the Grow Hub Controller as the brain of your indoor growing setup. Vivosun designed it to pull all your growing equipment onto one platform so you're not juggling separate timers, dimmers, and speed controllers. One controller can manage multiple grow lights and fans independently, each assigned to its own port with its own logic. The E42A and E42A+ models are the ones you'll see most often, and the E42A+ in particular is marketed as an upgraded all-in-one hub that supports guided grow pilots and grow recipes alongside basic scheduling.
In practice, the controller handles light intensity and spectrum, on/off periods, fan speed, and environmental triggers like temperature and humidity thresholds for duct fans. Once it's paired to the Vivosun app, you can monitor your environment remotely and push changes from your phone. The live dashboard updates every minute, and you can pull down to refresh manually if you want a faster read.
Before you start: what to gather and where it plugs in
Before you touch the controller, run through this checklist. Skipping any of these is the number one reason setup stalls halfway through.
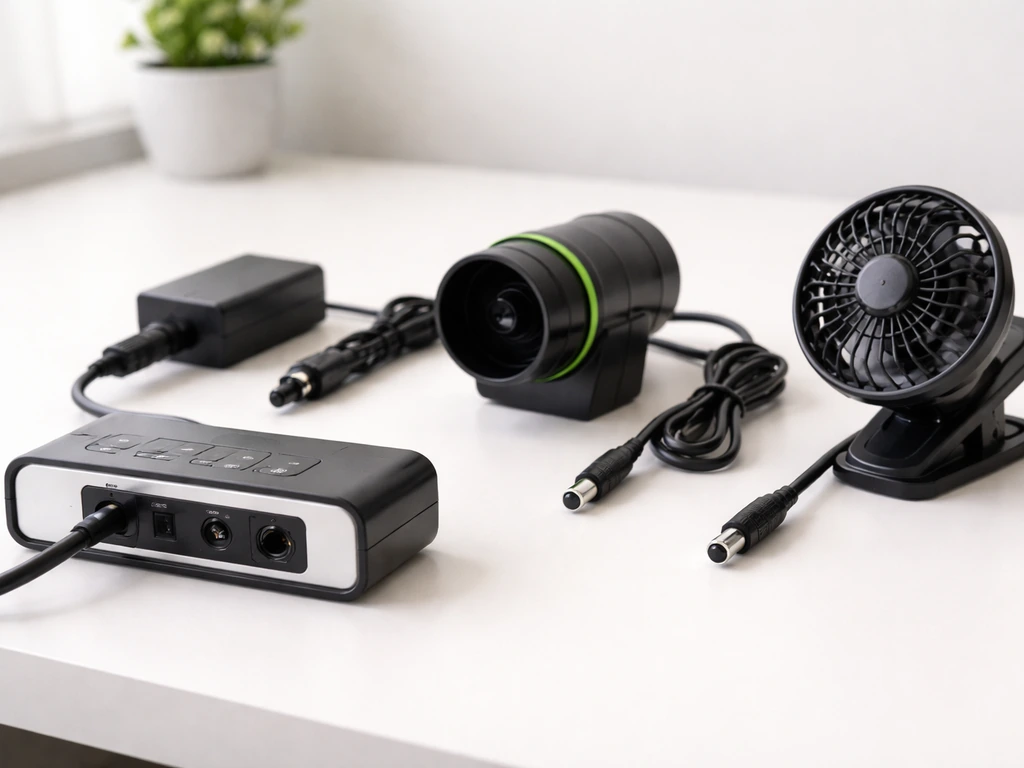
- A compatible Vivosun device to power the controller (such as an AeroLight, AeroZesh duct fan, AeroWave clip-on fan) OR a dedicated power adapter if you have one. The controller draws power directly from these devices, it doesn't have its own plug.
- A 2.4 GHz Wi-Fi network. This is non-negotiable. The Grow Hub Controller does not support 5 GHz. If your router broadcasts both bands under the same name, you may need to split them or connect your phone to the 2.4 GHz band specifically during setup.
- Bluetooth enabled on your phone. You need both Wi-Fi and Bluetooth active at the same time during the pairing process.
- The VIVOSUN app installed on your iPhone or Android device (including tablets). Download it from the Apple App Store or Google Play before you start.
- The controller itself, its included iron plate for mounting, and any Vivosun device cables you plan to connect to its ports.
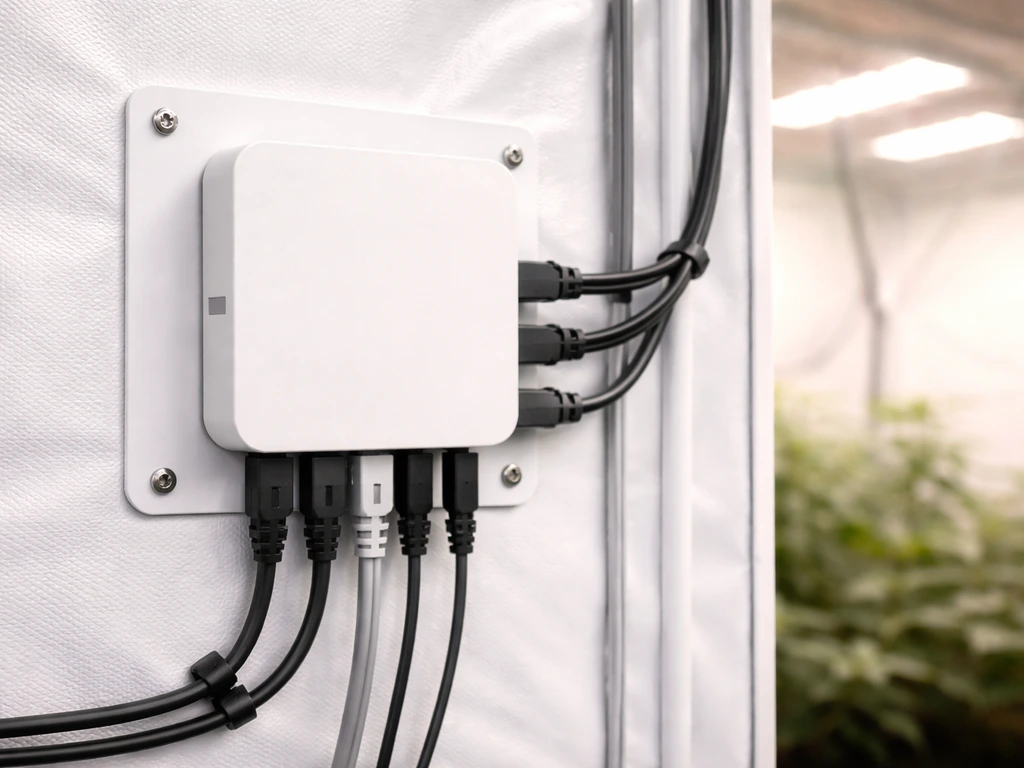
The controller mounts onto your tent or wall using the included iron plate and a magnetic attachment, so pick your mounting spot before you start running cables. It doesn't need a separate wall outlet as long as it's connected to a powered Vivosun device.
Physical setup and first power-on
Here's the exact sequence Vivosun recommends for first-time setup. Follow it in order and you'll avoid most of the common headaches.
- Mount the controller on your tent or wall using the iron plate. The magnet holds it firmly, so positioning it near your devices reduces cable clutter.
- Connect the controller to a powered Vivosun device (AeroLight, AeroZesh, or AeroWave are confirmed compatible) or plug in a power adapter. The controller powers on as soon as it receives power from the connected device.
- Once the LCD screen lights up, you're in first-time setup mode. The first thing the controller asks you to do is set the current time. Do this before anything else. The time setting drives all your schedules, so getting it right at the start saves you from chasing weird light and fan timing later.
- After setting the time, you'll be prompted to select the device type for each port. Take your time here. Assign each port the correct device type based on what's physically plugged in. Ports assigned the same device type share the same control logic, so if you set ports A, B, and C all as AeroWave clip-on fans, they'll all behave like circulation fans.
- Once all ports are configured, the controller's initial setup is complete. You can adjust port settings later under Settings > Port in the controller menu.
At this point your controller is running on its own. Schedules you set here will execute even without a Wi-Fi or app connection. The app connection comes next and adds remote control, grow recipes, and monitoring.
Connecting and configuring in the app
Pairing step by step
- Open the VIVOSUN app on your phone. Make sure your phone is connected to your 2.4 GHz Wi-Fi network and Bluetooth is turned on.
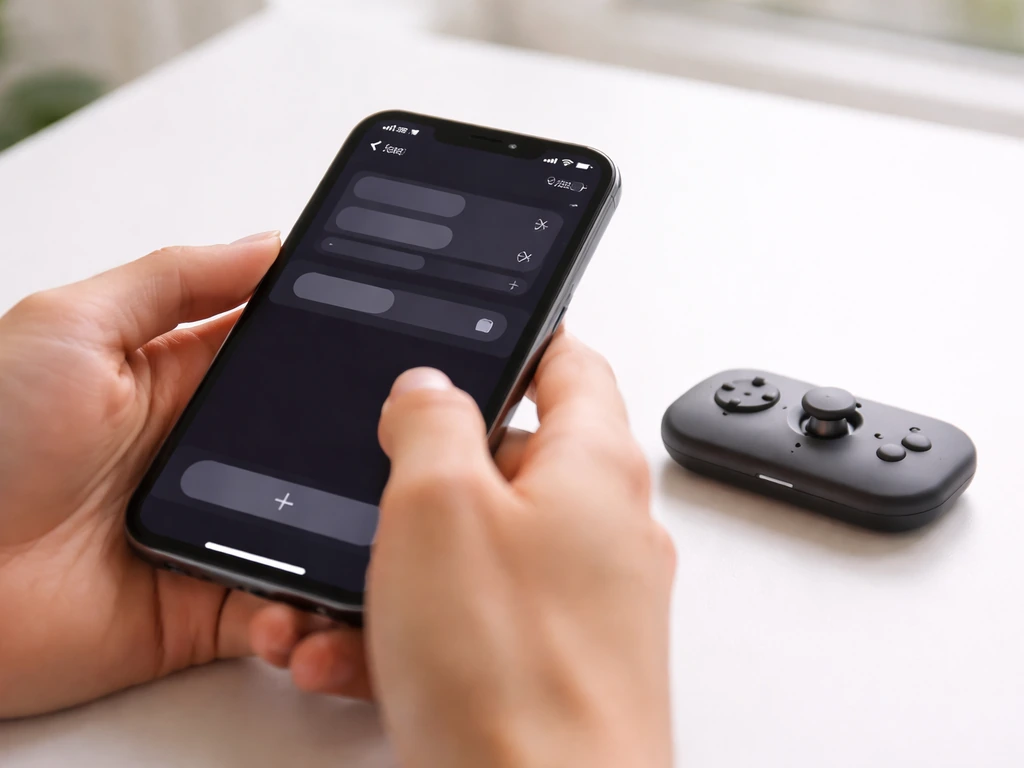
- Tap the '+' button to add a new device.
- Follow the on-screen prompts to add your controller model (for example, selecting VGrow or your specific controller type from the device list).
- During the connection process, the LCD on the controller will show a flashing device icon. This is normal and means it's waiting for the app to complete the handshake.
- Once the connection succeeds, the icon stops flashing and the controller appears as an active device in your app dashboard.
Initial app configuration
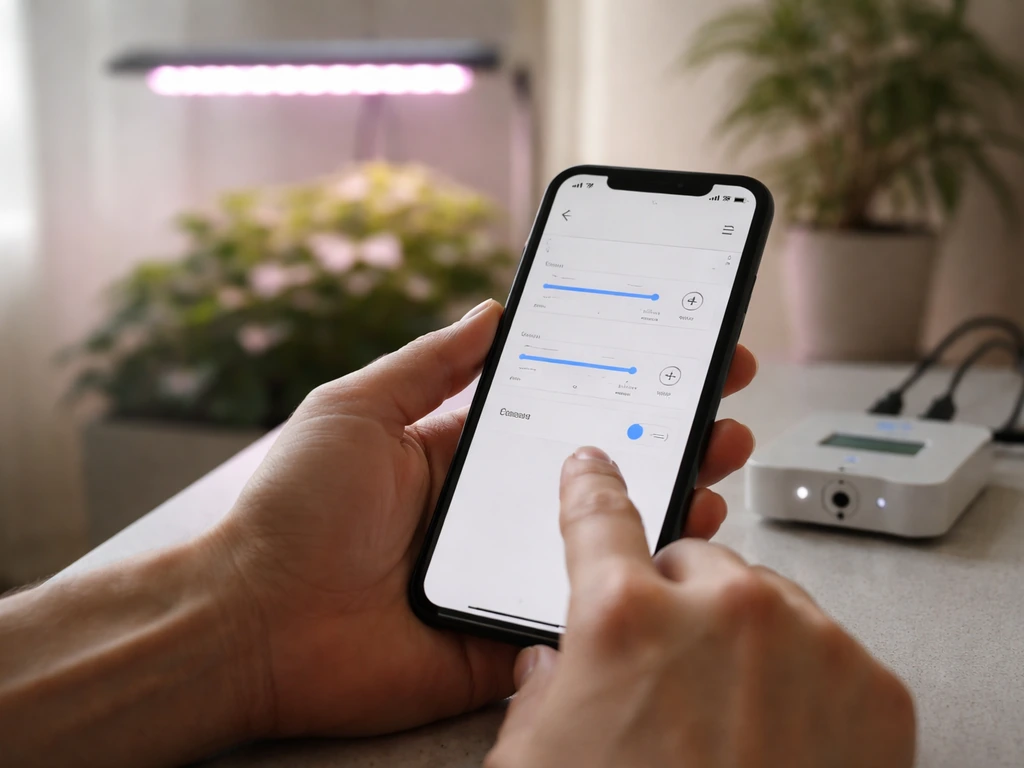
After pairing, go through the app settings for each device connected to the controller. For grow lights, you'll set intensity levels, spectrum if applicable, and on/off periods. For duct fans like the AeroZesh, you'll configure the standby and working zones using temperature and humidity triggers so the fan ramps up automatically when your environment hits a threshold. These environmental triggers are set inside the app, not on the controller's LCD, so it's worth spending a few minutes in each device's settings tab to confirm everything looks right.
Grow recipes and guided grow pilots are available in the E42A+ if you want a pre-built schedule rather than building your own from scratch. These are accessible from the main device screen in the app and can be a great starting point if you're new to dialing in a grow environment.
Using the controller day-to-day
Once everything is paired and configured, daily use is pretty hands-off. The controller runs your schedules automatically. The app dashboard updates every minute, so you can check in on temperature, humidity, and device status without touching anything in your grow space. If you want a faster refresh, just pull down on the dashboard screen.
When you need to make a quick change without disrupting your whole schedule, use manual mode. You can switch to manual mode either in the app or directly on the controller. One important note: if you're currently running a recipe (what Vivosun calls Plan mode), you need to stop the active recipe before switching to manual mode from the app. Forgetting this step is a common source of confusion when a manual change doesn't seem to take effect.
For ongoing maintenance, check your port assignments periodically if you swap or add devices. A port still set to the wrong device type will run the wrong logic even if the physical device is correct. It only takes a minute to verify under Settings > Port.
Power outage behavior
If your controller was connected to Wi-Fi and the app before a power outage, it will automatically reconnect to Wi-Fi and resume executing your settings when power returns. If it wasn't connected to Wi-Fi before the outage, it will still run the previous settings automatically but the time may need recalibration before everything syncs correctly. This is worth knowing if you wake up after an outage and your lights seem off-schedule.
Honest review: what the Grow Hub Controller does well and where it falls short
The Grow Hub Controller is genuinely useful if you're running multiple Vivosun devices and want them to behave as a system rather than as separate units. The single-controller hub design cuts down on gear clutter, and the grow recipe feature in the E42A+ is a nice touch for beginners who don't want to build a light schedule from scratch. Remote monitoring via the app is reliable once you're past the initial pairing, and the environmental trigger logic for fans works well when configured correctly.
| Aspect | Strength or Limitation | Notes |
|---|---|---|
| Multi-device control | Strength | Controls lights, fans, and other Vivosun devices from one hub; each port operates independently |
| App remote monitoring | Strength | Works on iPhone, Android, and tablets; live data refreshes every minute |
| Grow recipes / guided pilots | Strength (E42A+ only) | Pre-built schedules useful for beginners; saves setup time |
| Power source design | Minor limitation | Requires a compatible Vivosun device or adapter to power on; no standalone wall plug |
| Wi-Fi requirement | Limitation | 2.4 GHz only; dual-band routers cause pairing problems if bands share a name |
| Pairing reliability | Known gotcha | Requires Bluetooth enabled simultaneously; forgetting this is the most common first-fail |
| Post-outage reconnection | Inconsistent | Some users report needing to reset and re-pair after power disruptions |
| Port configuration depth | Learning curve | All ports must be individually configured; same device type shares logic which can surprise new users |
The biggest real-world frustration is the Wi-Fi band requirement. Modern routers that broadcast 2.4 GHz and 5 GHz under the same SSID trip up the pairing process regularly, and the controller gives no helpful on-screen error when this is the problem. If you're setting this up for the first time and have a mesh network or a modern dual-band router, plan to either temporarily disable the 5 GHz band or connect your phone to a separate 2.4 GHz-only network during setup. That one step resolves the majority of pairing failures. The GrowHub manual also notes that the controller connects only to 2.4 GHz Wi‑Fi networks, so using a 2.4 GHz-only network during setup can prevent pairing failures the Wi-Fi band requirement.
Compared to a simpler hydroponic kit with a basic timer, the Grow Hub adds real capability but also real complexity. If you're the kind of grower who wants to set a light schedule and forget it, simpler systems may feel more immediate. But if you're building out a proper indoor tent with multiple lights and fans, the hub approach pays off quickly.
Troubleshooting: common problems and quick fixes
Can't connect to the app / pairing fails
- Confirm your phone is on a 2.4 GHz network, not 5 GHz or a combined band. This is the most common cause.
- Make sure Bluetooth is turned on your phone before and during the pairing attempt.
- If you've tried pairing before, go into your phone's Bluetooth settings and forget/delete any previous Grow Hub Bluetooth device entries before retrying. Stale Bluetooth pairings block new connections.
- Force-close the VIVOSUN app and reopen it before starting the add-device flow again.
- Make sure the controller's LCD is showing the flashing device icon during the app's connection step. If it's not flashing, power-cycle the controller by disconnecting and reconnecting the power source.
Devices not showing up or not responding
- Check that each port has been assigned the correct device type during setup. An unassigned or incorrectly assigned port will not respond as expected.
- Verify the physical cable connection between the device and the port. A loose connection is easy to miss.
- If a device was previously working and stopped, check whether the controller switched back to a recipe/Plan mode that overrides manual settings.
Schedule or configuration not sticking
- Confirm the controller time is set correctly. An off time setting causes schedules to run at the wrong hours.
- If you're trying to make a manual change while a recipe is running, stop the recipe first in the app before switching to manual mode.
- After any configuration change in the app, wait a minute and pull down to refresh the dashboard to confirm the change registered.
Controller is flickering, frozen, or unresponsive
- Disconnect and reconnect the power source to do a basic power-cycle first.
- If the controller is still unresponsive, perform a hard reset (see the next section for exact steps).
- If the problem persists after a reset and fresh setup attempt, contact Vivosun support. Some users in this situation have received replacement units.
How to reset and re-pair, plus a final verification checklist
Full factory reset (E42A / E42A+)
A factory reset clears all Wi-Fi configuration and returns the controller to its out-of-box state. Use this when the controller is stuck in a bad state after a power outage, when pairing repeatedly fails, or before selling or moving a unit.
- Press and hold both the UP and DOWN buttons simultaneously for 3 seconds.
- You'll hear four short beeps. This confirms you've entered reset process mode.
- Continue holding both buttons for an additional 2 seconds.
- You'll hear one long beep. This signals the reset is complete.
- The controller will restart with factory settings. Wi-Fi configuration is cleared.
After the reset, go back to the beginning of the setup flow: set the time, configure your ports, then re-pair in the app. Delete any existing Bluetooth pairing for the controller on your phone before you start the app pairing step.
Final verification checklist
Before you call setup done, run through this list. Each item corresponds to a step that's easy to skip and causes problems later.
- Controller powers on and LCD is active (connected to a Vivosun device or power adapter).
- Time is set correctly on the controller.
- Every port in use has been assigned the correct device type.
- Phone is on a 2.4 GHz Wi-Fi network with Bluetooth enabled.
- Controller appears as an active (not pending) device in the VIVOSUN app.
- App dashboard shows live data and refreshes when you pull down.
- At least one schedule or grow recipe is active and the controller is executing it.
- Manual override works: switch to manual mode, adjust a setting, confirm the device responds, then switch back to your schedule.
- If running a recipe, confirmed that stopping the recipe is required before manual mode changes take effect.
Once you've checked every item, your Grow Hub Controller is fully operational. If you're also running a hydroponic grow kit alongside your tent setup, the controller works independently of the water system, so there's no conflict there. If you need the grow side too, follow the Back to the Roots hydroponic grow kit instructions to get your water and plant setup dialed in before you fine-tune your controller schedule. For day-to-day hydroponic guidance, you can also refer to the grow up hydrogarden manual alongside your controller setup. If you’re installing a Vivosun hydroponic grow kit, follow the Vivosun hydroponic grow kit instructions for setup and feeding. If you want to match that with hydroponics, follow the back to the roots hydroponic grow kit instructions for setup and feeding. If you’re installing a different model, like a Modern Sprout hydroponic kit, you can still use the same setup flow by following modern sprout hydroponic grow kit instructions for setup and feeding. The main thing to keep in mind as you expand your setup is that every new Vivosun device you add needs its port assigned and configured before it will respond. That's the one habit that keeps things running smoothly long-term.
FAQ
How can I tell whether a connection problem is Wi‑Fi, Bluetooth, or a port assignment issue?
Use a two-step check. First, confirm the controller can execute schedules without the app, then toggle a manual change from the controller itself. If the device still does not respond, you likely have a port assignment mismatch, not a network issue. If it responds locally but not in-app, then Wi‑Fi and/or Bluetooth pairing is the more likely cause.
Should I delete and re-pair Bluetooth every time I troubleshoot pairing failures?
Yes, when the pairing keeps failing. The controller can remember a stale Bluetooth association on the phone, so removing the existing Bluetooth pairing for the controller before you start app pairing reduces repeated failures and speeds up recovery.
What’s the safest way to set up during a mesh network environment?
During initial setup, connect your phone to a 2.4 GHz-only network (or temporarily disable 5 GHz on the router) so pairing is consistent. After the controller is fully paired, you can return to your normal mesh configuration, but if you see repeated reconnect loops, re-verify that the controller is still landing on 2.4 GHz.
Can I rely on schedules when the controller is offline?
Yes. Schedules you set on the controller execute even without Wi‑Fi or app access. Keep in mind that remote changes made later in the app cannot apply until the controller reconnects, so for critical adjustments, update the controller settings while you still have app connectivity.
Why do my light or fan settings look correct in the app but the hardware acts differently?
This is often a port mapping issue. If a port is assigned to the wrong device type, the controller can apply the wrong control logic even though the physical light or fan is connected correctly. Verify the assignment under Settings > Port for each connected device.
What should I do if my devices run on the old schedule after a power outage?
When the controller was previously connected to Wi‑Fi, it should reconnect automatically and resume with its settings. If Wi‑Fi was not connected before the outage, the controller may still run previous settings but the time sync can be off, which causes the schedule to look shifted. Re-check time sync via the app after power returns.
How do I switch to manual mode if I’m currently running a recipe (Plan mode)?
Stop the active recipe first, then switch to manual. If you try manual changes while a plan is still running, your changes may appear to “not take effect” because the recipe logic continues to control the ports until it is stopped.
Can I configure duct fan environmental triggers using the controller’s screen instead of the app?
No, environmental trigger logic is configured inside the app for duct fans. The LCD may let you view general controller status, but thresholds and ramp behavior for duct fans should be set in each device’s settings tab in the app.
What happens if I add a new light or fan after everything is already working?
You need to assign the new hardware to the correct port and then configure that port’s device settings in the app. The controller will not necessarily respond correctly to a newly connected device until its port assignment and configuration match the new equipment type.
When should I consider a factory reset versus continuing troubleshooting?
Use a factory reset when pairing repeatedly fails, the controller behaves unpredictably after a power event, or you want to wipe Wi‑Fi credentials before moving or selling the unit. After resetting, you must re-run setup steps, including time setup, port configuration, and the app pairing flow (including deleting old Bluetooth pairing on your phone).
How often should I review port settings for long-term reliability?
Review port assignments any time you swap hardware, rearrange devices, or notice unexpected behavior like intensity responding incorrectly or fan logic not matching your setup. A quick periodic check can prevent slow, confusing issues after changes to your grow hardware.