Setting up a VIVOSUN hydroponic grow kit is genuinely straightforward once you know what each part does and in what order to do things. For other kits, including the Back to the Roots hydroponic grow kit, follow its specific instructions for setup, nutrient mixing, and start-up steps to avoid common mistakes back to the roots hydroponic grow kit instructions. The most common model you'll find is the [VGrow DWC Hydroponics Grow Kit (Model: VSI-VGDWC15)](https://vivosun.
VIVOSUN Hydroponic Grow Kit Instructions: Setup to Harvest

Marcus Thornfield
20 May 2026
com/en-US/support/guide/vgrow-dwc-hydroponics-grow-kit), a 4-gallon (15L) Deep Water Culture bucket system. If that's what you have, this guide is built for you. If you have a different VIVOSUN bundle or a grow box pairing, take a minute to confirm your model number before diving in, because component counts and placement can vary.
Unbox and identify your VIVOSUN kit components
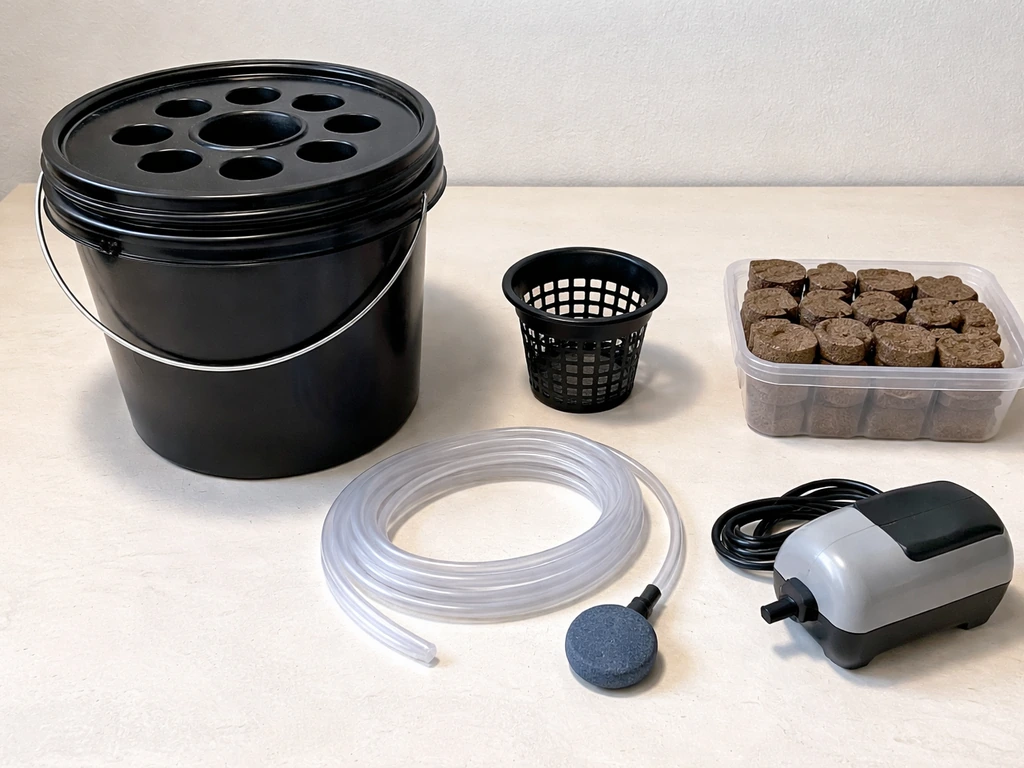
Before you touch anything else, lay every piece out on a table and match it to the list below. Missing parts are way easier to spot now than mid-assembly.
- DWC Hydroponic Bucket (1) — the main 4-gallon / 15L reservoir with a fitted lid
- Seedling Planting Basket (1) — a smaller net pot used during the germination/seedling phase
- Planting Basket (2) — standard-size net pots that seat into the lid for mature plant roots
- Air Stone (2) — porous stones that break the air pump output into fine bubbles
- Rapid Rooter (2) — pre-formed foam/sponge plugs used to start seeds or root clones
- Air pump (DC 5V, 4W, 2×2000 ml/min) — powers the air stones
- Water pump (DC 5V, 2W, 160 L/h) — handles any internal circulation
- Air tubing and connectors
- Power adapter(s)
If anything is missing or cracked out of the box, photograph it and contact VIVOSUN support before proceeding. Also take note: if you bought the VGrow Smart Grow Box bundle, check your bundle listing carefully because that configuration is not compatible with the E42A grow box. Use the VGrow Smart Grow Box only. Getting this right now saves a frustrating mismatch later.
Step-by-step assembly and placement
DWC systems have very few moving parts, which is one of the reasons they're a great starter setup. Here's the full assembly flow.
- Rinse the bucket, lid, net pots, and air stones with clean water before first use. No soap — residue will mess with your pH.
- Place the air stones inside the bucket. Position them at the bottom corners so bubbles distribute evenly across the reservoir.
- Connect the air tubing from each air stone up through the lid opening or side port to the air pump. Keep the air pump above the water line at all times to prevent back-siphon if power cuts out.
- If your kit includes a water pump for recirculation, seat it inside the bucket and route its output tube according to the diagram on the lid.
- Snap or seal the lid onto the bucket. Seat the planting baskets into the lid holes. They should sit snugly with the basket bottoms hanging down into the reservoir space.
- Do a dry-run: plug in the air pump without water and check that bubbles come out of both stones with good even flow.
- Place the assembled system where you plan to grow before adding water — a full 4-gallon bucket weighs roughly 33 lbs and is awkward to move.
Where to put it
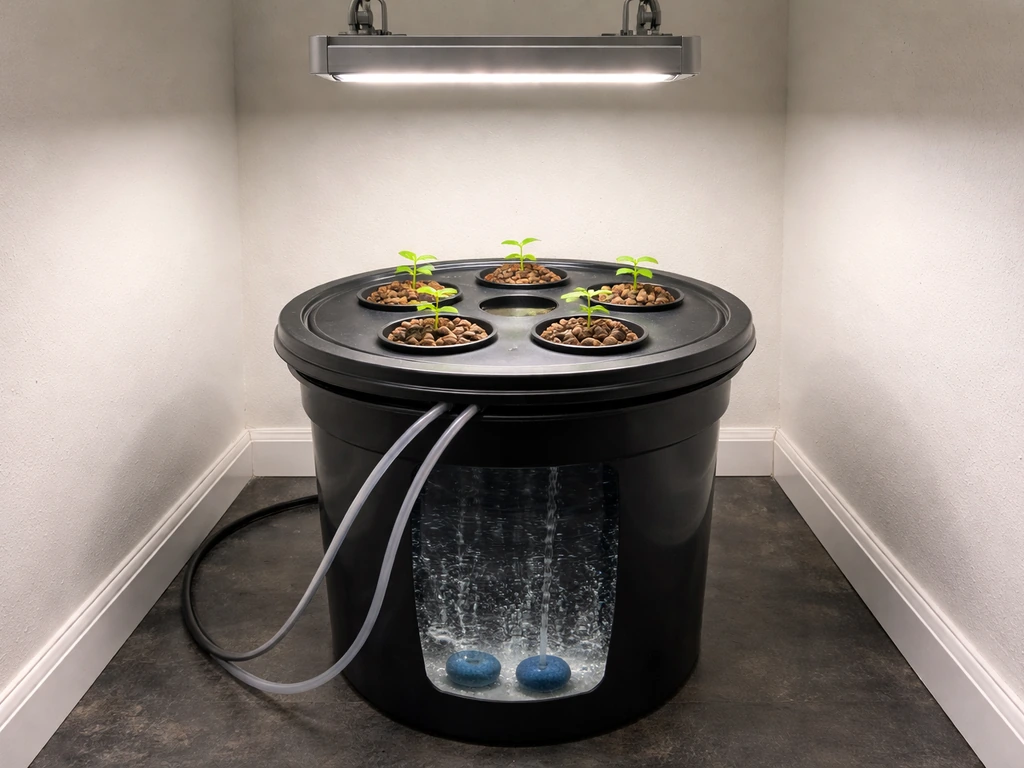
Choose a spot that stays between 65°F and 80°F (18–27°C). The bucket should sit on a level, waterproof surface. If you're using the system indoors under a grow light (not the VGrow box), make sure the light can be hung or positioned directly above without sitting on the bucket lid. Keep the reservoir out of direct sunlight, exposed light on the bucket wall is one of the fastest ways to trigger algae problems.
Filling the reservoir, mixing nutrients, and understanding pH and EC
This step trips up more first-time growers than any other. Do it in order and don't skip the pH check.
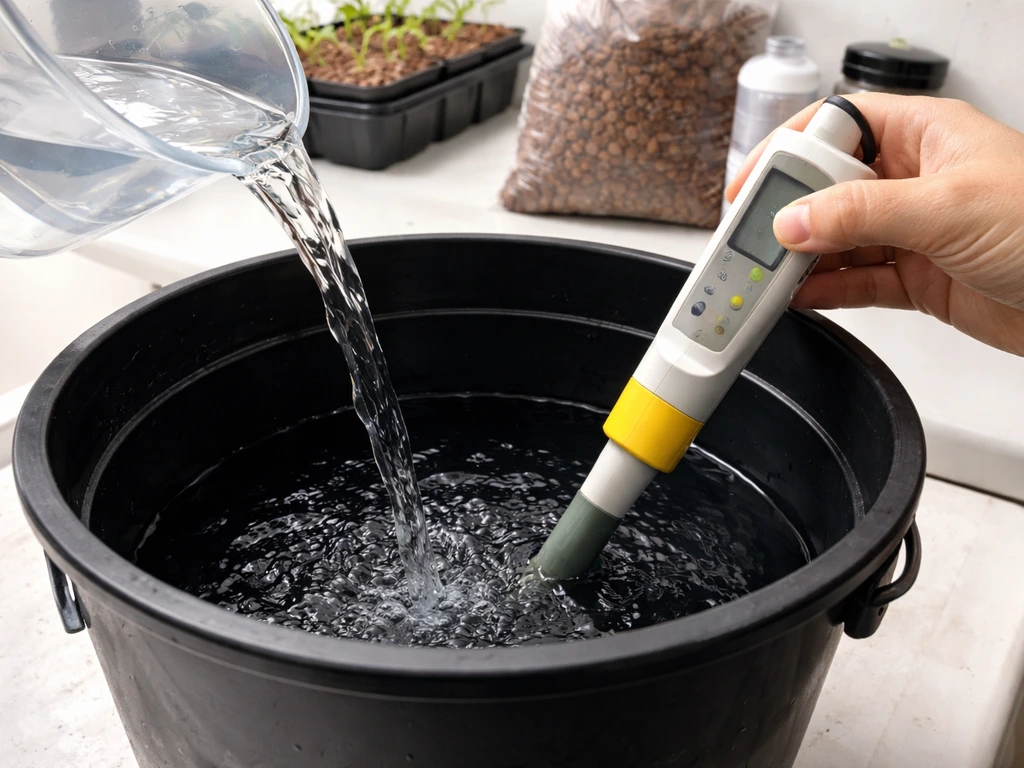
- Fill the bucket with room-temperature water. For the 15L reservoir, start with about 12–13 liters so you have headspace above the water line. Plant roots need oxygen, and in DWC that gap between the water surface and the lid is where the air pump's bubbles do their job.
- Add your hydroponic nutrient solution. Follow the dosage on your nutrient label for 'early growth' or 'seedling' stage — this is typically a quarter to half the recommended full dose. For most standard hydroponic nutrient lines, this puts you around 400–600 PPM (parts per million) or an EC of 0.8–1.2 mS/cm for seedlings, ramping up to 800–1400 PPM (EC 1.6–2.8) at peak vegetative growth.
- Stir the nutrient solution gently, then test your pH. Target 5.5–6.5 pH for DWC hydroponics, with 5.8–6.2 being the sweet spot. Use pH Up (potassium hydroxide-based) or pH Down (phosphoric acid-based) to adjust, adding tiny amounts at a time.
- Let the water sit for five minutes after adjusting, then recheck. pH can drift a little after mixing.
- Check EC/PPM with a basic meter. These are inexpensive and genuinely worth having — guessing nutrient concentration leads to deficiencies or nutrient burn.
Water temperature in the reservoir matters too. Keep it between 65°F and 72°F (18–22°C). Warmer water holds less dissolved oxygen and invites root rot. If your room runs warm, a small aquarium chiller or even frozen water bottles swapped in periodically can help.
| Parameter | Target Range | Notes |
|---|---|---|
| pH | 5.8–6.2 | Check daily for first two weeks |
| EC (seedling) | 0.8–1.2 mS/cm | Roughly 400–600 PPM |
| EC (vegetative) | 1.6–2.4 mS/cm | Roughly 800–1200 PPM |
| EC (flowering/fruiting) | 2.0–2.8 mS/cm | Roughly 1000–1400 PPM |
| Water temperature | 65°F–72°F (18–22°C) | Critical for root health |
| Reservoir headspace | 1–2 inches below net pot base | Roots reach for water, need air gap |
Lighting, timers, and environmental targets
If you're running the VGrow Smart Grow Box bundle, your lighting is integrated into the enclosure, and you'll use the grow box's own controls (check the companion VIVOSUN Grow Hub controller guidance for dialing in automated schedules). If you need help programming those schedules, follow the VIVOSUN Grow Hub controller manual for the right setup and settings. If you're running a standalone DWC bucket under a separate grow light, here's what to aim for.
- Seedling stage: 18 hours of light, 6 hours of dark. Keep the light close enough to prevent stretching but not so close it bleaches leaves — typically 18–24 inches for an LED panel.
- Vegetative stage: Stick with 18/6 for most leafy herbs and vegetables. Some crops like lettuce can go 20/4.
- Flowering or fruiting crops (tomatoes, peppers, cannabis if applicable): Switch to 12 hours light / 12 hours dark to trigger flowering.
- Use a simple mechanical or digital outlet timer. Set it and confirm the cycle runs correctly on day one — timer failures are a surprisingly common early problem.
- Ambient room temperature: 70°F–80°F (21–27°C) during lights-on, slightly cooler during lights-off is fine.
- Humidity: 50–70% relative humidity for seedlings, 40–60% for established plants.
- Airflow: A small fan on low aimed near (not directly at) your plants strengthens stems and prevents moisture buildup.
Planting: seeds vs. clones and the early-growth checklist
Starting from seeds
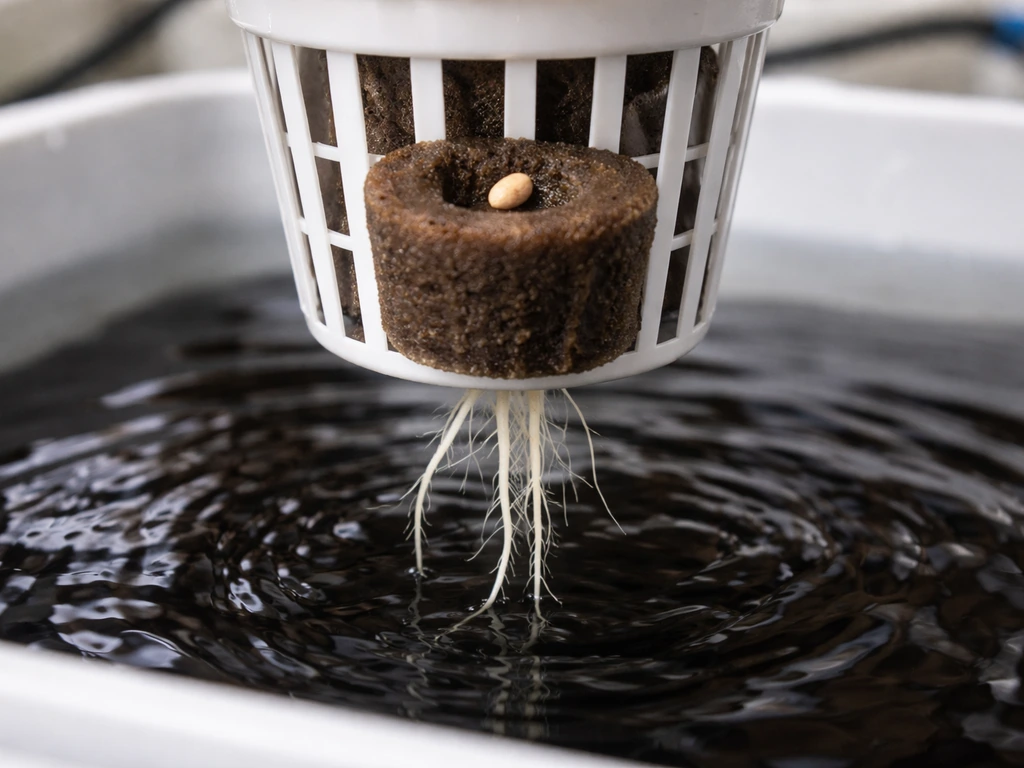
Place one seed into each Rapid Rooter plug. Push it about a quarter inch deep into the pre-formed hole and pinch the top lightly to cover it. Moisten the Rapid Rooter with plain pH-balanced water (5.8–6.2), don't use nutrient solution at this stage, it can burn emerging roots. Seat the Rapid Rooters into the smaller seedling basket, and keep the reservoir level slightly higher than normal at first so the bottom of the plug just barely kisses the water. Once you see the first root tip emerging from the plug (usually 3–7 days), drop the water level back to normal and switch to a diluted nutrient solution.
Starting from clones or transplants
If you're transplanting a rooted clone or a young start from a nursery pot, rinse all soil off the roots very gently under room-temperature water. Tuck the roots through the net pot and seat the plant so the base is stable. You can use a small amount of clay pebbles (hydroton) around the base to hold it upright. Start with a half-strength nutrient solution and ramp up over the first week as the plant adjusts to the DWC environment.
Early-growth checklist (first two weeks)
- Check pH every day for the first 10–14 days — it will drift more when the system is new
- Confirm the air pump is running (you should hear bubbling; check for consistent bubble activity from both stones)
- Top off evaporated water with plain pH-adjusted water, not more nutrient solution
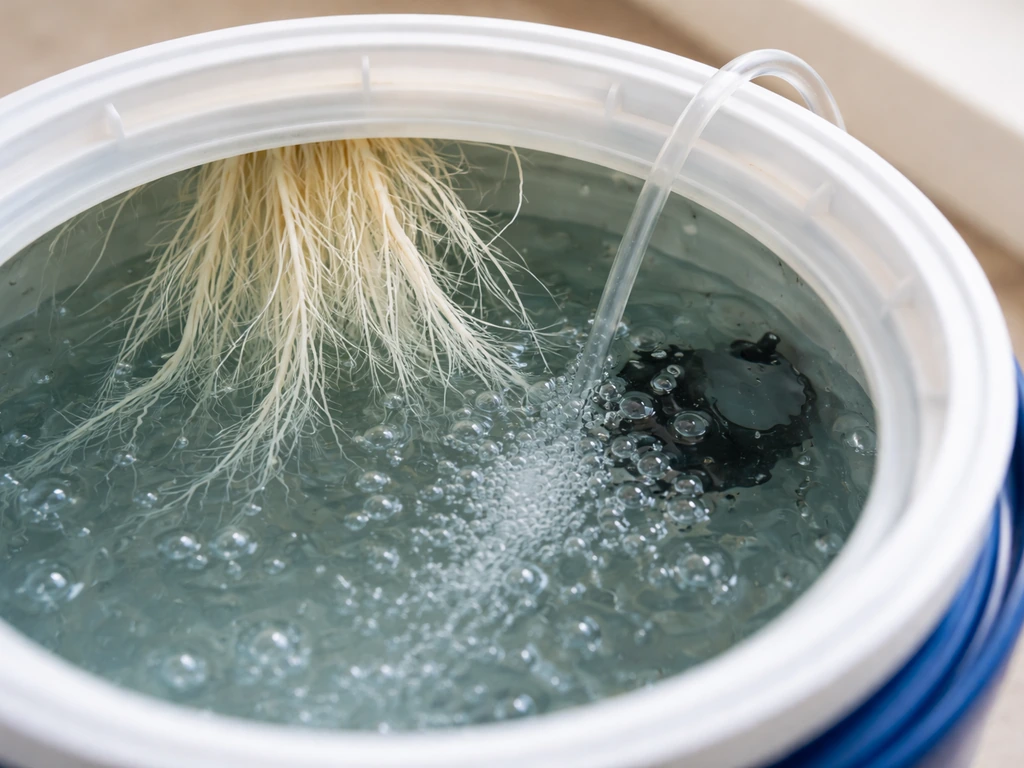
- Look for root tips emerging from the net pot — white and healthy-looking means you're on track
- Watch for any signs of damping off (seedling stem goes dark and collapses at soil line) — it's rare in DWC but can happen if roots stay too wet without airflow
- Keep the lid fully seated to block light from entering the reservoir
- Log your pH and EC readings daily so you can spot trends early
Ongoing maintenance: top-offs, reservoir changes, and cleaning
DWC is a low-maintenance system by design, but it's not a set-it-and-forget-it situation. Here's the realistic maintenance rhythm.
Daily
- Check water level and top off with plain, pH-adjusted water as needed
- Glance at the air pump to confirm it's running
- Note any color change in the water (yellowing or cloudiness is a warning sign)
Weekly
- Test pH and EC/PPM and adjust as needed
- Inspect roots through the bucket lid or any translucent section — they should be white to cream colored
- Check air tubing for kinks or disconnections
Every 1–2 weeks: full reservoir change
Drain the bucket completely, rinse it with plain water, then refill with fresh pH-balanced nutrient solution. Don't try to 'stretch' reservoir changes, old solution accumulates salt buildup, pH becomes harder to stabilize, and beneficial bacteria are outcompeted by harmful ones. In a 4-gallon DWC system with 1–2 plants, a full change every 7–14 days is the right interval. Younger seedlings can go a bit longer; heavy-feeding plants in peak growth need more frequent changes.
Between grows: deep cleaning
After harvest, do a full teardown. Soak the bucket, lid, net pots, air stones, and tubing in a diluted hydrogen peroxide solution (3% H2O2 at about 1 part per 5 parts water) for 30 minutes, then rinse thoroughly with clean water. Let everything air dry completely before storing or replanting. This kills off any residual pathogens, biofilm, or algae that could contaminate your next grow.
Troubleshooting the most common problems
No growth or very slow growth
First, check your pH. Nutrient lockout, where plants can't absorb nutrients even when they're present, is almost always a pH problem. If your pH is outside 5.5–6.5, nutrients become chemically unavailable and the plant stalls. Correct pH first, then wait 48 hours before assuming anything else is wrong. Also confirm your EC isn't too high (nutrient burn causes growth to stop) or too low (starvation). Finally, check water temperature, roots above 72°F slow dramatically and start dying.
Algae buildup
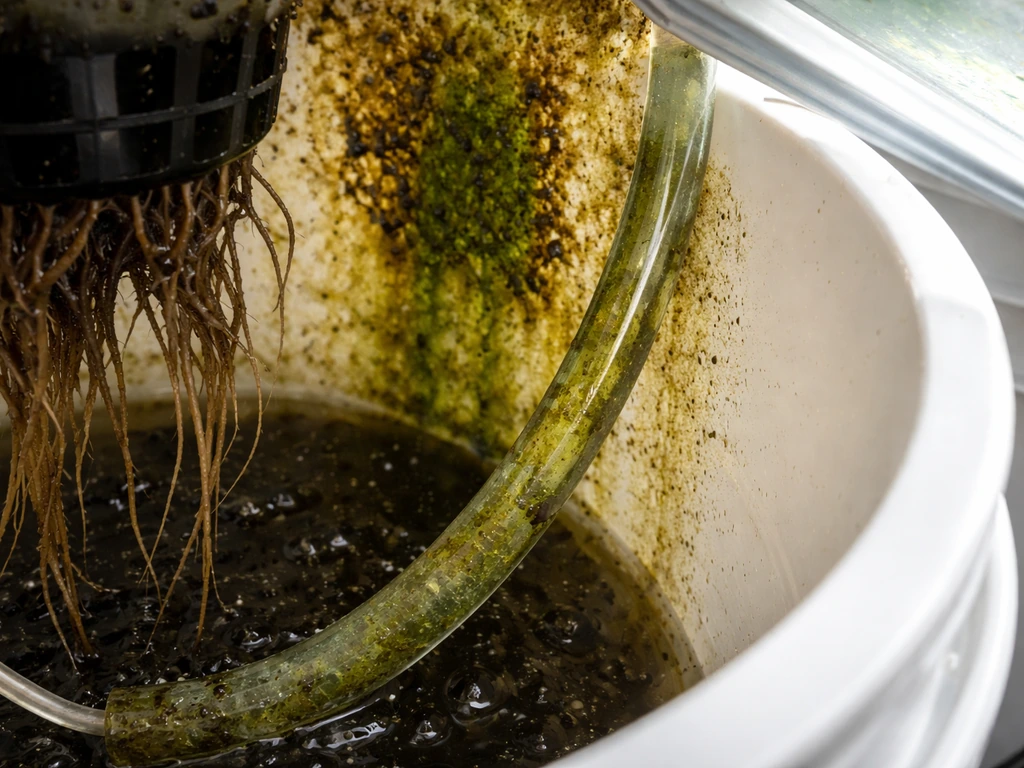
Green or brown slime on the bucket walls, tubing, or roots means light is getting into the reservoir. Algae compete with your plant for nutrients and oxygen and can choke roots. Block every possible light entry point: wrap the bucket in black tape or a light-blocking sleeve, ensure the lid seals completely, and check tubing entry holes. Once algae appear, do an emergency reservoir change, rinse all parts with diluted H2O2, and re-cover all gaps. Algae can come back fast if you don't fix the light leak.
Clogged or failed circulation
If bubbling stops or weakens, start with the simplest explanation: check that the air pump is plugged in and the outlet timer hasn't cut power unexpectedly. Then check for kinks in the air tubing. If the pump is running but bubbles are weak, the air stones may be clogged with mineral deposits. Remove and soak them in white vinegar for 30 minutes, rinse well, and reinstall. If the water pump fails, roots can still survive on air stone oxygenation in DWC, but fix it quickly.
Root rot (brown, slimy roots)
Healthy DWC roots are white to off-white. If they turn brown and slimy with a foul smell, that's root rot, usually caused by warm water temperatures, insufficient dissolved oxygen, or light contamination. Do an immediate reservoir change, trim away dead root material with clean scissors, add beneficial bacteria (products like Hydroguard work well) to the fresh solution, and address whatever caused it, usually temperature or a dead air stone.
Leaks
Leaks in a DWC kit almost always come from the grommet or seal where tubing passes through the bucket lid or wall. Check grommets first, if one is cracked or not seated flush, it won't seal under water pressure. A small amount of food-safe silicone sealant around the outside of a leaky grommet can solve this quickly. Also confirm the lid is fully snapped or seated all the way around its rim.
Light schedule mistakes
Inconsistent light cycles stress plants and can trigger unwanted flowering in crops that need long days. If your timer is malfunctioning, plants may receive random light and dark periods. Always confirm your timer is running correctly on day one by watching the lights cycle. Keep the timer outlet dedicated to just the grow light, sharing an outlet with appliances that interfere with timing can cause problems.
Pests and sanitation issues
Fungus gnats are the most common indoor pest in hydroponic setups, usually introduced through contaminated growing media or open standing water. Since DWC uses net pots instead of soil, you're naturally at lower risk, but it can still happen. Yellow sticky traps hung near the canopy catch adults early. Avoid overwatering the Rapid Rooter during the seedling phase, as moist foam near the surface is a prime breeding spot. For spider mites or aphids on leaves, wipe leaves with a diluted neem oil solution and increase airflow. Always isolate new plant material before introducing it to your system.
Yellowing leaves
Yellowing can mean a lot of things: nitrogen deficiency (lower leaves yellow first, moving upward), pH lockout preventing absorption, or simply old leaves at the end of their life. Check pH and EC before reaching for a specific nutrient fix. If both are in range and plants look otherwise healthy, it's probably normal leaf senescence, older leaves die as the plant redirects energy to new growth.
Harvest timing and keeping the system productive
How to know when to harvest
Harvest timing depends entirely on what you're growing. Leafy herbs like basil or lettuce can be harvested continuously, just snip outer leaves and the plant keeps producing. For fruiting crops, go by visual and tactile cues: tomatoes should be fully colored and slightly soft when squeezed, peppers should reach their mature color, and so on. If you're growing flowering crops, pistil color change and trichome development (checked with a jeweler's loupe) are the most accurate indicators.
Resetting the system for another round
- Remove spent plant material from the net pots, including as much root mass as you can pull out.
- Do the full deep-clean described in the maintenance section: H2O2 soak, rinse, dry.
- Inspect the air stones and replace them if they're visibly degraded or don't bubble evenly after a vinegar soak.
- Check all tubing for mineral buildup inside — if it's cloudy or blocked, replace it. Tubing is cheap.
- Refill with fresh water and nutrient solution at seedling-appropriate levels.
- Start your next seeds or clones fresh in clean Rapid Rooters.
- Log what worked and what didn't from your first cycle — pH drift patterns, nutrient amounts, light height — and adjust from there.
One of the things that makes a DWC system like the VIVOSUN VGrow kit satisfying over time is that each cycle teaches you something. If you want more details on how the DWC cycle works, the grow up hydrogarden manual can help you align your setup with the manufacturer’s guidance.
Your second grow will almost always outperform your first because you'll know where your system drifts pH-wise, how fast the plants consume water, and exactly when to step up nutrients. If you find yourself wanting more automation and monitoring across multiple systems, it's worth looking into how the VIVOSUN Grow Hub controller can tie environmental controls together.
And if you're curious how the DWC approach compares to other beginner kits, similar setups from Back to the Roots and Modern Sprout use nutrient-film or passive hydroponic methods that handle water management differently, each with its own learning curve. If you are using a back to the roots hydroponic grow kit, the same DWC principles apply for water level, light control, and nutrient timing Back to the Roots and Modern Sprout.
Keep the fundamentals in check, pH between 5.8 and 6.2, reservoir temperature below 72°F, both air stones running, and light out of the bucket, and the VIVOSUN DWC system will reliably grow almost anything you put in it.
FAQ
What should I check first if my plants look stalled even though my pH reading is correct?
If your pH is in range but plants still stall, verify the water temperature and oxygenation first. When reservoir water climbs above about 72°F, roots absorb nutrients more slowly even if chemistry looks fine. Also confirm both air stones are bubbling strongly and the air stones are not mineral-clogged (a common cause of weak oxygenation).
Can I mix nutrients in the water when seeding into Rapid Rooter plugs?
Don’t use nutrient solution to pre-moisten Rapid Rooter plugs. Instead, moisten with plain pH-balanced water (about 5.8 to 6.2) until you see the first root tip, usually 3 to 7 days. Early nutrient contact can damage emerging roots, which then slows rooting and delays stable DWC growth.
Is it okay to top off my reservoir instead of doing full water changes every time?
Yes, but manage it carefully. If you refill frequently, use a topping-up approach with pH-balanced water first, then do a full nutrient reservoir change on schedule (for a typical 4-gallon system, about every 7 to 14 days). Avoid repeatedly adding concentrated nutrients, because that drives EC up unevenly and makes pH harder to stabilize.
Where do light leaks usually happen, and how can I find them before algae starts?
Aim to keep the bucket out of direct light and ensure the lid seals properly. Light leaks often start at small points like tubing entry holes, imperfect grommet seating, or a lid that is not fully snapped down. A practical check is to shine a flashlight at bucket seams after assembly and look for any gaps where light can reach the reservoir.
My air bubbles are weak or stopped. What troubleshooting steps work best for VIVOSUN DWC kits?
If bubbling suddenly stops, do a quick sequence: confirm the pump is powered, check for an outlet timer off state, then inspect tubing for kinks or disconnections. If the pump is running but bubbles are weak, remove air stones and soak them (about 30 minutes) in vinegar, then rinse well and reinstall.
When my pH or EC is off, should I correct it in any particular order?
Try adjusting one variable at a time, but the order matters. Correct pH first, then adjust EC, then re-check water temperature and oxygenation. If you change multiple settings at once, it becomes difficult to know what actually fixed the problem, and plants can react slower than your testing cycle.
How often should I do a peroxide soak or full teardown for a DWC system?
For DWC, a true full system sterilization is a teardown step, not something you repeat every week. Between runs, a peroxide soak (about 30 minutes with 3% H2O2 diluted roughly 1:5) plus a thorough rinse and complete air-dry is usually enough. For day-to-day issues like algae, you typically address light leaks and do an emergency reservoir change rather than sterilizing everything.
I see brown slime on the bucket, how do I tell algae vs biofilm/root rot?
Often not. Brown slime alone can be biofilm or algae, so treat it as a light-contamination problem first: block light entry, then do an emergency reservoir change and rinse affected parts with diluted H2O2. Only after you confirm light control and oxygenation are stable should you judge whether root rot trimming and beneficial bacteria are needed.
How fast should I increase nutrients after transplanting a rooted clone into the DWC kit?
In DWC, your EC and pH targets depend on plant stage, but a common mistake is ramping nutrients too quickly for young starts. Use half-strength nutrient solution initially after rooting or transplanting, then increase gradually over about the first week while watching for tip burn or stalled growth.
My kit leaks. What parts should I inspect first, and can I seal a grommet?
Spillovers can cause local pH swings and mess with dosing accuracy. To prevent it, keep the lid fully seated, ensure the tubing grommets are intact, and route tubing so there is no tension or pulling at the lid. If you get minor leaks around the grommet, a small amount of food-safe silicone sealant around the outside of a properly seated grommet can help, but avoid coating areas that interfere with lid closure.
How do fungus gnats usually start in DWC, and what can I change to stop them early?
Yes, and it often matters more than people expect. Fungus gnats thrive in consistently damp, organic media. With Rapid Rooter, avoid soaking plugs beyond what’s needed and keep any wet foam surfaces from staying overly moist. Yellow sticky traps near the canopy help catch adults early while you correct moisture habits.
What does “minimum maintenance” really look like for VIVOSUN DWC over a full growth cycle?
If you want a simple cycle-safe expectation: you typically aim for continuous aeration, stable temperatures (reservoir under about 72°F), and pH in a workable range (about 5.8 to 6.2 during setup). If your environment is stable, your monitoring load drops mainly to pH/EC checks and periodic reservoir changes, not constant tinkering.