
To grow carnivorous plants successfully from a consumer kit, you need three things above everything else: pure water (distilled, rainwater, or reverse osmosis only), a nutrient-free growing medium (peat-based or sphagnum), and bright light for at least 4 to 6 hours a day. Get those three right from day one and your kit plants have a real shot. Miss any one of them and you will spend weeks wondering why your Venus flytrap is turning black or your sundew has no dew.
Grow It Carnivorous Plants Kit Instructions: Step-by-Step Care

Marcus Thornfield
10 Jul 2026
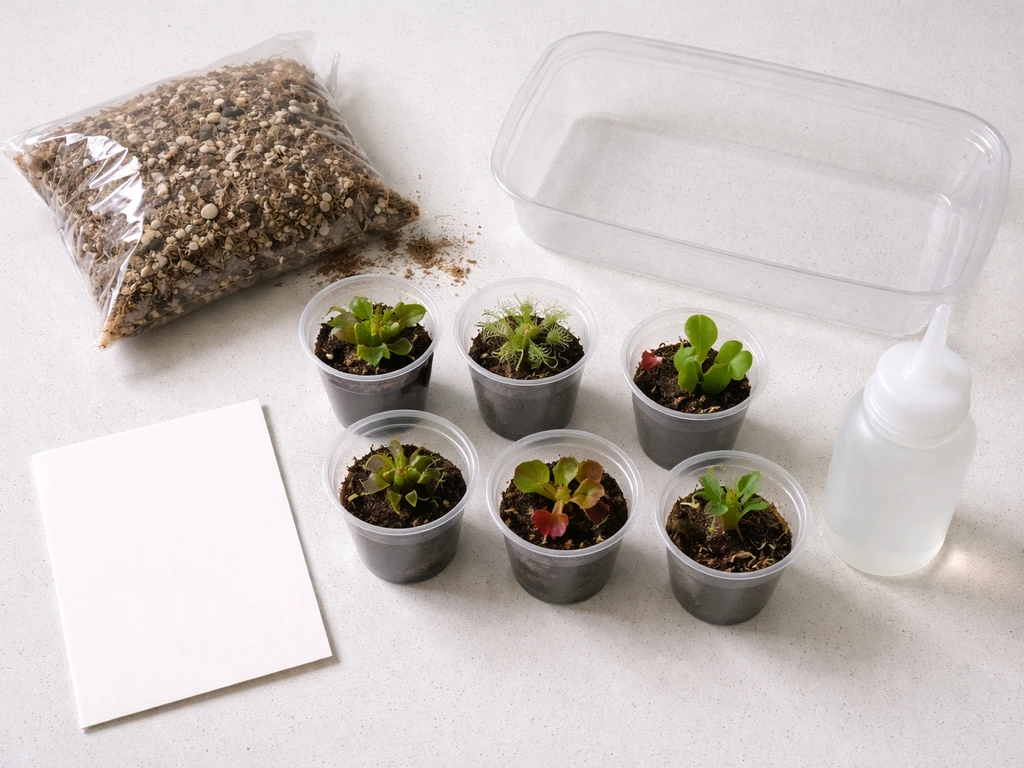
Picking the right kit and plant mix
Most mainstream beginner carnivorous plant kits center around a core group of genera: Venus flytraps (Dionaea), American pitcher plants (Sarracenia), sundews (Drosera), tropical pitcher plants (Nepenthes), and butterworts (Pinguicula). A classic three-plant bog kit like the California Carnivores beginner set will typically give you one of each: a Dionaea, a Sarracenia, and a Drosera. More expansive starter kits sometimes throw in Nepenthes and Pinguicula as well.
That species mix matters a lot, because not all carnivorous plants have the same care needs. Sarracenia and Venus flytraps are temperate bog plants. They need a cold dormancy period in winter, roughly 3 to 4 months below 70°F (but above freezing). Nepenthes are tropical and hate cold. Drosera species span both categories depending on origin. Before you even open the kit, look at your included plant list so you know which species you are working with and plan your long-term care accordingly.
If you are choosing between kits and have a windowsill rather than a grow-light setup, start with a bog-style kit focused on Sarracenia and Venus flytraps. They tolerate outdoor conditions well and reward bright outdoor light. If you want to grow indoors year-round under lights, a kit including Nepenthes or Pinguicula is a better fit since those species skip the cold dormancy requirement.
Unboxing, parts checklist, and reading the label
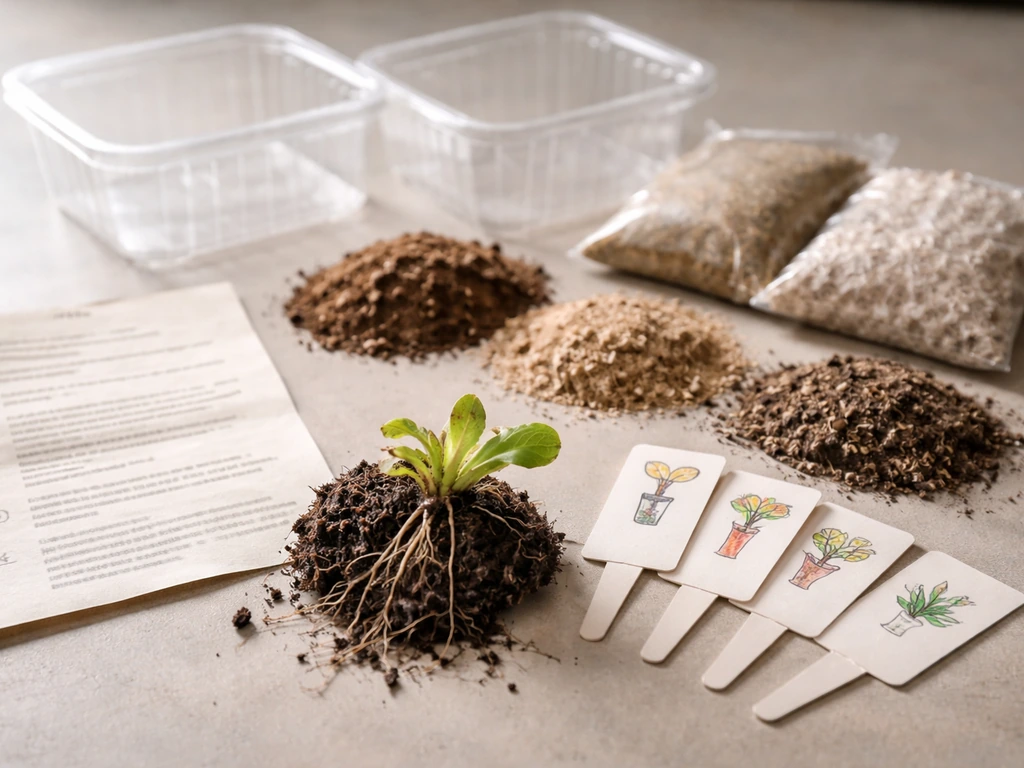
Before you touch anything, spread the kit contents out on a table and check them against the included instruction sheet. For complete animal planter grow kit instructions, follow the steps in your included sheet and confirm each part matches a carnivorous plant setup. Most kits ship with some combination of the following:
- Live plants (bare-root or in small nursery pots, sometimes wrapped in damp sphagnum)
- A bag of pre-mixed growing medium (usually peat moss and perlite, sometimes with sphagnum on top)
- A plastic pot or terrarium container with drainage holes
- A saucer or drip tray for the tray-watering method
- A small instruction card or sheet with brand-specific notes
- Possibly a packet of long-fiber sphagnum moss as a top dressing
Read the label on the growing medium bag before opening it. If it says anything about fertilizer, added nutrients, or moisture-control beads, do not use it for carnivorous plants. Those additions are designed for typical garden plants and will kill carnivorous species. A legitimate kit medium should list ingredients like sphagnum peat moss, perlite, or coarse sand only. If yours does not pass that check, replace it with a plain peat-perlite mix before planting.
Also inspect your plants the moment you open the bag or packaging. Healthy roots are white or light tan. A little browning on the very tips is fine. If roots are mushy or smell sour, that plant may have suffered in transit and needs immediate planting in fresh medium to recover. Traps on Venus flytraps that arrive closed and slightly dark are usually just stressed from shipping and will open up within a week of proper care.
Step-by-step setup: medium, container, water, and light
Preparing the growing medium
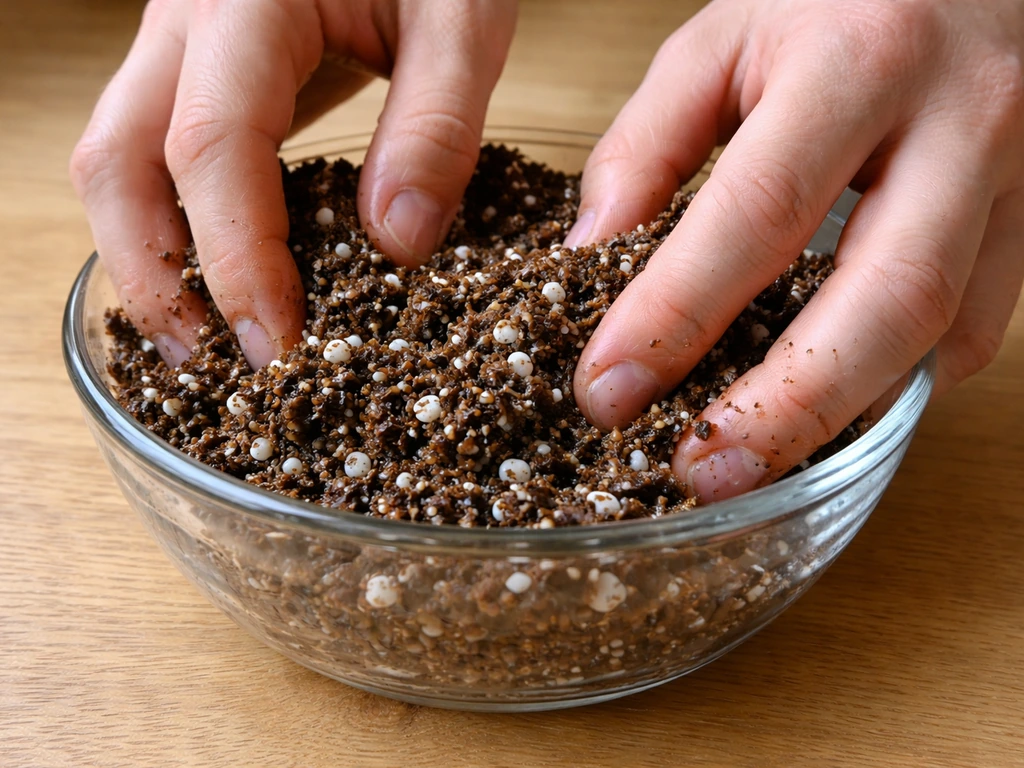
The most widely used mix for Venus flytraps and Sarracenia is a 1:1 blend of pure sphagnum peat moss and perlite. The U.S. Botanic Garden recommends a slightly peat-heavier ratio of 3 parts peat to 1 part coarse sand as an alternative. A WSU Extension guide suggests 1:1 peat to perlite or vermiculite for pitcher plants and similar bog species. All of these work. The key is that neither ingredient contains nutrients or fertilizers. Pure peat and horticultural perlite are easy to find at garden centers.
Before filling your pot, moisten the medium with distilled or rainwater until it is evenly damp throughout but not dripping like a soaked sponge. Dry peat is hydrophobic and will repel water if you try to wet it after planting, so pre-moistening is not optional. If your kit came with long-fiber sphagnum moss, set it aside to use as a top layer after planting.
Setting up the container
Your pot must have drainage holes. Carnivorous plants sit in a water tray but they still need airflow at the roots. If your kit includes a terrarium with no drainage, place a half-inch layer of clean pea gravel at the bottom before adding medium, and be careful not to over-water. For a standard plastic pot with drainage holes, the setup is straightforward: place a pinch of long-fiber sphagnum over each hole to keep medium from falling through, then fill halfway with your pre-moistened peat mix.
Water type and the tray method
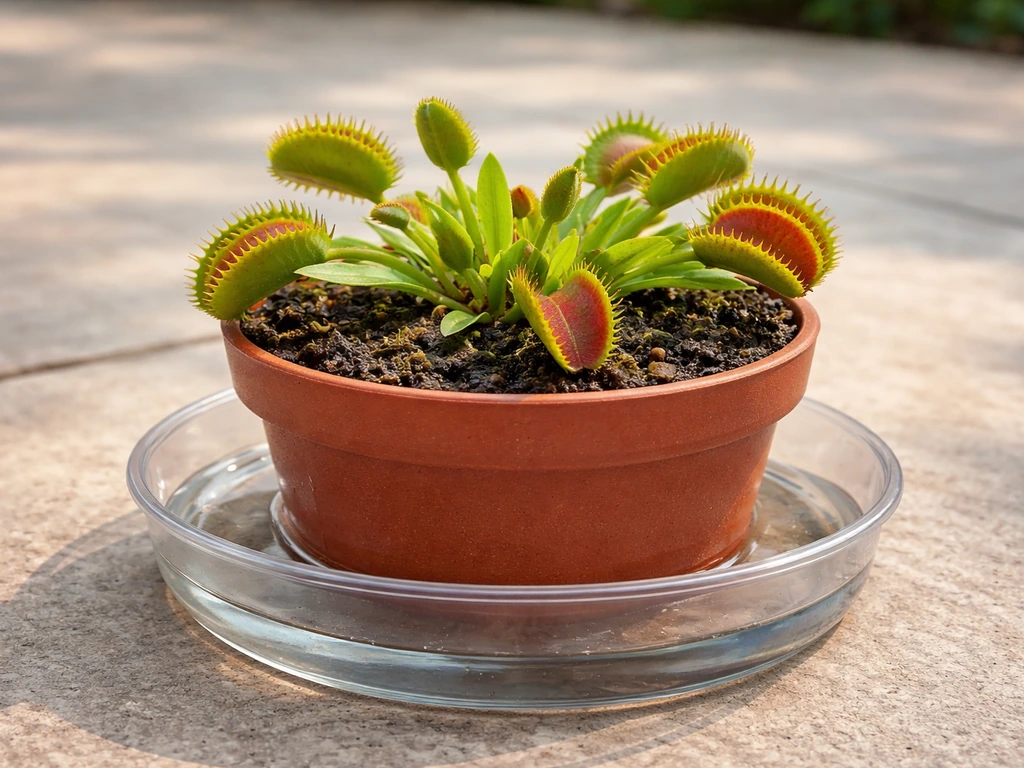
This is the single most important thing to get right. Use only distilled water, reverse osmosis water, or clean rainwater. Tap water contains dissolved minerals and chlorine that accumulate in the soil and damage these plants over weeks and months. Bottled spring water and mineral water are off the list for the same reason. Distilled water from a grocery store jug is the most practical solution for most beginners.
The recommended watering method is the tray method: blank" rel="noopener noreferrer">set your potted plant in a shallow saucer and keep 1 to 2 inches of distilled water in that saucer at all times during the growing season. The roots draw water up from below, which keeps the medium consistently moist without rotting the crown of the plant. California Carnivores specifically advises against flooding the top of the traps, so water from below, not above. During dormancy (more on that below), blank" rel="noopener noreferrer">let the tray dry out between refills rather than keeping it constantly wet.
Light placement
Bright light is non-negotiable. Venus flytraps and Sarracenia want at least 6 hours of direct sunlight per day outdoors, or equivalent bright indoor light. Sundews and butterworts can get by with slightly less direct sun but still need very bright conditions. The biggest mistake beginners make is placing their kit on a dim windowsill and wondering why growth looks pale and weak. A south-facing window is your best bet indoors. If you are growing in a terrarium under artificial lights, California Carnivores recommends a fixture with four T5 fluorescent bulbs or an equivalent LED panel for adequate intensity.
That said, do not blast a newly arrived plant with intense, unfiltered midday sun on day one. Acclimate it. Give gentle indirect or filtered sunlight for the first week, then gradually move it into full sun over 7 to 10 days. Plants grown in low light at a nursery need time to adjust their leaf structure to high-intensity light or they will sunburn.
Planting, transplanting, and your first-month timeline
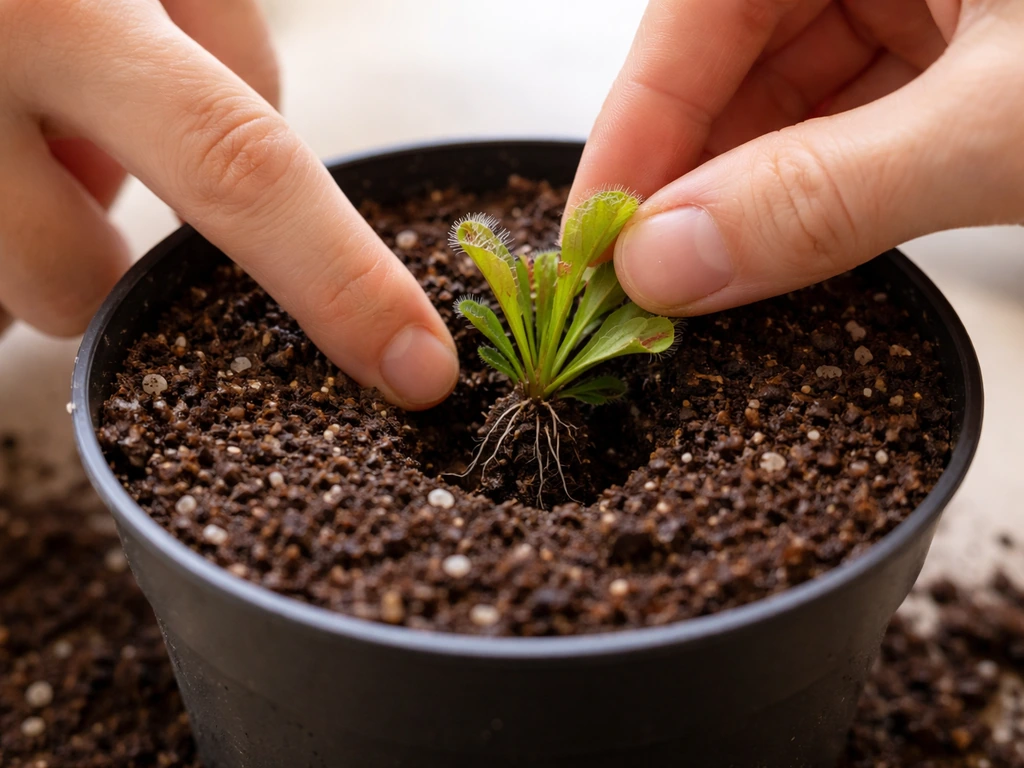
Once your medium is pre-moistened and your pot is half-filled, it is time to place the plant. Make a small hollow in the center of the medium with your finger, set the plant so the root base (the white rhizome on a Venus flytrap, or the root ball on a Sarracenia) sits at medium depth, not buried too deep. Then gently fill in around the roots with the rest of the medium. Do not pack it tightly. Loose medium allows roots to breathe and establish faster. If you have long-fiber sphagnum, lay a thin layer over the surface as a top dressing to help retain moisture.
Here is a realistic timeline for your first month after planting:
- Days 1 to 7: Acclimation week. Keep the plant in bright but indirect light. Fill the tray with an inch of distilled water and let the plant settle. Do not trigger the traps or disturb the roots.
- Days 7 to 14: Begin moving the plant into more direct sun gradually. Check the tray daily and top up with distilled water as needed. Some leaf yellowing or trap blackening at this stage is normal as old leaves die off and new growth emerges.
- Days 14 to 21: Growth should stabilize. New traps or leaves becoming visible are a good sign. Continue tray watering. Keep light consistent.
- Days 21 to 30: The plant is established. Assess your light setup. If growth looks etiolated (tall, thin, pale), it needs more light. If leaf edges are crispy brown, you may have too much intense heat along with sun. Adjust accordingly.
One thing to resist during this whole period: repotting unnecessarily. If the plant came in an adequate pot and the medium is clean and peat-based, leave it alone for at least three months. Every repot is a stress event. The exception is if you opened the kit and found the medium is fertilized, compacted, or clearly the wrong type. In that case, repot right away into clean medium using the steps above.
Feeding and what NOT to do
Do they actually need to be fed?
Carnivorous plants do not need you to feed them. Outdoors or near an open window, they will catch enough insects on their own. Indoors under lights with no access to bugs, you can occasionally give a Venus flytrap a single small live or freshly killed insect (a mealworm, a small cricket) once every 2 to 4 weeks during the growing season. Pitcher plants will catch what falls into them. Sundews are passive trappers. If a plant is catching food naturally, great. If not, it will still grow fine in good light with proper water.
What you absolutely should not do is force-feed large insects, trigger traps repeatedly for fun, or feed any kind of meat, cheese, or human food. If you want to grow jungle juice, follow proven growing instructions and use proper plant nutrition that matches your setup force-feed large insects. Traps that are repeatedly triggered without catching prey waste energy and blacken faster. Each Venus flytrap trap has a limited number of openings in its lifetime before it dies off naturally.
The fertilizer rule (and why it matters)
Never fertilize carnivorous plants through the soil. Never. These plants evolved in nutrient-poor environments and their roots are not built to handle fertilizers. Even a diluted dose will cause root burn and rapid decline. Do not use potting mixes with fertilizer added. Do not add compost. Do not use water-soluble plant food in the tray. Some advanced growers experiment with heavily diluted foliar feeding via the pitchers or traps, but that is not for beginners and is definitely not part of any standard kit.
Dormancy: the seasonal reset your kit plants need
Venus flytraps, Sarracenia, and many temperate Drosera species require a winter dormancy period of roughly 3 to 4 months. During dormancy, these plants go semi-dormant, growth slows dramatically, some leaves die back, and they recharge for spring. This is not your plant dying. It is a biological requirement. Without dormancy, temperate carnivorous plants gradually weaken and die within a few years.
Dormancy is triggered by shorter days and cooler temperatures. The ideal dormancy temperature range is below 70°F but above freezing (32°F). In practice, an unheated garage, a cold basement, or an outdoor space that stays frost-light works well. During dormancy, reduce watering, let the tray dry out between refills, and keep the plant in moderate light (it does not need intense light while dormant). Resume normal tray watering and bright light in early spring as new growth appears.
Tropical plants in your kit (Nepenthes, most Pinguicula) skip dormancy entirely. Keep them warm and growing year-round.
Common problems and how to fix them
| Problem | Likely Cause | Fix |
|---|---|---|
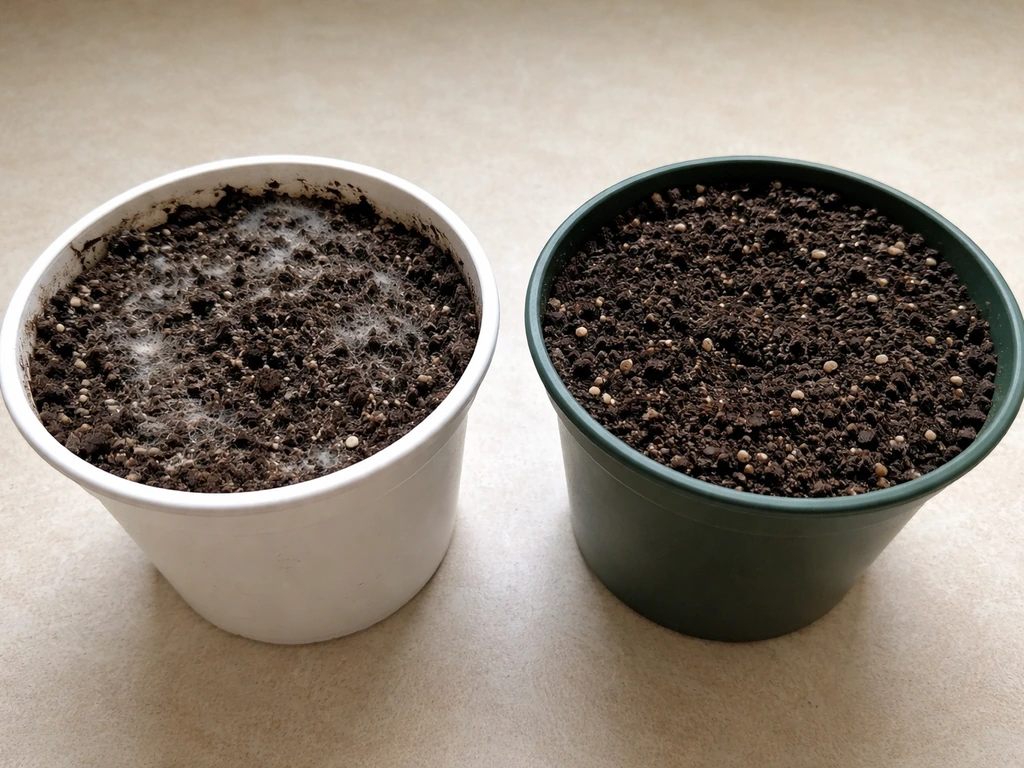
| Mold on soil surface | Too much moisture with poor airflow, or medium too dense | Improve air circulation, reduce standing water depth to under 1 inch, remove mold with a cotton swab, top dress with dry sphagnum |
| Traps or leaves turning black | Normal die-off of old leaves, or stress from tap water/fertilizer/low light | Remove dead leaves at the base, check water type, increase light, rule out fertilizer contamination |
| Pale, elongated, weak growth | Insufficient light (etiolation) | Move to a brighter location or upgrade lighting; 4 to 6+ hours of direct or high-intensity light daily |
| Medium staying too wet or soggy at top | No drainage holes, or tray overfilled | Ensure pot has drainage, keep tray water at 1 inch max, not flooded to pot rim |
| Sundew not producing dew | Low humidity or insufficient light | Increase light intensity, consider a humidity dome or place near other plants |
| Fungus gnats | Organic medium staying too wet on the surface | Let top inch of medium dry slightly more between watering, use sticky traps near the plant |
| Plant wilting despite wet tray | Root rot from contaminated water or fertilized medium | Remove from pot, trim rotten roots, repot in fresh peat-perlite, switch to distilled water only |
One thing worth saying about mold: a little surface mold in the first two weeks after planting is common, especially in closed terrarium setups or humid summer conditions. It usually goes away on its own once the plant is established and airflow improves. It becomes a real problem only when it starts covering the plant itself or stays persistent past a few weeks. If that happens, check your air circulation before reaching for any kind of fungicide treatment.
Keeping it going: your long-term maintenance routine
Weekly and monthly tasks
Once your kit plants are established, maintenance is genuinely low effort if the basics are right. Check the tray every day or two during summer and top up with distilled water before it completely dries out. In cooler months or during dormancy, check every few days and let the tray dry between refills. Remove dead leaves and blackened traps at the base (not by pulling, but by trimming with clean scissors) to keep the plant tidy and prevent mold.
- Every 1 to 2 days (growing season): Check tray water level, top up with distilled water as needed
- Weekly: Remove any dead or blackened leaves at the base with clean scissors
- Monthly: Check for pests (fungus gnats near soil, aphids on new growth), assess whether light is adequate by looking at growth color and density
- Annually (spring): Repot into fresh peat-perlite mix if the medium has become compacted or smells sour; this is also a good time to divide overgrown clumps
- Annually (fall/winter): Begin reducing tray water and move temperate species to a cool location for dormancy
Adjusting after your first month
After 30 days, you have enough information to make smart adjustments. If you are seeing lush green growth and active trapping, you are doing it right. If growth is pale and stretched, add more light. If you have lost multiple traps and leaves to blackening despite correct water and light, check whether your medium has any hidden nutrient content by looking up the exact product on the bag. If the tray smells swampy, dump it, rinse the saucer, and refill with fresh distilled water.
Lighting is the adjustment most beginners need to make after week one. A single north-facing windowsill simply does not give enough intensity for Venus flytraps or Sarracenia. If you cannot move to a south-facing window or outdoors, a dedicated grow light on a timer set for 12 to 14 hours per day makes an enormous difference. The four-bulb T5 or LED panel recommendation from California Carnivores is a good benchmark for terrarium setups.
A note on similar kits
If you have enjoyed working with your carnivorous plant kit, it is worth knowing that the same core principles (nutrient-free medium, pure water, bright light) apply across many specialty grow kits. Kits built around tropical or terrarium themes, like jungle animal grass grow kits or animal planter grow kits, use different plants but share some of the same setup logic around drainage, moisture, and lighting. If you are following pet grass self-grow kit instructions, use the label first and make sure you meet the water and light guidance so the grass grows evenly animal grass grow kits. The carnivorous plant version is one of the more demanding beginner kits out there, so if you get this right, you are well-equipped to tackle almost anything else.
FAQ
Can I use bottled spring water or mineral water instead of distilled/RO water?
Yes, but only if the brand’s label confirms the water is essentially mineral-free. If you can see a “mineral” or “electrolyte” listing, or if the jug has a mineral profile, skip it. Distilled or reverse osmosis is the safest default for a kit setup.
If I live in a warm climate, do my temperate kit plants still need dormancy?
You can, but only for temperate plants that will go through dormancy. If you keep a Venus flytrap or Sarracenia warm and wet year-round, it will weaken over time even if it still grows. For year-round indoor setups, you usually need an unheated space or a cold-light room.
What’s the safest way to water, and should I ever pour water over the traps?
If the kit uses a water tray, don’t top-water the crown. For Venus flytraps and similar plants, pour water into the saucer and let the medium wick up from below, then empty any excess if it overflows and stays deep around the base. Top splashes are one of the fastest ways to get blackening.
How do I know the peat mix is damp enough before planting?
A good test is to squeeze the peat mix lightly before potting. It should feel evenly damp, but no water should run out in a stream. If it drips, you may have pre-soaked too long, which increases early mold risk. If it feels dry and repels water later, it needs more thorough pre-moistening.
My plant’s traps are turning black soon after I unbox it, what should I check first?
Blackening right after arrival is often stress, but mushy, sour-smelling roots are a different problem. If roots smell sour or turn translucent, remove the plant, rinse off the old medium, and repot into fresh nutrient-free mix. Keep the tray wet but not flooded during recovery and increase light gradually.
My kit has multiple plant types, can I put them all in the same winter spot?
It depends on which plant you have. Venus flytraps and Sarracenia need winter cold, while Nepenthes generally should not see frost-level temperatures. If your kit includes both types, you must separate their seasonal schedules (tropical stays warm, temperate gets the cold period).
When is it actually worth repotting a carnivorous plant kit, and when should I leave it alone?
Do it as little as possible. After planting, avoid repotting for about three months unless the medium is obviously wrong (fertilizer or moisture-control beads) or the roots are failing. Even when repotting is needed, keep root disturbance minimal and use the same pure, nutrient-free ingredients.
Is it okay to trigger Venus flytrap traps repeatedly for fun?
Don’t. Triggers can cause energy drain and faster trap death even when the plant is otherwise healthy. A better approach is to feed only if the plant isn’t catching anything naturally, and only one small insect every couple of weeks for Venus flytraps during active growth.
What should I do if mold appears in a terrarium kit and keeps coming back?
If you see persistent fuzz or widespread mold that covers the plants, improve airflow first. In a terrarium, partially vent the enclosure or open it briefly in the daytime, and make sure the light intensity is adequate so surfaces dry faster. Only consider any treatment as a last resort, because many products can harm sensitive roots and pitchers.
If I grow my kit plants under a grow light, how should I set the schedule and ramp intensity?
Yes, but use a timer and avoid sudden intensity changes. Start on gentle light for the first week, then ramp up to the full schedule over about 7 to 10 days. If leaves blanch or look pale and stretched, increase light gradually and check the photoperiod against the species.