
Cherry blossom grow kits fall into three very different categories, and which one you have determines everything about how you set it up. Most kits are seed-starting kits that include Prunus seeds (usually Prunus serrulata for ornamental cherry blossom or Prunus serotina for black cherry), a growing medium like coconut coir pellets or loose potting soil, and a small container. A second type is a bonsai seed kit, which adds a ceramic pot, pebbles, and bonsai-specific instructions. A third, rarer type is a novelty or dyed-seed kit that markets itself with dramatic packaging but often contains unrelated flowering plants. The honest upshot: growing a cherry blossom from seed is a long game. You are not getting blooms in a few weeks. But you can absolutely get healthy seedlings, and that is a real win worth chasing.
Cherry Blossom Grow Kit Instructions: Setup, Planting, Troubleshooting

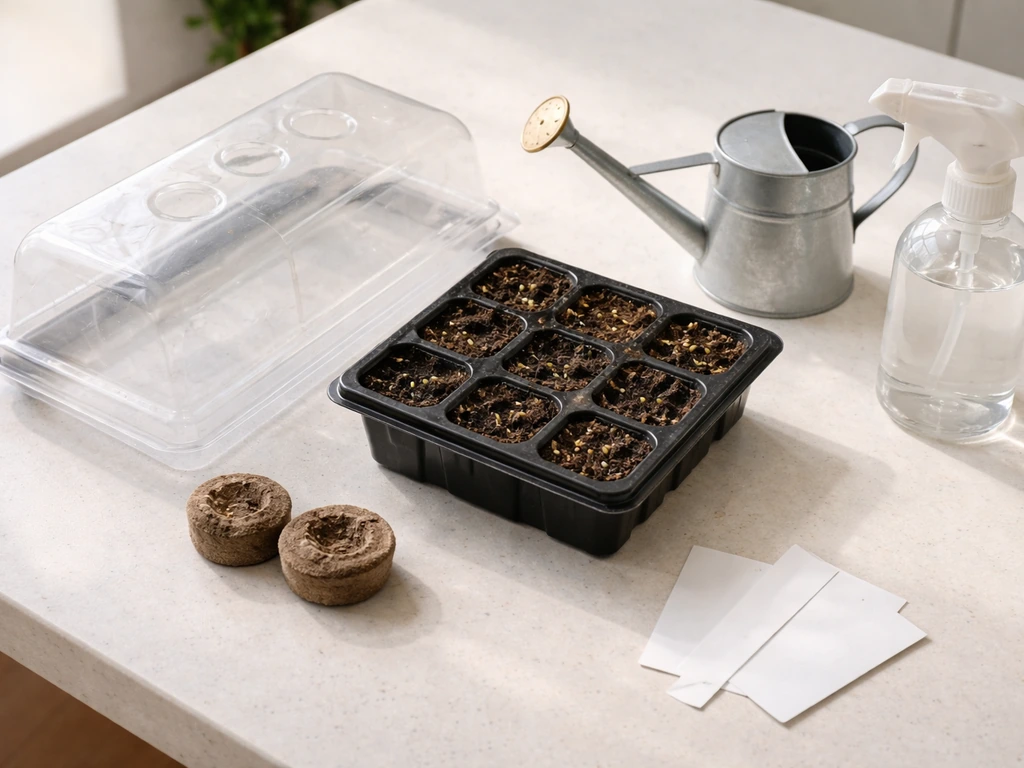
Know what kit you actually have
Before you do anything, identify your kit type. Flip the box over and look for the species name. "Prunus serrulata" means ornamental cherry blossom, which is the classic Japanese flowering cherry. "Prunus serotina" is black cherry, a North American tree with smaller, less showy flowers. If the box just says "cherry blossom" with no Latin name, you are likely dealing with a novelty product, and you should temper expectations accordingly.
Check what is physically in the box. A legitimate seed-starting kit should include seeds (sometimes in a labeled packet, sometimes in a small vial), a growing medium (coir pellets, a compressed soil disc, or loose potting mix), a container or tray, and a printed instruction sheet. Bonsai seed kits like those from Eve's Garden Gifts typically add a ceramic container, pebbles or gravel, and a bonsai-specific planting guide. If you have pellets and a tray with cells, you have a coir-based seed-starting kit and the setup process is slightly different from a loose-soil cup kit like Seeds In A Cup.
One thing worth flagging right now: cherry seeds are notoriously slow. Unlike a mini sunflower grow kit or a lavender grow kit where you plant and wait a couple of weeks, cherry seeds require a cold stratification period before they will germinate at all. If you are using a modern sprout lavender grow kit, follow its specific instructions for planting depth and light so your seeds can germinate reliably modern sprout lavender grow kit instructions. That is not a flaw in your kit. It is just how Prunus works biologically, and any honest kit will tell you this upfront. If yours does not mention stratification anywhere, check the manufacturer's website before assuming the instructions are complete.
| Kit Type | Typical Contents | Species Usually Inside | Realistic First Sprout Timeline |
|---|---|---|---|
| Seed-starting cup kit (e.g., Seeds In A Cup) | Seeds, loose potting soil, small cup | Prunus serotina (black cherry) | 4–6 months from start (includes stratification) |
| Bonsai seed kit (e.g., Eve's Garden Gifts) | Seeds, ceramic pot, pebbles, coir or bonsai soil mix | Prunus serrulata (ornamental cherry) | 3–5 months from start (includes stratification) |
| Coir pellet seed-starting kit | Seed packet, coir pellets, tray with dome | Varies, often Prunus serrulata | 3–5 months from start |
| Novelty/dyed seed kit | Dyed seeds, generic soil, decorative pot | Unknown or unrelated species | Unpredictable — may not be cherry at all |
Unboxing and setup: what you need before you start
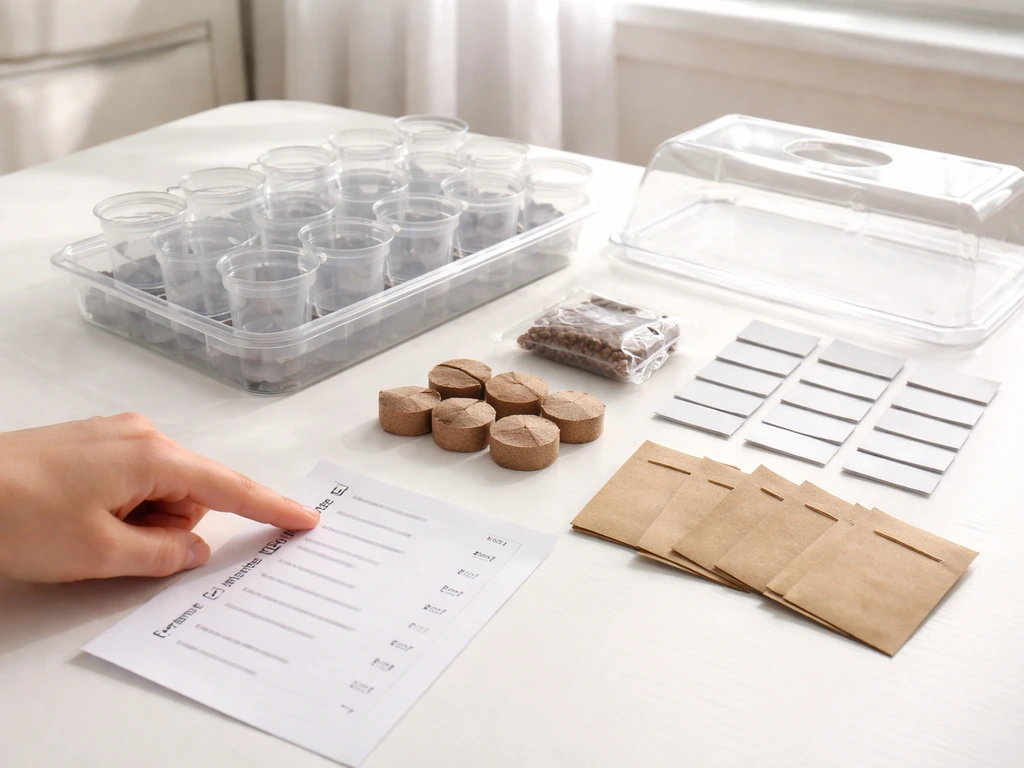
Lay everything out on a table and cross-reference it against the included parts list. If there is no parts list, look for the manufacturer's name and search for their instruction PDF online. If you need specifics like timing and setup details for a trowel and sprout organic grow kit, follow the kit's included instructions closely before planting trowel and sprout organic grow kit instructions. Missing seeds, missing soil, or a damaged container are all worth a quick customer service email before you begin, not after.
For most cherry blossom kits, you will not need much beyond what is in the box, but have these on hand just in case: If you are also growing strawberries, look for a grow kit instruction guide tailored to strawberry seeds, soil, and moisture needs target strawberry grow kit instructions.
- A small spray bottle or watering can with a gentle rose head
- A saucer or drip tray if the kit container does not have one built in
- Plastic wrap or a small humidity dome (some kits include one; others do not)
- A thermometer, especially if your home runs cold in winter
- Marker and tape to label the date you started stratification
- A small resealable plastic bag for the stratification step
If your kit uses coir pellets, do not expand them yet. If it uses loose potting soil from Seeds In A Cup or a similar brand, the instruction is to fill the planter about three-fifths full with soil, keeping it loose for drainage. Do not pack it down. Compressed soil is one of the most common reasons cherry seedlings struggle, because the roots need room to push through.
Planting your seeds: step-by-step for each kit type
For loose-soil cup kits (Seeds In A Cup style)
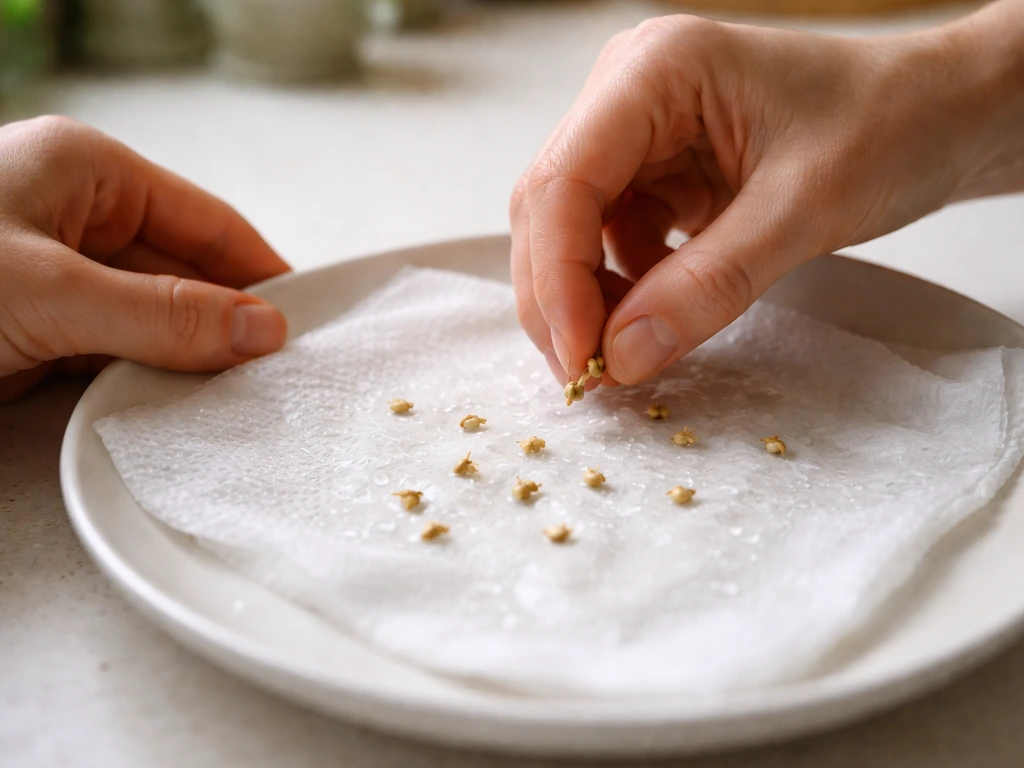
- Soak your seeds in room-temperature water for 24 hours. This softens the seed coat and helps moisture reach the embryo.
- After soaking, place seeds in a damp paper towel, fold it up, and seal it in a resealable plastic bag.
- Put the bag in the refrigerator for 90–120 days. This cold stratification mimics winter and is what triggers germination. Mark your start date on the bag.
- After stratification, fill your cup or container about three-fifths full with the included loose potting soil. Keep it loose, do not pack it.
- Plant one seed about 1 inch deep. Cover gently.
- Mist the surface lightly until the soil is moist but not soggy.
- Place in a warm spot and keep moist.
For coir pellet kits (tray and dome style)
- Place each coir pellet in its cell, then pour warm water slowly over each one. Let them expand fully before touching them — this usually takes about 5 minutes.
- Do not disturb the pellets while they are hydrating. Once expanded, gently smooth the top surface without packing it down.
- Your seeds will still need the soak and cold stratification steps above unless the kit instructions specifically say they have been pre-stratified.
- After stratification, press one seed per pellet about half an inch to 1 inch deep, depending on the seed size in your kit.
- Mist lightly from above to settle the medium around the seed.
- Place the dome over the tray to retain humidity.
For bonsai seed kits (ceramic pot style)
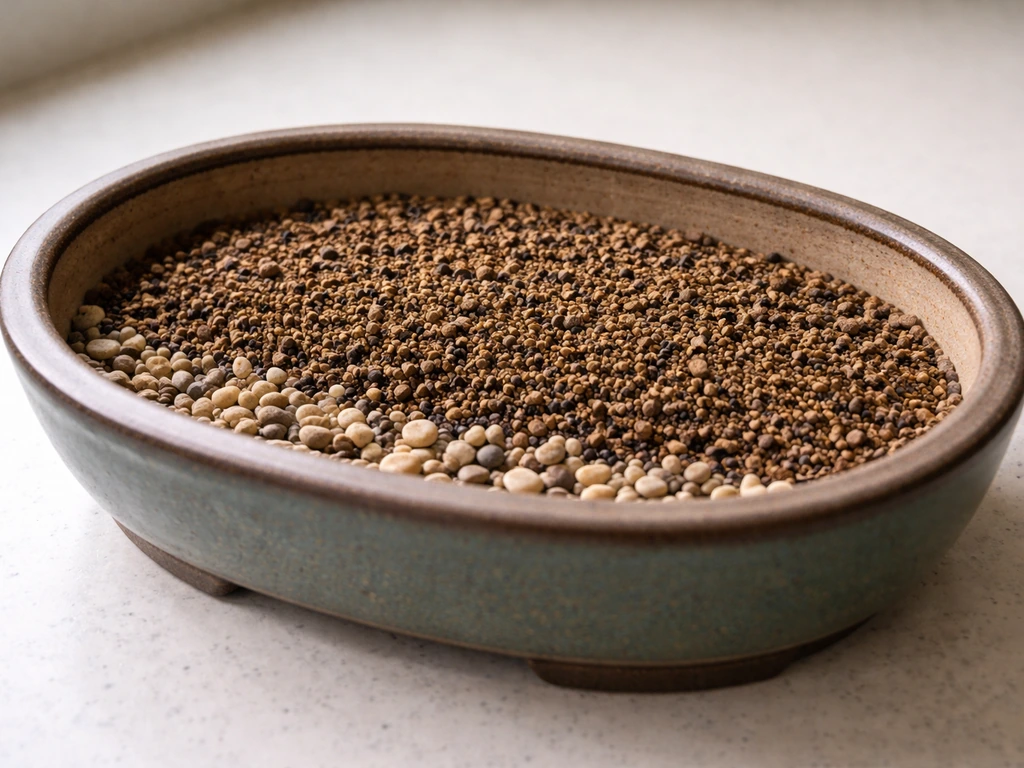
- Layer the pebbles in the bottom of the ceramic container for drainage.
- Add the bonsai growing mix on top, filling to about 1 inch from the rim.
- Soak seeds in room-temperature water (around 68°F/20°C) for 16–24 hours. Some guides also recommend gently scratching the seed surface with fine sandpaper to help water penetrate the hard coat.
- Cold stratify in a sealed damp bag in the fridge for 2–3 months.
- After stratification, plant seeds about half an inch deep in the bonsai mix.
- Mist gently and cover with plastic wrap until germination begins.
If your kit's instructions say nothing about stratification and just tell you to plant straight away, try it, but know that germination rates without stratification for Prunus species tend to be very poor. Cherry seeds held in cold conditions until the first signs of root movement (called incipient germination) is the standard approach for a reason.
Light, temperature, and watering: the settings that make or break germination
During the stratification phase (the cold period in the fridge), you do not need to worry about light. The seeds are dormant. Your fridge temperature is fine as long as it stays between 34–40°F (1–4°C). Check once a week that the paper towel or growing medium stays damp but never waterlogged. If the medium in a cup kit gets cloudy water sitting at the bottom, change it out to prevent mold.
Once stratification is done and seeds are planted, light becomes critical fast. Seedlings need 14–16 hours of light per day from the moment they germinate. A sunny south-facing windowsill can work in summer, but in most indoor situations a grow light is more reliable. Position the light close enough that seedlings do not have to stretch to reach it. A gap of more than 4–6 inches between the light and the seedling canopy is where leggy growth starts.
Temperature after planting should be warm but not hot. Aim for 65–72°F (18–22°C). Temperatures consistently above 72°F combined with low light are a recipe for leggy, weak seedlings. The transition from cold stratification back to warmth is actually what signals the seed to wake up and grow, so do not rush the cold period short just because you are impatient.
For watering, the goal is consistently moist, never soaked. With coir pellets, mist the surface rather than pouring water. With loose soil in a cup, water until you see a little moisture at the drainage hole, then stop. Let the top half-inch of soil dry slightly between waterings. Overwatering is far more dangerous than underwatering at the seedling stage, and soggy soil invites mold and root rot almost immediately.
What to expect from germination through first growth
After the stratification period ends and seeds are planted in warmth, expect to wait anywhere from 2 to 6 weeks before you see a sprout. Cherry seeds do not pop up overnight. The first sign is usually a tiny pale loop pushing up through the soil, the seedling's embryonic stem bending toward the surface. Once you see that, you are through the hardest part.
During the wait, check your container every 2–3 days. You are looking for moisture levels (not too wet, not bone dry), any sign of white mold on the surface, and eventually that first sprout. Do not dig into the soil to check on the seed. Disturbing it during this phase can set germination back significantly.
Once the seedling is above the surface, remove any plastic dome or covering to improve air circulation. Keep the 14–16 hour light schedule going and maintain temperatures in the 65–72°F range. In the first few weeks you will see the seed leaves (cotyledons) unfurl, followed by the first true leaves. True cherry blossom leaves are oval with serrated edges. If your seedling's leaves look nothing like that, it may be worth questioning whether the kit contained the right species.
| Phase | What's Happening | Approximate Timeline |
|---|---|---|
| Soaking | Seed coat softens, moisture penetrates | Day 1–2 |
| Cold stratification | Dormancy broken, root initiation begins | Weeks 2–16 (varies by kit) |
| Planting and warmth transition | Seed wakes up in warm soil | Days 1–7 post-planting |
| Germination (first sprout visible) | Seedling pushes through soil surface | 2–6 weeks post-planting |
| Seedling stage (cotyledons open) | First photosynthesis begins | Days 1–2 after sprouting |
| True leaf growth | Real cherry leaves appear | 2–4 weeks after sprouting |
Transplanting, repotting, and growing toward eventual blooms
Cherry blossom trees grown from seed will not bloom for several years, and often not for 5–10 years in a container or garden setting. That is the honest truth. But healthy growth from your kit is a meaningful milestone, and getting there is the goal for right now.
You will know it is time to transplant when roots start poking out of the drainage holes, or when the seedling looks visibly cramped and growth slows despite good light and watering. For a cup or coir pellet kit, this typically happens around 6–10 weeks after germination. Move the seedling into a pot that is about 2 inches wider in diameter than the current container. Use a well-draining potting mix, not straight garden soil, which compacts too easily indoors.
For bonsai-style kits, the transplanting process is more deliberate. You are shaping the root system alongside the tree's form. After the first growing season, you can begin trimming the taproot slightly to encourage lateral root spread, which is what gives bonsai their characteristic broad, surface-hugging root structure. This is a multi-year project, but the first transplant step is simply moving the seedling into a slightly larger bonsai training pot with fresh bonsai mix.
As the plant matures, it needs more light than most indoor setups can provide. Moving it outdoors during warm months (spring through early fall, once nighttime temperatures are consistently above 40°F) will support stronger growth. Bring it back inside before the first frost if you are in a cold climate, or leave it out year-round in USDA zones 5–9 depending on the species.
Troubleshooting: when things go sideways
No sprouts after several weeks
First, confirm your stratification period was long enough. Prunus seeds typically need 8–12 weeks minimum in the cold, and some guides recommend up to 4 months. If you skipped or shortened stratification, the seeds may still be dormant. Try re-moistening them, resealing in a bag, and putting them back in the fridge for another 4–6 weeks before planting again. Also check that your soil temperature after planting is warm enough. Seeds sitting in soil that stays below 60°F will not germinate well even after proper stratification.
White mold or fuzzy growth on the soil surface
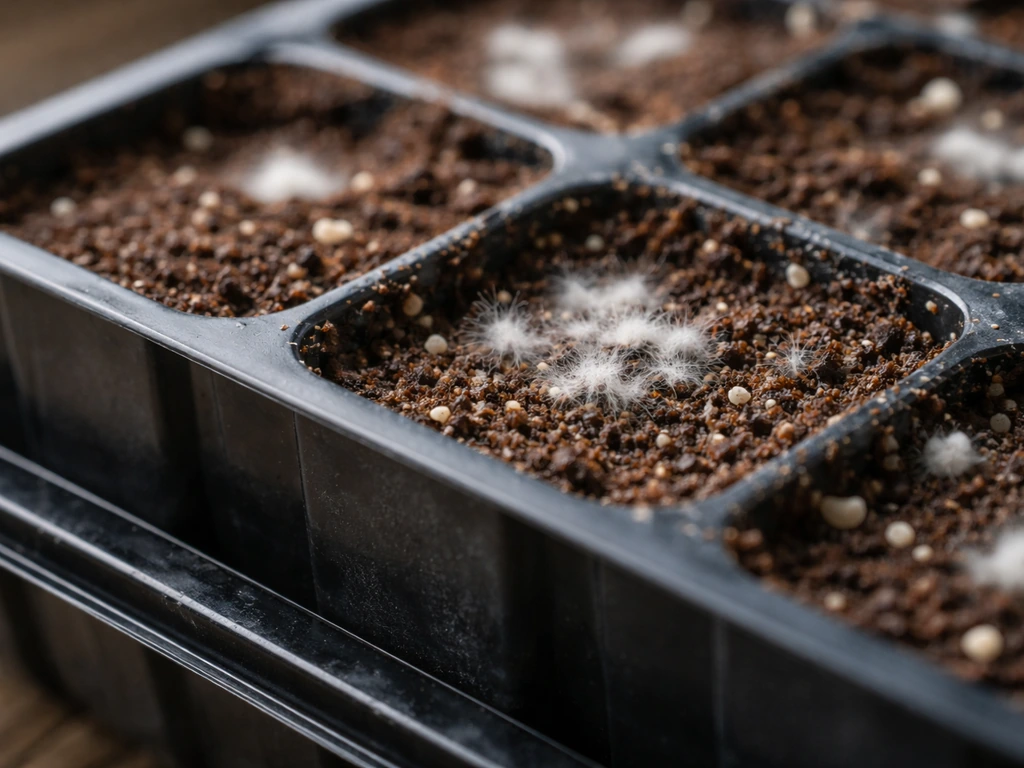
White mold on soil is almost always a watering problem. You are keeping the medium too wet with not enough airflow. Remove any dome immediately, let the top layer dry out slightly, and water less frequently going forward. If the mold is on the seeds themselves during stratification, rinse the seeds gently in clean water, replace the damp paper towel with a fresh one, and return to the fridge. For mold appearing in a water-based cup kit, change out the water completely as soon as you notice it getting cloudy. Acting fast here matters.
Leggy, thin, tall seedlings
Legginess means your seedling is stretching toward a light source that is too far away or too dim. This is the most common indoor seed-starting problem across all kit types, not just cherry blossom kits. Move your grow light closer, or if you are using a windowsill, rotate the pot daily and consider supplementing with a small LED grow light. If you are setting up a mini rose grow kit, the same idea applies: follow the mini rose grow kit instructions for positioning the light and keeping temps steady grow light. If you are using the Back to the Roots lavender grow kit, the step-by-step lavender grow kit instructions can help you match timing and conditions to the specific variety back to the roots lavender grow kit instructions. Using the right target grow kit instructions also helps you dial in the lighting and watering schedule for steady germination LED grow light. The target is 14–16 hours of adequate light per day. Also check that temperatures are not too high. Rooms consistently above 72°F push seedlings to grow fast and thin rather than compact and strong.
Overwatering and root rot
Yellowing lower leaves, a mushy stem at the soil line, or a sour smell from the soil are all signs of overwatering. If you catch it early, let the soil dry out completely (within reason), improve drainage by checking that the drainage hole is not blocked, and reduce watering frequency. If the stem is already mushy at the base, unfortunately the seedling is unlikely to recover. Start fresh with remaining seeds and water less aggressively next time.
Fungus gnats
Tiny flies hovering around your soil are fungus gnats. Their larvae live in the top inch of moist soil and can damage young roots. Let the top inch of soil dry out between waterings, which interrupts their lifecycle. For a heavier infestation, a soil drench treatment applied to the top inch of growing medium can kill larvae. Avoid over-applying liquid treatments because pushing insecticide too deep into the medium can do more harm than the gnats themselves.
Your kit instructions are missing or do not match your parts
Search the manufacturer's name plus the words "grow kit instructions PDF" and you will often find the correct guide online. For Seeds In A Cup kits specifically, their instructions are available on their website by kit name. For bonsai seed kits, look for a brand name on the packaging and check their product page. If you genuinely cannot find anything, the general framework in this article (soak, cold stratify 8–12 weeks, plant 0.5–1 inch deep, 14–16 hours of light, 65–72°F) will cover most legitimate cherry blossom seed kits. If you are using a different seed-starting setup altogether, you can use mini sunflower grow kit instructions as a related comparison for how the key steps are usually structured. Contact the retailer or manufacturer directly if parts are physically missing.
Your next 7–30 days: a quick action checklist
- Day 1: Identify your kit type and verify all parts are present. Look up the manufacturer's instructions online if the included guide is vague or missing.
- Day 1–2: Soak seeds in room-temperature water for 16–24 hours.
- Day 2: Transfer seeds to a damp paper towel in a sealed bag and place in the refrigerator. Label the bag with today's date.
- Weeks 2–16 (depending on kit): Check the bag every 1–2 weeks to ensure the towel stays damp. Do not rush this period.
- End of stratification period: Prepare your growing medium (expand coir pellets, fill soil cups loosely to three-fifths full, or layer the bonsai container). Plant seeds at the correct depth.
- First week post-planting: Keep the container in a warm spot at 65–72°F. Mist lightly. Do not overwater.
- Ongoing: Maintain 14–16 hours of light per day. Check soil moisture every 2–3 days. Watch for mold, gnats, and leggy growth.
- Weeks 2–6 post-planting: Watch for the first sprout. Remove any dome when you see it. Celebrate this moment — it is a genuine win.
- 6–10 weeks post-germination: Assess whether the seedling needs a larger pot. Transplant if roots are circling the bottom or escaping drainage holes.
- 30 days: If no sprout has appeared and stratification was completed properly, contact the kit manufacturer. Sometimes seeds are simply not viable, and reputable brands will send replacements.
FAQ
Can I skip cold stratification if I want faster germination?
With Prunus seeds, skipping it usually leads to very low germination. If you try anyway, plan for a long delay and consider a do-over if no sprout appears after several weeks. The safer option is to re-moisten, reseal, and run another full cold period (often another 4 to 6 weeks) before giving up.
How deep should I plant cherry blossom seeds in different kit types?
Follow the kit sheet if it states a depth, but a common range for Prunus is roughly 0.5 to 1 inch. If your kit uses a peat or coir pellet, ensure the surface is evenly pressed and the seed sits at that target depth once the pellet expands, not floating at the top.
What should I do if my seeds mold during stratification?
If mold appears on the paper towel or medium, rinse seeds gently with clean water, replace the damp paper with a fresh one, then return them to the fridge in a clean, sealed setup. If you used a water-based cup, swap the water immediately and keep an eye on cloudiness, since mold can accelerate quickly.
My seeds germinated, but the sprout never makes it out of the soil. Why?
Often the medium is too wet and crusted, too dry and shrinking, or the seed depth is wrong. Check moisture consistency, avoid packing soil, and maintain steady temperatures around 65 to 72°F. If a seed stays trapped, do not dig in repeatedly, as repeated disturbance can set progress back.
Should I cover the container with plastic after planting?
During the cold phase, coverage depends on the kit method, but after planting and once sprouts appear, remove domes or coverings to improve airflow. Stagnant humidity after emergence increases mold risk and can weaken thin seedlings.
What’s the right watering method for coir pellets versus loose soil?
For coir pellets, mist the surface instead of pouring so you do not create waterlogged pockets. For loose soil, water to slight drainage, then wait until the top half-inch dries a bit before watering again. Consistent moisture matters, but soaking and slow-draining trays are the main cause of damping off.
How do I prevent leggy growth if I only have a window?
Rotate the container daily so one side does not stretch toward the light. Keep the light source close, and if seedlings need frequent stretching to reach it, switch to a grow light. A small gap between lamp and canopy helps maintain compact growth.
Is 14 to 16 hours of light always required, even on cloudy days?
Yes, use a timer to keep the schedule consistent, and supplement on dim days. Cloudiness reduces intensity, so if you notice tall, weak growth despite the timer, move the light closer or increase light output rather than reducing hours.
What temperature range is safest after the cold period ends?
Aim for 65 to 72°F. Warmer rooms, especially above about 72°F with low light, encourage fast but weak, stretched seedlings. Avoid placing trays near heaters, radiators, or cold windows that cause daily swings.
How can I tell whether my kit contains the right species?
Compare leaf shape after emergence. True cherry seedlings develop oval leaves with serrated edges, and the first true leaves appear after cotyledons unfurl. If leaf form is consistently far off from cherry characteristics, it is worth contacting the seller with photos early.
When should I transplant, and how do I avoid root damage?
Transplant when roots poke from drainage holes or when growth slows despite good care, which is commonly around 6 to 10 weeks after germination. Choose a pot about 2 inches wider than the current container, and use well-draining potting mix. Handle seedlings by the leaves, not the stem.
Can I fertilize seedlings from a grow kit?
Generally wait until you have true leaves and sturdy growth, then use a diluted fertilizer at low strength. If seedlings are already struggling, do not fertilize to “fix” the problem, first correct light, temperature, and watering. Overfeeding can worsen damping-off risk.
My seedlings look fine, but the kit instructions are missing key steps. What should I do?
If the box lacks timing or stratification guidance, search for the manufacturer name plus “grow kit instructions PDF” and confirm species and recommended cold duration. If you cannot find a guide, use the standard framework for Prunus (cold stratify 8 to 12 weeks minimum, warm germination 65 to 72°F, and 14 to 16 hours of adequate light).
What do I do if fungus gnats appear in the container?
Let the top inch dry slightly between waterings, since larvae thrive in consistently moist upper soil. Yellow sticky traps help monitor adults, and for heavier infestations, use a top-inch treatment sparingly so you do not disturb deep into the medium or overapply chemicals.
Will my cherry blossom ever bloom, and how long should I plan for?
From seed, blooming usually takes several years and often 5 to 10 years, especially for container-grown trees. Healthy early growth is the objective, focus on strong roots and steady light first, then reassess pruning and long-term training later.