A Golden Teacher grow bag (or grow kit, same thing for practical purposes) is one of the most beginner-friendly ways to cultivate mushrooms at home, but the instructions that come in the box are often vague, cramped into a tiny leaflet, or written for someone who already knows what they're doing. This guide translates those instructions into a clear, start-to-finish walkthrough you can actually follow today. Whether you picked up a Tatandi kit, a Freshmushrooms kit, a MycoBag, or something similar, the core process is the same. I'll cover every stage, including the part most guides skip: what to do when things go wrong, and what to do after your first harvest.
Golden Teacher Grow Bag Instructions: Step-by-Step Guide

Marcus Thornfield
24 Mar 2026
One quick note before we dive in: One quick note before we dive in: always treat the printed instructions inside your specific kit as the final word on brand-specific details. This guide is designed to fill in the gaps and clarify the steps, not replace your kit's manual.
Choosing the right Golden Teacher grow bag and reading the included items
"Grow bag" and "grow kit" both refer to essentially the same product type here: a pre-inoculated substrate container (usually around 1200 ml) paired with a clear plastic grow bag that acts as a humidity tent. Some kits are bag-only, meaning the substrate is already inside a self-contained bag. Others are container-based kits that come with a separate bag you slip the container into. The workflow is slightly different between the two, but the fundamentals are identical.
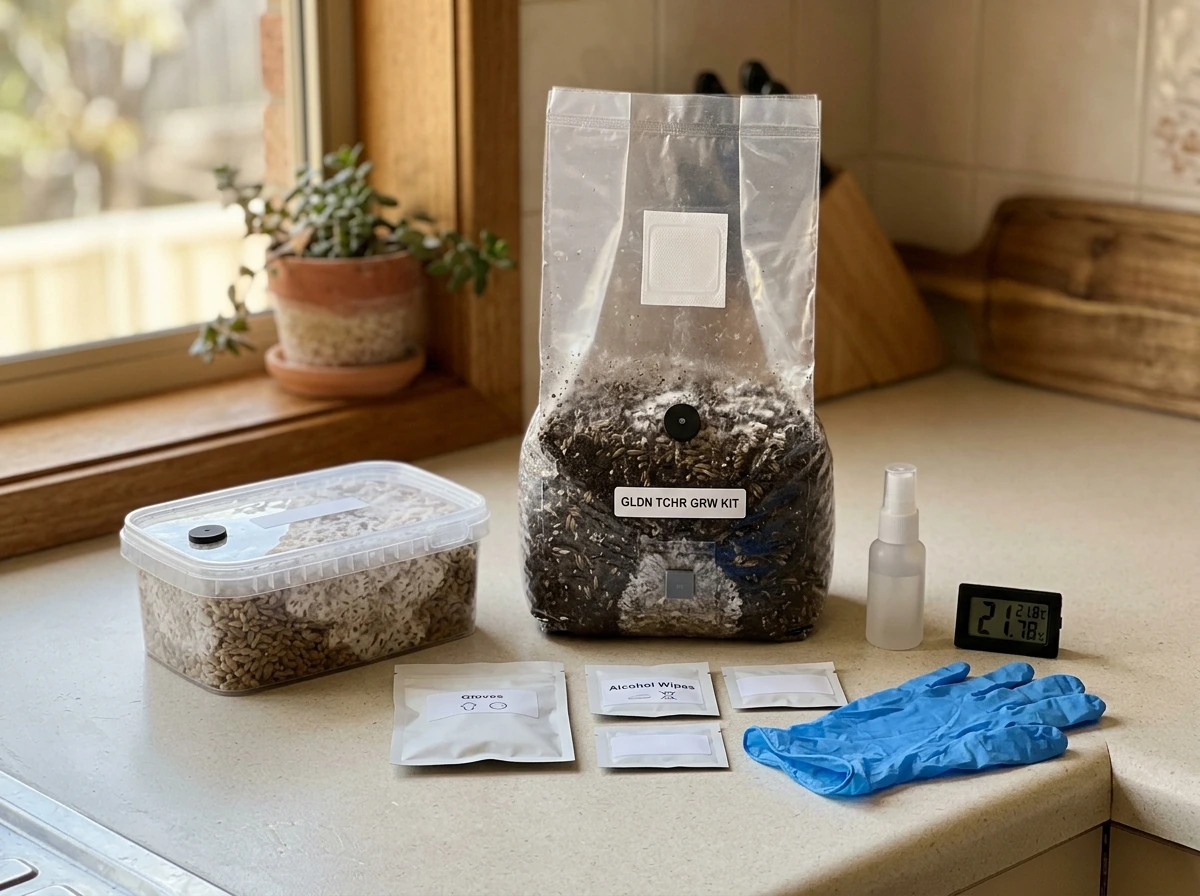
When you open your kit, check that all the expected items are present before you touch anything else. Most kits in this category include a similar set of components.
- A pre-colonized substrate container (typically 1200 ml) with a lid
- A clear plastic grow bag, often with a micro-perforation near the bottom or top for passive air exchange
- A small bag of casing substrate (a thin layer of peat or similar material to spread over the top of the block)
- A printed instruction manual or quick-start card
- Sometimes a paperclip or rubber band to help manage the bag opening
You'll need to supply a few things yourself: a clean spray bottle filled with tap water, isopropyl alcohol (70% works well), disposable gloves, a face mask, and ideally a thermometer to monitor your grow space. If you have a heat mat designed for plant propagation, that's worth having on hand too, especially if your room runs cool in winter.
One thing worth knowing right away: most Golden Teacher kits like the Tatandi version do NOT need hydration before the first flush. The substrate is already moisture-conditioned. Don't add water to the block itself at this stage. Save the watering steps for after your first harvest.
If you bought your kit and aren't using it immediately, store it in a refrigerator at 4 to 6°C and use it within 6 weeks. Beyond that window, colonization quality can decline.
Prepping the grow bag and workspace (sanitation, tools, and environment)
Contamination is the number one reason grow bags fail, and it almost always happens during setup. Invisible mold spores, bacteria, and wild yeasts are everywhere in your home, and they compete aggressively with the Golden Teacher mycelium. The good news is that a few minutes of prep work dramatically tips the odds in your favor.
Sanitize everything before you open the kit
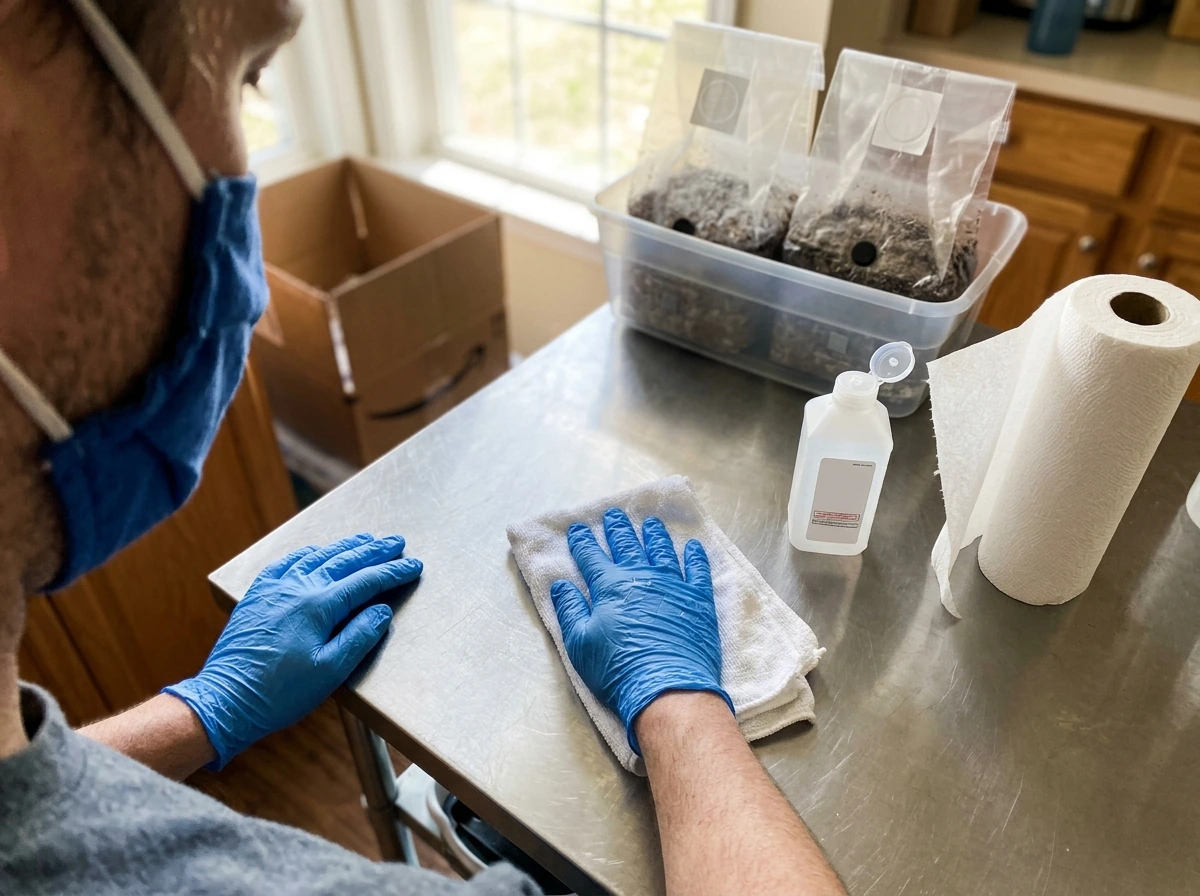
Wipe down your entire work surface with isopropyl alcohol and let it dry. Put on your gloves and mask before you open anything. This isn't overkill. Even clean-looking kitchen counters carry enough contaminants to ruin a flush. Think of this moment as a quick surgical prep. Wash your hands thoroughly even if you're wearing gloves, because gloves can tear without you noticing.
Keep pets and anyone who might sneeze or cough out of the room while you're setting up. Close windows to reduce airflow during the prep stage. Once the kit is in the bag and zipped, you're much less vulnerable.
Get your environment dialed in
Temperature matters more than most beginners expect. The ideal range for Golden Teacher fruiting is 18 to 28°C, with 23°C being the sweet spot. Too cool and growth stalls. Too warm and you risk contamination and weak pins. If your home runs below 20°C, place the kit on a seedling heat mat set to the low end of its range. A mat under the bag gently warms the substrate without overheating it.
Light exposure is indirect and minimal. A spot that gets natural ambient daylight, but never direct sun through a window, is perfect. Direct sunlight will dry out the bag, overheat the substrate, and stress the mycelium. A shelf in a room with curtains, or under a lamp on a 12-hours-on/12-hours-off schedule, both work well.
Step-by-step grow bag workflow (from setup to ongoing care)
The steps below reflect the most common workflow across Golden Teacher grow bag kits. Check your kit's manual to confirm any brand-specific variations, especially around casing substrate and ventilation schedules.
Initial setup
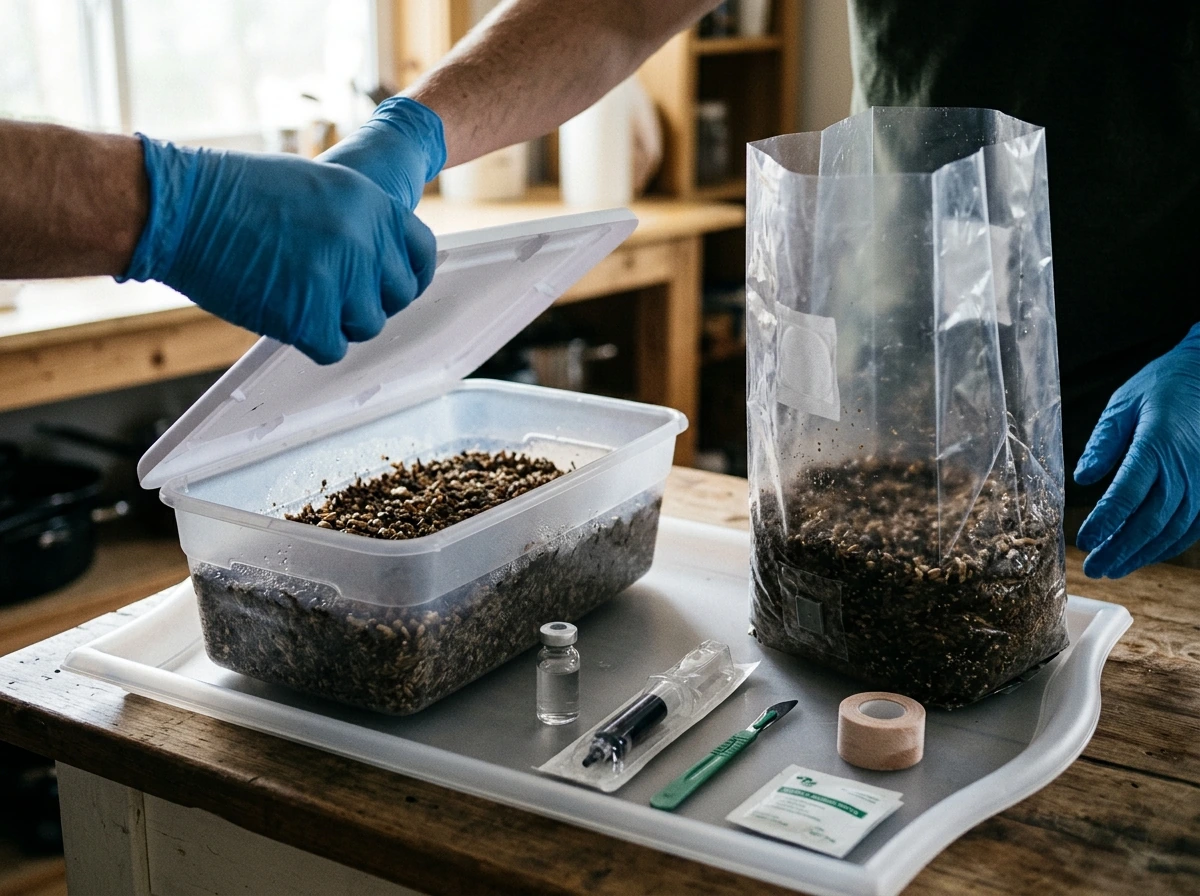
- Sanitize your workspace and put on gloves and a mask.
- Remove the lid from the substrate container and set it aside. You'll need it again later for rehydration.
- Open the small casing substrate bag and spread it in a thin, even layer over the top surface of the block. This casing layer helps retain moisture and encourages pinning.
- Add a small amount of water (just a tablespoon or two) to the inside of the grow bag itself, not to the substrate directly.
- Carefully slide the substrate container (without its lid) into the grow bag.
- Close the bag's zipper or fold-top to the halfway point. Not fully sealed, not fully open. That half-open position provides a small amount of passive gas exchange while holding in humidity.
Daily care during colonization and early pinning
Once the kit is set up, place it in your prepared spot at the right temperature and leave it mostly alone. Spray the inside walls of the grow bag once daily with clean water. Avoid spraying directly onto the substrate or casing layer. The goal is to keep the bag walls visibly moist, creating the humid microclimate the mycelium needs. If your environment is particularly dry, a second light spray in the evening is fine.
For bag-only kits like MycoBag, the approach is even simpler: keep the bag sealed at 25°C and do not open it until harvest. Moisture is maintained by misting the inside walls through the bag's sealable opening, then resealing. Expect to wait 25 to 35 days before you see anything developing.
For Freshmushrooms-style kits, the bag is positioned with its micro-perforation pointing upward and left slightly open during the initial phase to allow a small amount of moisture to evaporate. This prevents excess condensation from pooling on the substrate, which could invite contamination. You do not add water during this phase.
When primordia (first pins) appear
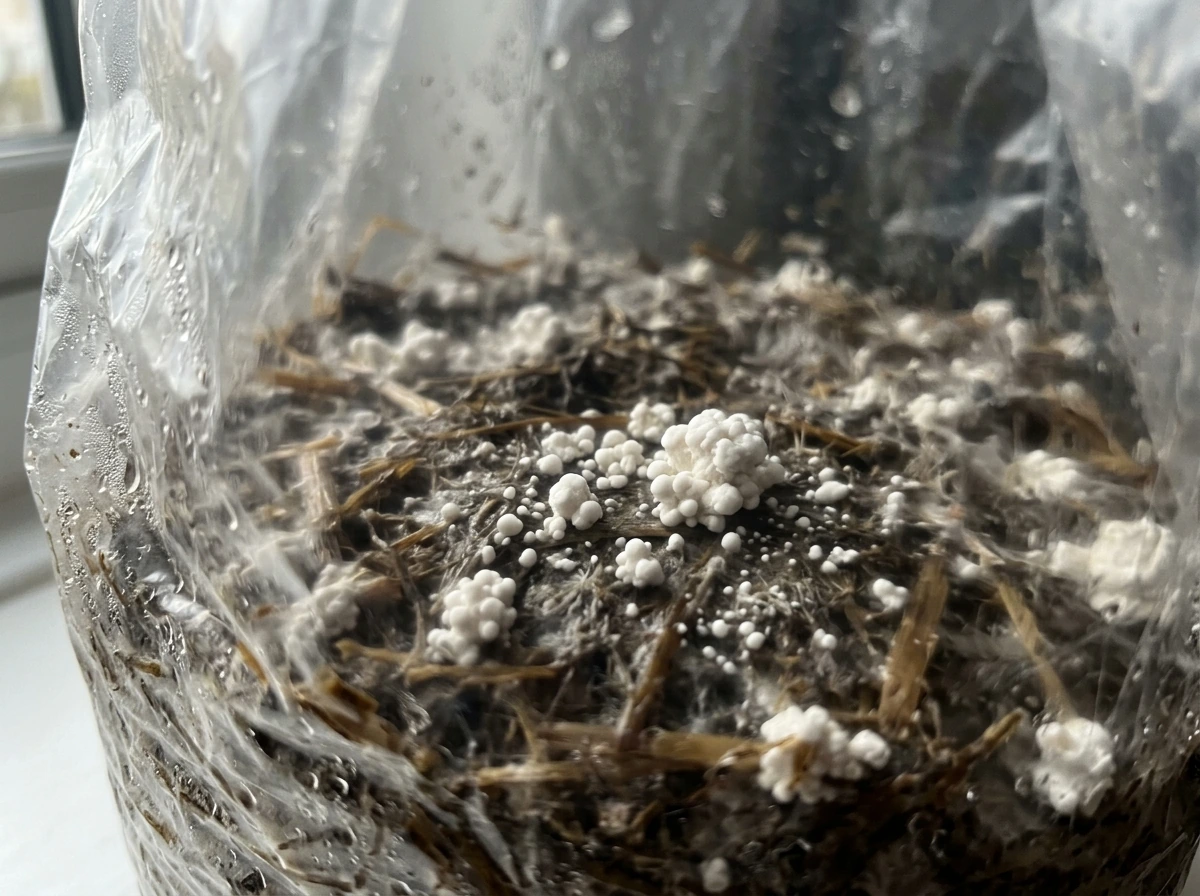
Primordia are the tiny white dots or knobby bumps that signal the first mushrooms are forming. In a Freshmushrooms kit, you can expect to see these within about a week. In a Tatandi or MycoBag setup, it often takes longer depending on temperature.
Once you see primordia, it's time to shift your care routine. Open the zipper to about two-thirds open (not fully open, not halfway). Now you need to actively ventilate the bag twice a day: fully open the bag, fan it gently for a few seconds to exchange the air, spray the inside walls lightly, and reseal to the two-thirds position. Azarius’ grow kit guide recommends opening the bag and gently fanning for roughly 20 to 30 seconds to exchange stale, CO2-heavy air for fresh air fan it gently for a few seconds to exchange the air. Each ventilation session should take about 10 minutes. This fresh air exchange (FAE) is essential. Without it, CO2 builds up inside the bag and causes mushrooms to grow long, spindly, and weak rather than short and dense.
Harvest timing, storage, and what to do after the run
When to harvest
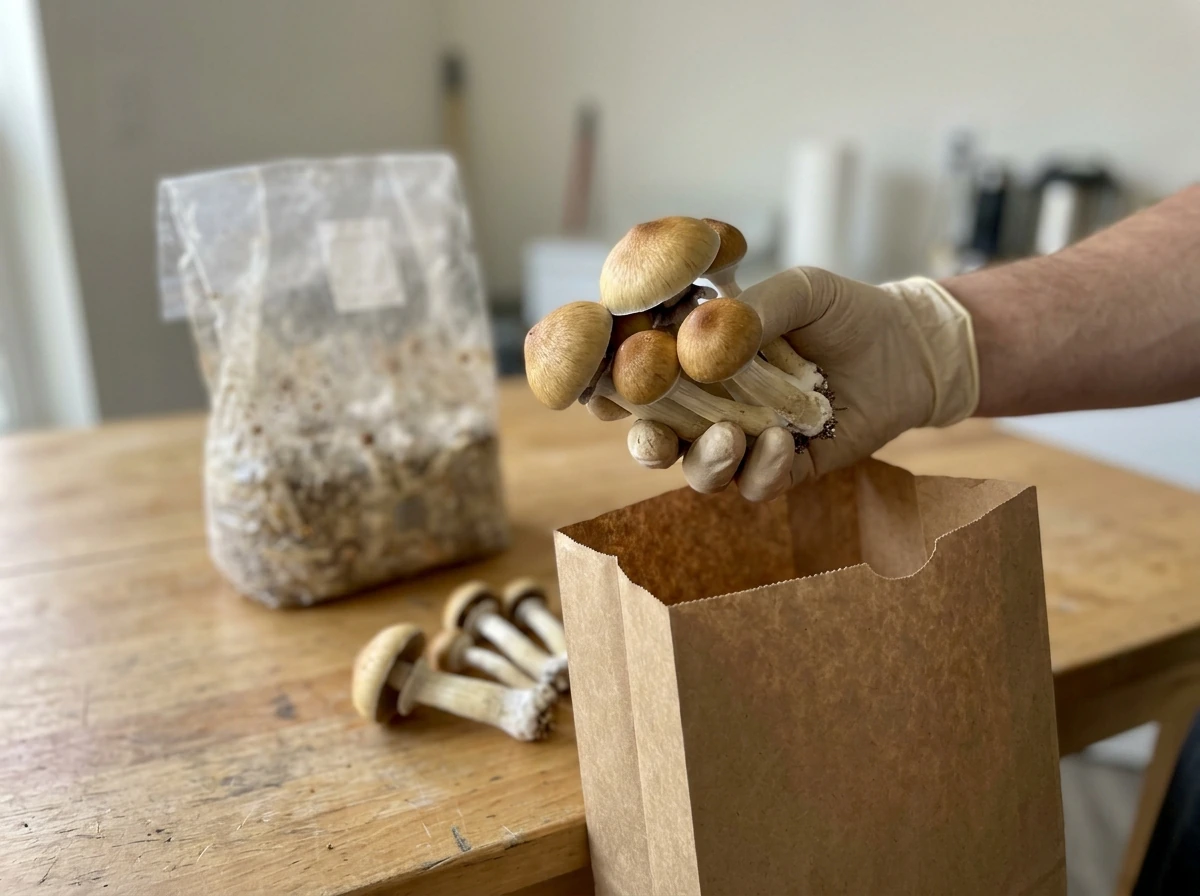
All three kit brands converge on the same harvest signal: watch the veil. The veil is the thin membrane connecting the edge of the mushroom cap to the stem. As the mushroom matures, that veil stretches and eventually tears. Harvest 5 to 6 hours after you see the veil beginning to break. At that point, the mushrooms are at peak potency and size. If you wait until after spores start dropping (you'll see a dark powdery dusting on the substrate and lower mushrooms), you've waited too long. Spore drop can also contaminate the substrate and shorten the life of your kit.
To harvest, grip each mushroom firmly at the base, twist it slightly, and pull upward with gentle, steady pressure. Don't yank or cut. Twisting and pulling cleanly removes the entire base without leaving stem tissue behind to rot. Leftover stem tissue is a contamination risk and can delay the next flush.
Between-flush rehydration
After your first harvest, the substrate needs to be rehydrated before it can produce another flush. This is where most beginners get confused, but it's straightforward once you know the steps. Between-flush rehydration for magic grow capsules is similar, but always follow the specific timing and dosing in the capsule instructions magic grow capsules instructions.
For Tatandi-style kits: remove the container from the grow bag, fill it to the brim with clean tap water, place the lid back on, and let it soak at room temperature for 20 minutes. Drain off all the excess water, then put the container back in the grow bag and repeat the growing steps from the beginning.
For Freshmushrooms-style kits: after the first harvest, fill the kit with clean cold tap water, rest it for 12 hours (this cold shock stimulates the mycelium), then open a corner of the lid to drain the excess water. Replace the kit in the bag and repeat the earlier steps. Cold tap water is intentional here. The temperature drop mimics natural rainfall and gives the mycelium a signal to fruit again.
For MycoBag-style kits: after harvesting, reseal the bag and mist the inside walls with water before closing. The bag stays the primary humidity tool throughout multiple flushes.
Storing your fresh harvest
The specific Golden Teacher grow bag manuals don't cover post-harvest drying in detail, so here's what's generally accepted for fresh mushrooms: store them in a paper bag in the refrigerator and use them within a few days. Paper (not plastic) allows the mushrooms to breathe and prevents moisture buildup that speeds up spoilage. For longer storage, a food dehydrator set to around 35 to 45°C will dry them down to "cracker dry" (no bendiness at all), at which point they can be stored in an airtight jar in a cool, dark place for months.
Troubleshooting common grow bag issues and how to fix them
Problems are normal, especially on your first run. Here's what you're most likely to see and how to respond.
| Problem | Likely Cause | What to Do |
|---|---|---|
| Green, black, or pink patches on substrate | Contamination (mold) | Remove the kit from the grow bag immediately. Do not open the bag indoors. Discard the kit. Do not try to salvage it. |
| No pins after 2 weeks | Temperature too low, or CO2 too high | Check that temp is 18–28°C. Add ventilation. Try placing on a heat mat. Some kits take up to 35 days. |
| Mushrooms growing long and thin (leggy) | Too much CO2, not enough fresh air exchange | Increase ventilation to twice daily for 10 minutes. Open the bag more fully during FAE sessions. |
| Substrate looks too dry / bag walls have no moisture | Not enough misting | Spray the inside bag walls more frequently. Do not spray the substrate directly. |
| Excessive condensation pooling on substrate | Bag too sealed, too much water | Leave the bag opening slightly more open. Reduce misting frequency. |
| Second flush isn't coming after rehydration | Incomplete soak, or kit is exhausted | Ensure the full soak/drain cycle was done properly. Some kits only reliably produce 2–3 flushes. |
| Mushrooms opening caps very fast | Temperature too high, or harvest delayed | Harvest immediately. Lower room temperature if above 28°C. |
A quick note on green contamination: Trichoderma mold (bright green patches) is the most common contaminant in mushroom grow bags and it spreads fast. If you see it, the kit is done. There's no saving it. The earlier you catch and remove it, the less chance it spreads spores around your grow space. Wipe down the area with alcohol after discarding.
If your kit stalls but doesn't show visible contamination, don't panic. Temperature fluctuations, a draft from an air conditioner, or simply a slower-than-average colonization timeline are all common causes of delayed pinning. Azarius recommends high humidity of around 90, 95% inside the bag along with daily fresh air exchange, and for stalled kits past day 14 with no pins, a cold-shock step using a fridge at roughly 2, 5 °C for 12 hours stalled but doesn't show visible contamination. Give it a few extra days at stable temperature before assuming something is wrong.
Safety, legal considerations, and realistic expectations
This is the section that matters, and it's worth reading carefully. Golden Teacher is a well-known strain of Psilocybe cubensis, a species that contains psilocybin, a controlled substance in many countries and U.S. states. Laws vary significantly depending on where you live. Laws vary significantly depending on where you live. In some jurisdictions, growing mushrooms from a spore kit is explicitly illegal. In others, spores are legal to possess but cultivating them to fruiting bodies is not. In others, spores are legal to possess but cultivating them to fruiting bodies is not. In a small number of places, cultivation has been decriminalized or legalized under specific conditions.
It is your responsibility to verify the laws in your specific location before proceeding. This guide does not constitute legal advice, and the information here is provided for educational purposes only.
Most grow bag kits sold commercially include a legal disclaimer on this point. Tatandi's instructions, for example, explicitly state the kits are manufactured exclusively for scientific, ornamental, or collectible use, and that the instructions apply only to individuals over 18 years of age. That language is there for a reason. Take it seriously.
On safety in the grow room: the sanitation steps in this guide aren't just for mushroom health. Mold spores released from a contaminated kit can be a respiratory irritant, which is why the mask recommendation is genuine, not performative. If you're immunocompromised or have respiratory sensitivities, take extra care, or consider whether this type of cultivation is appropriate for your situation.
As for realistic expectations: a healthy Golden Teacher grow bag can produce two to four flushes before the substrate is exhausted. The first flush is typically the largest. Yields vary widely based on temperature control, humidity, and how cleanly the setup was handled. Don't be discouraged if your first run produces less than you expected. The most common reasons are temperature being too low, not enough fresh air exchange, or harvesting too late. All of those are fixable on the next run.
If you're working with other mushroom grow bag formats (not Golden Teacher), the general workflow here will overlap significantly. If you're working with other mushroom grow bag formats (not Golden Teacher), the general workflow here will overlap significantly, and you can use all-in-one mushroom grow bag instructions as an adjacent guide for the same kind of step-by-step setup. The ventilation schedule, humidity management, and rehydration process are consistent across most pre-colonized bag kits. You can also find brand-specific breakdowns for other kits on this site, including all-in-one mushroom grow bag setups and other branded options, if you want to compare approaches or troubleshoot a different model. north spore grow bag instructions north spore grow bag instructions The ventilation schedule, humidity management, and rehydration process are consistent across most pre-colonized bag kits. You can also find brand-specific breakdowns for other kits on this site, including all-in-one mushroom grow bag setups and other branded options, if you want to compare approaches or troubleshoot a different model. spore sorcery grow bag instructions
FAQ
Can I reuse the same gloves and mask for the whole setup and multiple days?
For best results, use fresh disposable gloves during setup and replace them if you touch anything non-sanitized, like your phone, door handles, or the floor. Masks are for reducing inhalation exposure, but replace them if they become damp or hard to breathe through, and do not reuse for multiple unrelated sessions if you can avoid it.
What water should I use in the spray bottle, tap water or distilled?
Tap water is usually fine for the inside-wall misting described in these grow bag instructions. If your area has very hard water or strong chlorine taste, consider filtering or resting tap water overnight so the odor/aerosols reduce, since mineral buildup and chemical residue can contribute to messy moisture and off growth.
How do I tell the difference between too much humidity and too much fresh air exchange (FAE)?
Too little humidity often shows dry bag walls and slow or sparse primordia. Too much FAE typically dries the microclimate, leading to faster moisture loss and small or stressed pins. Watch for CO2 signs, if the mushrooms become long and weak, that points to insufficient FAE, while uniformly wet pooling or heavy condensation can point to excess moisture or poor positioning.
Should I open the bag more than twice per day once primordia appear?
Usually no. The twice-daily ventilation described is designed to balance CO2 removal and moisture retention. More openings increase drying and can stress pins, especially if your room is cooler or has moving air. If growth is slow, adjust temperature and misting first, then consider slightly extending each ventilation session rather than increasing frequency.
What if my bag keeps getting condensation beads on the inside walls during the early phase?
A little condensation is normal, but heavy droplets that run downward are a red flag. For container-based kits, keep the orientation and “open slightly to evaporate” approach used in Freshmushrooms-style setups, and avoid spraying directly toward the substrate. Wipe the excess moisture from the bag walls with a clean paper towel only if you can do it without leaving fibers behind and without breaking your sanitation routine.
Is a thermometer enough, or should I also track humidity?
A thermometer is the most important control. If you only have one measurement tool, prioritize temperature, since Golden Teacher fruiting stalls when it drops too far. If you can measure humidity, aim for the environment to support condensation on the bag walls, not dripping pools, because bag wall moisture is the practical indicator in these kits.
My mushrooms look “blurry” or mushy, is that necessarily contamination?
Not always, but it can be. Mushrooms that are slimy, collapse quickly, or show unusual discoloration can indicate bacterial or mold issues. Green patches (Trichoderma) are a clear stop signal. If you suspect an issue, isolate the kit, stop aggressive opening, and check closely for odor changes and any spreading discoloration before deciding whether to discard.
What should I do if I miss the harvest window and spores start dropping?
If spore drop has already occurred, harvest may still be possible for remaining mushrooms, but expect reduced potency and potentially shorter kit life due to contamination risk and substrate stress. After harvesting, proceed with the correct rehydration method for your kit style, and be extra strict about sanitation during the next flush setup.
Do I need to remove every mushroom base completely to get the next flush?
Yes, leaving behind stem tissue can rot and can seed contamination. Twist and pull with gentle steady pressure so the base comes out cleanly. If you notice a leftover chunk, remove it carefully with sanitized hands or tools, minimizing how long the kit stays open.
Can I keep the grow bag in the same place after a flush, or do I need a full reset?
In most cases, you keep it in the same prepared spot, but a “reset” is still smart after you harvest, especially if anything touched the outside of the bag during removal. Re-sanitize your work area, and confirm temperature and light conditions match your earlier success setup before starting the next rehydration and ventilation cycle.
How long can I store freshly harvested mushrooms without quality dropping fast?
Refrigeration in a paper bag is intended for short storage, use within a few days for best texture and potency. If you plan to keep them longer, dehydrate to “cracker dry,” then store in an airtight jar in a cool dark place. Avoid plastic for short-term storage because trapped moisture accelerates spoilage.
What should I do if the kit seems dead, no primordia at all after the expected time?
First confirm temperature stability, avoid drafts from fans or HVAC, and check that you are not skipping daily bag wall misting. For container-based kits, also verify that your primordia trigger phase and later ventilation phase are happening (two-thirds opening and twice-daily FAE once you see pinning). If you have been stable and still see nothing well past the typical range, don’t keep opening repeatedly, instead reassess temperature, placement (indirect light, no sun), and contamination signs.
Are there any common mistakes that directly cause failure in Golden Teacher grow bag instructions?
The biggest mistakes are adding water before the first flush when the kit expects none, spraying onto the substrate or casing instead of only bag walls, and failing to ventilate adequately after primordia show (leading to long, weak mushrooms). Also watch for harvesting too late, because letting spores drop can shorten the productive life of the bag.