Tree grow tubes are plastic sleeves you push over a young tree seedling to protect it from deer browse, wind, and herbicide drift while creating a warm, humid microclimate that speeds up early growth. To use them correctly: plant your tree at the right depth with the root flare visible, drive a stake into the ground about half the tube's diameter away from the stem, slide the tube over the tree and down to the soil surface (pushing it in about 1–2 cm), and secure the tube to the stake with ties. That's the core of it. The rest of this guide covers choosing the right tube, avoiding the most common mistakes, and knowing when to take the tubes off before they do more harm than good.
How to Use Tree Grow Tubes Step-by-Step Guide

Marcus Thornfield
2 Jul 2026
What tree grow tubes are actually for (and when they're worth it)
blank" rel="noopener noreferrer">Grow tubes do a few specific jobs. They block deer and rabbits from browsing on your seedling. They reduce moisture loss from wind. They create a warmer, more humid pocket around the stem that can push early growth faster than an unprotected tree in the open. In forestry and reforestation contexts, they also make it easier to apply herbicide around the tree without spraying the foliage directly.
They're worth using when browsing pressure from deer or rabbits is high, when you're planting in an exposed site with strong winds, or when you're establishing multiple trees across a large area and need a low-maintenance protection system. If you're unsure whether deer pressure is actually a problem on your land, look for browsed stems, hoof prints, or rub marks on existing vegetation before you invest in tubes. Light pressure might not justify the cost.
They're less useful (and can actually cause problems) in very hot climates, shaded sites, or situations where you plant a tree and then forget about it for a full season. The greenhouse effect inside a solid-walled tube can keep a tree growing late into the fall, blank" rel="noopener noreferrer">delaying wood hardening and reducing cold tolerance. That's a real risk in cooler climates and something to plan around. If you're working with specific kit-grown seedlings, such as giant sequoia or living Christmas tree kits, the same principles apply once you move those seedlings into an outdoor planting situation. If you have a money does grow on trees plant kit, follow the same grow-tube principles once your seedling is ready for outdoor planting kit-grown seedlings.
Pick the right tube and prep your site
Choosing tube height and style
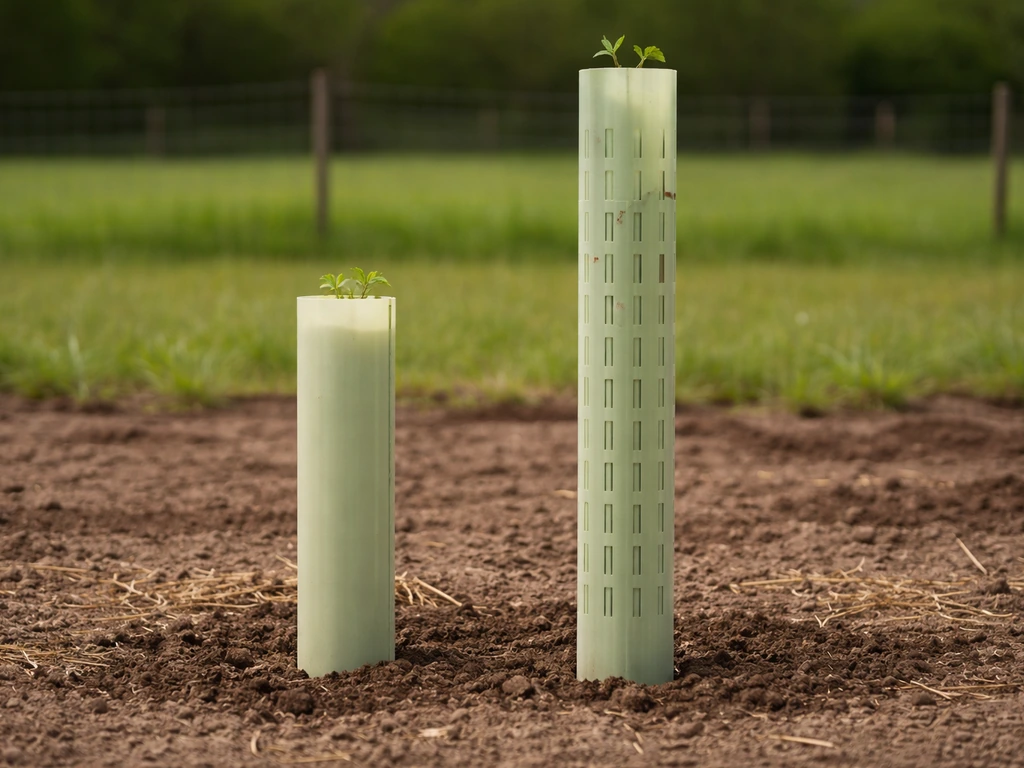
Tube height is driven by the deer pressure on your site. Standard options run from about 18 inches (for rabbit protection only) up to 5 feet (for full deer protection). If you're in an area with white-tailed deer, go with at least a 4-foot tube. Tubes 4 feet and taller should generally be vented if you're in a warm climate or want to avoid the late-season growth problem mentioned above.
Solid-walled tubes are the most common and work well in most situations. Ventilated designs (like the Tubex Ventex) are purpose-built for warmer climates and modify the internal balance of CO2, humidity, and light for better outcomes when heat buildup is a concern. If you have a solid-walled tube and want airflow without buying a new product, some manufacturers like Blue-X support venting by using a staking method or ventilation punch to add holes, but read the instructions for your specific tube before modifying it.
| Tube Type | Best For | Watch Out For |
|---|---|---|
| Solid-walled (standard) | Most climates, deer and browse protection | Heat buildup, delayed hardening in fall |
| Ventilated / mesh | Warm climates, heat-sensitive species | Less condensation protection, slightly less browse protection |
| Short (18–24 in) | Rabbit/rodent pressure only | No protection from deer browse |
| Tall (4–5 ft) | High deer pressure sites | Needs staking, may need venting |
Prepping the planting site
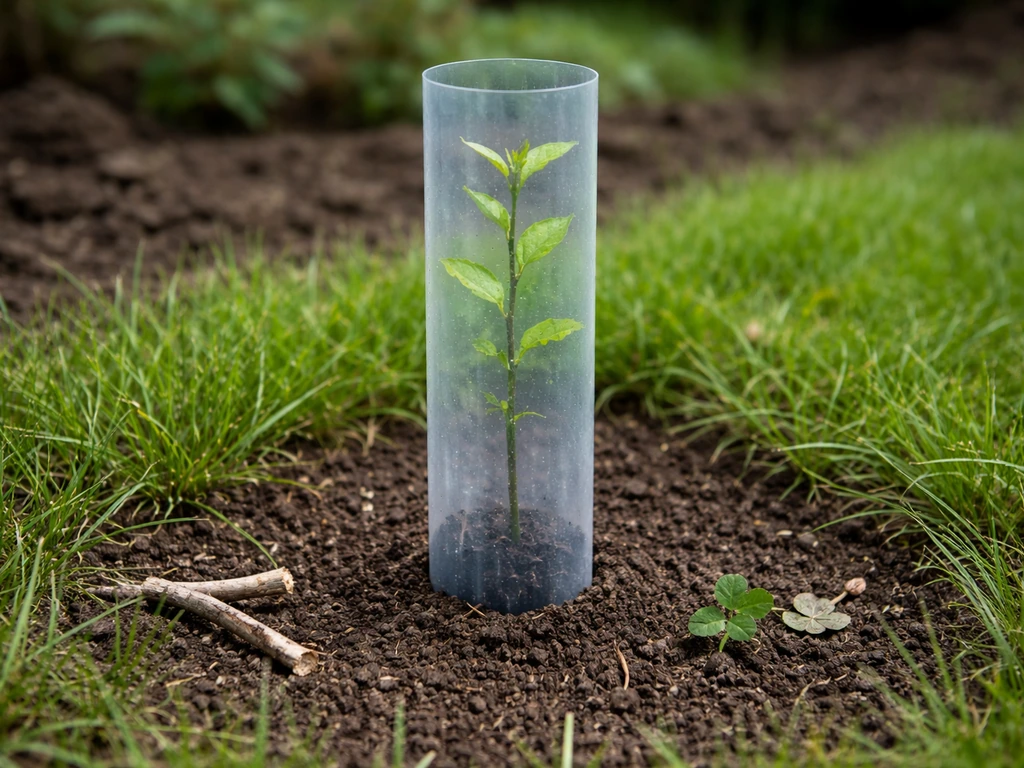
Before you put the tube anywhere near a tree, get your planting depth right. This is the single most common mistake and it causes long-term problems that tubes can't fix. The root flare (the spot where the trunk widens as it meets the roots) must sit at or very slightly above the soil surface. If you bury the root flare, the tree will struggle and eventually fail, tube or no tube. When digging your hole, set the depth so the flare lands at grade or a centimeter or two above it. If the tree came in a container, measure from the flare to the bottom of the root ball and dig to that depth, not just to the depth of the container.
Clear a circle of at least 3 feet around the planting spot. Remove grass, weeds, and any competing vegetation. Weed competition is one of the biggest killers of young trees in the first two years, and a tube won't help if grass is robbing moisture and nutrients from the root zone. A layer of mulch around the base (not touching the trunk) helps suppress weeds and retain moisture.
Step-by-step installation
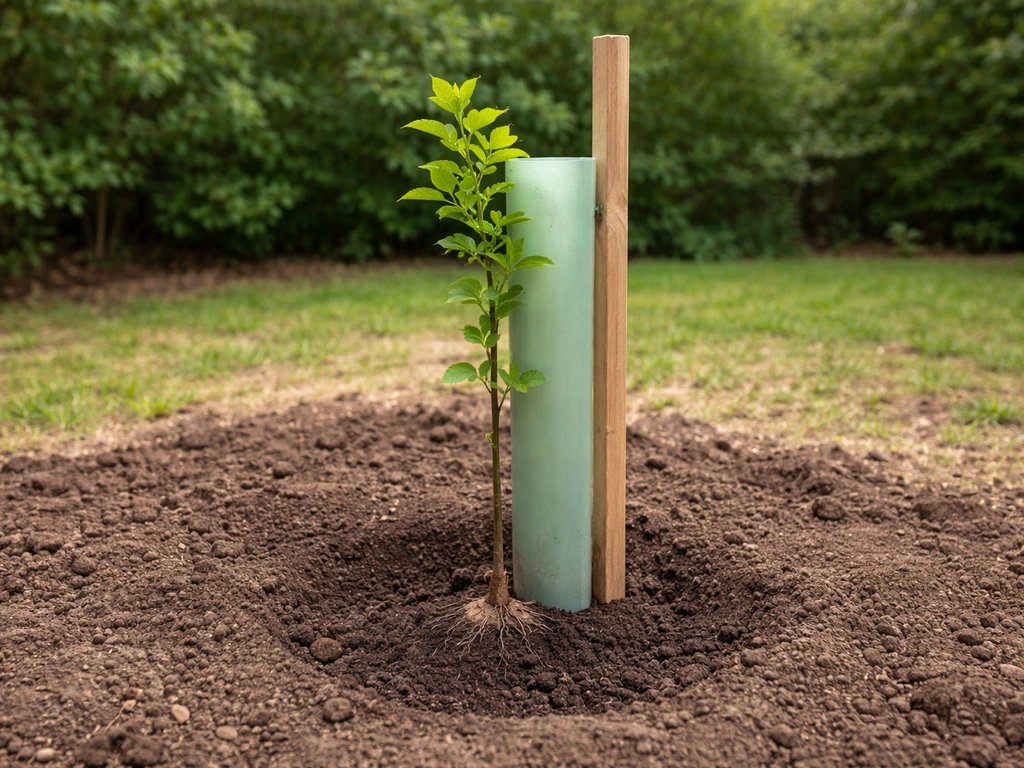
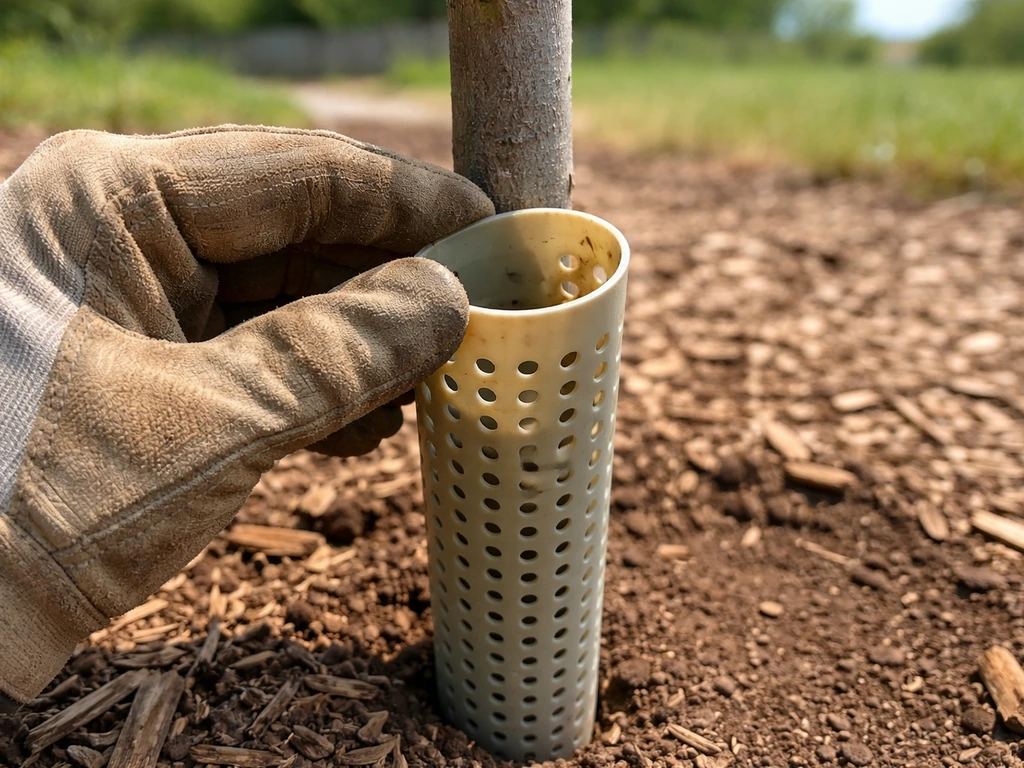
- Plant your tree at the correct depth with the root flare visible at or just above ground level.
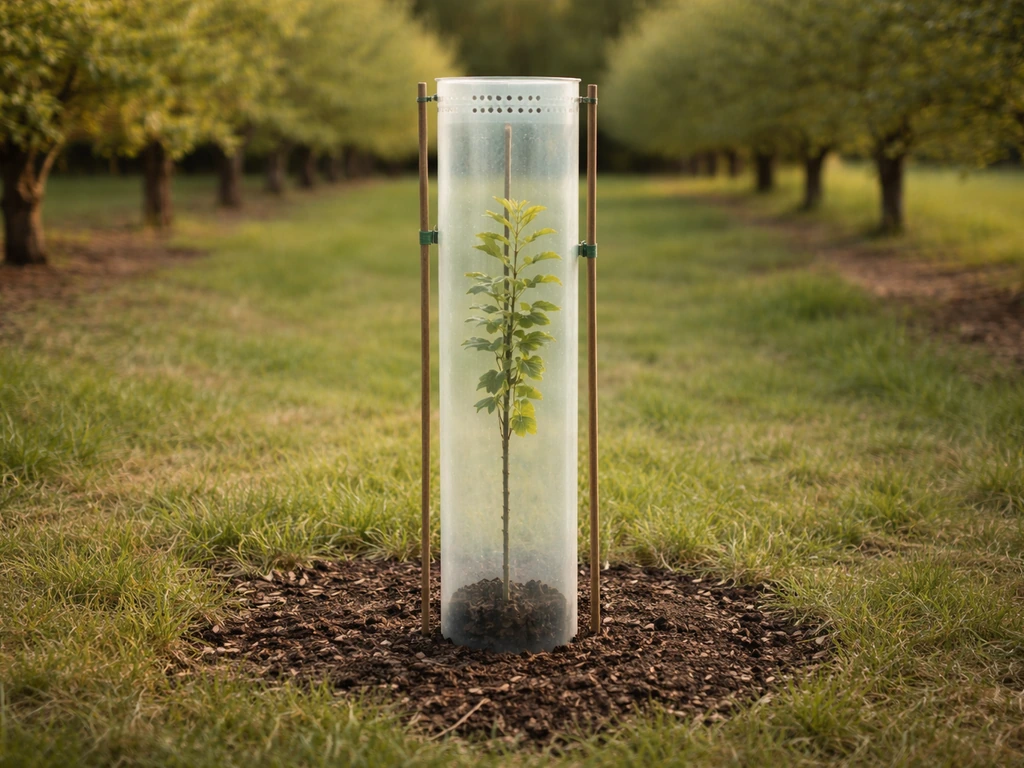
- Choose your stake: it should be as tall as or slightly taller than the tube you're using. A quality wooden or fiberglass stake is fine for most applications. Drive it into the ground first, before the tube goes on, so you don't accidentally damage the root ball by hammering near the tree.
- Position the stake about half the tube's diameter away from the seedling stem. For a tube that's 4 inches across, place the stake about 2 inches from the stem. This keeps the stake from rubbing the tree while still supporting the tube firmly.
- In areas with a strong prevailing wind, place the stake on the windward side of the tree (the side the wind comes from). This way the tube pushes against the stake rather than away from it in a gust.
- Slide the tube over the tree and down to ground level. Push the bottom edge into the soil about 1–2 cm (roughly half an inch to an inch). This seals the base and prevents a wind-tunnel effect where air rushes up from the bottom past the foliage. Some manufacturers advise against pressing the tube into the ground if rodent pressure is a concern, since a buried edge can create a sheltered entry point for mice. Know your site and use your judgment.
- Secure the tube to the stake using the ties or clips included with your tube. Attach at the top and ideally mid-point for taller tubes. Ties should be snug enough to keep the tube from spinning or shifting but not so tight they bite into the tube material.
- Check that the seedling stem is not pressed against the tube wall. There should be a small gap of air around the stem inside the tube.
If you're using a mesh or rigid tube protector (like Plantra-style products), the installation sequence is slightly different: drive the stake first, then slide the protector over the stake so the stake runs along the outside of the tube wall, and press or push the base to the ground from there. Check your product's instructions since the tie placement varies by brand. If you're using a palm tree grow kit, follow the kit's instructions closely for the right setup and timing Check your product's instructions.
Ongoing care and maintenance
Airflow and venting
For solid-walled tubes in warm climates or on sites with intense summer heat, check the inside of the tube during your first few site visits. If you're consistently finding wilted foliage, excessive condensation dripping onto the stem, or the tree looks bleached rather than green, airflow is your problem. Ventilated tubes solve this at the design level. For solid tubes, follow your manufacturer's guidance on adding vent holes (punch or drill a few holes near the top of the tube, away from direct soil level). Blue-X notes that tubes 4 feet and taller can be vented this way when needed.
Managing ties as the tree grows
Check every tie point at least once a season. Trees grow fast inside tubes, and a tie that felt loose in spring can be digging into the tube wall or stem by midsummer. Loosen any tie that looks tight or that's leaving an indentation in the plastic. This is the same principle you'd use managing any garden tie: the moment it starts to constrict, it becomes a problem. Replace worn or brittle ties promptly.
Weed control around the base
Keep a weed-free zone around the base of each tube. Grass and weeds that grow right up against the tube base can trap moisture against the stem and create a hiding spot for rodents. Pull weeds by hand close to the tube rather than using a string trimmer, which can nick the tube or the stake and eventually damage the tree if the tube shifts.
Troubleshooting common problems
The tree looks stunted or barely growing
First, check planting depth. If the root flare is buried, the tree is essentially being choked at the base even if it looks fine above ground. Gently clear the soil around the base of the stem. If you find the flare is an inch or more below grade, you'll need to dig up and replant at the correct depth. This is uncomfortable to do but it's the right call. A tree planted too deep will not thrive long-term.
Second, check airflow. A completely sealed tube with no venting in a hot climate will stall growth rather than boost it. Vapor pressure and CO2 levels inside the tube matter, and a well-designed ventilated tube or a few vent holes near the top can make a significant difference.
The tube is leaning or keeps falling over
Your stake isn't deep enough or isn't tied to the tube securely. A stake's depth should roughly match the tube height as a rule of thumb. A 4-foot tube needs a stake driven deep enough to resist the leverage of the full tube length in wind. Re-drive the stake and re-tie the tube. If the soil is very soft or sandy, use a longer stake or add a second stake on the opposite side.
Condensation pooling inside the tube
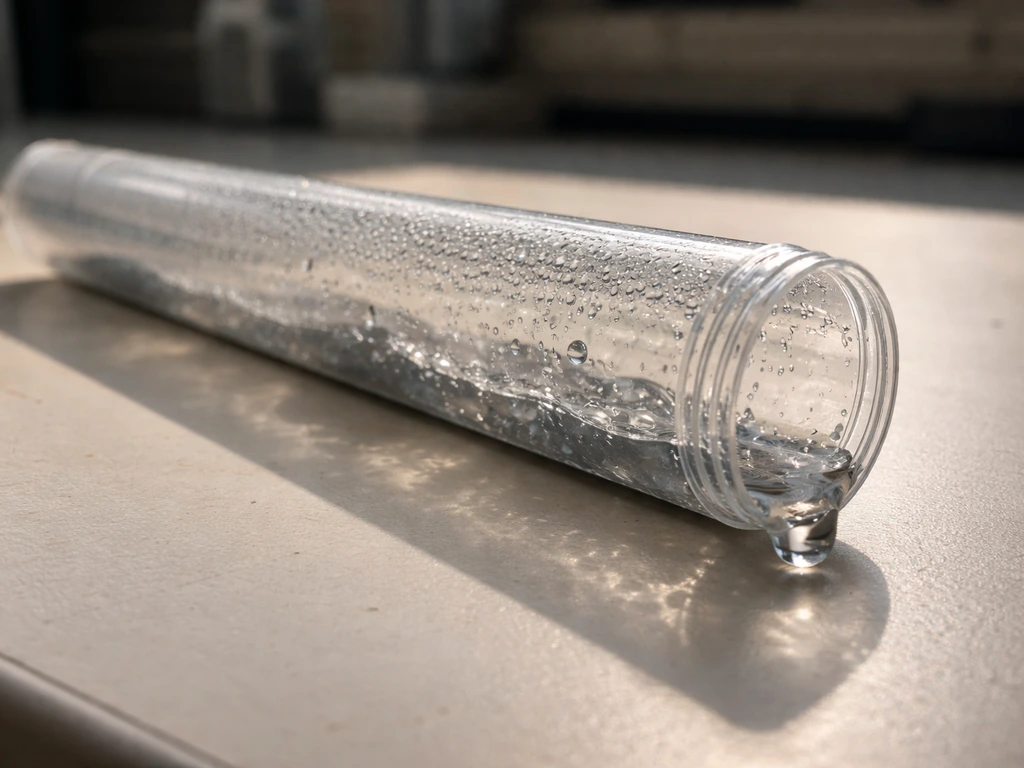
Some condensation inside a tube is normal and even beneficial. Excessive pooling that drips constantly onto the crown or stem can promote fungal issues. The fix is ventilation: add vent holes near the top of the tube or switch to a ventilated product. Also check that the tube base isn't creating a completely sealed environment at soil level.
Rubbing or girdling at the stem
If the stem is pressed against the tube wall and rubbing as the tree moves in wind, that abrasion can cause real damage over time. Check that your stake is positioned correctly (roughly half the tube diameter from the stem) and that the tube has a bit of play around the stem. If the tree's stem has already grown wide enough to press against the tube interior, you're approaching removal time. Don't wait until the tube is actually constricting the stem.
Pests getting inside the tube
Voles and mice love the warm, protected space inside a grow tube. If you're seeing chewing damage at the base of the stem, check whether the tube base is sealed to the soil. A tube pushed in 1–2 cm usually discourages entry, but on sites with high rodent pressure you may need to lay a small wire mesh collar at the base before placing the tube. Check the base of each tube during every site visit in autumn and spring when rodent activity is highest.
Tree emerging from the top and getting rubbed by the tube rim
Once the leader (main stem) grows out the top of the tube, the rim can rub against it in wind. This is a sign the tree is doing well, but the tube is now starting to work against you. If you are growing a living Christmas tree kit, these tube-care and ventilation checks are the same basics you will follow from day one grow a living christmas tree kit instructions. Don't leave the tube on for much longer once the leader has emerged significantly. Trim or score the tube to allow the stem to emerge cleanly, or proceed to full removal.
When and how to remove grow tubes
Most grow tubes should come off within 3 to 5 years, once the tree has developed enough stem caliper and root system to support itself without protection. The clearest sign it's time: the stem at the base of the tube is firm, the bark is developing normally, and the leader has been out the top of the tube for at least a full growing season. Don't leave tubes on indefinitely. A tube that was once protecting a small seedling can become a constriction risk as the stem expands.
To remove safely, first cut or untie all ties. Then gently lift the tube straight up off the tree. Don't yank or twist it, especially if the stem has grown close to the tube wall. If the tube feels stuck, score it vertically with a utility knife and peel it open rather than forcing it over the stem. Some tubes are designed to be slit open for exactly this reason.
After removal, inspect the stem carefully. Look for any indentations, bark damage, or spots where the tube was pressing. Minor surface marks usually resolve on their own. Deeper constriction marks that look like a groove in the bark need monitoring over the following season. Remove the stake at the same time or shortly after, since a stake left in place too long can itself cause issues as the tree expands.
Plan for recycling or disposal when you remove tubes. Plastic tubes don't biodegrade in the field and they become litter if left to break down on site. Many local agricultural extension offices or reforestation programs have tube recycling options worth checking out.
Finish the job today: your quick checklist
- Root flare is at or just above soil grade (not buried)
- Planting hole is the right depth: measure from flare to bottom of root ball
- 3-foot weed-free zone cleared around planting spot
- Stake driven before tube is placed, about half the tube diameter from the stem
- Stake is on the windward side in exposed sites
- Tube base pushed into soil about 1–2 cm (unless rodent pressure is high)
- Tube secured to stake at top and mid-point with snug but non-constricting ties
- Stem has a small air gap around it inside the tube (not pressed against the wall)
- Vent holes added or ventilated tube used for tubes 4 ft and taller in warm climates
- Weed control plan in place for the base area
- Ties checked and loosened if needed (plan to check again mid-season)
- Removal date or checkpoint noted (aim to assess at year 3)
If you're working with kit-grown seedlings from products like giant sequoia grow kits, palm tree grow kits, or living Christmas tree kits, the tube setup process is identical once those seedlings are large enough to transplant outdoors. The same root flare rule, stake spacing, and removal timing all apply. Get the planting depth right first, get the tube on with a secure stake, and check in at least twice a year. That's genuinely most of what successful tree tube use comes down to.
FAQ
What if the grow tube base doesn’t fully contact the soil after planting?
If you can only partially insert the tube (for example, the base won’t reach soil level), you reduce protection against rodents and you may create an air pocket that traps moisture near the crown. In that case, clear the planting area first, then press the tube base into firm contact with the soil (about 1 to 2 cm), and recheck after watering since soil can settle and open a gap.
Can I add mulch around the tree while using grow tubes?
Yes, but only at the right time and depth. Keep mulch away from the trunk and tube interior, and do not bury the root flare. If you add mulch before you’ve confirmed flare position, you can accidentally cover the flare with inches of organic material, which defeats the main purpose of correct tube use.
How do I know if the tube is rubbing the stem too much?
If your seedling’s stem rubs hard enough to look scuffed or flattened, don’t just “wait it out.” Reposition the stake if it’s too close or too far from the stem, loosen any ties that are pulling the tube inward, and confirm there is small clearance for movement. If the leader is already near the top rim, start planning for early tube removal or tube slitting so the stem can emerge without continuous abrasion.
Do tree grow tubes mean I can skip watering?
Watering is still needed. Tubes cut wind-driven moisture loss, but they do not replace irrigation, and blocked drainage can lead to soggy soil. A practical approach is to water deeply just outside the tube (or through an opening if your design allows it), then check soil moisture 2 to 4 inches down around the root zone before the next watering.
Should I remove grow tubes after 3 to 5 years no matter what?
Not necessarily. Some tubes can be left on longer in cooler climates with slower growth, but the key decision is stem and bark response, not the calendar. Use the article’s timing cues (leader out for a full season, base stem firm and normally barked) and remove earlier if you see constriction grooves, tight ties, or rubbing.
How should herbicide application work when grow tubes are installed?
Generally, avoid spraying herbicide onto or near the tube interior while it’s closed, because drift or runoff can still enter the microclimate. Use spot-application methods intended for tube-protected seedlings and follow the label guidance for distance and timing. If your tube is designed for herbicide use, confirm whether it is meant for soil-directed treatments only or if foliage contact is still prohibited.
How often should I inspect tubes during hot summer weather?
Condition varies by tube type. Solid tubes can trap more heat and moisture, so plan on more frequent visual checks in summer (especially condensation patterns, wilting, or bleaching). Ventilated tubes reduce some risk, but you still need tie checks and airflow inspections, particularly after storms or during rapid stem expansion.
What counts as “too much” condensation inside a grow tube?
If condensation is only occasional, it’s fine, but constant dripping onto the crown is a warning sign of excessive moisture and limited airflow. The specific fix is to improve ventilation by adding vent holes per your tube instructions (near the upper portion of the tube) or switching to a ventilated model. Also confirm the tube base is not sealed airtight at the soil level.
What should I do if the ties are already indenting the tube or stem?
If you tied it too tight and it’s already leaving an indentation, loosen it right away, then re-tie using a method that allows for stem expansion. Recheck after 2 to 4 weeks because trees often accelerate growth once protected, and what was “just snug” can become constricting surprisingly fast.
When is a rodent mesh collar at the base worth using?
Yes, in some settings it helps but it doesn’t replace proper depth and clearance. A wire mesh collar at the base can deter rodents when chew damage is occurring, but make sure it doesn’t create a sealed interface that traps constant moisture, and keep mulch and debris from bridging across the collar.
If I discover the tree was planted too deep, can I just adjust the soil without replanting?
You can, but only after confirming you are not burying the root flare with dirt. If the flare is too low, the durable fix is replanting to correct grade. If you’re stuck with repositioning complexity, at least remove soil around the flare immediately so the tree can breathe, then follow with a proper replant if the flare remains below grade.
My tubes wobble in wind, what changes typically fix it?
Wind performance depends on having enough stake depth and proper lateral placement. If you’re using a very tall tube, consider increasing stake length and, in very soft soil, adding a second stake on the opposite side for stability. After any storm, recheck that the tube still has slight play around the stem and that the tube hasn’t shifted closer than roughly half the tube diameter.