
Most palm tree grow kits work the same basic way: you soak the seeds, plant them in moist substrate, cover the container to trap humidity, and keep everything warm until a small green shoot appears. The process sounds simple, but palms are slower and pickier than most beginner plants, and the instructions that come in the box are often too vague to actually help. This guide translates the typical kit manual into a clear, step-by-step walkthrough you can follow start to finish, whether your kit came with seeds, a rooted seedling, a soil mix, or a soilless growing plug.
Palm Tree Grow Kit Instructions: Complete DIY Setup Guide

Marcus Thornfield
17 Jul 2026
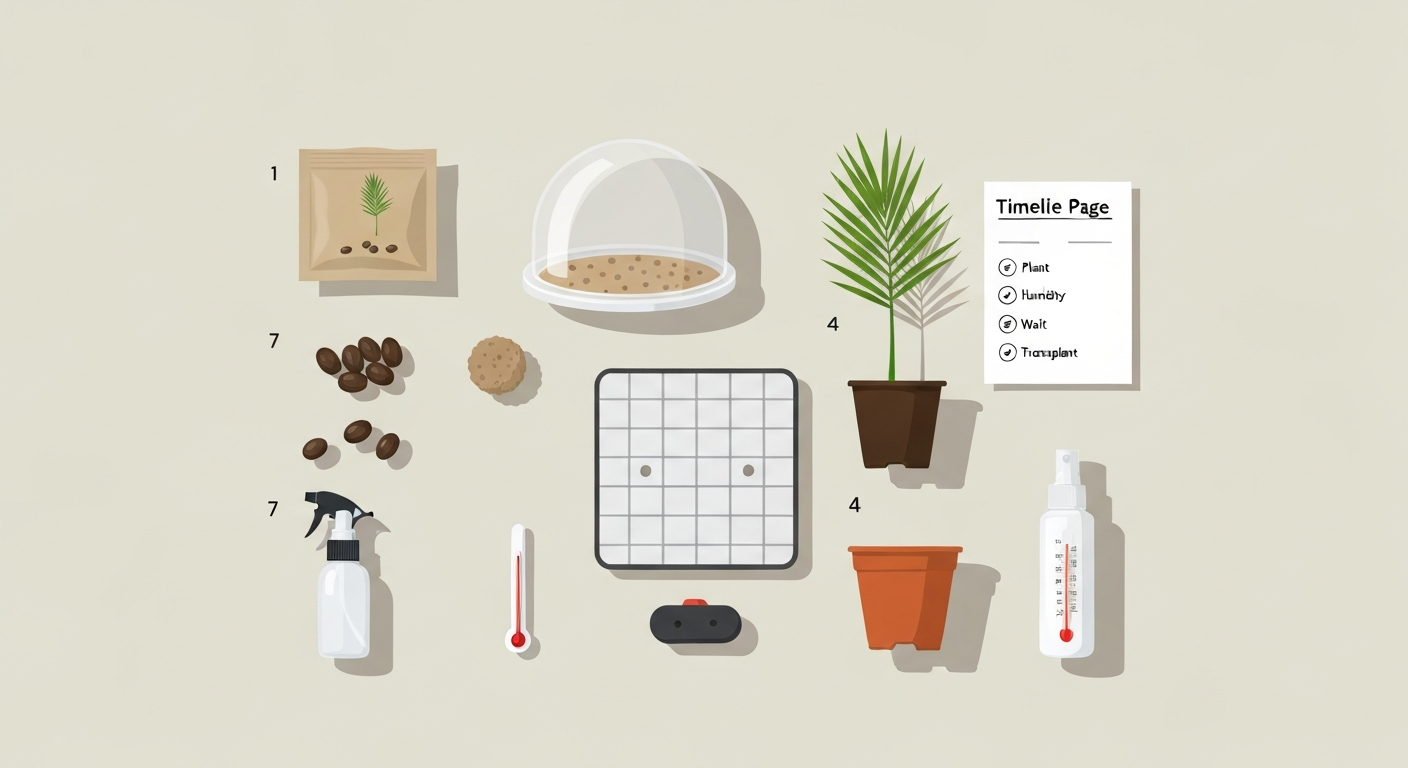
One-Page Quick-Start Timeline
Print this out and stick it to your fridge. It covers the full journey from opening the box to a palm you can transplant into a real pot. Times are estimates because palm germination is genuinely variable, but this gives you a framework so you know when to act and when to wait.
| Day / Week | What to Do | Watch For |
|---|---|---|
| Day 1 | Unbox kit, inspect seeds or seedling, gather supplies | Mold on seeds, damaged packaging, missing parts |
| Day 1–7 | Pre-soak seeds in warm water, changing water daily | Seeds sinking = viable; floaters may still germinate |
| Day 7 (after soak) | Prepare substrate, fill container, plant seeds at correct depth | Substrate should be moist but not dripping |
| Week 1–2 | Set up humidity dome, heat mat, and lighting; monitor temperature | Condensation inside dome = good humidity |
| Week 2–4 | First check for sprouts (fast species like Washingtonia) | Tiny white root tip or green shoot at soil surface |
| Week 4–8 | Most tropical palms (Areca, Dypsis) show first emergence | Yellowing or mold signals watering or airflow problem |
| Week 8–16+ | Slow species (Chamaedorea) may still be working; keep warm | Sporadic germination over many months is normal |
| Month 3–6 | Seedling has 2–3 leaves; begin dilute fertilizing | Pale new growth = nutrient deficiency |
| Month 6–12 | Root system fills small container; ready to transplant | Roots circling the bottom = time to move up |
Materials and Replacement Parts Checklist
Most palm grow kits include the basics, but they often skip a few things you'll genuinely need. Here's what should be in the box and what's worth picking up before you start.
What's Typically in the Box
- Palm seeds (1–5 seeds depending on brand) or a rooted seedling plug
- A small growing container or seed tray
- Substrate: compressed peat pellet, coir disc, or a small bag of pre-mixed soil
- A humidity dome or plastic cover
- Basic instruction card (usually vague on timing and species-specific needs)
- Occasionally: a small fertilizer packet or moisture indicator stick
Useful Extras to Have Ready
- Seedling heat mat with a thermostat (aim for 85–95°F / 29–35°C substrate temperature)
- Small spray bottle for misting
- Thermometer and hygrometer to monitor air temperature and humidity
- Dilute liquid fertilizer: a balanced 10-10-10 or palm-specific slow-release granules
- Extra perlite or coarse sand to amend dense kit soils
- Small pots (4-inch and 6-inch) for eventual transplant
- Well-draining palm potting mix for transplant stage
- Fungicide dust (captan or thiram) if storing seeds before planting
If any kit components are missing or damaged, contact the manufacturer using the card in the box. For generic replacement parts like peat pellets, coir discs, or humidity domes, garden centers and online retailers stock standard sizes. Seed kits from brands like Botanico, Garden Republic, or Back to the Roots follow similar formats, so replacement trays and domes from those lines are usually interchangeable.
Unboxing and Initial Setup, Step by Step
How you unbox and set up depends heavily on whether your kit came with seeds or a living seedling. These two formats need different first steps, so figure out which you have before doing anything else.
Seed Kits
- Open the package carefully and lay everything out. Check the seeds for mold or shriveling. A firm, plump seed is viable; a seed that's soft, cracked, or smells off may not germinate.
- Read the species label. If the kit names the species (e.g., Washingtonia robusta, Areca palm, or Chamaedorea elegans), look it up to know the germination timeline. This will save you a lot of anxiety.
- Expand any compressed substrate according to instructions, usually by adding warm water to a peat pellet or coir disc and letting it absorb for 5–10 minutes.
- Do not plant seeds immediately if they need a pre-soak. Set seeds aside in a small bowl of warm water first (see Seed Preparation section below).
- Set up your container in a warm, sheltered spot before you plant so you're not moving seeds around after planting.
Seedling Kits
- Open packaging immediately. Living seedlings can suffocate in sealed packaging, so don't leave this kit in a box for days.
- Inspect the root plug or soil block. It should be moist but not soaking. If it's bone dry, give it a gentle bottom-water (set it in a shallow tray of water for 20 minutes).
- Place the seedling in its included container or a slightly larger pot with drainage holes right away.
- Skip the heat mat at this stage; the seedling already germinated. Focus on light and stable warmth (65–85°F / 18–29°C).
- Keep the humidity dome on for the first 1–2 weeks while the seedling acclimates, then begin gradually venting it.
Kit-Specific Setup: Soil, Soilless, and Seedling Tray Kits
Palm grow kits come in three main formats, and each one has a different setup routine. Getting this right at the start prevents most of the common failures I see people run into.
Soil-Based Kits
These kits usually include a bag of pre-mixed potting soil or a compressed peat pellet. Expand the pellet fully before planting, and check that the texture is crumbly and loose, not muddy. If the included mix feels dense or clay-like when wet, work in a small amount of perlite (about 20% by volume) to improve drainage. Fill your container to within about half an inch of the rim, make a shallow divot at the planting depth specified for your species, and plant. Water gently from the top until moisture just reaches the bottom, then cover with the dome.
Soilless and Hydroponic Kits
Some premium palm kits skip soil entirely and use a rockwool cube, coir plug, or expanded clay pebble tray as the growing medium. These work well for germination but require more attention to nutrient solution. Before adding any seeds, rinse the growing medium thoroughly with plain pH-adjusted water (pH 5.8–6.2) to remove any manufacturing residue. Do not add nutrients yet. During germination, plain water is fine. Once the first true leaf appears, begin feeding with a diluted nutrient solution at a low electrical conductivity (EC) of about 0.5–1.0 mS/cm. Think of EC as a measure of how much fertilizer is dissolved in the water: zero is plain water, and you build up slowly. Increase to 1.2–1.5 mS/cm only after roots are visibly established. Keep the pH of your water between 5.5 and 6.5 throughout.
Seedling Tray Kits
Multi-cell seedling trays are common in kits designed for growing several palm specimens at once. Fill each cell to the top with substrate, tap the tray gently to settle it, then use a pencil tip to make your planting holes. These trays dry out faster than deep pots because of their shallow volume, so check moisture daily. Bottom-watering (pouring water into the outer tray and letting cells absorb it from below) works better than top-watering for trays because it reduces the risk of washing seeds out of position.
Seed Preparation and Germination Techniques
Palm seeds have thick outer coats (called the endocarp or seed coat) that can slow germination significantly. Most kit instructions tell you to soak, but they rarely explain why or how much it actually matters. Here's what the science says and what I've found works in practice.
Pre-Soak
Soak palm seeds in warm water for 1–7 days, changing the water every 24 hours. The daily water change removes germination-inhibiting compounds that leach out of the seed coat. A seed that sinks is usually a good sign of viability, though floaters can still germinate. After soaking, plant the seeds immediately. Leaving them out of water after soaking can trigger a secondary dormancy, which basically means the seed shuts back down and takes far longer to sprout.
Scarification
Scarification means physically or chemically roughing up the seed coat so water can get in more easily. For most home kits, mechanical scarification is safe and effective: use a nail file or fine sandpaper and gently rub one side of the seed until you see a slight color change in the coat, then stop. Do not file through to the white interior. This technique has been shown to increase germination speed and percentage in date palms (Phoenix dactylifera) and some Washingtonia species. Chemical scarification with sulfuric acid is used in research settings but is not appropriate for home kits. Stick with a nail file.
Stratification
Most tropical palm species in home kits do not require cold stratification, which is a chilling period used to break dormancy. The palms commonly sold in kits, such as Areca, Chamaedorea, and Washingtonia, are warm-climate species that germinate best in constant warmth. If your kit species card mentions stratification, it means a warm-moist period, not a cold one. Wrap the seed in a damp paper towel, seal it in a plastic bag, and keep it at about 85°F (29°C) for 2–4 weeks before planting.
Germination Walkthrough: Planting, Heat, and Humidity
Getting germination right is mostly about planting depth, heat, and moisture. Each of these has a sweet spot, and going too far in either direction is the most common reason a kit fails.
Planting Depth and Container Choice
Plant palm seeds at a depth equal to roughly their own width. For a small Areca or Chamaedorea seed (about the size of a large pea), that's roughly half an inch. For a larger date palm seed, go about an inch deep. One thing that surprises beginners: palms have two germination styles. Some species (like Phoenix and Washingtonia) send a root away from the seed before the shoot appears at all. This is called remote germination, and it can look like nothing is happening when actually a root is traveling through the substrate. Other species (like Areca and coconut) form a visible button right at the seed surface before the shoot emerges. Knowing your type saves you from digging up a perfectly healthy germinating seed in frustration.
Use a container with drainage holes. A 4-inch pot works well for a single seed. Avoid using enormous pots early on because excess substrate around the seed stays wet too long, which invites fungal problems.
Heat Mats
A seedling heat mat is genuinely worth using for palms. Substrate temperature between 85–95°F (29–35°C) is the sweet spot where most tropical palms germinate fastest and most uniformly. Studies on the Germination of Seed of Three Palms, Journal article summarizing temperature effects (cites Meerow & Broschat) supports that many tropical palms germinate fastest and most uniformly around 29–35°C blank" rel="noopener noreferrer">Studies on the Germination of Seed of Three Palms — Journal article summarizing temperature effects (cites Meerow & Broschat). Without added heat, especially in cooler homes, germination can take two to three times as long or fail entirely. Place the mat under the container, not on top, and use a thermostat probe in the substrate if you can. Ambient air temperature in the room can be cooler than this; what matters is the temperature right at the seed.
Humidity Domes
The humidity dome (the clear plastic cover that comes with most kits) keeps moisture around the seed so you don't have to water constantly. You should see light condensation on the inside of the dome. If it's completely clear, the humidity is too low. If water is pooling at the bottom, vent the dome slightly by propping it open a crack. Once you have a shoot with its first leaf, start venting for 30 minutes a day, then an hour, gradually acclimating the seedling to lower humidity over 1–2 weeks.
The Ideal Environment for Palm Seedlings
Palms are generally forgiving once established, but seedlings are more sensitive than mature plants. Getting these four environmental factors right will prevent most problems.
| Factor | Target Range | Practical Notes |
|---|---|---|
| Temperature (air) | 68–85°F (20–29°C) | Avoid drafts and windowsills that dip below 60°F at night |
| Substrate temperature (germination) | 85–95°F (29–35°C) | Use a heat mat with thermostat; remove mat once germinated |
| Humidity (under dome) | 70–90% relative humidity | Light condensation on dome interior is a good indicator |
| Light (established seedling) | 100–300 µmol·m⁻²·s⁻¹ PPFD | Most shade-tolerant palm seedlings need less light than people expect |
| Photoperiod | 14–16 hours of light per day | Use a timer so you don't forget |
| Airflow (post-germination) | Gentle indirect air movement | A small fan on low prevents fungal buildup; avoid blasting seedlings directly |
Light: More Nuanced Than Just 'Sunny Window'
Palms like Chamaedorea (parlor palm) and Areca are naturally understory plants. They do not need or want intense direct sunlight as seedlings. A bright indirect window or a grow light kept 8–12 inches above the seedling is ideal. If you're using a grow light, aim for a PPFD (photosynthetic photon flux density, a measure of usable light intensity) of about 100–200 µmol per square meter per second for shade-tolerant indoor species. For outdoor species like Washingtonia or date palm that will eventually live in full sun, you can push closer to 300–400 µmol once they have a few leaves. Standard fluorescent shop lights can work if kept very close, but a decent LED grow light gives much more consistent results. Run lights for 14–16 hours daily using a timer.
Substrates and Potting Mixes: What Works and What to Substitute
The substrate in your kit was chosen for convenience, not necessarily optimum palm performance. Here's how to evaluate what you got and how to improve it if needed.
What Makes a Good Palm Seedling Substrate
You want a mix that holds enough moisture to stay consistently damp between waterings, drains freely so there's never standing water around the roots, and has enough air pockets (roughly 10–15% of the volume should be air space after watering). Most kit peat pellets meet the moisture-holding requirement but can compact and shed water once they dry out even once. Coir-based substrates are more resilient if they dry slightly.
DIY Mix Recipes
If the included substrate runs out or you want to make your own for transplanting, these two blends work well for palm seedlings:
- Soil-based blend: 2 parts peat or coir, 1 part pine bark fines (1/8–3/8 inch grade), 1 part coarse perlite or coarse sand. This replicates the 2:1:1 production mix used in commercial palm nurseries.
- Looser, faster-draining blend: 2 parts coir, 2 parts pine bark, 1 part coarse sand. Better for species prone to root rot (e.g., Kentia/Howea) or for humid growing environments.
- Soilless substitute: Rinsed coir chips or a 50/50 blend of coir and perlite. Use with a dilute nutrient solution rather than relying on the substrate for fertility.
Particle Size Matters
One thing most home growers overlook: particle size in your mix affects drainage more than the ingredients themselves. Aim for most particles to fall between about 0.5 and 4 mm. Avoid very fine mixes (like standard garden soil or fine compost) because they pack tightly and cut off the air supply to roots. If you buy pine bark for your mix, look for the 1/8 to 3/8 inch (3–9 mm) grade rather than fine bark mulch.
Soilless and Hydroponic Kit Nutrient Management
If your kit uses a rockwool cube, coir plug, or net pot with clay pebbles, the substrate itself provides zero nutrition. You are in charge of feeding from the start. Use plain pH-adjusted water (pH 5.8–6.2) until you see the first true leaf, then introduce nutrients at a very low EC of 0. The UNH Cooperative Extension guide 'Hydroponics at Home, UNH Cooperative Extension' advises using sterile starting media, keeping humidity high during germination, and beginning nutrients at reduced strength (about 0.5–1.0 mS/cm) once the first true leaves appear Hydroponics at Home — UNH Cooperative Extension. 5–1.0 mS/cm. Think of this as roughly quarter-strength solution compared to what a mature plant would receive. Gradually increase to 1.2–1.5 mS/cm as the plant grows its second and third leaves. Check pH every time you mix a new batch, because nutrients shift it.
Watering and Fertilizing Routine
Palm seedlings want consistently moist substrate, not wet. The easiest test: push your finger about an inch into the substrate. If it feels dry, water. If it feels damp, wait. If it feels soggy, you're overwatering and need to let it dry and improve drainage before the next cycle. Bottom-watering (placing the container in a shallow tray of water for 20–30 minutes, then removing it) is gentler than top-watering and avoids disturbing seeds or shallow roots.
Hold off on fertilizing until the seedling has at least two true leaves, not counting the first tiny sprout. Start with a diluted balanced fertilizer at half the label strength, or use a slow-release palm fertilizer granule worked into the top of the substrate. Palms grown in kits rarely need heavy feeding in their first year. Over-fertilizing is a much more common mistake than under-fertilizing at this stage.
Species and Kit Variations: Indoor Dwarf Palms vs. Outdoor Species
Not all palm kits are aimed at the same end result. Knowing which category your kit falls into changes your long-term care plan significantly.
| Kit Type | Common Species | Germination Time | Long-Term Destination | Key Notes |
|---|---|---|---|---|
| Indoor dwarf palm kit | Chamaedorea elegans (parlor palm), Dypsis lutescens (Areca) | 3–16+ weeks (variable) | Houseplant, stays indoors | Very shade tolerant; slow but low-maintenance |
| Fast-growing novelty kit | Washingtonia robusta, Phoenix canariensis | 1–3 weeks (fast) | Outdoor landscape eventually | Germinates quickly but will outgrow indoor conditions |
| Coconut palm kit | Cocos nucifera | 4–6 weeks | Tropical outdoor or large conservatory | Needs the whole coconut; warm and humid; not suited to cool climates |
| Date palm kit | Phoenix dactylifera | 2–6 weeks with prep | Outdoor or large container in warm climates | Benefits most from scarification; very drought-tolerant once established |
| Seedling starter kit | Various, seedling already sprouted | Already done | Pot on indoors or outdoors per species | Focus shifts immediately to light and stable temperature |
If you enjoy growing trees from seed, the approach here has a lot in common with kits for giant sequoias or living Christmas trees, where patience and consistent warmth are more important than any special technique. For step-by-step instructions on growing a giant sequoia from a kit, see grow a tree giant sequoia kit instructions. The core challenge with palms is that the wait is long, and it's easy to give up or interfere too soon.
Pest and Disease Checks
The most common killer of palm seedlings in kits is not insects but fungal damping-off. This is caused by fungi including Pythium, Rhizoctonia, and Fusarium, and it shows up as a sudden collapse of the seedling at the soil line, often with a dark, water-soaked stem base. Prevention is far easier than cure: use sterile substrate, keep the dome vented enough to allow some air exchange, avoid waterlogged conditions, and don't reuse old potting mix. If you're growing multiple seeds and one collapses, remove it immediately and do not top-water the remaining seeds for a few days.
Spider mites and fungus gnats are the most common insect pests on palm seedlings kept indoors. Fungus gnats (tiny flies hovering around the soil) are a sign of consistently overwatered substrate. Let the top inch dry between waterings and they'll lose their breeding ground. Spider mites show up as tiny speckling on leaves with fine webbing underneath. Wipe leaves with a damp cloth and improve airflow. Neither pest is an emergency at the seedling stage if caught early.
Troubleshooting Common Problems
| Problem | Likely Cause | Fix |
|---|---|---|
| No sprout after 8+ weeks | Too cool, seeds not viable, or secondary dormancy | Check substrate temp (needs 85–95°F); verify seeds were soaked and planted immediately after soaking |
| Seedling collapsed at soil line | Damping-off fungal disease | Remove affected seedling, reduce watering, improve airflow, use sterile substrate for future seeds |
| Yellow leaves on young seedling | Overwatering, nutrient deficiency, or too little light | Check drainage first; if draining well, try dilute balanced fertilizer |
| Substrate drying out in hours | Too small a container, or peat pellet has hardened | Bottom-water thoroughly, add perlite to mix, or move to slightly larger pot |
| White mold on substrate surface | High humidity + poor airflow | Vent dome more, scrape off surface mold, let surface dry slightly |
| Roots visible at bottom drainage holes | Rootbound seedling | Transplant to next pot size up (4 to 6 inch, or 6 to 8 inch) |
| Pale, leggy seedling stretching toward light | Insufficient light intensity or too few hours | Move light closer or increase to 14–16 hours; measure PPFD if possible |
| Floaters during pre-soak | Possible low viability, air pockets in seed coat | Plant anyway but expect lower germination rate; not all floaters are dead |
| Nutrient solution pH drifting (hydroponic kits) | Nutrients reacting with water minerals | Test and adjust pH each time you mix a fresh batch; target 5.5–6.5 |
| Seeds rotting in substrate | Too wet and too warm without airflow | Reduce watering frequency, ensure substrate has drainage, add a small fan nearby |
Transplanting and Long-Term Care
When roots start circling the bottom of your container or poking out of the drainage holes, it's time to move up. Choose a pot only one or two sizes larger than the current one. Going too big floods the root zone with more substrate than the roots can use, and that extra wet substrate becomes a fungal risk. Use a well-draining palm potting mix (or the DIY blend above) for the new pot.
Handle the roots gently. Palm roots do not regenerate as readily as some other plant families, so broken roots are a real setback. Water the seedling thoroughly an hour before transplanting so the root ball holds its shape, tip it out gently, and lower it into the new pot at the same depth it was growing before. Do not plant deeper. Water thoroughly after transplanting and keep the plant in indirect light for one to two weeks while it recovers from the stress.
Moving Outdoor Species Outside
If you're growing an outdoor species like Washingtonia or Phoenix, you'll eventually want to move it outside. Do this gradually. For tips on protecting young outdoor specimens during this transition, see our guide on how to use tree grow tubes. Start with an hour of outdoor shade per day, then two hours, then dappled sun, over a period of two to three weeks. Direct sun on a seedling that grew up under grow lights will bleach the leaves badly. Once hardened off, these species are tough and will grow quickly in their first outdoor summer.
Monitoring Schedule at a Glance
| Frequency | What to Check |
|---|---|
| Daily (germination phase) | Substrate moisture, dome condensation, temperature on heat mat |
| Every 2–3 days (seedling phase) | Moisture level, signs of mold or pests, height of seedling |
| Weekly | Leaf color, light distance, nutrient solution EC and pH (hydroponic kits) |
| Monthly | Root check through drainage holes, fertilizer schedule, pot size adequacy |
| Every 3–6 months | Repotting assessment, outdoor hardening plan for outdoor species |
Where to Find Manufacturer Manuals and Replacement Parts
If you've lost the instruction card that came with your kit, your best first stop is the brand's website. Most major grow kit brands (Botanico, Back to the Roots, National Geographic, and similar) post PDF instruction sheets by product name in their support or FAQ sections. Search for your exact kit name plus the word 'instructions' to find the right one. If you need grow a living Christmas tree kit instructions, look for the kit's manufacturer support page or a dedicated how‑to guide for living tree kits that walks through soaking, planting, and acclimation step by step. For replacement parts like humidity domes, peat pellets, coir discs, or seedling trays, garden centers carry generic versions that fit most standard kit containers. If you want a novelty option, the Money Does Grow on Trees plant kit includes themed containers and compatible humidity domes. Replacement seeds for common kit species (Chamaedorea, Areca, Washingtonia) can be sourced from specialty seed suppliers like Rare Palm Seeds or Palm Beach Nursery, which typically sell cleaned, tested seed with germination notes.
For deeper species-specific guidance, the University of Florida IFAS publication BUL274 on palm seed germination is one of the most thorough free resources available and covers dozens of species with specific germination timings. It's written for nursery professionals but is readable by home growers and worth bookmarking if you plan to grow multiple species over time.
FAQ
What species- and seed-specific data must I collect before writing palm tree grow kit instructions?
List the exact palm species (scientific and common name) and seed/propagation stage (seed, pre-germinated seed, seedling). Record seed size, hardiness zone, native climate (tropical/subtropical/temperate), known germination type (remote vs. adjacent), typical germination window for that species, and any published dormancy behaviors. These details determine temperature, scarification/stratification needs, expected timing, light tolerance, and long-term potting/substrate choices.
Which kit-specific details are essential to translate a kit manual into an actionable checklist?
Document every kit component (tray, domes, heat mat, grow light, media, nutrient sachets, hydroponic parts, labels, instructions). Note component dimensions, electrical specs (voltage, wattage, heat-mat temperature range), media type (peat, coco, perlite, rockwool), and if seeds or seedlings are included. For hydroponic kits, record reservoir volume, pump flow rate, recommended EC/pH ranges, and replacement-part model numbers. Use these to create step-by-step setup, safety reminders, and part-replacement links.
What germination protocols and pre-treatments should the guide cover?
Include species-tested options: warm-soak durations (1–7 days with daily water changes), mechanical scarification (abrasion/filing), hot-water treatment (pour boiling water, cool, soak), and sulfuric acid protocols (only for experienced users with safety gear; provide references). Explain warm-moist or cold-moist stratification when required. State immediate planting after soaking and recommended fungicide dusting for stored cleaned seeds. Cite realistic timing ranges (e.g., Washingtonia <2 weeks; Areca 3–4 weeks; Chamaedorea variable, months).
What temperature, light, and humidity conditions should be recommended?
Give ranges: germination—warm seeds prefer ~21–38°C (70–100°F), with 29–35°C ideal for many tropical palms; bottom heat mats help. Seedlings—match species light tolerance: shade-tolerant house palms at low PPFD (<100 µmol·m⁻²·s⁻¹), sun-loving palms 200–400 µmol·m⁻²·s⁻¹. Photoperiod 14–18 hours for vegetative growth. Maintain high humidity dome (70–90%) during germination; gradually reduce humidity after true leaves form and roots establish.
How should substrates and watering be specified for different kit types?
For soil-based kits recommend well-drained mixes: examples 2:1:1 peat:pine bark:perlite or 2:2:1 peat:bark:sand. Use medium particle sizes (0.5–4 mm). Watering: keep substrate moist—not waterlogged—avoid standing water; allow top 5–10 mm to dry between waterings for many palms. For soilless/hydroponic kits start with sterile plugs or rockwool, keep very high humidity until root protrusion, then begin very dilute nutrient solution (EC 0.5–1.0 mS/cm, pH 5.5–6.5). Gradually increase feed as roots develop.
What fertilizing and nutrient advice is required for seedlings and transition to long-term pots?
Start fertilizing after first true leaves or visible root establishment. Use a balanced, palm-suitable fertilizer with micronutrients; for hydroponics start at half-strength (EC ~0.5–1.0 mS/cm) then raise to ~1.2–1.5 mS/cm over weeks. For container palms use slow-release fertilizer or liquid feeds at 1/4–1/2 strength for young seedlings, increasing with size. Emphasize not to overfertilize—watch for tip burn and chlorosis—and to flush media occasionally to avoid salt buildup.