
Setting up the Click & Grow Smart Garden 9 takes about 15 minutes. You fill the 4-liter water tank, drop in up to nine plant pods, clip on the germination domes, connect the lamp arm, and plug it in. The built-in timer runs the LED lamp for 16 hours on and 8 hours off automatically, so there are no app or settings to configure. That's genuinely the whole process for a first run. The sections below walk through every step in order, explain the gotchas I ran into, and cover maintenance and troubleshooting so you're ready for whatever comes next. For a similar quick-start guide, see snap and grow greenhouse instructions. For the official step-by-step guide, see Click & Grow's click and grow smart garden instructions on their support site. For detailed, step-by-step guidance, see the start pickin grow box instructions.
Click and Grow Smart Garden 9 instructions: Setup & Care Guide

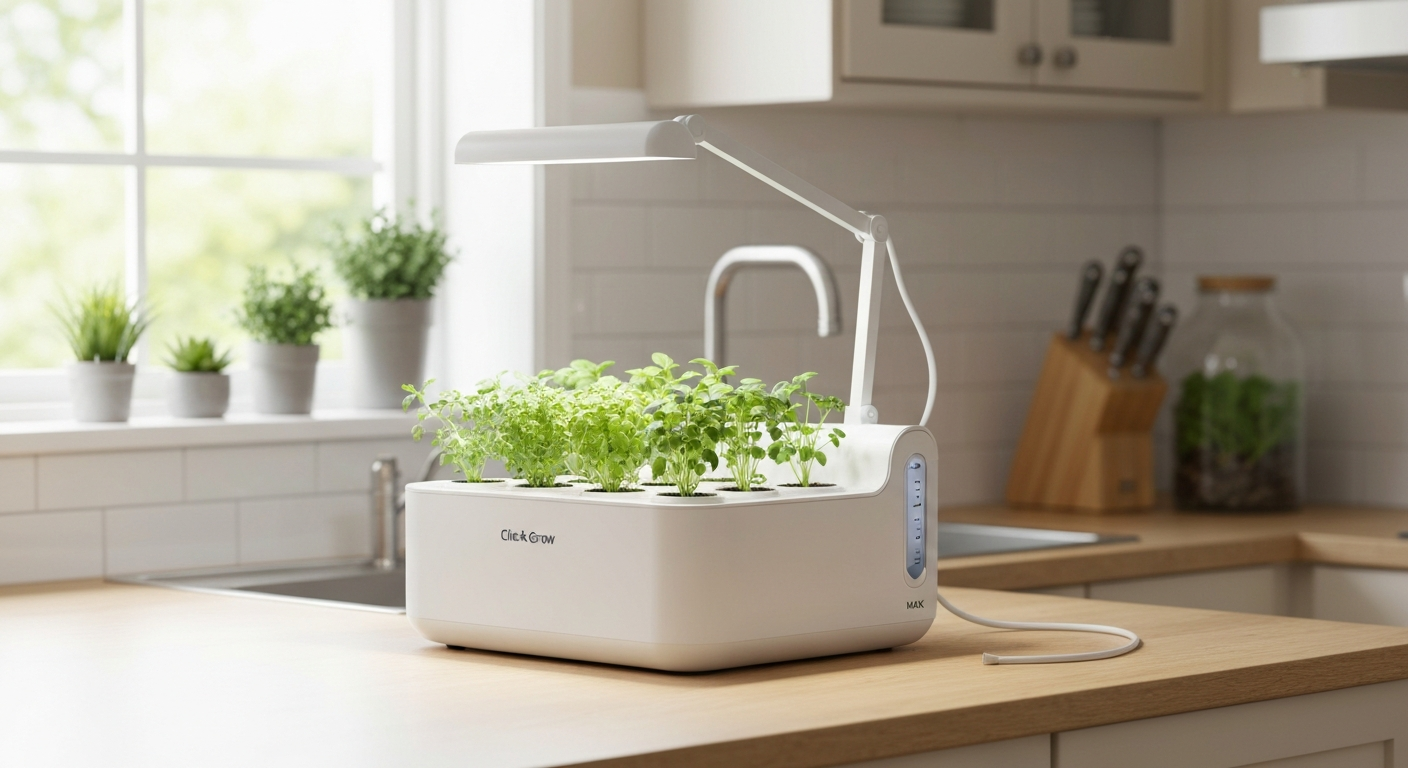
Unboxing and complete parts list
When the box arrives, open it from the top and lift out each layer carefully. The lamp arm sits across the top, and the tank body with the lid is underneath. Everything is foam-separated, so nothing should rattle. Lay all parts out on a table before you start. Here's what should be in the box:
| Part | Quantity | Notes |
|---|---|---|
| Water tank / main body | 1 | Gray or white plastic body; holds 4 L (135 fl oz) |
| Plastic grow lid (with 9 holes) | 1 | Sits on top of the tank; pods slot into the holes |
| Lamp arm (base section) | 1 | Clips into the side of the body |
| Lamp arm extension | 1 | Adds height for taller plants; connects to base section |
| LED lamp head | 1 | Clips onto the top of the arm; full-spectrum LED |
| Power cable | 1 | 2,800 mm (about 9 ft) — longer than most competitors |
| Plant pods (pre-seeded) | 3 or 9 | Depends on which bundle you bought |
| Plastic plant cups | 9 | Fit inside the lid holes; pods sit inside these |
| U-shaped pod lids | 9 | Snap onto each cup to stabilize the pod |
| Germination domes | 9 | Clear plastic caps; keep humidity up during sprouting |
| Wicks | 9 | Pre-fitted inside the cups; draw water up to the pod |
| Quick-start card / instruction booklet | 1 | Printed guide; full PDF manual available from Click & Grow |
Check the lamp head and cable connector straight away. On one of my setups I found the lamp connector slightly bent in transit, which caused a loose connection later. If anything looks cracked or missing, Click & Grow's support team will send replacements under the 1-year warranty. Keep the box for the warranty period.
Tools, workspace, and safety prep
You don't need any tools to assemble the Smart Garden 9. Everything is push-fit or clip-on. That said, a few quick prep steps will save you headaches later.
- Clear a flat surface near a power outlet. The unit is 604 mm wide and 396 mm tall (about 24 in × 15.5 in) at full lamp extension, so check that it fits your counter or shelf before filling the tank with water.
- Keep the unit away from sinks, open windows, and steam sources. The electronics in the lamp are low-voltage and the cable is well-insulated, but water on the lamp head is never a good idea.
- Check that the outlet you plan to use is not overloaded. The Smart Garden 9 draws 13 W — roughly the same as a standard LED light bulb — so it's fine on any standard household circuit.
- Do not use an extension cord that is coiled or covered, as that can cause heat build-up over time. The 2,800 mm cable is long enough to reach most outlets without needing an extension at all.
- If you have children or pets, plan the placement so the cable runs behind the unit and isn't dangling where it can be pulled.
- Wash your hands before handling plant pods. Oils and residue from your hands can affect the growing medium (Click & Grow calls it 'smart soil') before germination starts.
Step-by-step assembly and first-time setup
Follow these steps in order. The whole process takes about 10 to 15 minutes on a first run. I'm including the lamp height adjustment here because it's the step most people skip and then regret later when the arm is too low for tall plants.
- Place the main tank body on your chosen surface. Orient it so the lamp-arm socket (the slot on the side) faces out toward you.
- Slide the base lamp arm section into the socket on the body. It clicks into place with firm pressure. If it doesn't click, check the orientation — there's a flat edge that must face inward.
- Connect the lamp arm extension to the top of the base section. For most herbs and leafy greens, use one extension. The full height with one extension is approximately 396 mm (about 15.6 in). If you plan to grow taller plants like tomatoes later, note that additional extensions are sold separately.
- Clip the LED lamp head onto the top of the extension arm. The connector for the power cable is on the underside of the lamp head.
- Run the power cable down the lamp arm and plug it into the lamp head connector. The cable has a cable management groove along the arm — tuck the cable into it so it doesn't hang loose.
- Do not plug into the wall socket yet. Fill the tank first (see the water setup section below) so the wicks are primed before the light comes on.
- Insert the nine plastic plant cups into the holes in the grow lid. Each cup has a wick pre-fitted. The wick should hang down into the tank.
- Place the grow lid onto the tank. It sits flush and is not clipped or locked — it just rests on top.
- Insert your plant pods into the cups (see the pod installation section below).
- Snap the U-shaped lids around each cup. These hold the pod steady and reduce evaporation.
- Place a germination dome over each pod. These stay on until you see a sprout pushing up — usually 3 to 10 days depending on the plant variety.
- Fill the tank (see the water setup section below), then plug in the power cable. The lamp will turn on immediately and the 16-hour timer starts counting from that first moment.
One thing I wish the quick-start card said more clearly: the timer starts from when you first plug in, not from a preset clock time. So if you plug in at 10 pm, the lamp will turn off at 2 pm the next day. Try to plug in during morning hours so the 'daytime' cycle lines up with your actual day. It makes it much easier to monitor your plants.
How to install Click & Grow plant pods
Click & Grow plant pods come pre-seeded in a biodegradable cup filled with the company's peat-based growing medium. There are 60-plus varieties available, covering herbs (basil, mint, thyme), leafy greens (lettuce, kale, spinach), and fruiting plants (cherry tomato, chili pepper, strawberry). Each pod is sealed with a sticker lid that you remove just before planting.
- Take a plant pod from its packaging. Do not remove the sticker lid yet.
- Place the pod into a plastic plant cup. The pod should sit snugly — if it wobbles, check that the wick is correctly tucked underneath.
- Now peel off the sticker lid from the top of the pod. Removing it after placing the pod reduces the chance of soil spilling.
- Do not push the pod down or compress the growing medium. The correct planting depth is set by the cup and the pod size — they are designed to sit flush. Forcing the pod deeper can bury the seeds too far and prevent germination.
- Snap the U-shaped lid around the cup rim. It should click on both sides and sit flat. This lid keeps the pod at the right height and also makes it easy to lift the whole pod-and-cup unit out for inspection.
- Place the germination dome over the pod. The dome traps humidity around the seed, which speeds up sprouting. Leave it in place until you see a seedling that is tall enough to touch the inside of the dome — then remove the dome for that pod.
- Repeat for each of the nine positions. You can leave positions empty if you don't have nine pods — just leave the cup and U-lid in the hole to prevent evaporation from that spot.
Click & Grow offers a free pod replacement guarantee if a pod fails to sprout within a reasonable time window. Multiple user reports (see awful product and customer service (Reddit) | r/ClickAndGrow) document variable germination rates, occasional pods not sprouting, and community advice to contact support for replacements. If you reach two weeks with no sprout, contact their support team with your order number rather than digging into the pod. They're generally quick to send a replacement, and pulling apart the pod to investigate usually just makes the situation worse.
Using third-party seeds and DIY pods
Click & Grow officially supports using your own seeds through what they call 'experimental pods' or blank seedless pods. These are empty cups filled with the same growing medium but no pre-planted seeds. You buy them from Click & Grow's store and fill them yourself. This is the most reliable DIY approach because the cup size, wick position, and medium density are all calibrated for the Smart Garden 9's water delivery system.
People also experiment with fully third-party pods, using their own containers and growing media. The Reddit community has documented this extensively. The honest summary: it can work, but there are real limitations. The holes in the Smart Garden 9 lid are a specific diameter, so third-party containers need to match that diameter or be adapted. More importantly, the wick-to-medium interface matters a lot. If your growing medium is too dense, the wick won't draw water up. If it's too loose, roots get waterlogged. I've seen community reports of both problems.
- Use Click & Grow's own blank/experimental pods as your first DIY option — they're designed for the system and remove the sizing guesswork.
- If you use a third-party container, measure the lid hole diameter first (approximately 55 mm) and make sure your container fits snugly without gaps that allow water to evaporate.
- Use a peat-based or coir-based growing medium for DIY pods. Dense soil mixes and standard potting compost do not wick well at the volumes this system delivers.
- Plant seeds at the depth specified on the seed packet, not deeper. The Smart Garden's grow medium stays moist, so seeds don't need to be buried far.
- Do not use hydroponic nutrient solutions in the water tank. The Click & Grow system is designed for plain water — the nutrients are embedded in the growing medium of each pod. Adding liquid nutrients can cause salt build-up on the wicks and clog them over time.
- Third-party pods can void your warranty claim for water tank or wick-related issues, so use them knowingly.
Filling the reservoir and water setup
The Smart Garden 9 holds 4 liters (about 135 fl oz, or just over 1 US gallon) of water. There is a water level window or indicator on the side of the tank body. The goal is to keep the water level between the MIN and MAX marks, the wicks draw water up passively, so the tank doesn't need to be topped up every day.
- Before the first fill, check that the grow lid is seated correctly and all cups with wicks are in place. The wicks need to hang down into the tank before you add water.
- Pour plain tap water slowly into the fill opening on the grow lid. Room-temperature water is fine. Cold water straight from the fridge can stress seedlings slightly, but it's not a serious issue.
- Fill to the MAX line — approximately 4 L. Do not overfill past the MAX mark. Overfilling pushes water up into the growing medium and can drown seeds before they germinate.
- Check the water level window on the side of the tank after filling. You should see the water at MAX. If the line is hard to read, tilt the unit very slightly toward the window to get a clear view, then level it back.
- After first planting, expect to top up the water every 2 to 4 weeks depending on plant type and room temperature. Fruiting plants and large leafy greens drink faster than small herbs.
- Never let the level drop below MIN for more than a day or two. If the wicks dry out completely, they can take time to re-prime, and established plants will wilt quickly.
- Use plain water. Click & Grow's nutrient system is in the pod soil, not the water, so you don't need to add anything.
If you live somewhere with very hard tap water (lots of minerals), you may notice a white crust forming around the fill hole and on the wicks over time. This is limescale. It doesn't hurt the plants immediately, but it can eventually reduce wick flow. Click & Grow's official advice is to dissolve it with mild food-grade vinegar or citric acid during a cleaning cycle between plantings. More on that in the maintenance section below.
Light, placement, and electrical guidance
The Smart Garden 9's LED lamp runs a 16-hour-on, 8-hour-off cycle by default, which research and extension guidance backs up as a solid choice for herbs and leafy greens. Studies from university extension programs confirm that basil does well at around 16 hours of photoperiod per day, and most lettuce varieties thrive at 14 to 16 hours. The factory default is well-chosen and you don't need to change it.
Where to put it
- Kitchen countertop or desk near a wall outlet is the classic placement. The 2,800 mm cable reaches most outlets without an extension cord.
- Keep it away from south-facing windows where direct afternoon sun hits. Direct sunlight plus the grow lamp can overheat seedlings and dry out the water tank far faster than expected.
- Avoid spots near heat vents, radiators, or stovetops. Warm, dry air pulls moisture from the growing medium faster than the wicks can deliver it.
- Drafts from air conditioning vents or open windows can also stress plants, even if temperature seems fine. Slight leaf curl at the edges is often a draft problem, not a light or water problem.
- The unit is not waterproof, so placing it near a sink where it could get splashed is not ideal, even though the tank is obviously designed to hold water.
- Keep at least 5 cm (2 inches) of clearance on all sides for air circulation around the lamp.
Lamp height and light intensity
The lamp arm ships with one extension installed. For most herbs and lettuce, this height is correct straight out of the box. If you're growing taller plants (cherry tomatoes, for example) you will eventually need an additional extension arm, which Click & Grow sells separately. The closer the lamp is to the canopy, the more light the plants receive. Academic guidance on indoor growing suggests a target PPFD (photosynthetic photon flux density, basically a measure of useful light reaching the plant) of around 200 to 300 µmol/m²/s for basil and leafy greens. You don't need a meter to hit these targets, just keep the lamp at the recommended height for your plant type and let the 16-hour cycle do the work.
Electrical notes
- Power consumption is 13 W. Running it 16 hours per day costs roughly 0.2 kWh per day, or about 75 kWh per year — very modest on an electricity bill.
- If you must use an extension cord, use a fully uncoiled, flat extension rated for indoor appliance use. Do not use a coiled or covered extension cord.
- The unit operates on standard household voltage. No adapter is needed in the US, UK (with plug adapter), or EU — check the label on the power supply brick for your region's voltage.
- Do not modify the power cable or lamp connector. The 1-year warranty is voided by electrical modifications.
Operating the Smart Garden 9 day to day
Once you've plugged in, the Smart Garden 9 runs itself. There's no app, no Bluetooth, and no manual controls beyond the power outlet. The timer is built into the unit and starts counting from the moment you plug it in.
Timer behavior and power interruptions
The timer resets if power is lost, which is one of the most commonly discussed gotchas in online communities and YouTube setup videos. If your outlet trips a breaker, or you unplug the unit to clean, the clock resets to zero and the lamp turns on for a fresh 16-hour cycle from that point. This is not a malfunction. It just means the lamp may run at an unexpected time for the next day or two after a power interruption. Replug in the morning to re-sync the cycle to daylight hours.
Routine care schedule
| Frequency | Task |
|---|---|
| Daily | Check that the lamp turned on (quick visual confirmation). Remove any germination domes where seedlings have broken the surface. |
| Every 2 to 4 weeks | Check the water level window and top up to MAX with plain tap water. |
| When plants are harvested | Remove the used pod and cup. Rinse the cup and wick under warm water. Inspect the wick for discoloration or slimy residue — replace if needed. |
| Between full growing cycles | Empty and rinse the tank with warm water and a small amount of mild detergent. Rinse thoroughly. Check for limescale and treat with food-grade vinegar or citric acid if needed. |
| Every 1 to 2 growing cycles | Inspect wicks for clogging or discoloration. Replace wicks if water uptake seems slow (plants wilting with adequate tank level). |
| Every 2 to 3 growing cycles or annually | Full deep clean (see maintenance section below). Check lamp arm connections for looseness. |
What to do between crops
When a pod finishes its growing cycle (either harvested fully or spent), lift out the whole cup-and-pod unit using the U-shaped lid as a handle. The spent growing medium can go in a compost bin. Rinse the cup and wick before re-using them, or swap in fresh components from Click & Grow's Pro Plant Cups set, which includes nine cups, nine U-lids, nine wicks, and nine domes as a replacement bundle.
Troubleshooting common problems
LED and power issues
| Symptom | Likely cause | Fix |
|---|---|---|
| Lamp won't turn on at all | Power cable not fully connected at lamp head, or outlet is off | Check both ends of the cable. Try a different outlet. |
| Lamp turns on at wrong time of day | Timer reset after a power interruption | Unplug and replug in the morning to reset the 16 h cycle from a sensible start time. |
| Lamp flickers or dims | Loose connection at lamp head or bent connector pin | Inspect the connector. If bent, contact Click & Grow support — do not try to bend the pin back yourself. |
| Lamp works but plants aren't growing well | Lamp is too far from the canopy, or drafts are affecting plants | Check lamp height. Add the extension arm if plants are very short. Check for nearby air vents. |
Water, roots, and mold
| Symptom | Likely cause | Fix |
|---|---|---|
| Water level drops much faster than expected | High room temperature or direct sunlight hitting the tank | Move the unit away from direct sun and heat sources. |
| White crust around fill hole or on wicks | Limescale from hard tap water | During your next between-cycle clean, treat with food-grade vinegar or diluted citric acid. Rinse thoroughly before replanting. |
| Green or black slime on tank interior or wicks | Algae or mold from light reaching the water | Ensure the grow lid and cups are covering the tank fully — exposed water grows algae. Deep-clean the tank with mild detergent and rinse well. |
| Plants wilting despite full water tank | Clogged or dried-out wicks | Remove cups, inspect wicks. If stiff or coated with residue, replace them. Replacement wicks are available from Click & Grow. |
| Mold on growing medium surface | Overwatering or insufficient airflow | Remove germination domes earlier. Ensure the room has some air movement. A small fan nearby (not pointing directly at plants) helps. |
Pod and germination problems
| Symptom | Likely cause | Fix |
|---|---|---|
| No sprout after 10 to 14 days | Pod defect, seed viability issue, or dome removed too early | Keep domes on for the full expected germination window. If still nothing after 14 days, contact Click & Grow for a free replacement pod. |
| Seedling is very pale or etiolated (tall, spindly, yellow) | Not enough light or lamp too far from canopy | Reduce lamp height. Check that the timer is running the full 16 hours per day. |
| Roots growing outside the cup and into the tank | Normal behavior for established plants | This is fine — the roots are seeking water. No action needed unless they are blocking the wicks of neighboring pods. |
| Pod growing medium is dry and crumbly despite full tank | Wick is not drawing water — possibly not seated correctly | Lift the cup and check that the wick hangs down into the water. Re-seat if it was folded up inside the cup. |
Cleaning and seasonal maintenance
Click & Grow recommends a proper clean between growing cycles, not just a rinse. I'd suggest doing a full deep clean at least once a year, or whenever you notice build-up. Here's exactly what is and isn't dishwasher-safe, because this trips people up constantly.
| Part | Dishwasher-safe? | Cleaning method |
|---|---|---|
| Water tank body | Yes, at ≤50°C (120°F) | Top rack, cool wash cycle |
| Grow lid (with 9 holes) | Yes, at ≤50°C (120°F) | Top rack, cool wash cycle |
| Plastic plant cups | Yes, at ≤50°C (120°F) | Top rack, cool wash cycle |
| U-shaped pod lids | No | Hand wash with mild detergent |
| Germination domes | No | Hand wash with mild detergent, avoid hot water (can warp) |
| Wicks | No | Rinse under warm water; replace if clogged or discolored |
| Lamp arm and lamp head | No | Wipe with a dry or very lightly damp cloth only; never submerge |
For limescale, soak affected plastic parts in a solution of mild food-grade vinegar or citric acid dissolved in water for 30 to 60 minutes, then scrub gently and rinse very thoroughly before reassembling. Click & Grow's official maintenance guidance says to empty and rinse the reservoir with warm water before re‑planting (mild detergent is OK), dissolve limescale with mild food‑grade vinegar or citric acid, note that the water tank, lid and plastic cups are dishwasher‑safe at ≤50°C/120°F while lamp parts, domes, U‑shaped lids and wicks must not go in the dishwasher, and to disinfect (ethanol is an option) and wait about three weeks before replanting after a pest infestation. Any vinegar residue left in the tank can affect roots, so don't rush the rinse step.
If you've had a pest infestation (fungus gnats in the medium are the most common complaint), Click & Grow advises a thorough disinfection with ethanol on hard surfaces and a minimum 3-week wait before replanting. This gives any remaining eggs time to fail to hatch without a live host. Replace all wicks and cups after a pest problem, they're cheap enough that it's not worth the risk of re-infestation.
Replacement parts and where to get them
All official replacement parts come directly from Click & Grow's online store. Third-party sellers on Amazon and elsewhere sometimes stock compatible accessories, but the safest route for anything touching the growing system (wicks, cups, domes) is OEM parts from Click & Grow, since sizing matters.
| Part | Where to buy | Notes |
|---|---|---|
| Plant pods (any variety) | Click & Grow store, Amazon, Best Buy | 60-plus varieties; model SG9S8US pods (Best Buy SKU 6411993) |
| Pro Plant Cups set (9 cups + 9 U-lids + 9 wicks + 9 domes) | Click & Grow store | Best value replacement bundle; replace after each growing cycle if needed |
| Individual wicks | Click & Grow store (accessories section) | Replace if water uptake slows despite a full tank |
| Germination domes (individual) | Click & Grow store | Also included in Pro Plant Cups set |
| Lamp arm extension | Click & Grow store | Needed for tall plants; not included in base kit |
| Supernova upgrade kit | Click & Grow store | Upgraded lamp head for improved light intensity |
| Pollination brush | Click & Grow store | Useful for fruiting plants like tomatoes and peppers |
| Watering indicator | Click & Grow store | Visual float indicator; helpful if the water window is hard to read |
How the Smart Garden 9 compares to similar grow kits
If you're deciding whether this kit is right for you, or you ended up here while researching a different model, here's a quick comparison of the Smart Garden 9 against some common alternatives. For a different approach, see Patio Pickers grow box instructions for setup and care tips. If you're also considering outdoor raised beds, check the Keter Easy Grow elevated garden bed instructions for straightforward setup and care guidance. Wired's buyers' gallery recommends the Click & Grow Smart Garden 9 as a countertop option and notes practical, hands‑on observations such as refill cadence and ease of reset between plant cycles. The core question is usually: how much control do you want versus how much convenience? For users comparing models, see the Keter Easy Grow instructions for a step-by-step setup and parts list.
| Kit | Pods / capacity | Water tank | Timer / lighting | Best for |
|---|---|---|---|---|
| Click & Grow Smart Garden 9 | 9 pods | 4 L (1.06 gal) | Built-in 16 h on/8 h off; no app needed | Beginners who want a set-and-forget indoor herb garden |
| Click & Grow Smart Garden 3 / 6 | 3 or 6 pods | Smaller tank | Same built-in timer | Smaller spaces or starter setups; same pod system |
| Garden Patch Grow Box | Varies (soil-based) | No reservoir | No built-in lighting | Outdoor or sunlit-windowsill gardening; different setup entirely |
| Start Pickin Grow Box | Pre-planted, multiple | No reservoir (soil-based) | No built-in lighting | Self-watering raised bed style; not a countertop LED garden |
| Keter Easy Grow Elevated Garden Bed | Raised bed, soil-based | Sub-irrigation reservoir | No built-in lighting | Outdoor / patio growing; much larger scale than Smart Garden 9 |
| Patio Pickers Grow Box | Soil-based planter | Sub-irrigation tray | No built-in lighting | Deck or balcony use; not comparable as an indoor LED kit |
The Smart Garden 9 is the right choice if you want an indoor, countertop, plug-in system that works without natural light. The soil-based grow boxes (like the Garden Patch Grow Box, Start Pickin Grow Box, and Keter Easy Grow options) are fundamentally different products that need outdoor or sunlit placement, their setup guides are a completely different conversation. If you're comparing indoor LED garden systems specifically, the main trade-off is pod capacity versus price: the Smart Garden 9 at nine pods hits a useful middle ground between the smaller 3- and 6-pod units and larger multi-level systems.
A few final tips from experience
The Smart Garden 9 is one of the easier grow kits to get right first time, but a few habits make a big difference. Don't remove the germination domes early, it's tempting once you see soil shifting, but that trapped humidity is doing real work in those first days. Top up the water before it hits MIN rather than after, because wicks that dry out even briefly can take a day or two to fully re-prime. And if something's wrong with a pod, contact Click & Grow's support before trying to fix it yourself. Their replacement policy is genuinely generous, and the answer is almost always 'we'll send you a new one' rather than a complicated fix.
Once you have a cycle or two under your belt, you'll find the refill schedule and harvest timing become intuitive. Basil in particular is a fast-growing, rewarding first crop, you'll be trimming leaves within four to six weeks. Enjoy the small wins along the way.
FAQ
What official product facts must be verified and included in the guide?
Model name and variants (Smart Garden 9, SKU/model numbers); pod capacity (9); product dimensions (604 × 396 × 184 mm); product weight (≈2.4 kg); water reservoir capacity (4 L / 1.06 US gal / 135 fl oz); rated power consumption (13 W) and cable length (≈2800 mm); default lamp timer (16 h on / 8 h off) and whether schedule resets on power loss; list of included box contents (lamp, extension arm(s), water tank, 9 plant cups/pods, domes, power adapter, manual); warranty length (1 year) and any OEM replacement parts available.
Which primary authoritative sources should be cited and mirrored for accuracy?
Click & Grow official product page and product spec sheet; Click & Grow support/setup guide and cleaning/maintenance support articles; official Smart Garden 9 user manual / quickstart PDF; Click & Grow accessories and replacement parts pages (Pro Plant Cups, domes, wicks, arms, etc.). These are the primary tier‑1 sources to cite for specs, official procedures and parts availability.
What secondary and independent sources are important to corroborate user experience and comparative guidance?
Retail listings (Best Buy, Amazon) for SKU/capacity cross‑checks; reputable product roundups/reviews (Wired, The Verge, etc.) for hands‑on observations about ease of use and refill cadence; university extension material on grow lights (PPFD, DLI) and recommended photoperiods for leafy herbs and lettuce (to justify lighting recommendations); Virginia Tech / Purdue microgreen/lettuce lighting tables for crop‑specific benchmarks; community sources (YouTube unboxing/setup videos, Reddit threads) to capture common user pain points and DIY variations (but clearly label community content as anecdotal).
What hands‑on tests must be performed to make the guide accurate and actionable?
Full unboxing and inventory (time each step, photograph/package contents). Assembly and first‑run setup (assemble lamp/arm(s), insert pods/cups, place domes, fill reservoir to recommended level, start lamp timer) and note any friction points. Water fill and leak test (verify reservoir capacity, show fill method and measure time to fill). Lamp behaviour test (confirm 16/8 cycle, timelamp on/off, test behavior after power loss and manual restart). Light measurements: measure PAR/PPFD and calculate DLI at typical canopy heights (with lamp at stock height and at any adjustable positions) for 3 representative pod positions (center, edge, corner). Germination trials: run at least 2–3 cycles using official Click & Grow pods (herbs, lettuce, basil) and at least one third‑party seed/pod test (document preparation, wick changes, and success rate). Refill cadence test: run a planted cycle to record water consumption and time between refills. Troubleshooting reproduction: deliberately reproduce common faults (LED not powering, no water wicking, mold on pods, failed germination) and test fixes recommended by Click & Grow support. Cleaning and disassembly test: document safe cleaning steps, compatibility with dishwasher for parts claimed dishwasher‑safe, limescale removal with vinegar/citric acid, and drying time before replanting. Parts replacement test: install replacement cups/domes/wicks/arm and confirm fit and function.
Which measurements and instruments are required for hands‑on tests?
Small digital scale (optional) for checking weight if verifying specs; measuring jug for confirming reservoir capacity; PAR meter / quantum sensor to measure PPFD at canopy and calculate DLI; stopwatch or timer to verify lamp on/off schedule; lux meter (optional) for rough light checks; thermometer/hygrometer for ambient microclimate notes; camera with macro capability for close‑ups of wicks, roots and mold; basic multimeter to verify power adapter output when troubleshooting.
What visuals are required to make the guide publication‑ready?
High‑resolution photos (or staged sequences) showing: unboxing layout with all included items and labelled callouts; step‑by‑step assembly photos (attach arm, lamp, place tank, insert cups, fit domes); closeups: plant pod insertion, U‑shaped lids, wick placement, germination domes on/off, water fill port and max fill line; table/diagram of parts with OEM part names and SKUs; annotated images showing lamp height/angles and where to measure PPFD; photos of common problems (blocked wicks, waterline, rootbound pods, mold, sediment/limescale) and the corrective action being performed; before/after cleaning images; screenshots or photos of official manual sections where useful (with copyright attribution) or recreated diagrams when necessary; charts/tables: daily/weekly care schedule, refill cadence table, troubleshooting checklist table mapping symptom → probable cause → fix. Use step numbers on images matching the numbered walkthrough.