To assemble the Keter Easy Grow elevated garden bed, you snap together the frame legs first, then attach the side and end panels in the numbered sequence shown in the included instruction sheet, drop in the drainage plug, add a layer of gravel or landscape fabric for drainage, fill with potting soil to about 2–3 inches below the rim, and you're ready to plant. The whole job takes about 30–45 minutes with no tools required for most steps. That said, there are a few real gotchas worth knowing before you start, including a wobble issue tied to leg seating, a drainage plug that can be tricky to fit, and a water gauge that clogs with dirt over time. This guide walks you through every stage so you don't run into those surprises mid-build. For a smooth start, use the keter easy grow instructions to guide every step from frame setup to planting and watering This guide walks you through every stage.
Keter Easy Grow Elevated Garden Bed Instructions From Unboxing

What the Keter Easy Grow elevated bed actually is
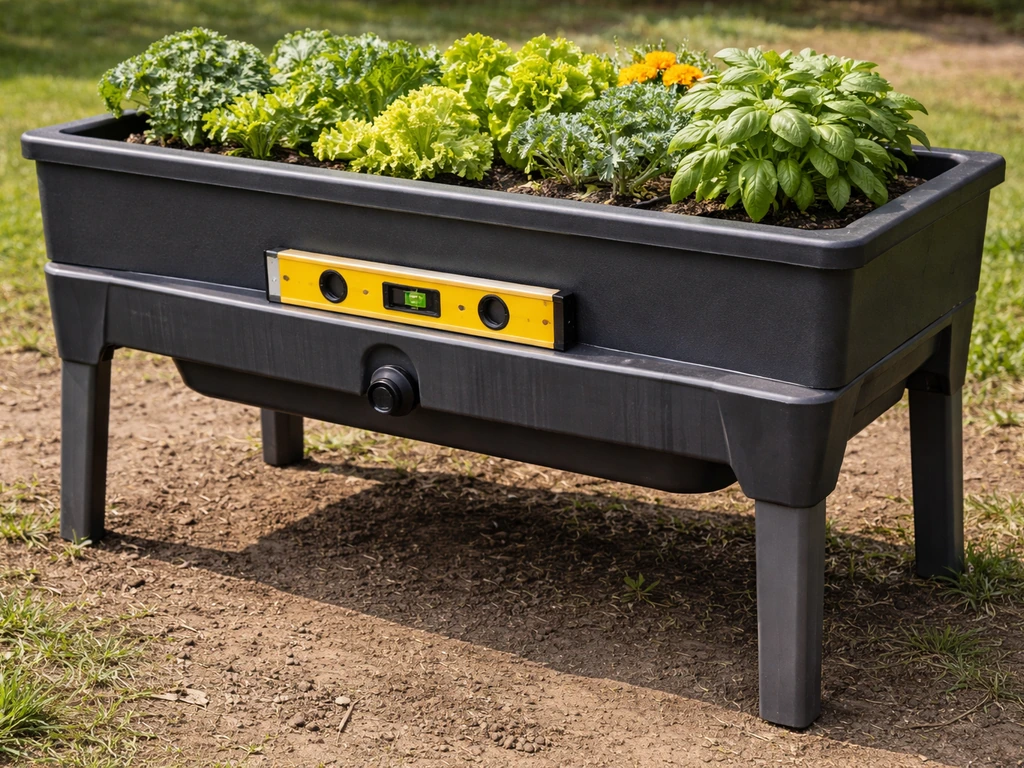
The Keter Easy Grow Elevated Garden Bed (item number 17194592) is a freestanding raised planter made from polypropylene resin, designed to sit at counter height so you can garden without bending down. Assembled, it measures 114 cm long by 49.3 cm wide by 75.7 cm high (roughly 45 x 19 x 30 inches), with a 120-liter growing capacity. That's enough room for a decent mix of vegetables, herbs, and flowers. It comes with built-in plant dividers so you can section off different crops in the same bed.
The standout feature is the built-in watering system. There's a reservoir in the base, a water level indicator (a small float-style leaf gauge), and a drainage tap or plug that lets excess water escape. The idea is that plant roots draw water up from the reservoir as needed, while the drainage plug prevents the roots from sitting in standing water. This is the same self-watering principle used in other elevated planters and grow kits, just built into a fairly simple snap-together frame. Keter also makes related elevated bed models (the Darwin, Splendor, Signature, and Wood Look versions), and while the assembly steps are similar, each has its own labeled parts list and PDF manual. If you want the best results, follow the snap-and-grow greenhouse instructions that match your model and wiring setup. Make sure you're working from the correct instruction sheet for your exact model.
Real-world durability is genuinely good. One reviewer used the same Easy Grow beds for four years in Hawaii's heat, humidity, and salt air with no visible fading and no structural failure. Polypropylene resin doesn't rust, rot, or splinter, which puts it ahead of wood raised beds for low maintenance. That said, quality control is inconsistent. Some buyers have received units with missing screws, cracked parts, or a drainage plug so deformed it wouldn't seat properly. Checking your parts before you start building saves a lot of frustration.
Unboxing checklist: what should be in the box
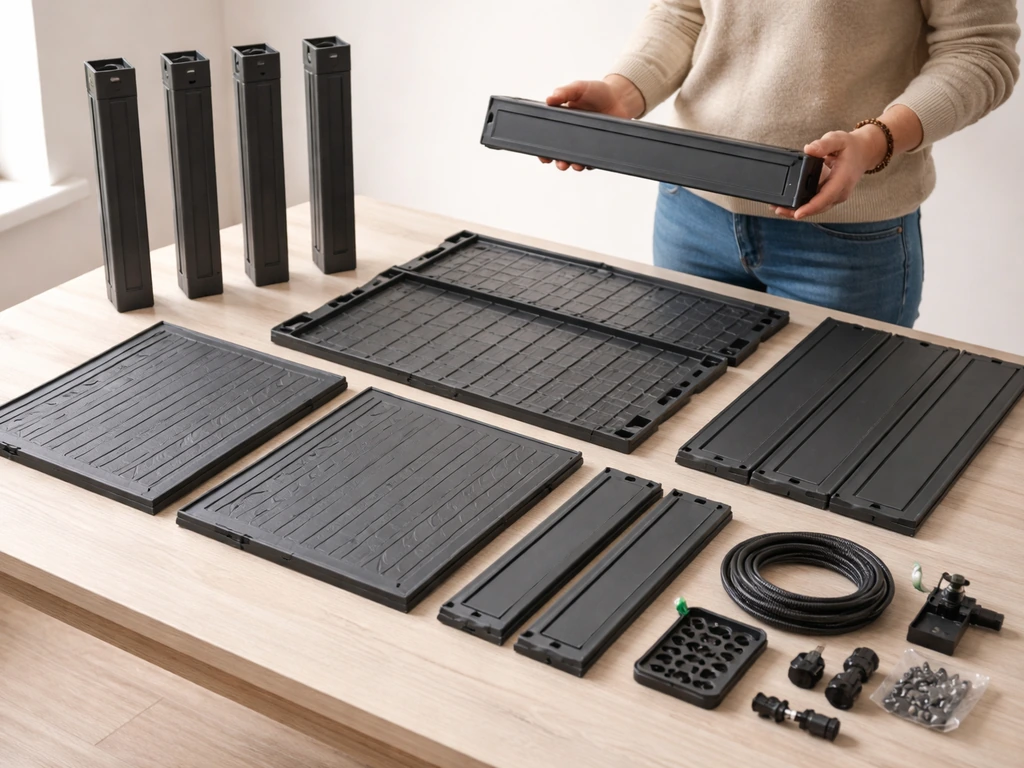
Before you touch a single panel, lay everything out on a flat surface and cross-reference it against the parts list in your instruction sheet. Keter uses a letter-and-name system for parts (A, B, C, M, WG, F, P, S, LL, RL, and similar), and the quantities are listed right in the manual. Count every piece.
- Frame leg posts (usually 4, sometimes with left/right variants labeled LL and RL)
- Long side panels (2)
- Short end panels (2)
- Bottom tray or basin with the drainage tap/plug pre-inserted or included separately
- Water level indicator (the float leaf or gauge tube)
- Plant dividers (check your model's count, usually 2–3 divider panels)
- Hardware bag with screws, bolts, or locking clips depending on your version
- Instruction sheet (fold-out or booklet, sometimes multi-language EN/FR/ES/DE/IT/NL)
If anything is missing or visibly cracked, don't proceed. Contact Keter customer support with your item number (found on the box or the parts bag) before starting the build. Trying to work around a broken or missing part, especially the drainage plug, leads to bigger problems later. Also confirm you have the right model's instruction sheet. If you want the quick-start version, follow the start pickin grow box instructions for prepping, planting, and initial watering start the build. Keter's assembly PDF library lists several elevated bed models, and the step diagrams for the Darwin, Splendor, and Signature versions are different enough to cause confusion if you're looking at the wrong one.
Step-by-step assembly: frame, panels, and positioning
These steps follow the general Keter elevated bed assembly sequence. Your specific instruction sheet may have 10–12 numbered diagram steps. Follow the diagrams in order and don't skip ahead.
- Lay all panels face-down on a clean, soft surface (a lawn or a blanket works) so you don't scratch the finish while building.
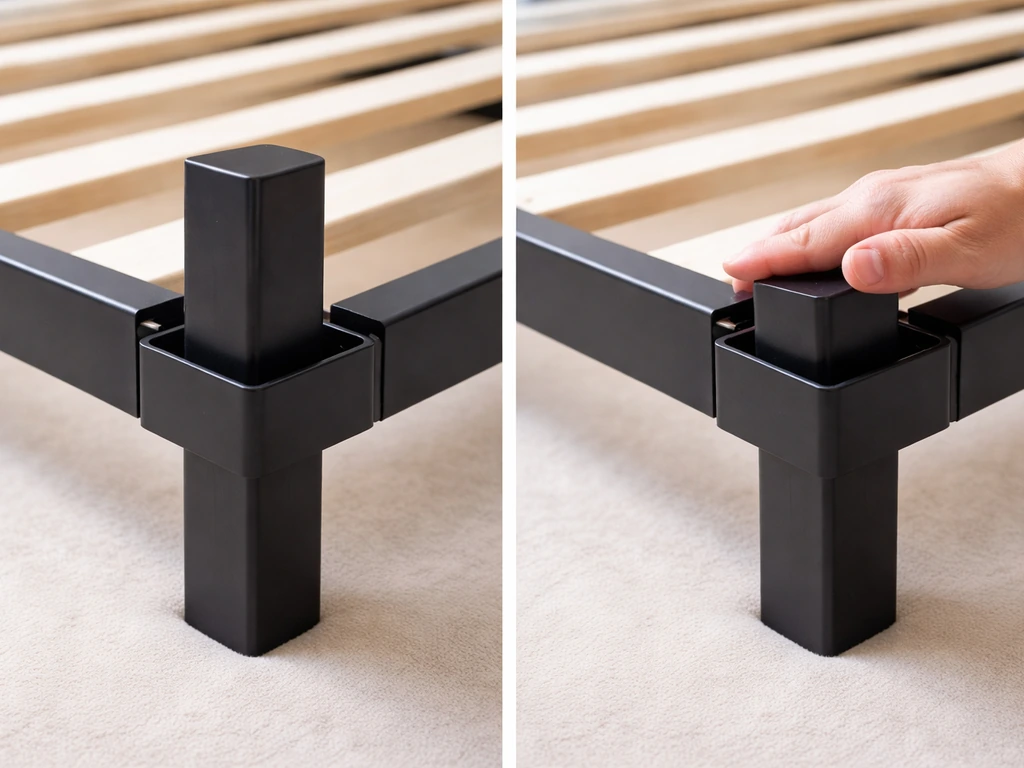
- Attach the four leg posts to the bottom tray first. Most Easy Grow models have the legs snap or bolt into corner receivers on the basin. This is the most critical step: press each leg firmly until you feel or hear it seat fully. Legs that aren't fully locked cause the wobble issue reviewers complain about.
- Connect the two long side panels to the leg posts. Keter panels typically slot into channels or clip onto the posts. Align the top edge flush before pressing in the lower clips.
- Attach the two short end panels in the same way. With all four panels in place, the frame should feel solid. If it flexes noticeably, go back and re-check the leg connections at the basin corners.
- Insert the plant dividers if desired. These drop into slots inside the bed and you can position them wherever you want to separate plant varieties.
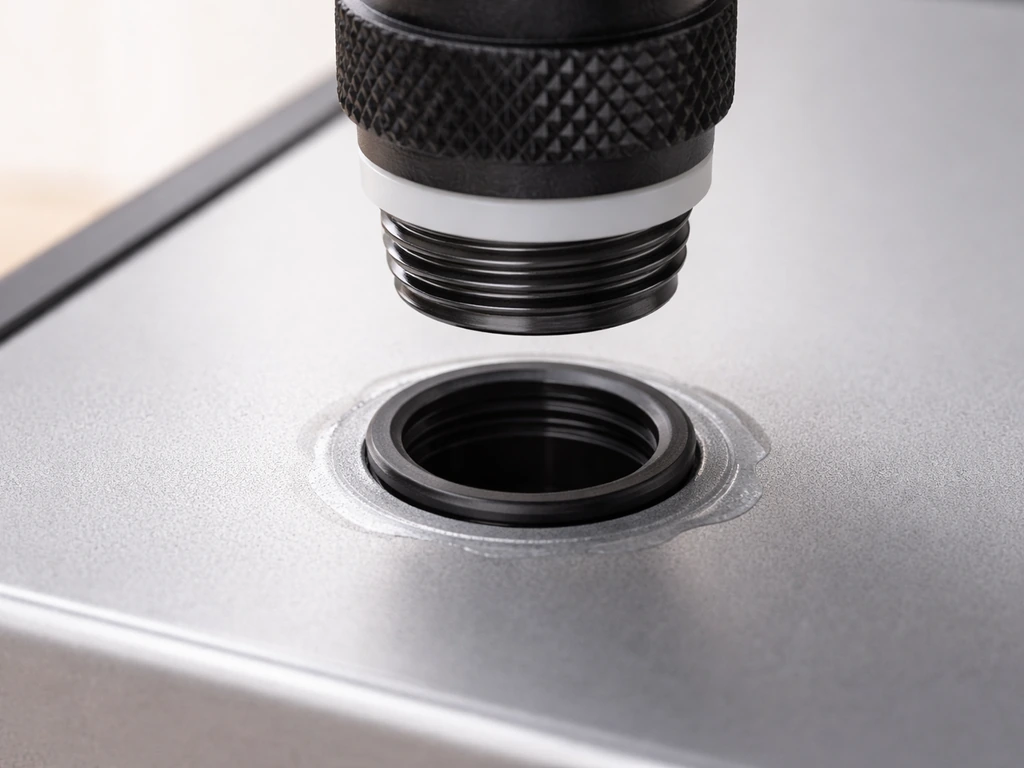
- Seat the drainage plug or connect the drainage tap. It should fit snugly into its port on the underside of the basin. If the plug is deformed or won't seat, do not force it. Contact Keter for a replacement before filling with soil.
- Drop in the water level indicator. This is the float-leaf gauge that sits in the reservoir opening. It should move freely up and down. Note: this tube is prone to clogging with dirt over time, which we'll cover in the troubleshooting section.
- Stand the assembled bed upright, check that all four legs are in firm contact with the ground, and give it a gentle push from each side to confirm stability before adding soil.
One thing worth calling out: the legs on some Easy Grow models have a left and right version (labeled LL and RL in the Darwin manual). If you mix them up, panels won't align and the bed will look twisted. Check the labels before you snap anything in. This is the single most common assembly mistake.
Where to put it and how to level it
The Easy Grow is designed for outdoor use only. The drainage system runs continuously, meaning water will drip from the plug area during and after watering, so you don't want this inside. Pick a spot with full or partial sun depending on what you're growing, and make sure you can actually reach the drainage tap on the underside without having to move the whole bed once it's full and heavy.
Level ground is important. The reservoir at the base needs to sit flat so the water level indicator reads accurately and so water distributes evenly across the root zone. If you're placing the bed on a deck or patio, check with a small spirit level across the top rim once it's positioned. If you are setting it up on a patio, use the included grow box instructions to choose a level spot and place it where you can reach the drainage tap underneath. On soft ground or grass, the legs can sink unevenly over time, so set the bed on pavers, stepping stones, or a piece of pressure-treated lumber to keep it stable.
Keep drainage access in mind. Don't push the bed against a wall or fence so tightly that you can't reach under the basin to open the drainage plug when needed. About 6 inches of clearance on the drain side is plenty. Also think about rain exposure: if you're in a wet climate, you'll want to be able to quickly open the drainage plug during heavy rainfall to avoid the bed overflowing and drowning your plants. (More on this in the troubleshooting section.)
Filling it correctly: soil, drainage, and layout
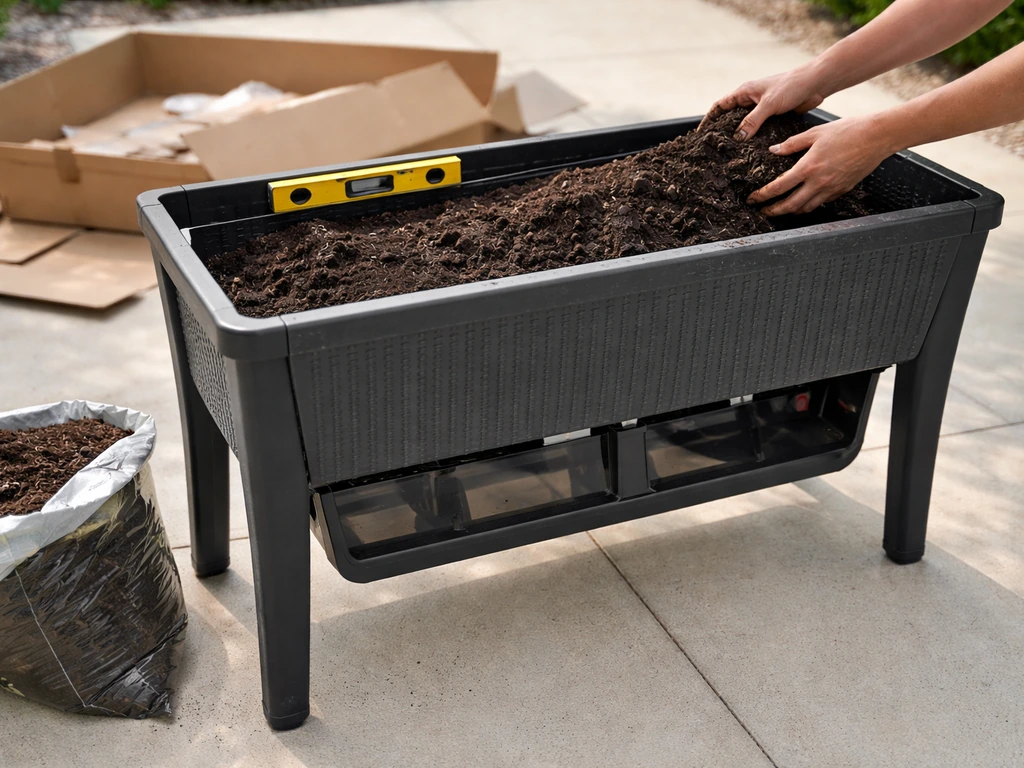
The Easy Grow uses a reservoir-based self-watering system, so the type of soil you use matters more than in a regular raised bed. Use a quality potting mix, not garden soil or topsoil. Garden soil is too dense for this kind of system and will block the wicking action between the reservoir and the root zone. A mix labeled for containers or raised beds works well. The Hawaii reviewer who got four years of success specifically used potting soil.
You don't need to add gravel to the bottom of this bed the way you might with a traditional container. The reservoir and drainage tap handle water management for you. What you can do is lay a piece of landscape fabric loosely across the bottom of the planting area before adding soil. This slows down the rate at which fine soil particles migrate down into the reservoir over time and helps keep the drainage port clear. It's a five-second step that extends the life of the water system noticeably.
Fill soil to about 2–3 inches below the top rim. This leaves room for mulch and prevents soil from washing out during watering. The total volume is 120 liters, so you'll need roughly 3–4 cubic feet of potting mix. Plant dividers can be positioned before or after filling. The bed handles everything from shallow-rooted herbs and lettuce to deeper-rooted crops like carrots, beans, and tomatoes. Just keep in mind the depth is fixed, so very large root vegetables may not reach their full potential.
To water, fill through the soil surface or directly into the reservoir fill port until the water level indicator shows full. Let the indicator drop before refilling. During the first few waterings, you'll notice water appears at the drainage tap fairly quickly as the reservoir fills and excess drains off. That's normal and exactly how the system is supposed to work.
Honest pros and cons based on real user experience
| What works well | What to watch out for |
|---|---|
| No tools needed for most of the assembly | Leg seating can be finicky, causing wobble if not fully locked |
| Polypropylene resin resists rust, rot, fading, and salt air | Inconsistent quality control: missing screws, cracked parts, and deformed plugs have been reported |
| Ergonomic height is genuinely useful for back and mobility issues | Water gauge tube clogs with dirt over time, making it unreliable |
| Self-watering reservoir reduces day-to-day watering effort | Drainage plug must be managed actively in heavy rain to prevent root drowning |
| Plant dividers let you mix crops in one bed | Not suitable for very deep-rooted crops like large root vegetables |
| 4+ year lifespan reported in harsh outdoor conditions | Replacement parts can be hard to source if something breaks during setup |
The biggest real-world frustration isn't with the design itself but with out-of-box quality. If you get a unit where the drainage plug is deformed, the water level leaf is snapped, or screws are missing, the bed is hard to set up correctly from day one. Always inspect parts before assembly and don't let the excitement of starting the build cause you to skip past something that needs to be addressed with Keter before you proceed.
Troubleshooting the common sticking points
The bed feels wobbly after assembly
This almost always comes down to the leg posts not being fully seated in the basin corners. Some reviewers also mention assembly-related problems like legs that do not seat properly, which they describe as causing an “unsturdy and wobbly” build, along with reports of cracked or damaged parts in transit blank" rel="noopener noreferrer">legs not seating properly causing an “unsturdy and wobbly” build. Disassemble back to the legs-and-basin stage and re-press each leg until it locks completely. Also check that you haven't mixed up left and right leg versions if your model has them. If the wobble persists on level ground after correct assembly, check whether the legs are all making contact with the surface. A small shim under a short leg is a quick fix for slightly uneven pavement.
The drainage plug won't fit or seat properly
If the plug is deformed or the port opening is misshapen from transit damage, don't try to force it. A plug that's not properly seated means your reservoir won't hold water at all, defeating the self-watering function. If you're looking for click-and-grow smart garden 9 instructions style guidance, follow the same habit of checking key components so you can avoid water issues before they disrupt your plants self-watering function. Contact Keter support with your item number and request a replacement part. In the meantime, you can still use the bed like a conventional planter by watering from the top surface, but fix the plug before relying on the reservoir system.
The water level indicator stops working
The float tube that shows water level in the reservoir tends to clog with fine soil particles over time. This is a known and common issue. To clear it, lift the indicator tube out, rinse it under running water, and clear the bottom opening with a thin wire or toothpick. The landscape fabric trick mentioned in the filling section helps slow this down. If the gauge is already clogged, switching to a simple watering schedule (check soil moisture with your finger and water when the top inch is dry) works perfectly well as a substitute. For click and grow smart garden instructions, the same idea applies: check the soil moisture and water only when the container needs it simple watering schedule.
Plants are getting waterlogged during rain
During heavy or prolonged rainfall, the reservoir can fill faster than the drainage tap can handle, especially if the plug is closed. The fix is simple: pull or open the drainage plug during wet weather to let excess water escape freely. One reviewer in Hawaii found out the hard way that leaving the plug closed through a rainy winter drowned their worms and plants. Once the rain passes and normal conditions return, reseat the plug and go back to regular reservoir-based watering. If you're in a reliably rainy climate, consider leaving the plug permanently open and managing moisture through direct top watering instead.
Panels don't align or won't click in properly
Panel misalignment usually means either the legs aren't fully seated or you're trying to attach a panel before its neighboring panels are in place. Keter's step diagrams are numbered for a reason: they're telling you the order that keeps things stable and aligned. If a panel won't click in, back up two steps, confirm the prior parts are locked, and try again. Forcing a panel into place cracks the connection points and creates a weak spot that gets worse over time.
Ongoing maintenance to keep it performing well
A few quick habits will keep the Easy Grow bed in good shape season after season. Periodically pull the drainage plug to flush the reservoir, drain any standing water, and rinse away sediment buildup. Keter's own Darwin manual recommends this, and the flushed water is actually useful: it's rich in natural salts and minerals from the soil, so save it to water other garden plants. Clean the water level indicator tube at the start of each growing season. At the end of the season, remove the plug before storing or leaving the bed through winter to prevent standing water from freezing inside the basin and cracking it.
If you're comparing the Easy Grow to other self-contained grow systems, it sits in a similar space to the self-watering grow boxes and elevated planters covered elsewhere on this site, but the Easy Grow's bigger footprint and proper elevated height make it a more capable option for growing real quantities of food rather than just herbs on a windowsill. It's a good step up for anyone who's outgrown a smaller countertop kit and wants to grow outside at a comfortable working height.
FAQ
How can I tell if the Easy Grow reservoir is actually filling and working correctly after assembly?
Do a water test before planting, add water through the fill port until the indicator reaches full, then confirm you see a steady drip from the drainage plug area and that the float gauge drops after a set time. If the indicator never rises or drops immediately, the drainage plug may not be fully seated (stop and fix before relying on self-watering).
Can I use my own compost, garden soil, or a mix with compost in the Easy Grow?
For this system, avoid straight garden soil or heavy compost mixes, they can clog wicking and reduce water movement from the reservoir. If you want compost, blend it into a container-style potting mix at a light ratio and keep the bulk airy, so the wicking pathway stays open and the water level indicator behaves normally.
What should I do if my yard is uneven and the bed wobbles again after I level it?
Recheck seating at the leg posts, then place the bed on a solid, non-compressing base (pavers or stepping stones). If a leg is on grass or soft ground, it can settle and create wobble later even if it was level at first.
How much clearance do I need around the drainage side so I can open the plug when it’s full?
Aim for easy access space under and beside the underside of the plug area, a practical starting point is about 6 inches. Also make sure you can operate the plug without tilting the bed, since forcing access can crack panel connections.
Should I leave the drainage plug open year-round in rainy areas?
In consistently wet climates, leaving it open can prevent overflow, but you will reduce true reservoir-based self-watering. A common compromise is keep it closed during dry spells, open it during heavy rain, and monitor the indicator so you do not accidentally switch into constant top-watering conditions.
Why does my water level indicator clog, and how often should I clean it?
Fine particles and sediment can accumulate in the float tube openings, especially if you use dense soil or disturb the soil surface. A good maintenance habit is cleaning at the start of the season, and doing a quick rinse if the gauge response becomes slow or erratic mid-season.
Is landscape fabric at the bottom enough, or do I still need gravel?
You typically do not need gravel in this specific elevated model because the reservoir and drainage tap manage water. Using landscape fabric loosely can help slow soil migration into the water system, which helps keep the drainage port clearer over time.
Can I remove the plant dividers after I fill the bed, or do I have to install them first?
Yes, but repositioning after filling is harder because the dividers can shift soil and potentially disturb the bottom area. If you must move them later, lift and reposition carefully to avoid compacting soil that could affect wicking performance.
What plants do worst in the fixed depth of the Easy Grow bed?
Very deep root vegetables can underperform because the bed depth is limited. If you want to grow carrots or similar crops, consider shorter varieties and be prepared that yields may be smaller than in deeper raised beds even when watering is correct.
How should I flush and store the bed to avoid winter damage?
Before winter, remove the drainage plug so any remaining water does not freeze inside the basin, and let the reservoir fully drain. During storage, keep the bed dry and supported so legs do not hold standing moisture against the ground, which can accelerate wear at contact points.