Setting up a Patio Pickers self-watering grow box is straightforward once you understand how the wicking system works: you fill a bottom reservoir through a dedicated fill tube, and the potting mix draws water upward to plant roots on demand. The kit (product code ER 2345IS) includes a growing box, aeration screen, fill tube, mulch cover, and casters. The Patio Pickers instructions and planting guide for the official kit documents product code ID ER 2345IS as an INSTRUCTIONS & PLANTING GUIDE PDF. You supply peat or coir-based potting mix, dolomite lime, fertilizer, seeds or seedlings, and scissors. Get those pieces in order and you're ready to go.
Patio Pickers Grow Box Instructions for Self Watering Setup

Marcus Thornfield
4 Jul 2026

What a Patio Pickers self-watering grow box is (and what you'll need)
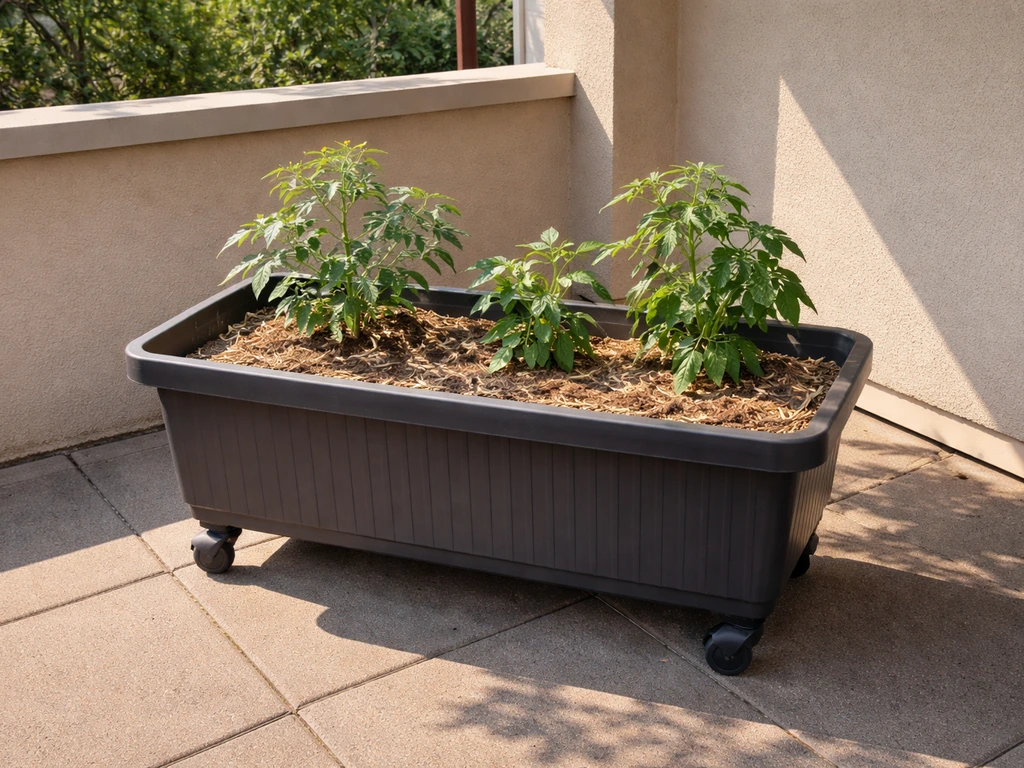
The Patio Pickers grow box is a sub-irrigation planter made by EMSCO Group. Instead of watering from the top, you pour water into a fill tube that feeds a reservoir at the bottom of the box. An aeration screen sits above that reservoir, and the potting mix packed above the screen wicks moisture upward to the root zone. Plants pull water as they need it, which means less overwatering, less evaporation, and more consistent moisture than a standard pot. The mulch cover on top reduces weed growth and slows surface evaporation further. Casters on the bottom let you roll it into better sun or under cover before a storm.
One thing worth knowing upfront: this kit is part of the broader EMSCO family that includes the Start Pickin', City Picker, and Bountiful Harvest grow boxes. Replacement parts (especially the mulch cover and aeration screen) are sometimes sold through Tractor Supply and work across several of these models. However, EMSCO doesn't sell parts individually through their own site, so hold onto everything in the box.
Here's what ships with the kit versus what you need to source yourself:
| Included in the kit | You need to provide |
|---|---|
| Growing box | Peat or coir-based potting mix (see media rules below) |
| Aeration screen | 2 cups (1 lb.) dolomite lime |
| Fill tube | Granular fertilizer (2 cups synthetic or 3 cups organic) |
| Mulch cover | Seeds or seedlings |
| Casters | Scissors or utility knife |
| Instructions & planting guide | Water |
Step-by-step setup: from unboxing to first fill

Before you start, lay all the parts out and confirm nothing is missing. If the aeration screen or fill tube is absent, you'll need to source a replacement before assembly makes any sense. Once everything checks out, here's the full build sequence. If you want click-and-grow style results, follow the click and grow smart garden instructions for timing, watering, and setup so your system performs from day one.
- Attach the casters to the bottom of the grow box so you can move it once it's full and heavy.
- Place the aeration screen inside the box. This screen sits above the reservoir space at the bottom and supports the potting mix.
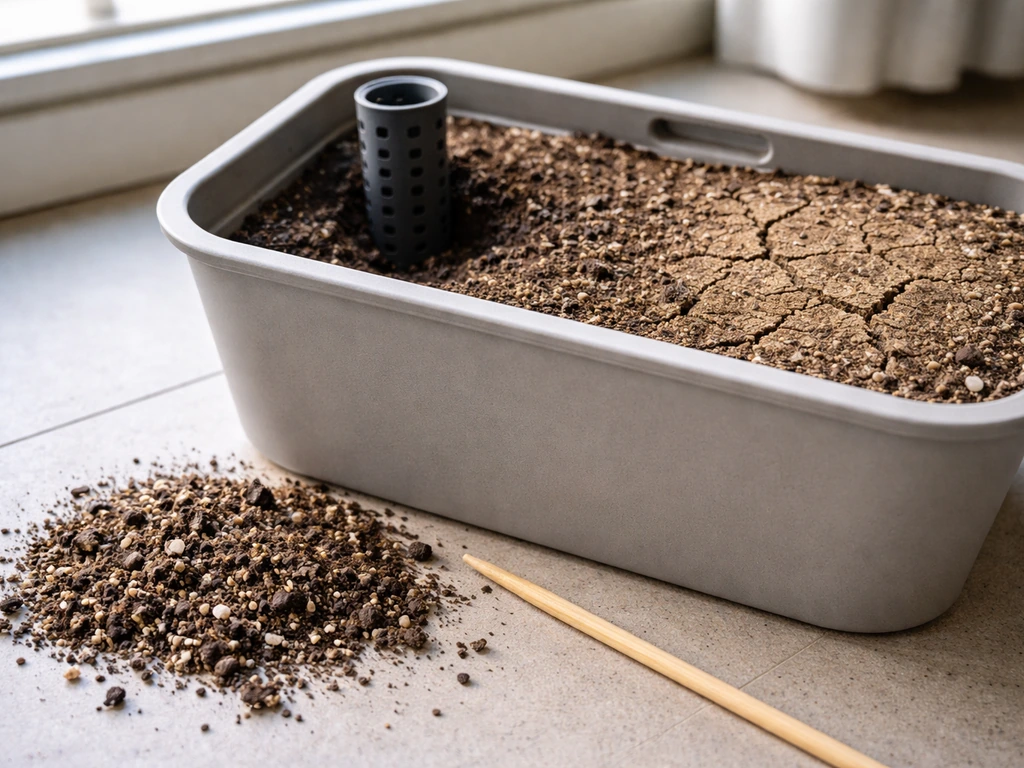
- Insert the fill tube through the corner hole in the aeration screen and push it all the way down to the very bottom of the box. This is critical — if the tube doesn't reach the bottom, you won't fill the reservoir properly.
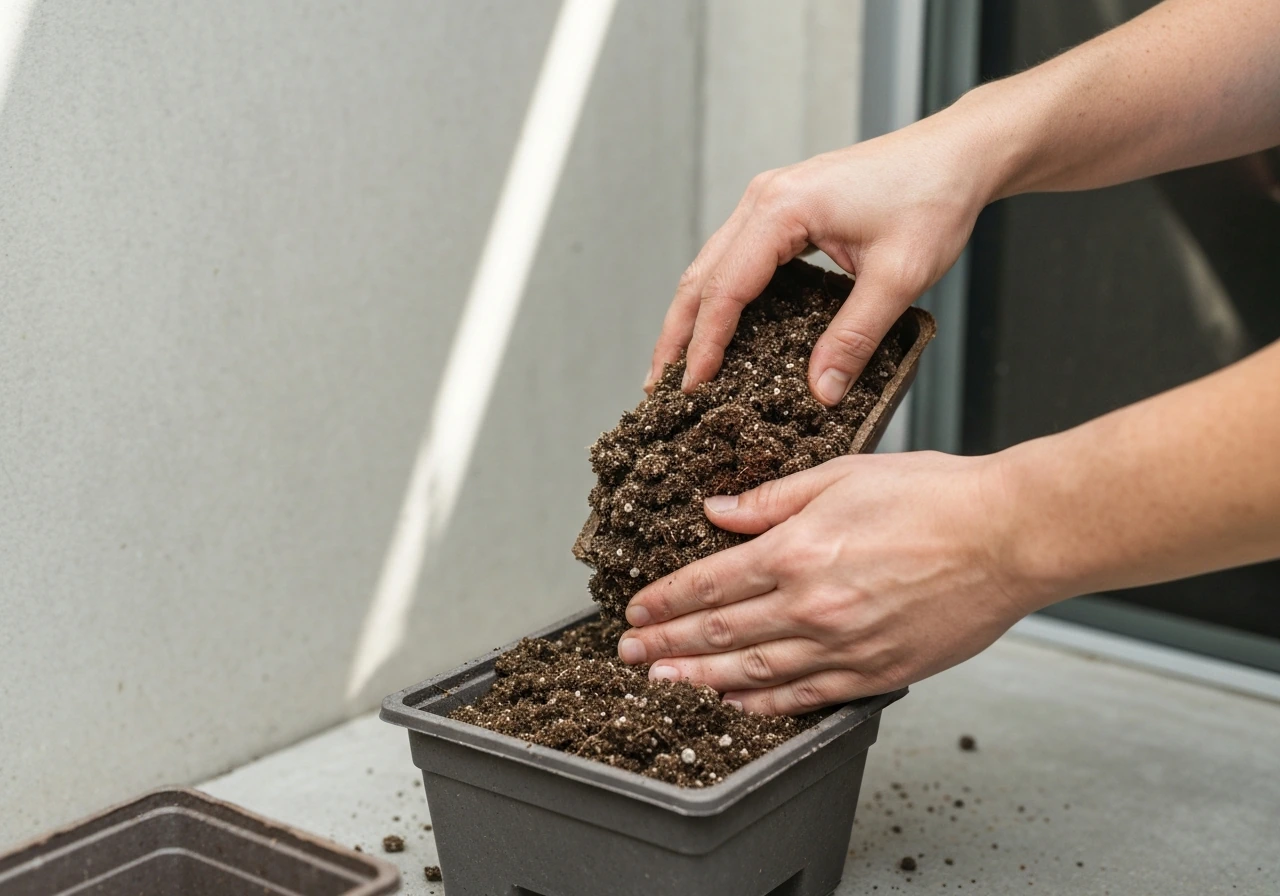
- Pack the open corners of the box (around the screen) firmly with moist potting mix. This corner packing is what starts the wicking — it creates a direct bridge between the reservoir below and the soil above. Don't skip it.
- Add moist potting mix on top of the screen, filling the box to within 2 inches of the top. The mix should feel like a wrung-out sponge — damp, not soggy. Pre-moistening it before you pack it in makes a big difference for getting wicking started.
- Spread a layer of dolomite lime (2 cups / 1 lb.) evenly across the top of the potting mix.
- Mix additional dolomite into the top 3–4 inches of potting mix and level the surface.
- Dig a shallow 2-inch trough across the mix and lay your fertilizer strip in it (2 cups synthetic or 3 cups organic granular). Cover the trough back over — plants should not be sitting directly on the fertilizer.
- Lay the mulch cover over the top of the box and secure it.
- Use scissors or a utility knife to cut an 'X' opening where the fill tube comes through, then cut additional 'X' openings where you plan to plant. Size each planting 'X' to match the root ball of your seedlings.
- Plant your seedlings or sow seeds through the 'X' openings.
- Fill the reservoir by pouring water slowly down the fill tube. Keep going until you see water flowing out of the overflow hole on the side of the box — that's your signal the reservoir is full.
How the self-watering system works (and how to keep it wicking)
The overflow hole on the side of the box is your best friend for managing water levels. When you fill and water drips out of that hole, the reservoir is topped up. When it stops dripping and the tube feels dry, it's time to refill. If you're looking for keter easy grow elevated garden bed instructions, the same sub-irrigation principles like consistent moisture and correct media preparation will help you dial in results refill. Always water through the fill tube only, never pour water directly onto the soil surface, which defeats the sub-irrigation design and can displace your fertilizer strip.
Wicking can be slow to start, especially if the potting mix was too dry when you packed it in. Dry peat moss in particular acts like a sponge that repels water at first rather than absorbing it. If you notice the soil surface staying very dry even after filling the reservoir, the fix is to lightly hand-water the surface just once to jumpstart the capillary action. After that, the system should take over.
The refill schedule changes as your plants grow. When plants are small and their roots haven't reached deep into the mix yet, check the reservoir every few days. Once plants mature and start pulling water aggressively in summer heat, you may need to top up daily. The rule from the instructions is clear: never let the reservoir run completely dry. An empty reservoir doesn't just mean thirsty plants, it stops nutrient uptake because the wicking mechanism breaks when the moisture bridge is interrupted.
What to grow, how to plant, and spacing rules
Choosing the right potting mix (this really matters)
The Patio Pickers system is picky about growing media, and this is where a lot of people run into trouble. The mix must be peat moss or coconut coir-based, ideally with perlite and/or vermiculite. Do not use anything that lists screened topsoil, bark, forest humus, sawdust, or partially composted material as a main ingredient, those materials do not wick, and your reservoir will just sit there full of stagnant water while your plants dry out above. Check the ingredient panel on the bag before you buy. If you want step-by-step garden patch grow box instructions for planting and setup, follow the product guidance in the grow box instructions resource. A standard container or potting mix from a garden center usually works, but read the label.
Seeds vs. seedlings and how many to plant
The kit supports both seeds and seedlings. If you're starting from seedlings, look for plants that are 5–7 inches tall in roughly 2-inch wide pots, that size transitions well into the grow box. For seeds, crops like cucumbers, squash, and beans germinate easily and grow fast enough that direct sowing works fine. Here's the planting quantity guide from the official instructions:
| Crop | Recommended quantity |
|---|---|
| Tomatoes | 2–3 plants |
| Peppers | 8 plants |
| Lettuce | 10 plants |
| Cucumbers (from seed) | Direct sow, thin to 2–3 |
| Squash (from seed) | Direct sow, thin to 1–2 |
| Beans (from seed) | Direct sow per packet spacing |
The overcrowding rule is worth repeating: don't squeeze in extra plants thinking you'll get more produce. Overcrowding creates competition for water and nutrients, and it traps humidity in a way that invites disease. Also make sure no plant stem is sitting right on top of the fertilizer strip, keep at least a couple of inches between roots and the trough.
Where to put it: sun, shade, and patio placement
Placement makes or breaks your harvest, and the good news is the casters give you flexibility most planters don't. The rule is simple: warm-season crops like tomatoes, peppers, and eggplant need a minimum of 8 hours of direct sun per day. If your patio gets less than that, stick to cool-season crops. Leafy greens like lettuce, spinach, and arugula actually prefer partial shade, too much direct afternoon sun in July will bolt them fast.
On a south or west-facing patio in midsummer, the grow box can heat up considerably. That's great for tomatoes but can stress lettuce. If you're growing greens in hot weather, position the box where it gets morning sun and afternoon shade. Because the box is on casters, you can adjust as the seasons change without disturbing the plants.
The official instructions don't specify an exact temperature range, but as a general rule: don't leave warm-season crops out if overnight temps are dropping below 50°F, and don't be surprised if growth slows significantly during heatwaves above 95°F. If you want keter easy grow instructions for similar setup and care, follow the same approach and check the specific guidance for your model. Rolling the box to a slightly sheltered spot during extreme heat helps.
Troubleshooting common problems
Wicking isn't working / soil stays dry
If the reservoir fills (you see the overflow) but the soil stays bone dry, the potting mix wasn't moist enough when you packed it, or the corner wicking columns weren't packed tightly. The fix: hand-water the soil surface once to get capillary action started. If that doesn't work within a day or two, you may need to unpack and re-wet the mix before repacking. Also confirm the fill tube reaches the bottom of the box, a tube that only reaches halfway down won't fill the reservoir correctly.
Water leaking from somewhere other than the overflow hole
The only place water should exit the box is the overflow hole on the side. If you're seeing water pooling underneath the box or seeping through a seam, check that the aeration screen is seated flat and that the box itself isn't cracked. Minor cracks on older boxes can sometimes be sealed temporarily with waterproof silicone, but at that point it's worth contacting EMSCO about a replacement, though parts availability can be limited, as users have noted that EMSCO doesn't sell components separately.
Algae or green slime in the reservoir
The mulch cover is your main defense against algae, it blocks light from reaching the moist soil surface and the reservoir below. If algae is building up, check that the mulch cover is fully secured and that you haven't left gaps around the fill tube opening. If you notice an algae smell when you fill the tube, flush the reservoir by filling until water runs from the overflow hole, then letting it drain completely before refilling with fresh water. Repeat once or twice to clear it out.
Mold on the soil surface
Surface mold usually means the top of the mix is staying too wet, either from overwatering the surface directly (stop doing that) or from poor airflow around the plants. Make sure you're only watering through the fill tube. If the mulch cover is trapping humidity and causing surface mold underneath, you can trim the 'X' openings slightly larger to allow a bit more airflow. Avoid adding water to the reservoir if the overflow hole is still draining, the system is still full.
Slow or stunted growth
Slow growth usually comes down to one of three things: the reservoir ran dry and interrupted nutrient uptake, the potting mix choice was wrong (bark or topsoil-based mixes don't feed nutrients up to roots effectively), or the box isn't getting enough sun. Check your sun hours first, it's the most common fix on a patio. If sun is adequate, refill the reservoir and make sure it hasn't been running dry between checks. If you're mid-season and growth just stopped, check whether the fertilizer strip has been exhausted; you may need to top-dress with additional fertilizer.
Pests
The mulch cover reduces soil-level pest access compared to open planters, but aphids, whiteflies, and spider mites can still hit foliage. Inspect the undersides of leaves regularly. For small infestations, a strong blast of water from a hose (aimed away from the fill tube) or insecticidal soap spray handles most common patio pests. Keep the box away from overhanging plants that might harbor pests.
Ongoing care schedule and harvesting tips
Once everything is running, the Patio Pickers system is genuinely low-maintenance. Here's a practical ongoing schedule:
| Task | Frequency |
|---|---|
| Check and refill reservoir via fill tube | Every 2–3 days (young plants) / Daily (mature plants) |
| Inspect overflow hole to confirm reservoir is full | Every fill |
| Check mulch cover for gaps or lifting edges | Weekly |
| Inspect foliage for pests or disease | Weekly |
| Flush reservoir if odor or algae is present | As needed |
| Add dolomite lime | Each time you replant (2 cups / 1 lb.) |
| Add fertilizer | At initial planting only — not during the growing season |
For harvesting, the best practice is to pick regularly rather than letting crops over-ripen on the plant. With tomatoes and peppers, regular harvesting encourages the plant to keep producing. With lettuce and leafy greens, cut outer leaves and let the center keep growing, you can harvest from the same plants for weeks.
When the season ends and you're ready to replant, remove the old root mass, replace or refresh the potting mix if it's compacted, and always add fresh dolomite before planting again. The instructions specifically say to mix dolomite into the top 3–4 inches of the existing mix at replanting time. Don't reuse the old fertilizer strip, start a new one each planting cycle. Taking those two steps keeps the system wicking well season after season.
If you're enjoying the self-watering grow box format and want to compare it to similar kits, systems like the Start Pickin' grow box and Garden Patch grow box use comparable sub-irrigation setups and are worth a look for patios where you want more growing space. Each has slightly different assembly steps, and if you want the exact start pickin grow box instructions for comparison, check the Start Pickin' guide too. Each has slightly different assembly steps, but the core wicking logic is the same.
FAQ
Can I just use a regular garden-center potting mix in the Patio Pickers grow box?
Yes, but only if you use a wicking-compatible potting mix. For best results, avoid topping up the reservoir with any “normal” potting soil. Add only peat or coconut coir-based mix (with perlite and/or vermiculite if available) and pack it firmly so the wicking columns stay continuous.
What should I do if I see water running from the overflow hole while I’m refilling?
You should not “top off” the reservoir if water is still draining from the overflow hole. First wait until the overflow has stopped (meaning the reservoir is at its set level), then refill through the fill tube. This prevents overfilling and reduces the chance of algae or water escaping seams.
My overflow hole keeps draining, is the box overfilled or is something misassembled?
If the overflow hole is dripping continuously even after you think the reservoir is full, check two things: the fill tube depth (it must reach the bottom) and whether the aeration screen is seated flat. A mis-seated screen can create uneven flow paths that keep water moving out.
Does water quality (hard water, soft water, chlorinated water) affect how well the wicking system works?
The kit is designed for consistent moisture, so water quality matters. If your tap water is very hard or chlorinated, mineral buildup can reduce performance over time. A practical approach is to flush the reservoir periodically by filling until overflow runs, then draining completely before the next refill with fresh water.
How do I handle odor, mineral buildup, or fertilizer clumping in the reservoir?
If you notice fertilizer buildup or the box starts smelling, do a full clear-out by flushing until water exits the overflow hole, then letting it drain fully. After that, restart fertilizing using fresh strip placement for the next cycle rather than trying to “stretch” old fertilizer.
What causes surface mold, and what’s the fastest fix without breaking the self-watering design?
If you get surface mold, it usually means the top of the mix stays too wet or airflow is blocked. Stop any surface watering, confirm you’re filling only through the fill tube, secure the mulch cover properly, and consider slightly enlarging the mulch’s 'X' openings for airflow if the manufacturer design allows it.
If the reservoir is full but plants look thirsty, how can I diagnose the cause quickly?
Most likely, one of three issues is happening: the wicking mix was too dry when packed, the mix type is incorrect (bark/topsoil-based materials), or the corners were not packed tightly enough. Try a one-time light hand-water to start capillary action, and if it fails within a day or two, re-wet and repack the mix.
Can I move the grow box during weather changes, and what are the temperature guidelines?
Yes, but start with small adjustments. For heatwaves, roll or reposition the castered box to morning sun and afternoon shade for greens, and shelter it during extreme heat. For cold snaps, bring warm-season plants in or cover them before overnight temps drop below about 50°F, since growth slows and stress increases quickly.
Can I “rescue” droopy plants by adding more water right away?
Don’t add water to the reservoir if the overflow hole is still actively draining, even if the plants look droopy. Use the fill tube to refill only after draining has stopped, then re-check after a normal wicking cycle. Constant overfilling can disrupt moisture balance and keep algae-producing conditions active.
Why do I have uneven growth and pest problems when I plant the box densely?
Overcrowding reduces airflow and makes it harder for roots to access water evenly. Use the kit’s planting quantity guide, and keep at least a couple of inches between root areas and the trough. If stems are pressed against the fertilizer strip, you can get nutrient stress and inconsistent wicking.
How do I adapt the instructions when starting from seeds instead of seedlings?
For seeds, only sow the recommended number and cover depth, then keep the mix consistently moist during germination. Since this system waters from below, you still need proper initial packing, then check the reservoir more frequently early on until roots establish deep contact with the wick columns.
Should I ever water the top of the mix to keep seedlings from drying out?
You generally don’t need top watering, and doing so can defeat the design by wetting the surface and encouraging algae or mold. If you must troubleshoot, use a one-time light hand-water to kickstart capillary action, then return to fill-tube-only operation.
What maintenance should I do between seasons so the grow box wicks well year after year?
At the end of the season, remove root mass, refresh or replace compacted mix, and mix fresh dolomite into the top few inches before the next planting. Also start a new fertilizer strip each cycle rather than reusing the old one, since it loses effectiveness and can affect wicking-related nutrient uptake.