Dip N Grow is a liquid rooting hormone concentrate designed to help plant cuttings develop roots faster and more reliably. You dilute it with water, dip the cut end of your stem into the solution for a few seconds, then plant. That's the whole process. If you've been staring at the bottle wondering what to actually do, this guide walks you through every step, covers the settings you need to keep cuttings alive, and tells you exactly what to do when things go sideways.
Dip N Grow Instructions: Setup, Dip Step, and Troubleshooting

Marcus Thornfield
24 Mar 2026
What Dip N Grow Actually Is (and What It Does)
Dip N Grow is a hormonal rooting concentrate, not a grow kit in the hydroponic or seed-starting sense. It won't germinate seeds or grow plants on its own. Instead, it helps cuttings (stem pieces you snip from an existing plant) form roots more quickly once you stick them into a rooting medium. The active ingredients are IBA (indole-3-butyric acid) and NAA (naphthaleneacetic acid), which are two synthetic auxins, meaning they mimic the natural hormones plants use to trigger root cell growth. You're essentially giving a cutting a concentrated root-growth signal at the moment it needs it most.
A quick note on variants: Dip N Grow comes in different concentration strengths. The standard dilution ratios differ between the 1:5 (for softwood cuttings), 1:10, and stronger mixes for hardwood cuttings. Before you follow any step here, check the label on your specific bottle for the recommended dilution for your plant type. The core three-step process (mix, dip, plant) is the same across all versions, but the water-to-concentrate ratio changes. If your bottle says something different from what this guide describes, follow your label.
What You Should Have in the Box (Parts Checklist)
Dip N Grow ships as a concentrate product rather than a full kit with trays and media included, so your checklist splits into what comes in the package and what you'll need to source yourself before you start.
Included with Dip N Grow
- One bottle of Dip N Grow liquid rooting hormone concentrate (size varies by purchase)
- Product label with dilution table, safety information, and EPA registration details
- Basic usage instructions printed on or attached to the bottle
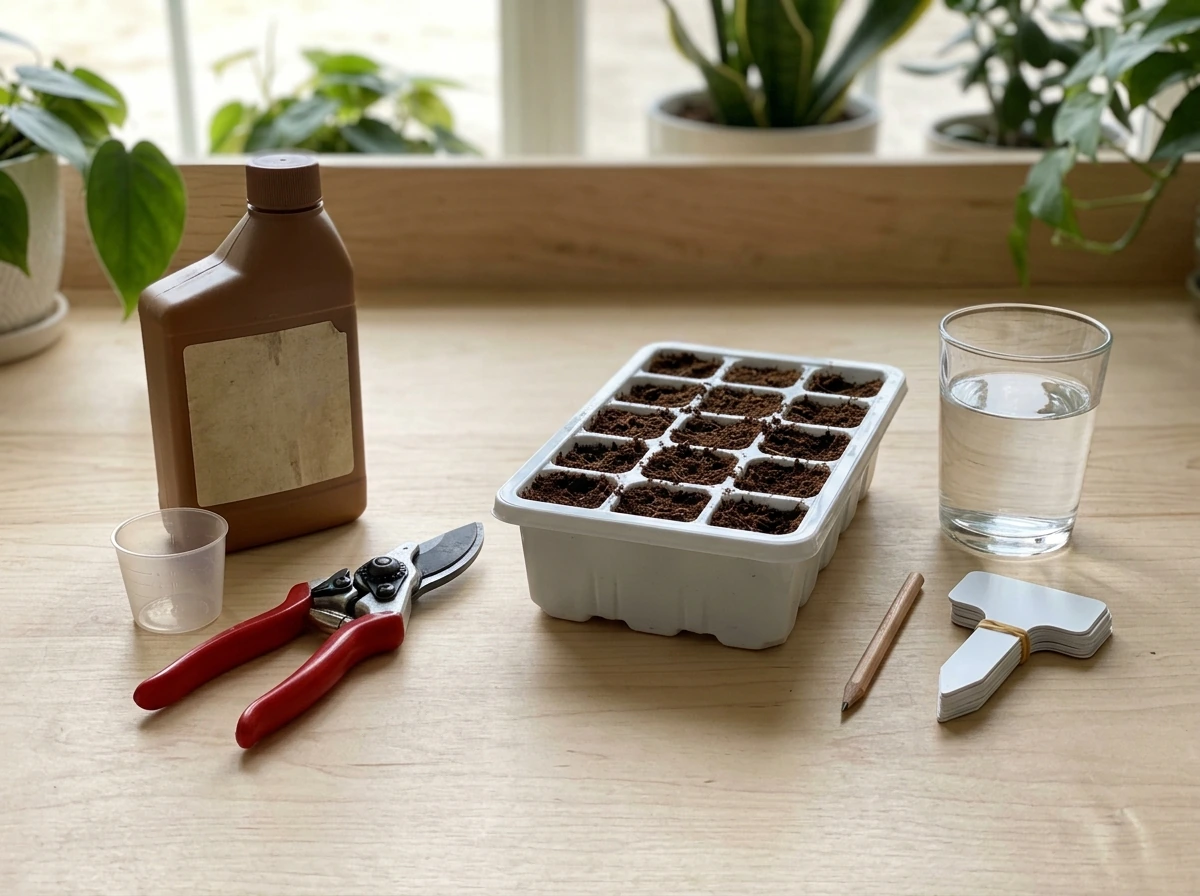
What You'll Need to Gather
- A small dilution cup or shot glass (dedicated to this use only, not for food)
- Clean water, preferably distilled or filtered (tap water with heavy chlorine can interfere)
- Sharp, clean pruning shears or a razorblade for taking cuttings
- A rooting medium: perlite, vermiculite, peat moss, rockwool cubes, or a sterile propagation mix
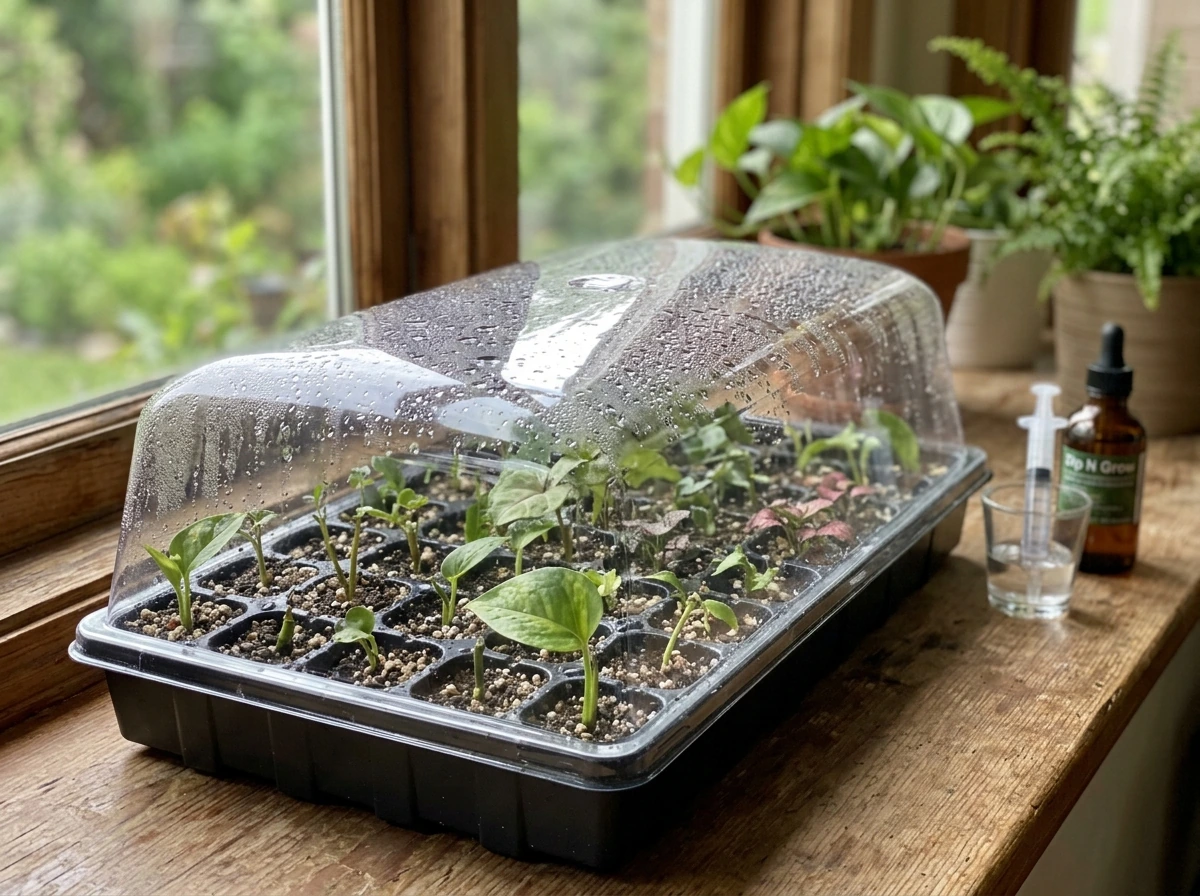
- Small pots or a propagation tray with drainage holes
- A clear humidity dome or loose plastic wrap to cover cuttings
- A spray bottle for misting
- Labels or tape to mark which cutting is which
- Gloves (optional but recommended since this is a pesticide concentrate)
Step-by-Step Dip N Grow Instructions
The official three-step process is mix, dip, plant. Here's what each of those actually looks like in practice in the dip and grow instructions.
Step 1: Prepare Your Rooting Medium and Tray
Before you touch the bottle, get your rooting medium ready. Wet it thoroughly so it's evenly moist but not dripping. Fill your pots or propagation tray cells and use a pencil or dibber to pre-make holes where you'll insert each cutting. This matters because you do not push the cutting in after dipping, you lower it in. Pushing would wipe the hormone off the stem before it does its job.
Step 2: Take Your Cuttings
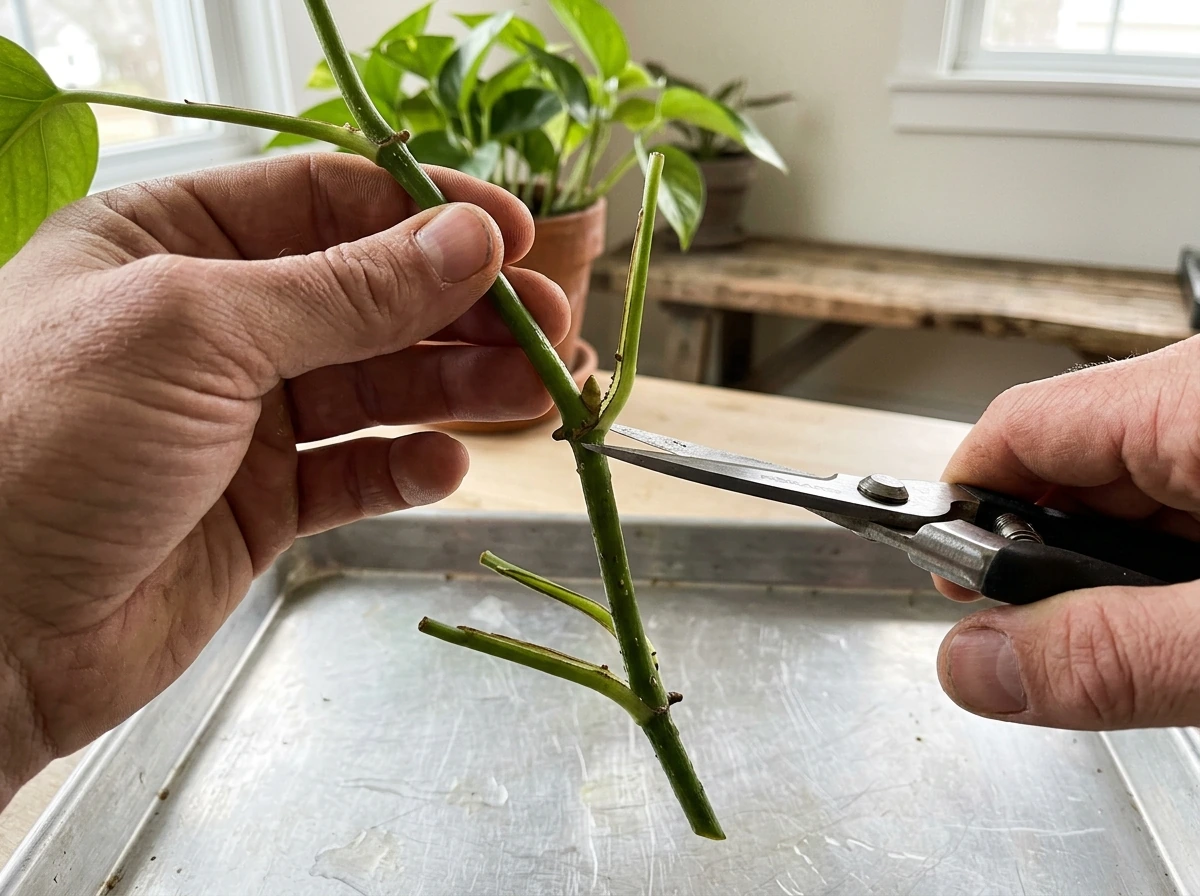
Use clean, sharp shears and cut just below a node (the bump or joint where a leaf meets the stem). For most plants, a 3 to 6 inch cutting works well. Remove any leaves from the bottom inch or two of the cutting so nothing is buried in the medium. Make the basal cut (the bottom cut) at a slight angle to increase surface area. Work quickly once you start cutting so the stems don't dry out before dipping.
Step 3: Mix the Solution
Pour a small amount of clean water into your dilution cup, then add Dip N Grow concentrate according to the ratio on your label. For softwood and semi-hardwood cuttings, a common starting dilution is 1 part Dip N Grow to 5 parts water. For hardwood, a stronger concentration (1:3 or as labeled) is often recommended. Only mix as much as you'll use in one session since the diluted solution loses potency over time and shouldn't be stored for reuse. If you're using the LilyEve Grow Turn Ampoule, follow the bottle directions for the correct dilution before you dip your cuttings.
Step 4: Dip the Cutting
Submerge the basal end of the cutting (approximately the bottom one inch) into the diluted solution. Hold it there for 3 to 5 seconds, then remove it. That's the whole dip. Don't leave it in longer thinking more is better; over-dipping can actually burn the stem tissue and inhibit rooting rather than help it. Shake off any excess drop of liquid and move immediately to planting.
Step 5: Plant the Cutting
Lower the treated end into the pre-made hole in your rooting medium. Gently firm the medium around the base of the cutting so it stands upright without rocking. Don't pack it so tightly that you strip the solution off the stem. Once all cuttings are planted, mist the tops lightly with clean water and cover the tray with a humidity dome or loose plastic wrap.
Step 6: Label and Log
Write the plant name and dip date on a label and stick it in each tray or pot. Rooting can take several weeks to a month depending on species, and you won't remember which tray you started when. Logging the date also tells you when to start checking for roots without disturbing cuttings too early.
Water, Light, and Temperature During the First Week
The first week is the most critical and also the time when most people accidentally kill their cuttings by overdoing it. Here's what to focus on.
Moisture and Watering
The medium should stay evenly moist but never waterlogged. A quick test: squeeze a small handful. It should feel damp and barely release a drop or two. If it's dripping freely, it's too wet and your cuttings will rot. If it crumbles dry, it's too dry and the stems will desiccate. Mist the tops of cuttings once or twice a day rather than watering heavily from below. If you're using a propagation tray with bottom reservoirs, keep only a small amount of water in the reservoir (about a quarter inch) and let it dry between refills rather than keeping it perpetually flooded.
Light
Keep cuttings in bright, indirect light for the first week to two weeks. Direct sun at this stage is too much: the cutting has no roots yet to uptake water, so intense light causes the leaves to lose moisture faster than the plant can compensate and they'll wilt or scorch. A north or east-facing window, or a grow light set at low intensity (around 20 to 30 watts equivalent at 12 to 16 hours per day) works well. Once you see the first signs of new growth or confirmed roots, you can gradually increase light intensity.
Temperature
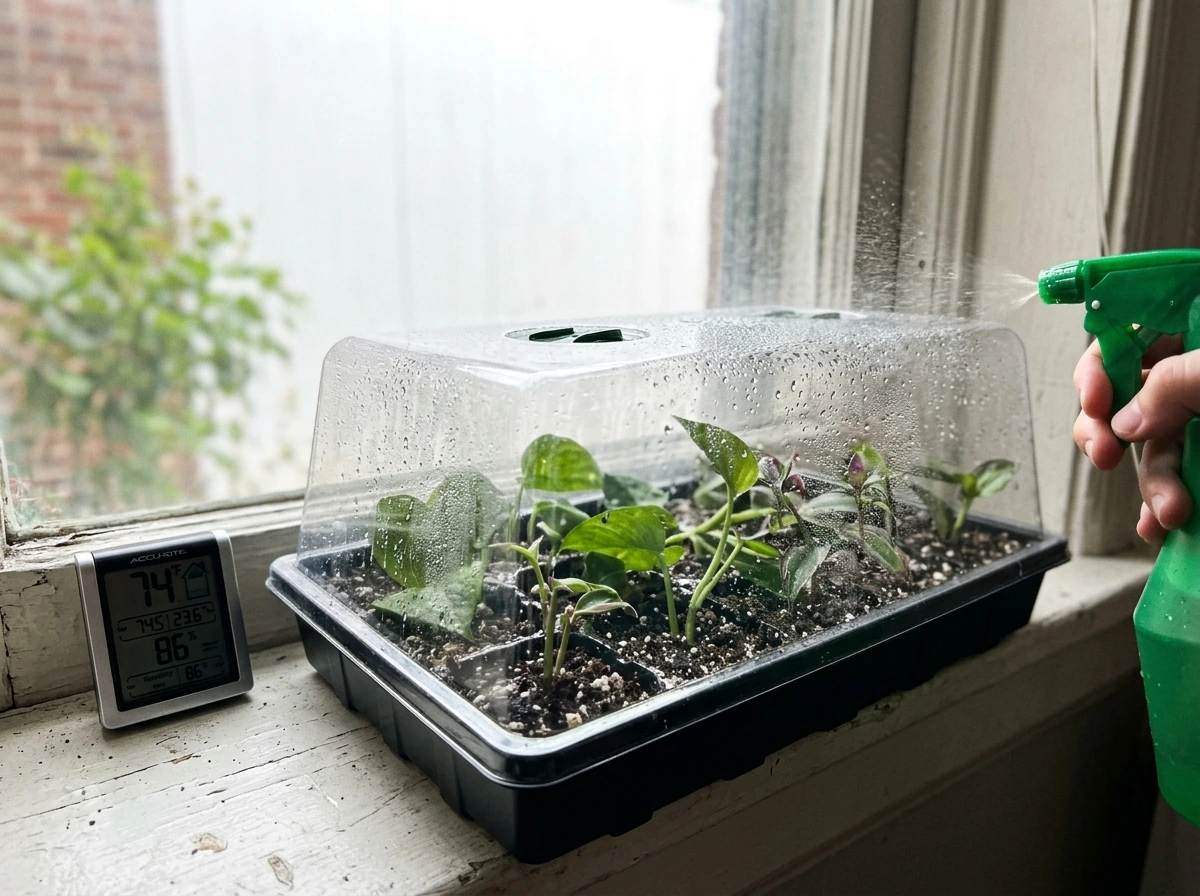
Cuttings root best when the rooting medium is slightly warmer than the air above. The ideal temperature range is 65 to 75 degrees Fahrenheit (18 to 24 Celsius) for most common plants. Bottom heat from a seedling heat mat set to around 70 to 75F speeds rooting significantly. Avoid cold windowsills in late winter or early spring since cold root-zone temperatures dramatically slow or stall rooting even when air temperature feels fine. Keep cuttings away from heating vents that create dry heat bursts.
Humidity
Maintain high humidity around the foliage by keeping the dome on or plastic loosely in place. Aim for 70 to 90 percent relative humidity if you can measure it. Vent the dome briefly once a day for 10 to 15 minutes to prevent fungal buildup. As rooting progresses (usually after 2 to 3 weeks), start opening the dome for longer periods each day to harden off the cuttings before fully removing it.
Common Problems and How to Fix Them
Most Dip N Grow failures come down to a handful of predictable issues. Here's what's probably going wrong and how to address it.
Nothing Is Rooting After Two Weeks
First, check your dilution. Using too little concentrate means the auxin dose wasn't strong enough. Using too much can actually inhibit root formation. Re-check your label ratio. Second, check temperature: a cold root zone is the most common silent reason cuttings stall. Add a heat mat if you don't already have one. Third, some plants simply take longer, sometimes up to a full month. Don't pull cuttings early to check for roots more than once a week at most, since disturbing the medium repeatedly stresses the developing root tissue.
Stem Bases Are Rotting
This almost always means the medium is too wet, the tray reservoir is too full, or airflow is completely absent. Let the medium dry slightly between mistings, empty reservoir trays fully and refill only when the surface feels dry about an inch down, and vent your humidity dome daily. If you're seeing a dark or mushy collar at the base of the stem, remove that cutting and discard it to prevent spread to the others.
Leaves Are Wilting or Dropping
Some leaf wilt in the first few days is completely normal since the cutting has no roots to supply water yet. If wilting is severe or doesn't recover overnight, increase humidity around the cuttings immediately and move them out of direct light. If leaves are dropping off cleanly (not wilting and yellowing), the cutting may have been stressed before you took it or the cut was made at the wrong point on the stem.
Algae or Green Film on the Medium
Algae grows when light hits a wet surface. Cover the top of your propagation medium with a thin layer of dry perlite, or use black propagation trays that block light from reaching the medium surface. Avoid placing your tray directly in a window where sunlight hits the soil. If algae has already established, don't panic: it's more of a cosmetic problem than a fatal one unless it's so thick it's blocking airflow to the stem base.
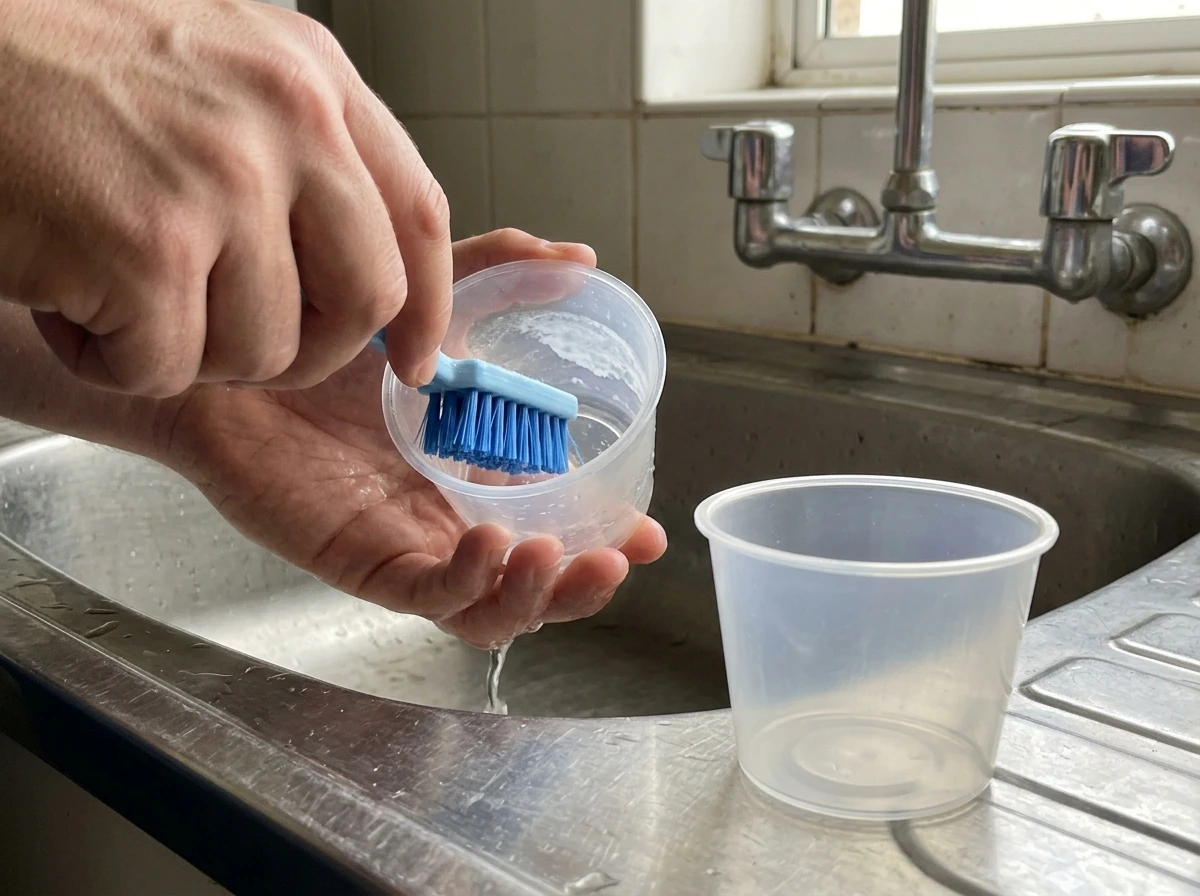
Film or Residue Building Up in Your Dilution Cup
The hormone solution can leave a slight residue if left to dry in the cup. Rinse and scrub the cup with warm water after every use and let it air dry. Never store leftover diluted solution in the cup for future sessions. The residue itself isn't dangerous but can affect the accuracy of your dilution ratio next time if it builds up.
Uneven Rooting Across Cuttings in the Same Tray
This usually comes down to inconsistent dipping (some held for 2 seconds, others for 7), variation in cutting quality (some had nodes, some didn't), or uneven moisture and temperature across the tray. Make sure your heat mat covers the entire tray, rotate the tray 180 degrees every few days if it's near a window, and try to be consistent with your 3 to 5 second dip time.
Maintenance After the First Week
Once your cuttings are planted and settling in, there's a simple rhythm to follow each week.
| Task | Frequency | Notes |
|---|---|---|
| Mist foliage | Daily or every other day | Keep leaves from wilting; don't soak medium |
| Check medium moisture | Every 2 days | Should feel like a wrung-out sponge |
| Vent humidity dome | Daily | 10–15 minutes to prevent fungal issues |
| Check for root development | Once per week | Gently tug or lift one cutting to check; replant immediately |
| Clean dilution cup | After every use | Rinse with warm water, air dry |
| Increase light gradually | Starting week 2–3 | Only as roots begin to establish |
| Remove dome fully | Week 3–4 | Harden off before full exposure |
There are no nutrient changes needed during the rooting phase. Dip N Grow's job is done the moment the cutting is planted. Dip’N Grow’s product listing cites an EPA label link and includes the EPA registration number 64388-1, framing it as a biochemical pesticide or regulator. Once roots are 1 to 2 inches long and the cutting has begun putting out new leaf growth, you can start a very dilute fertilizer solution (quarter-strength) if you're continuing to grow on in the same medium. If you're transplanting into soil, the soil itself will supply nutrients for the first few weeks.
Cleaning Up Between Batches
Before starting a new round of cuttings in the same tray or pots, clean everything thoroughly. Wash trays, humidity domes, and any tools with a 10 percent bleach solution (1 part bleach to 9 parts water) or a commercial propagation disinfectant. Rinse well and let everything air dry completely. Reusing contaminated media from a failed batch is one of the easiest ways to bring rot or disease into your next round, so don't do it unless the previous batch was completely healthy.
When to Transplant (and How to Do It Right)
Rooting typically takes several weeks to a full month depending on the plant species and conditions. The clearest sign that a cutting is ready to move is when you see roots poking out of the drainage holes of your pot, or when a gentle tug on the stem meets real resistance from established roots. New leaf growth is a good sign but not by itself proof of rooting; a cutting can push a new leaf from stored energy before it has any roots at all.
When you're ready to transplant, water the propagation medium an hour before you start to soften it and make removal easier. Tip the cutting out gently, keeping as much medium around the roots as possible. Plant into a pot or garden bed with good-quality, well-draining soil. Water in lightly and keep the newly transplanted cutting in moderate light (not full sun) for another week to let the roots adjust to the new environment. After that first week in its new home, it's ready for normal care.
If some cuttings in your tray haven't rooted while others have, leave the slow ones in place rather than forcing a transplant. Give them another week or two. Cuttings that never root at all after six weeks should be discarded. They either had damaged stem tissue, were dipped incorrectly, or simply weren't a good candidate for propagation from that parent plant.
If you're also exploring other rooting or plant-growing methods, the same site covers the full Dip and Grow instructions for similar rooting products as well as a guide to Spray-N-Grow instructions for foliar feeding approaches, so you can compare methods side by side depending on what your plants actually need.
FAQ
How deep should I dip the cutting, and does dipping more than an inch help?
For best results, use only the bottom one inch as the dipped section and keep the cut end submerged for 3 to 5 seconds. If your cutting is shorter than that, dip only what exists at the basal end, then plant immediately. Don’t let leaves or any removed-leaf area soak, it increases the chance of rot.
What if I forgot to dip a few cuttings, can I fix them after planting?
If a cutting looks fine but you skipped the dip step entirely, it may still root, especially in easy-to-root plants, but it will usually be slower and less reliable. If you already planted, you generally cannot “rescue” it by re-dipping the stem later without disturbing roots. Better approach is to start a fresh batch with the correct dip timing and dilution.
Can I mix Dip N Grow in advance and store the diluted solution for tomorrow?
You should not keep diluted Dip N Grow and reuse it later. Once mixed, the diluted solution loses potency over time and you can also end up with dilution errors from residue in the cup. Mix only what you can finish in the same session, then rinse the cup immediately.
Why do my cuttings root worse when I leave them in the hormone longer?
Avoid submerging the cutting longer than the label window (the article’s guidance is 3 to 5 seconds). Over-dipping can damage basal tissue and inhibit rooting. Use a consistent timing method, for example count out loud or use a phone timer, so all cuttings get the same exposure.
How do I know if the problem is temperature, and what’s the best way to check?
A temperature drop below the recommended range often causes slow rooting, sometimes without obvious wilting. If you suspect cold conditions, measure the rooting medium temperature directly and use a heat mat under the tray, making sure it covers the entire tray area so all cuttings stay in range.
Can I poke holes after I dip the cuttings?
Yes, but do it before dipping: pre-make holes so you lower the cutting in rather than pushing. If you must adjust position after planting, do it gently and quickly, because shifting can strip hormone residue and damage the cut surface.
What does early wilting mean, and when should I intervene?
It’s common to see leaf wilting for the first few days, since cuttings lack roots initially. However, if wilting is severe and doesn’t rebound overnight, increase humidity right away and move the cuttings to brighter shade (bright indirect light, not direct sun) to reduce water loss.
What should I do if I see dark or mushy tissue at the stem base?
If cuttings are developing dark, mushy tissue at the base, remove and discard that cutting immediately to protect the rest of the batch. Disinfect tools and consider reducing moisture and improving ventilation, because that odor and texture usually signal rot in consistently wet conditions.
My medium stays wet, how do I correct moisture without letting cuttings dry out?
If the rooting medium is staying wet (or the reservoir is too full), you’ll often get rot and stalled rooting. Let it dry slightly between mistings, keep the reservoir shallow, and vent the humidity cover daily. A squeeze test helps confirm damp, not saturated, conditions.
Can I place the tray in a sunny window to speed things up?
Light can be too intense before roots form. Keep cuttings in bright indirect light initially, and if you’re near a window rotate the tray to prevent one side from drying faster. Once you see confirmed rooting (root tips or resistance to a gentle tug), you can slowly increase light.
When should I check for roots, and how often should I disturb the medium?
Logging matters because roots can appear at slightly different times by cutting and plant type. A practical approach is to mark the tray with the date of dipping and check once a week by looking for root tips, then confirm by gentle resistance rather than repeatedly pulling cuttings out.
When is it safe to start fertilizing, and what strength should I use?
Don’t fertilize during the rooting phase. Start only after roots are established (for example, once you can see about 1 to 2 inches of roots) and new leaf growth indicates the cutting can take up nutrients. Until then, keep focus on moisture, humidity, and warmth.
Can I reuse media and trays from a failed batch?
Clean and disinfect trays, domes, and tools between rounds, and fully air-dry anything that contacted failed cuttings. Media reuse is a common source of disease carryover, so if the prior batch had rot or widespread failure, replace the medium instead of trying to salvage it.
What’s the safest way to transplant rooted cuttings with minimal shock?
For transplanting, water the medium beforehand to reduce root breakage, then lift with as much medium around the roots as possible. After moving, keep the new plant in moderate light for about a week and avoid full sun until it shows stable new growth.