Here's the honest situation: 'LA Colors Mega Grow' is actually a nail treatment product, not a plant grow kit. LA Colors (the cosmetics brand) makes a Mega Grow Nail Treatment designed to strengthen and grow nails, sold at beauty retailers and online. If you searched for grow kit instructions and landed here, you're likely thinking of a different brand or kit entirely. That said, this guide will help you figure out exactly what you have, confirm whether it's the nail treatment or a different grow product, and get you pointed in the right direction fast.
LA Colors Mega Grow Instructions: Setup, Settings & Fixes

Marcus Thornfield
4 May 2026
First: Figure Out Exactly What You Have
LA Colors is a well-known cosmetics brand, and their 'Mega Grow' product (SKU CBLQ357) is a nail polish-style nail treatment in a 0.44 fl oz bottle. It's sold as part of nail care sets alongside a hardener and strengthener. There is no LA Colors plant grow kit, hydroponic system, or seed-starting product by this name on the market as of May 2026.
So if you're holding something called 'Mega Grow' and expecting a plant kit, check the label and packaging carefully. Ask yourself:
- Is the product in a small nail polish-style bottle? That's the LA Colors nail treatment.
- Does the box mention seeds, growing media, nutrients, or hydroponics? Then it's a different brand entirely.
- Does the packaging show a plant, herb, or vegetable image? Look for the actual brand name, which won't be LA Colors.
- Did you receive it as a gift or buy it secondhand? Check for any remaining brand markings on the box or reservoir.
A lot of grow kits have names like 'Mega Grow,' 'Super Grow,' or 'Grow Pro' across multiple brands. The name alone doesn't identify the product. Once you confirm the actual brand, you'll be able to find the right instructions quickly.
If You Have the LA Colors Mega Grow Nail Treatment
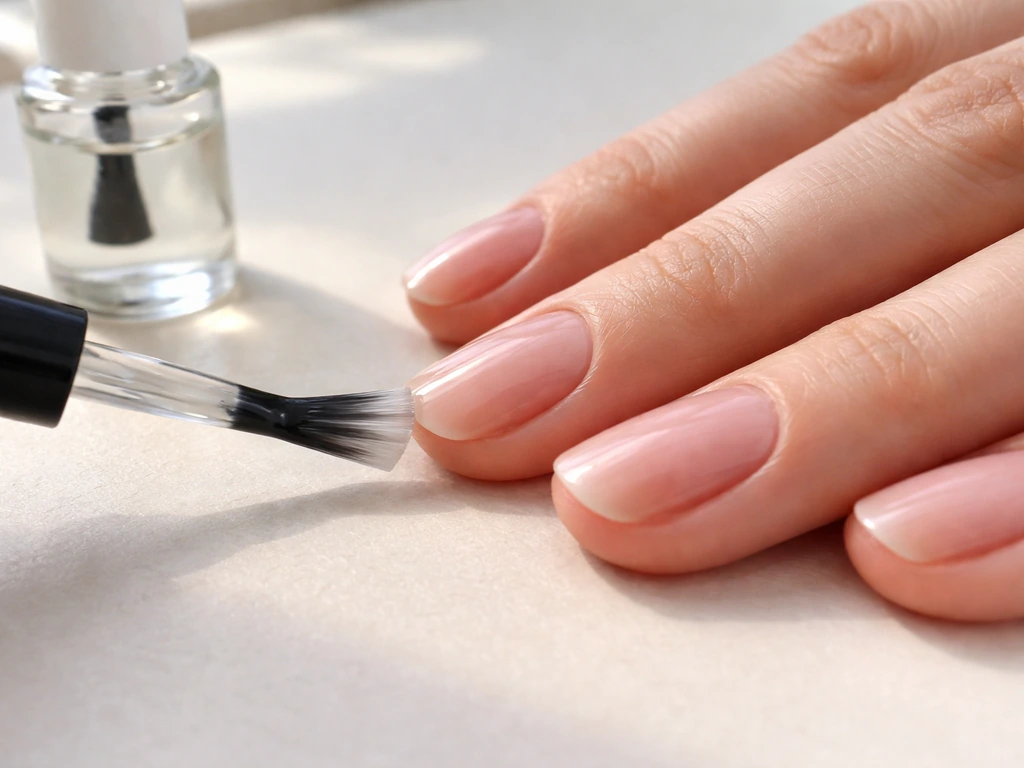
The LA Colors Mega Grow Nail Treatment is a topical nail product. Here's how to use it correctly so you actually get results: If you meant the LilyEve Grow ampoule, follow the dosing and timing on your ampoule label so it matches your growth stage how to use lilyeve grow turn ampoule.
- Start with clean, dry nails. Remove any existing polish completely and wash hands thoroughly.
- Apply one thin coat of Mega Grow directly to the nail surface, including the tips. Treat it like a base coat.
- Allow it to dry fully before applying regular nail polish on top, or wear it alone for a treatment-only look.
- Reapply every two to three days for best results. Most users see noticeable strengthening within two to four weeks of consistent use.
- Remove with regular nail polish remover when you want to start fresh, then reapply.
- Avoid getting the product on skin or cuticles repeatedly, as the active strengthening agents can dry out surrounding skin over time.
The product is sold only within the 50 U.S. states. It typically comes in the 0.44 fl oz bottle and is also available in a three-piece set with a hardener and a strengthener. Each product in that set plays a slightly different role: the hardener is applied as a top coat to seal, Mega Grow is the base treatment for length and growth support, and the strengthener addresses brittleness. You can layer them or use them independently.
Common Nail Treatment Issues and Fixes
No growth or improvement after two weeks
This is the most common frustration. Nail treatment products work on the surface layer and support structure, but they can't override poor nutrition, hydration, or physical nail damage. Make sure you're applying consistently every two to three days without skipping. Also check that you're not soaking your hands in water for extended periods (dishwashing, long baths) right after application, as this can pull the treatment off before it sets.
Product peeling or chipping off quickly
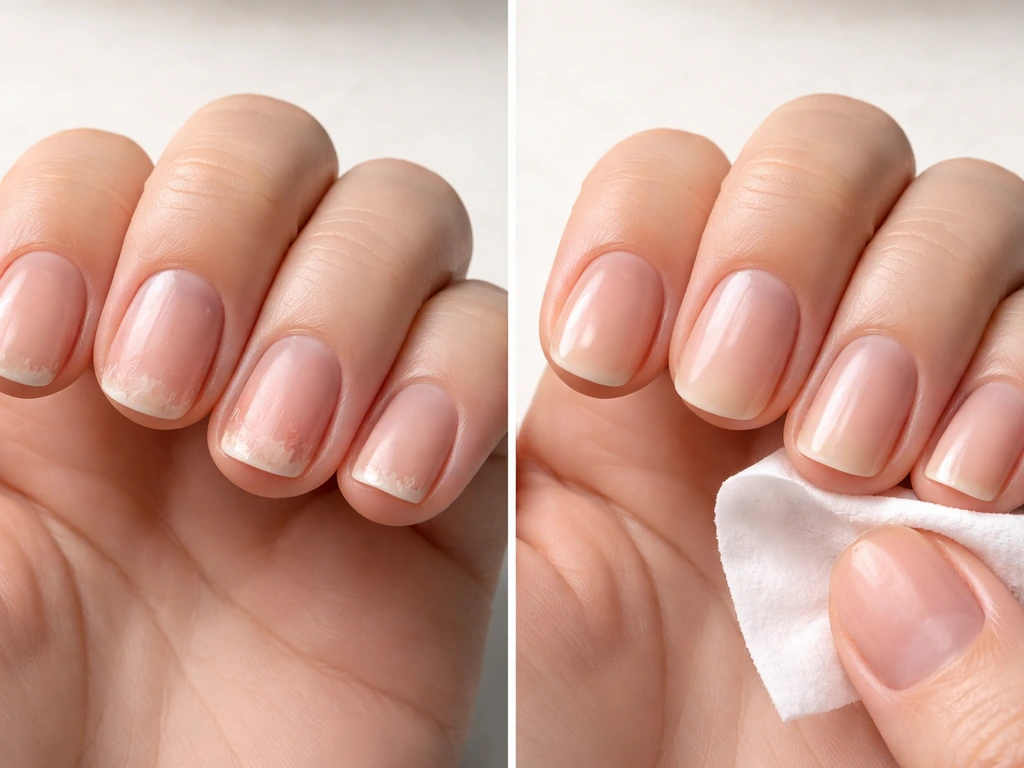
The most likely culprits are oily nails at application time or applying the coat too thickly. Always wipe the nail with a dry cloth or alcohol wipe before applying. Thin coats bond much better than thick ones and dry faster too.
Nails feel more brittle after use
Some nail treatment formulas, especially those with formaldehyde or similar hardening agents, can over-harden nails with too-frequent use. Take a break of five to seven days if this happens, moisturize the nails and cuticles with oil, then resume on a less frequent schedule. The strengthener in the three-piece set is better for ongoing use once nails reach the desired hardness.
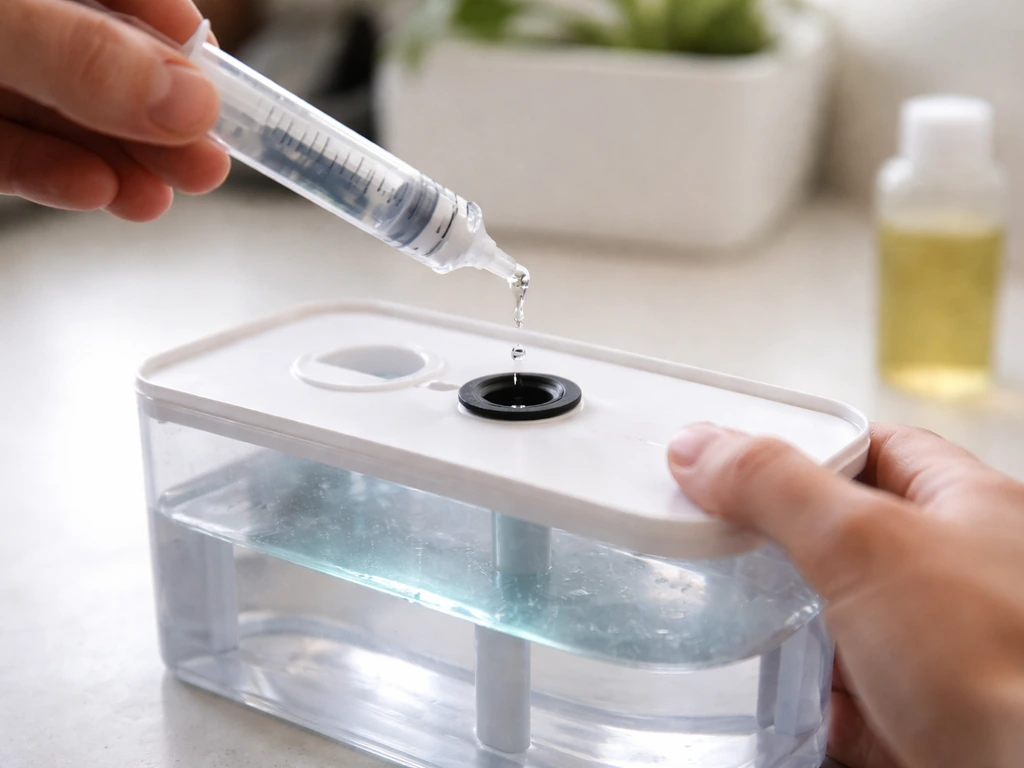
Brush is dry or product has thickened
Add two to three drops of nail polish thinner (not remover) to the bottle and roll it gently between your palms. Never shake the bottle, as that introduces air bubbles. If the product has completely solidified, it's time to replace it. Most nail treatments have a shelf life of about 12 to 24 months from opening.
If You're Actually Looking for a Plant Grow Kit
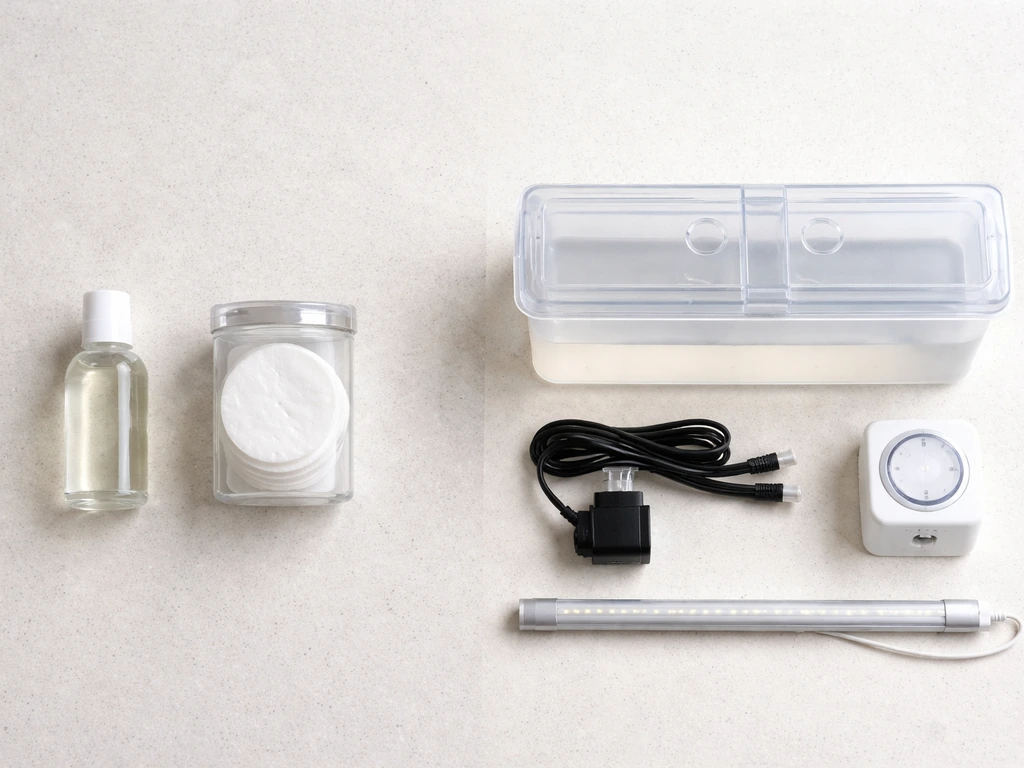
If a plant grow kit is what you need instructions for, the first step is identifying the actual brand name on the box or reservoir. Many consumer grow kits look similar and share marketing language. Here's what to look for in the unboxing to identify your kit:
- A reservoir or tray (usually plastic) that holds water or nutrient solution
- A grow light or light pod (either LED or fluorescent)
- Grow pods, net cups, or seed trays for holding plants
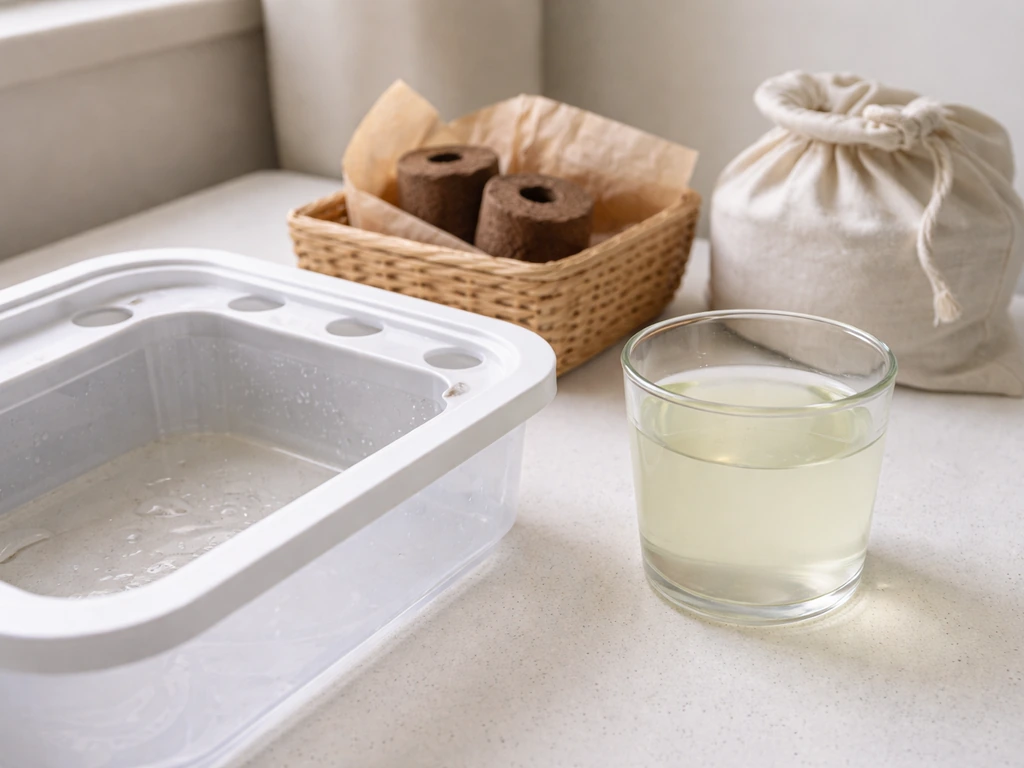
- A growing medium such as peat pellets, rockwool cubes, coco coir, or clay pebbles
- A nutrient packet or liquid solution bottle
- A pump or wicking system to deliver water to roots
- An instruction booklet or quick-start card with the brand name clearly printed
Once you have the brand name, searching for '[Brand Name] grow kit instructions' will pull up the exact manual. Popular consumer grow kit brands include AeroGarden, Back to the Roots, Click and Grow, Hamama, and many others. If your kit is a Click and Grow model, you can use its cleaning and maintenance steps to keep the reservoir and sensors working properly. Each has very specific setup steps, light schedules, and nutrient dosing that are unique to their system.
General Grow Kit Setup That Applies to Most Systems
While you track down your exact brand, here is a general setup flow that applies to the majority of counter-top consumer grow kits. These steps won't replace your manual, but they'll get you oriented and can prevent the most common setup mistakes.
Unboxing and assembly
- Lay out every component and match it to the parts list in the manual. Don't skip this step. Missing a small piece like a pump cover or seed pod cap causes real problems later.
- Rinse the reservoir and any trays with plain water before first use. New plastic can have manufacturing residue that affects water pH.
- Assemble the frame or light arm per the manual. Most systems snap together without tools.
- Insert the grow pods or seed trays into their designated slots before filling with water.
- Fill the reservoir to the 'fill' or 'max' line, not above it. Overfilling can flood the grow pods and drown seedlings.
Lighting setup
Most consumer grow kits with built-in lights are designed to run 16 hours on and 8 hours off for seedlings, then shift to 14 hours on and 10 hours off once plants are established (roughly week three onward). If your kit has a timer, program it immediately. If not, plug the light into a cheap outlet timer from a hardware store. Light consistency is more important than intensity at the seedling stage.
Water and nutrient management
Most hydroponic kits come with a nutrient tablet or liquid concentrate. The standard starting dose is one tablet or the 'seedling' amount listed on the nutrient bottle per the reservoir volume. Do not double-dose thinking more nutrients equals faster growth. Over-fertilizing causes nutrient burn (yellowing leaf tips, stunted roots). Refill with plain water between full nutrient refills, and do a complete reservoir change every two weeks.
First start-up
After filling and adding nutrients, insert your seed pods and turn on the light and pump. Set your timer. Then leave it alone for the first five to seven days. The most common beginner mistake is fiddling too much in the first week. Seeds need consistent warmth, moisture, and light to germinate. If your room temperature is below 65°F (18°C), germination will be slow regardless of everything else.
Troubleshooting a Generic Grow Kit
| Problem | Most Likely Cause | Fix |
|---|---|---|
| No sprouting after 10+ days | Cold temps, old seeds, or pods placed incorrectly | Move kit to a warmer spot (70-75°F ideal), check pod orientation, replace seeds if older than 1 year |
| Slow or leggy growth | Insufficient light or light too far from plants | Lower the light arm so it's 1-2 inches above canopy, verify 16-hour schedule is running |
| Green algae coating reservoir | Light reaching the water through gaps | Cover any exposed water/reservoir with opaque tape or the included reservoir cover |
| Mold on growing medium | Poor airflow or overwatering above medium surface | Improve air circulation with a small fan, reduce any top-watering, ensure pump is circulating correctly |
| Yellowing leaves | Nutrient deficiency or pH imbalance | Check nutrient dose, do a full reservoir change, test water pH (target 5.5-6.5 for hydroponics) |
| Leaking from reservoir | Cracked seam or ill-fitting pump tubing | Empty, dry, and inspect for cracks; re-seat pump tubing connections firmly |
| Gnats or small insects | Overwatered media or organic debris on surface | Remove decaying leaves, let surface dry between waterings, use yellow sticky traps nearby |
Planting and Propagation Tips
Most counter-top grow kits are designed for herbs, leafy greens, and small fruiting plants. Basil, lettuce, spinach, mint, and cherry tomatoes all do well in hydroponic systems. If you're starting from seed, no pre-soaking is needed for most herb seeds. Just press them gently into the grow pod opening at the depth specified on the seed packet, usually 1/4 inch or less.
If you're propagating cuttings instead of seeds, take a 3 to 4 inch cutting just below a leaf node, strip the lower leaves, and place the stem in a rockwool cube or coco pod that stays consistently moist. Roots typically appear in 7 to 14 days. Once you see roots poking out of the bottom of the cube (usually 1/2 inch of visible root), the cutting is ready to move into the main system.
Transplanting from soil into a hydroponic system requires gentle but thorough root washing. Rinse all soil off the roots under lukewarm water before placing in the net cup with your growing medium. Soil particles left on roots create a breeding ground for bacteria in the reservoir. Give transplants a few extra days before adding full-strength nutrients, as the transition causes mild stress.
Ongoing Maintenance and Harvesting
Weekly care routine
- Top off the reservoir with plain water to the fill line as needed (evaporation is normal)
- Do a full nutrient reservoir change every 14 days
- Trim any dead or yellowing leaves to prevent them from decomposing in the water
- Check that the pump or wicking system is moving water correctly
- Wipe any algae or residue off the inside of the reservoir during water changes
When to harvest
Herbs like basil and mint are ready to harvest as soon as the plant has at least six mature leaves and is 4 to 6 inches tall. Always cut from the top down, just above a leaf node, to encourage bushy regrowth rather than tall, spindly stems. For lettuce, start harvesting outer leaves from week four onward. Never take more than one-third of the plant at one time.
Fruiting plants like cherry tomatoes signal readiness when fruit color deepens and the tomato gives slightly under gentle pressure. With most counter-top kits, you can harvest tomatoes continuously over six to ten weeks before the plant reaches the end of its productive life.
Cleaning out for the next run
- Remove all plants and used grow pods. Compost the organic material.
- Empty the reservoir completely and rinse with plain water.
- Mix a cleaning solution of one part white vinegar to three parts water, fill the reservoir, and let it sit for 30 minutes.
- Scrub the interior with a soft brush to remove any mineral deposits or biofilm.
- Rinse thoroughly with fresh water at least twice until no vinegar smell remains.
- Wipe down the light arm and exterior with a damp cloth.
- Allow everything to air dry fully before starting a new grow cycle.
Quick Diagnostic Checklist Before You Do Anything Else
Run through this list right now if your grow kit isn't performing. It covers 90% of the issues people run into in the first three weeks.
- Is the light actually turning on and running on a timer? Plug it into a phone charger outlet to test the timer separately.
- Is the room temperature between 65°F and 80°F? Anything below 60°F will stop germination cold.
- Are the seed pods right-side up with the seed at the correct depth?
- Is the reservoir filled to the correct line, not above or below?
- Did you add nutrients at the right dose for the reservoir volume?
- Has it been at least 7 days since you planted? Most seeds need a full week before anything is visible.
- Is there any light hitting the reservoir water directly? Cover it if so.
- Is the pump running? Put your hand near the outlet or intake to feel for water movement.
- Are the grow pods sitting securely in their cups without gaps that would let roots dry out?
If you've confirmed all of these and still have issues, the most likely remaining culprits are seed viability (old or improperly stored seeds) or a pH problem with your water. Grow It Depot recommends checking hydroponic pH with a pH meter, targeting a range of 5. Grow It Depot recommends checking hydroponic pH with a pH meter, targeting a range of 5. 5 to 6.
5 [targeting a pH range of 5. 5 to 6. 5](https://www. epicagriculture.
com/blogs/news/how-to-adjust-ph-in-hydroponic-system). 5 to 6. 5 for most plants [pH problem with your water](https://www. growitdepot.
com/blogs/news/maintaining-water-quality-hydroponics-guide). Tap water in some areas runs above pH 8, which locks out nutrients even when they're present. A basic pH test kit costs about five dollars and can save a lot of frustration. Adjust water pH down to the 5.
5 to 6. 5 range with a few drops of pH Down solution before adding it to the reservoir.
Other grow product instruction guides on this site cover specific branded systems in detail, including kits that use liquid ampoule treatments, rooting solutions, and spray-on growth formulas, so if you're working with one of those, you'll find walkthroughs tailored to that exact setup. If you meant spray-n-grow instructions instead, look for the section that matches your exact spray-on growth formula so the timing and dosing are correct grow product instruction guides.
If you have dip and grow instructions from your kit, follow the dosing and timing exactly for best germination and growth grow kit instructions. The core principles of light, water, temperature, and nutrients apply across almost every system, but the specific timing and dosing always comes down to the exact kit in your hands.
If you meant a plant grow kit, look up the exact dip n grow instructions for your kit’s brand so the timing and dosing match your system.
FAQ
I have a “Mega Grow” bottle, but the label also mentions hardener and strengthener. Can I use them all in the same day?
Yes, if it’s the LA Colors three-piece set, use the base Mega Grow first and let it dry, then apply the hardener or strengthener as directed. Avoid stacking multiple layers that are meant to be separate treatments, if the bottle instructions warn about frequency. If you’re not sure, start with Mega Grow only for a week to confirm how your nails respond.
How often should I apply LA Colors Mega Grow if my nails are peeling or splitting?
If you’re seeing peeling or splits, don’t increase frequency immediately. Use a conservative schedule (every 3 days at first) and keep coats thin. If the nail feels overly hard or rough, pause for 5 to 7 days, moisturize cuticles with oil, then resume less frequently.
Can I use LA Colors Mega Grow on damaged nails, gel removal, or after acrylics?
You can, but only after the surface is stable. Let the nails rest after removal, then start with thin applications. If you notice burning, swelling, or persistent tenderness, stop and switch to moisturizing-only care until the nail plate looks normal again.
Why does my bottle look separated or grainy, even though it is not solidified yet?
Some nail treatments separate. If it’s still usable, roll the bottle gently and inspect for clumps that do not mix. Do not shake, bubbles can ruin the film and make it dry unevenly. If it won’t blend smoothly after gentle rolling, replace it.
Can I thin LA Colors Mega Grow with water or nail polish remover?
No. Thin only with nail polish thinner, not remover, and add it sparingly (a few drops at a time). Water can change how the film sets, and remover may affect adhesion or increase irritation.
I used Mega Grow and my nails turned darker or developed a white haze. What should I do?
This can happen from residue buildup or over-thick coats. Remove gently, give nails a short rest, then resume with thinner layers. If the area looks irritated, skip further use until sensitivity improves.
How long should I wait before washing dishes or swimming after applying Mega Grow?
Give it enough time to fully set and bond to the nail. After applying, avoid prolonged water exposure immediately, especially dishwashing or long baths. A practical approach is to apply at night and keep hands dry the rest of the evening, then return to normal the next day.
Does Mega Grow help with nails that are brittle due to frequent hand sanitizers or cleaning chemicals?
It can help, but it cannot fully counter repeated chemical stripping. Pair it with a protective habit, wear gloves for cleaning, and moisturize cuticles regularly. If brittleness persists, reduce exposure and consider using the strengthener component once nails are at the desired hardness.
My search results show “grow” instructions, but I definitely have LA Colors Mega Grow. Why does that content keep showing up?
Many products share “mega grow” type marketing language. Search results often blend nail-care and plant-growth terms. The fastest fix is to confirm the exact brand and SKU on the label, then search for “Mega Grow nail treatment instructions” rather than “grow kit instructions.”
If I actually meant a plant grow kit, what’s the single quickest way to confirm what I have?
Look for the brand name and model on the box or on a label near the reservoir, power cord, or control panel. If it has seeds, a reservoir, a light hood, or nutrient tablets, it’s likely a plant system. If it is only a small nail-bottle treatment, it is not a plant kit.
Can I use pH testing and nutrient dosing guidance from hydroponic instructions for a nail treatment problem?
No, those steps apply only to plant hydroponics. For nail treatment issues, the relevant variables are coat thickness, application frequency, dryness or water exposure right after application, and whether the formula is fresh or expired.