To clean a Click and Grow garden, unplug it, empty the water reservoir, and rinse the tank with warm water. For algae or mineral buildup, fill the tank with a mild food vinegar or citric acid solution, let it sit for a few minutes, then rinse thoroughly and dry with a paper towel. Wicks, the small foam or string pieces that carry water from the tank up into each pod, need to be checked for positioning and rinsed by hand. The lamp arm, germination domes, and wicks should never go in the dishwasher, but the plastic cups and tank lid can go in on a gentle cycle under 50°C (120°F).
How to Clean Click and Grow: Step-by-Step Guide

Marcus Thornfield
5 May 2026
Which Click and Grow model you have and what needs cleaning
Click and Grow makes a few different countertop gardens, and the cleaning steps are almost identical across all of them, but knowing your model helps you understand what parts you're working with. The three most common ones you'll encounter are the Smart Garden 3, the Smart Garden 9, and the larger Click and Grow 25. For opening the Smart Garden 9 water tank lid for cleaning access, Click and Grow provides a dedicated step-by-step help guide.
| Model | Pod capacity | Water tank size | Key cleaning notes |
|---|---|---|---|
| Smart Garden 3 | 3 pods | Small reservoir, no separate lid access | Rinse tank by hand; plastic cups are dishwasher safe under 50°C |
| Smart Garden 9 | 9 pods | Medium reservoir with a tank lid that opens for cleaning access | Tank lid and plastic cups are dishwasher safe; separate guide exists for opening the lid |
| Click and Grow 25 | 25 pods | 8 litres (270 fl oz); uses ~5L per week | Larger tank means more limescale potential; unplugging and a 2-hour reset is the first troubleshooting step |
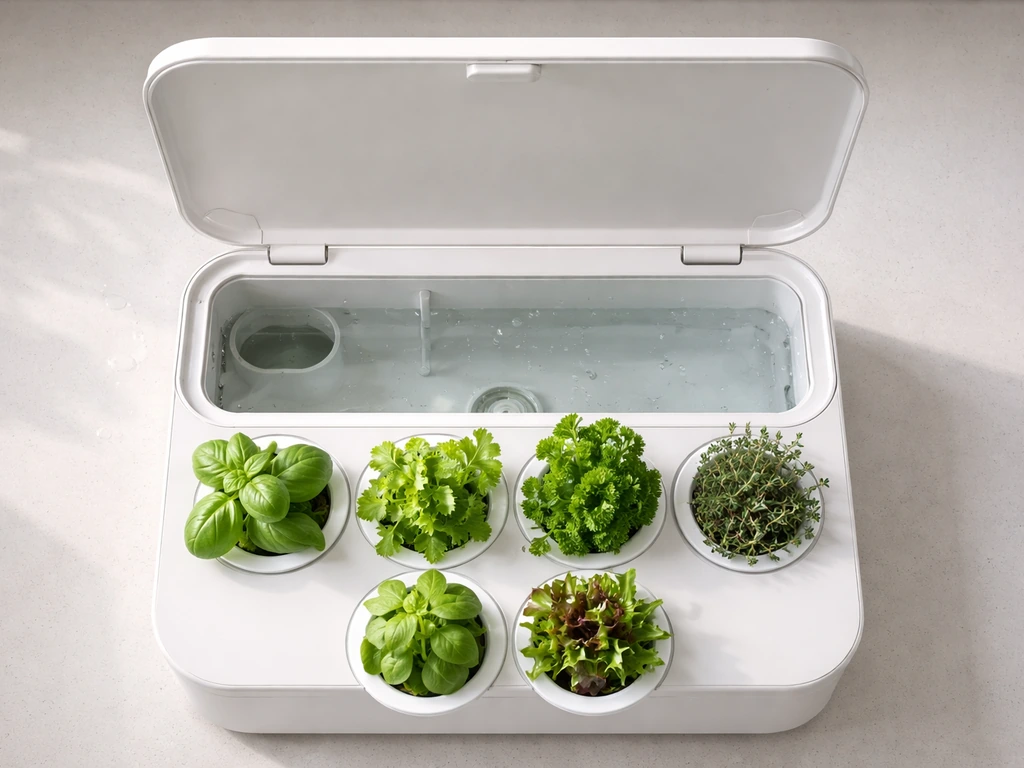
Regardless of model, the parts that need your attention are: the water reservoir (the tank itself), the pod tray or base where the pods sit, any water-transmitting wicks inside the system, the plastic cups or pod holders, the germination domes if you use them, the U-shaped lids, and the lamp arm plus its exterior surface. Each of these collects something different: the tank gets mineral scale and algae, the wicks can clog or slip out of position, and the exterior collects dust and grime that can block light output.
How to safely clean the reservoir, pods, and internal parts
Before you touch anything, unplug the unit. This is non-negotiable, especially on the Click and Grow 25, which has sensors and electronics near the water path. Once it's unplugged, give it a few minutes before you start disassembling.
- Unplug the garden from the wall and remove all pods from their slots.
- Lift the pod tray or base off the reservoir and set it aside.
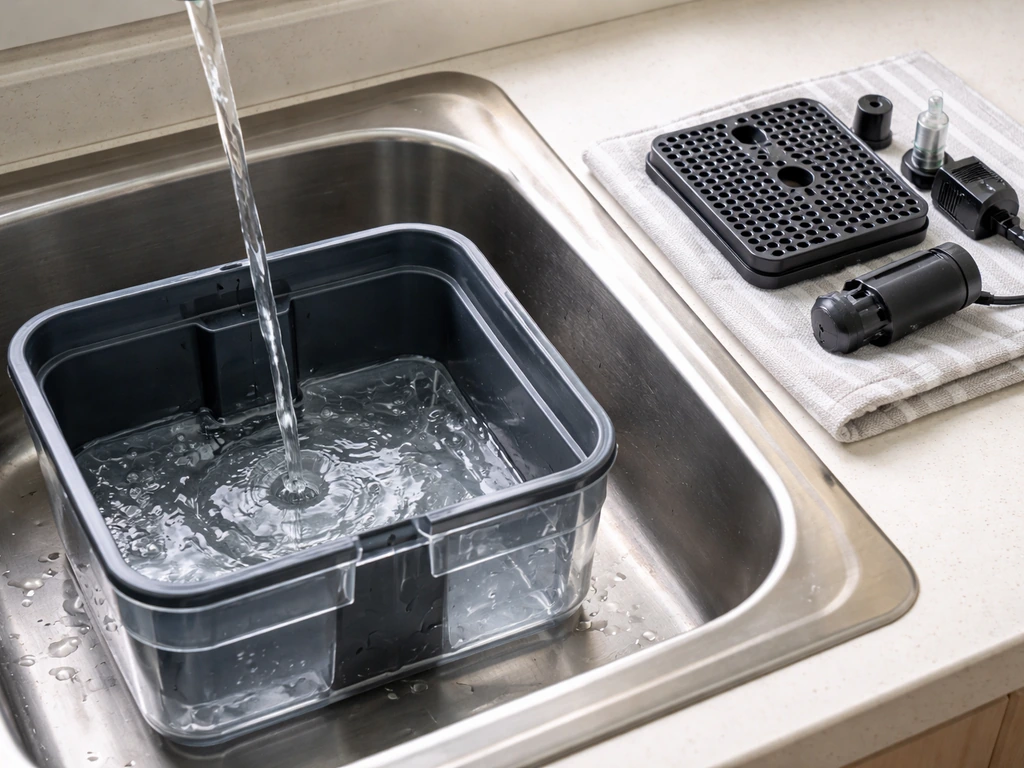
- Pour out any remaining water from the reservoir. If you're on a Smart Garden 9, open the tank lid for better access—Click and Grow has a short guide for this if the lid feels stiff.
- Rinse the reservoir with warm water two or three times to flush out loose debris.
- For light grime: add a small drop of dish detergent to the tank, swirl it around, and rinse thoroughly until no soap remains.
- For algae or mineral buildup (white crusty deposits or green slime): fill the tank with a solution of mild food-grade vinegar or citric acid mixed with warm water, let it sit for 5 to 10 minutes, then pour it out and rinse the tank at least three times with clean water.
- Wipe the inside of the tank dry with a clean paper towel. Any moisture left behind can restart algae growth quickly.
- Wash the plastic cups and tank lid in the dishwasher on a gentle, low-temperature cycle—but keep the temperature under 50°C (120°F) or the plastic can warp. Everything else gets hand-washed only.
- Wipe down the pod tray and any pod slots with a damp cloth. A soft toothbrush works well for getting into the small grooves where algae hides.
Avoid bleach, harsh degreasers, or any strong chemical inside the reservoir. These gardens are designed to grow food, and residues from aggressive cleaners can absorb into the pod soil and harm your plants. Warm water, dish soap, vinegar, and citric acid are all you need.
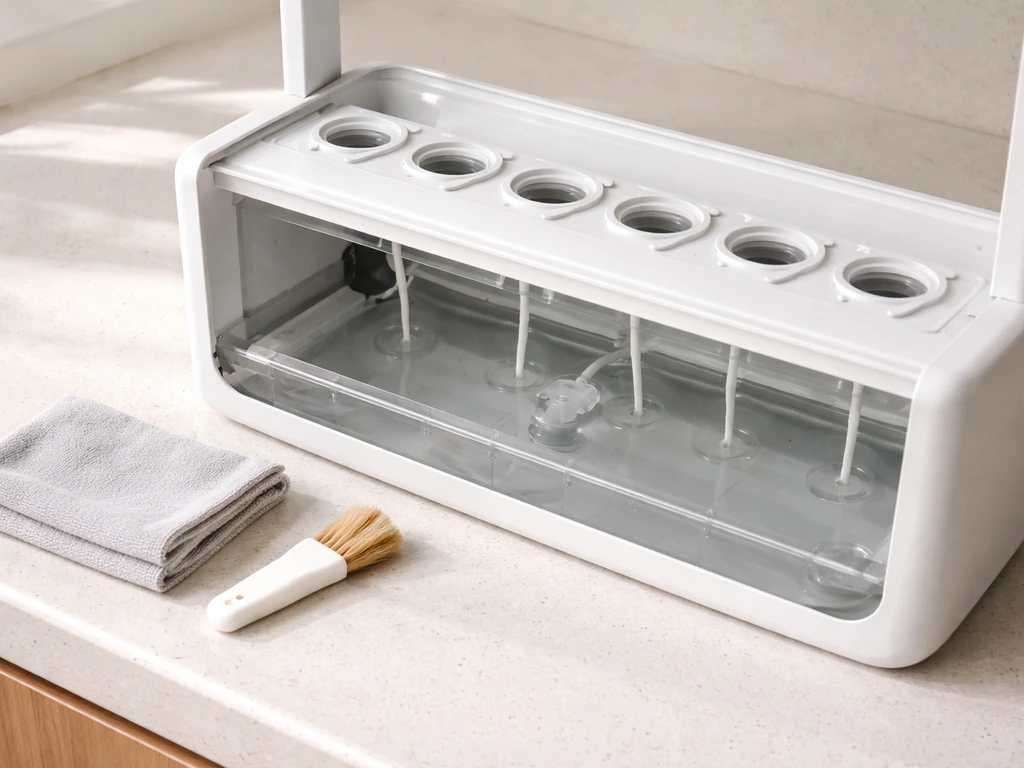
De-scaling and clearing clogs in water lines, pumps, and wicks
The most frustrating problem with these gardens is when your pods are dry even though the water level looks fine. After you resolve any clogs in the wicks and water path, follow the dip and grow instructions for the next planting cycle. This is almost always a wick issue, and it's the piece most people forget to check during cleaning.
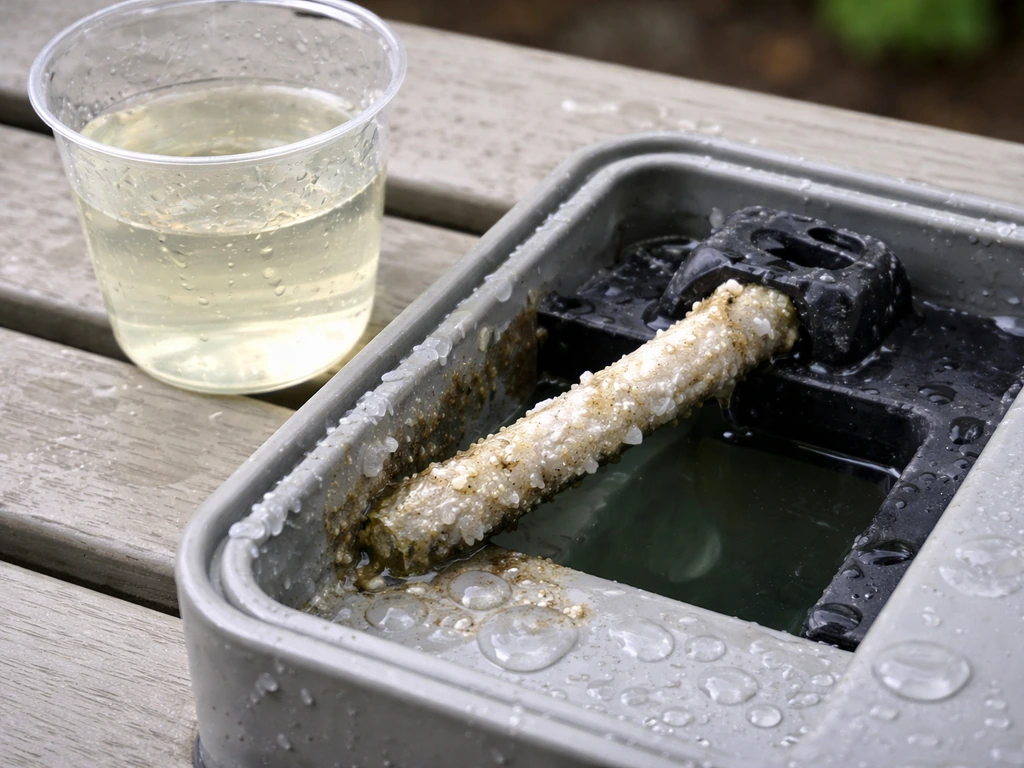
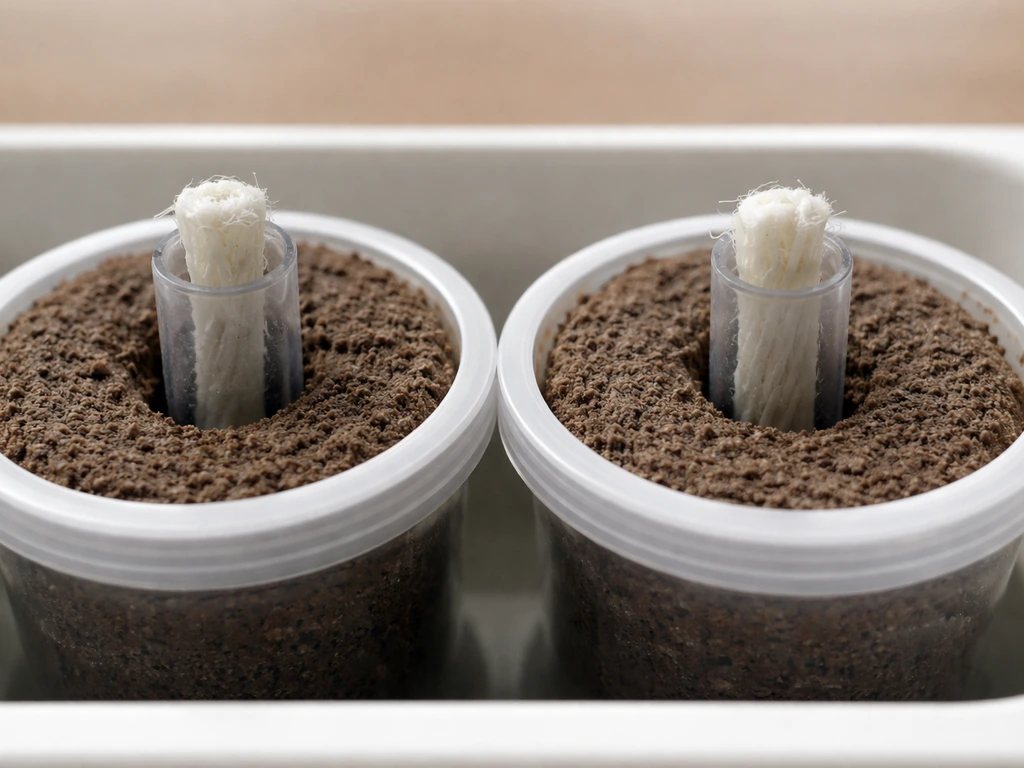
The wick is a small foam or string-like material that sits inside the pod slot and physically pulls water from the tank up into the pod base by capillary action. If the wick sits too high, it loses contact with the water. If it sits too low, it can get waterlogged and stop wicking properly. When you're cleaning, pull each wick out, rinse it under warm water, and squeeze it gently to flush out any mineral deposits or biofilm. Then reinsert it so it fits snugly in its tube and makes contact with the water level below.
Mineral scale (the white chalky buildup you see in hard-water areas) is the main thing that clogs the water path in these gardens. The vinegar or citric acid soak described above dissolves it effectively. If the scale is thick and crusty, you can let the solution soak for up to 30 minutes. A soft bottle brush or pipe cleaner helps scrub inside any narrow channels without scratching the plastic.
The Click and Grow 25 has a larger tank and a higher weekly water consumption (around 5 litres per week), which means it cycles through more water and can accumulate scale faster than the smaller models. If you're on hard tap water, consider switching to filtered water or doing a vinegar rinse every 4 to 6 weeks rather than waiting for visible buildup.
Cleaning the LEDs, exterior surfaces, and handling odors
The lamp arm on every Click and Grow model is the one part you do not want to get wet. Dust and grime on the LEDs can noticeably reduce light output over time, which then shows up as slow or leggy plant growth. Use a dry or very lightly damp microfiber cloth to wipe the LED panel. Never spray any liquid directly onto the lamp, and don't submerge the arm in water.
For the exterior plastic casing of the unit, a damp cloth with a tiny bit of mild dish soap is all you need. Wipe it down, then go over it with a clean damp cloth to remove any soap, and let it air dry before plugging back in.
Odors coming from a Click and Grow garden are almost always from stagnant water or decaying root matter left in the reservoir after a growing cycle ends. The vinegar soak handles most of it. If a musty smell persists after cleaning, do a second soak with a fresh citric acid solution, focusing on rinsing any grooves or channels where organic material can hide. Leaving the tank open and dry for 12 to 24 hours before reassembling also helps significantly. Lids and pod slots should be wiped down and aired out too, since biofilm builds up on any surface that stays consistently damp.
Rinsing, drying, and putting it back together the right way
Rinsing properly is just as important as scrubbing. Any vinegar, citric acid, or soap residue left in the tank will affect your plants, and any moisture left in the wrong places invites algae to come right back.
- After any cleaning solution soak, rinse the tank at least three times with clean fresh water. Fill it, swirl, pour out, and repeat.
- Shake out as much water as you can from the tank and wipe the interior with a dry paper towel.
- Set the tank upside down or on its side on a clean towel and allow it to air dry for at least 1 to 2 hours before refilling. If you have time, overnight is even better.
- While the tank dries, rinse the pod slots, wicks, and plastic cups and let those dry separately.
- Once everything is dry, reinsert each wick into its tube and confirm it fits snugly without being crammed in.
- Place the pod tray back onto the tank, fill the reservoir with fresh water to the fill line, and reinsert your pods.
- Check the float: Click and Grow warns that the water level float should not rise above the garden surface level. If it does, you've overfilled it, which can cause root rot or failed germination.
- Plug the unit back in and confirm the lamp turns on and any indicator lights behave normally.
One thing that trips people up at reassembly: the germination domes and U-shaped lids go back on after you add pods, not before. If you put them on over an empty slot, the condensation they create has nowhere to go and just feeds more mold.
When things still aren't right after cleaning
If you've cleaned everything and your garden still isn't performing the way it should, here's how to diagnose the most common post-cleaning problems.
Pods are still dry or plants are yellowing and slow
Go back and check the wicks first. This is the number one cause of dry pods even when the tank is full. Make sure each wick is seated at the right height in its tube, fits without gaps, and isn't kinked or compressed. If a wick feels stiff or discolored even after rinsing, replace it. Click and Grow sells replacement wicks, and they're inexpensive. Click and Grow also sells Smart Garden plastic cups as a set, including plastic cups along with U-shaped lids, domes, and water-transmitting wicks Click and Grow sells replacement wicks.
Algae or mold keeps coming back on the pod surface
According to Click and Grow, surface mold and algae on the pods are generally harmless and are sometimes a sign of healthy, active soil. That said, if it's aggressive and spreading, you can gently scrape the surface growth off with a soft tool without damaging seeds or roots. The main prevention tactics are keeping your room temperature between 18 and 24°C (64 to 75°F) and making sure pods aren't sitting in too much water. If pods feel soggy, click them out of the garden for a day or two and let them dry out before reinserting.
The Click and Grow 25 shows an error or won't reset
The official first step for any Click and Grow 25 error is to unplug the unit and wait at least 2 hours before plugging it back in. That's a genuine full reset, not just a quick off-on cycle. If the error persists after the 2-hour reset and a full clean, contact Click and Grow support directly since the issue may be sensor-related.
Leaks after reassembly
If water is dripping from the base after you put everything back together, the pod tray likely isn't seated flush on the reservoir. Lift the tray off, check that no wicks or debris are trapped under the seal, and press it back down firmly. Overfilling the reservoir past the fill line can also cause water to push up through the pod slots.
Persistent odor after cleaning
If the smell comes back within a few days, there's usually a hidden pocket of biofilm somewhere. Check the underside of the tank lid, inside any channels or ridges on the pod tray base, and the tubes that hold the wicks. A cotton swab or narrow bottle brush can reach into spots a cloth can't. Letting the whole unit air out with the tank open and empty for a full 24 hours before replanting also makes a big difference.
How often to clean and a simple maintenance routine
The best time for a full clean is at the end of every growing cycle, right before you plant new pods. That's roughly every 1 to 3 months depending on what you're growing. For the Click and Grow 25, which cycles through about 5 litres of water per week, aim for a full clean every 4 to 6 weeks if you're on hard tap water.
| Task | Frequency | What to do |
|---|---|---|
| Top up water | Every few days | Add fresh water to the fill line; don't let the tank run dry |
| Quick rinse | Every 2 to 4 weeks | Empty the tank, rinse with warm water, refill with fresh water |
| Full clean | Every growing cycle or 4 to 6 weeks | Vinegar or citric acid soak, wick rinse, wipe down all surfaces, full dry before reassembly |
| Wick check | Every full clean | Rinse each wick, check positioning, replace if stiff or discolored |
| LED wipe | Every full clean | Dry microfiber cloth over the lamp panel only; no liquids |
| Deep descale | When visible scale appears | 30-minute vinegar or citric acid soak; scrub with soft brush |
If you stay on top of the quick rinse every few weeks, the full cleans become much faster because you're not battling heavy scale or thick algae. Think of it the same way you'd treat a coffee machine or kettle: a light rinse regularly is far easier than a deep rescue clean every few months.
For today: if your garden has visible algae, dry pods, or a smell, start with the vinegar soak on the reservoir, then check and rinse every wick before reassembling. Follow the spray-n-grow instructions for your specific product to keep dosing and timing correct. Once the reservoir vinegar soak is done, follow the dip and grow instructions to get your pods ready for the next cycle.
That combination solves the majority of Click and Grow problems in one cleaning session. Follow the la colors mega grow instructions to set up and feed your plants properly. If you've tackled other grow systems before, you'll notice that many of the same principles apply across kit types, whether you're working with soil-based pod gardens or water-based rooting systems from other brands.
If you are using LilyEve grow turn ampoules, follow the same reservoir cleaning routine so residues do not interfere with water flow and plant health. The fundamentals of keeping water paths clear and surfaces dry between cycles carry across nearly all of them.
FAQ
Can I clean my Click and Grow while it is still plugged in if I do it quickly?
No. Unplug the unit first, then wait a few minutes before touching the reservoir or wicks. On the Click and Grow 25, electronics and sensors sit near the water path, so quick plug-in cleaning increases risk and can also confuse sensor behavior.
What water should I use for rinsing, tap water or distilled?
For the final rinse, distilled or filtered water is a good choice if you have hard tap water. It reduces mineral re-depositing on parts like the wick tubes and pod tray channels, which helps delay the next vinegar soak.
How do I tell if a wick is still clogged after rinsing?
If water still does not pull up after reassembly, remove the wick again and check for stiffness, discoloration, or a misshapen tube fit. Even after rinsing, a wick can keep a mineral film, so replacing it is often faster than repeatedly soaking.
Is it okay to scrub the inside channels with anything abrasive to remove scale faster?
Avoid metal scrubbers or aggressive scraping that can scratch the plastic. Scratches create tiny grooves where algae and biofilm reattach, and they can also make the tray seal less effective, leading to leaks or persistent odors.
How long should I leave vinegar or citric acid in the reservoir?
A short soak works for light buildup, but if the scale is thick and crusty, extend the soak up to about 30 minutes. After the soak, rinse thoroughly and dry, because any remaining acid residue can affect plant performance.
Do I need to rinse the pods themselves, or only the reservoir and wicks?
If you see only harmless surface growth, you generally do not need to wash the pod contents. Focus cleaning on the water path and wick contact areas, then wipe and air out lids and damp surfaces to limit biofilm buildup.
Can I use dishwasher cleaning for pod cups to save time?
Only plastic cups and the tank lid are suitable for a gentle cycle under 50°C (120°F). Do not place the lamp arm, germination domes, or wicks in a dishwasher, heat and residues can warp parts or leave chemicals that interfere with water flow.
What should I do if I cleaned everything but my garden still smells after a day?
Re-check the underside of the tank lid, ridges or channels on the pod tray base, and the underside seals where liquid can pool. Use a cotton swab or narrow brush for hidden grooves, then air out the unit (tank open, empty) for 24 hours before replanting.
My unit has condensation or mold on domes, what is the most common mistake?
Putting the domes or U-shaped lids on over empty slots can trap condensation with no drainage path. Add pods first, then install domes and lids, and make sure the internal surfaces are wiped and dried between cycles.
How often should I do a full clean if I use filtered water?
If you use filtered or softened water, you can often stretch the interval beyond the hard-water schedule. A practical approach is to do a quick rinse and wick check every few weeks, and reserve full vinegar cleaning for when you notice early mineral buildup or recurring dry-pod behavior.
Is “white chalky” buildup always mineral scale, and is vinegar always safe to use?
White chalky residue is usually mineral scale, vinegar or citric acid dissolves it well. Do not use bleach or harsh degreasers in the reservoir, these can leave residues that absorb into pod soil and harm plants even if you rinse afterward.