
Most Target strawberry grow kits fall into one of three types: seed-based soil kits (like the Back to the Roots Organic Wild Strawberry Grow Kit), seed-embed sponge kits (like Modern Sprout's 'You Are My Jam' starter), or hydroponic pod kits. Once you know which one you have, setup is genuinely straightforward. Expect germination in 2–4 weeks, true leaves within 6–8 weeks, and your first small fruits somewhere between 70 and 120 days from planting, depending on the kit. This guide walks you through every stage, translates the confusing parts of the typical included manual, and tells you exactly what to do when things go sideways.
Target Strawberry Grow Kit Instructions: Setup & Troubleshoot

Marcus Thornfield
20 Jul 2026
Who this guide is for and what it covers
If you picked up a strawberry grow kit at Target, received one as a gift, or are eyeing one on the shelf and wondering whether it actually works, this guide is for you. It covers every step from opening the box to eating your first berry. You do not need any prior gardening experience. Whether your kit came with seeds, a pre-grown plug, or hydroponic sponge pods, you will find your specific setup instructions here. The guide also covers what to do when germination is slow, what that white fuzz on the soil means, and how to keep your plant alive through flowering and into harvest. It draws on manufacturer manuals for both the Back to the Roots and Modern Sprout kits sold at Target, as well as university extension guidance on seed starting, pest control, and fertilizing container strawberries.
Identify your kit: what you have and what should be in the box
Target carries at least two distinct strawberry grow kit lines as of mid-2026. The Back to the Roots Organic Strawberry Grow Kit is a mason-jar style soil kit with seeds. The Modern Sprout line includes seed-starter kits under names like 'You Are My Jam' and 'Complimentary Colors.' If your kit came in a glass jar with a cork or lid, compressed coir disk, and a seed packet, you almost certainly have the Back to the Roots version. If it came in a small tin, pot, or branded container with a seed-embed puck (a compact disc of clay, coir, and compost already hiding the seeds), that is a Modern Sprout Seed Pop style kit. Some shoppers also find AeroGarden-compatible strawberry pod kits on Target's shelves or online, those come with net cups, grow sponges, and a nutrient bottle.
Check the TCIN (Target's internal product ID) on your receipt or the barcode label on the box if you need to pull up the exact product page for your kit. This matters because the watering schedules and light requirements differ slightly between models.
What should be in each kit type
| Kit Type | Container | Growing Medium | Seeds/Plant | Extras |
|---|---|---|---|---|
| Back to the Roots Organic | Glass mason jar with lid | Organic potting mix + compressed coconut-coir disk | Organic wild strawberry seeds | Spray bottle, organic fertilizer spike |
| Modern Sprout Seed Pop | Small tin, pot, or ceramic | Nutrient-rich clay/coir/compost puck (seeds embedded) | Seeds pre-embedded in puck | None usually; some include a card with care instructions |
| AeroGarden-compatible pod kit | No container (fits AeroGarden device) | Foam grow sponge in net cup | Strawberry seed or seedling in sponge | Grow dome, pod label, liquid nutrient bottle |
If anything is missing, do not start the kit yet. A cracked spray bottle or missing fertilizer spike in the Back to the Roots kit can cause early problems. Check everything against the list above before you do anything with the seeds.
Quick decision checklist: which kit type do you have?
Answer these four questions to confirm your kit type before jumping into setup. The setup instructions diverge meaningfully depending on your answer.
- Does your kit include a compressed coconut-coir disk and a separate seed packet? If yes, you have a seed-based soil kit (Back to the Roots style). Go to the seed-based setup section.
- Does your kit include a pre-formed puck or 'seed pop' disc where seeds are already embedded in the medium? If yes, you have a Modern Sprout-style soil embed kit. The medium preparation step is different — you do not need to press seeds into soil yourself.
- Does your kit include a foam sponge, net cup, grow dome, and liquid nutrients, but no soil? If yes, you have a hydroponic sponge kit (AeroGarden-compatible). Go to the hydroponic sponge section.
- Does your kit include a small, already-rooted plant or a bare-root runner? If yes, you have a plug or plantlet kit. Those need hardening off and transplanting, not seed starting — skip to that section.
Unboxing and inventory: parts checklist, what to replace, and condition checks
Before anything touches water or soil, lay every component on a clean surface and check it against your kit type's expected contents. Doing this now prevents the frustrating moment three weeks in when you realize the spray bottle leaks or the fertilizer spike was never in the box.
- Inspect the seed packet for tears, moisture damage, or mold. If seeds are clumped together with visible moisture, they may already have low viability.
- Check the compressed coir disk (Back to the Roots): it should be firm and dry, not already expanded or crumbling.
- Check the spray bottle nozzle by pumping it a few times. If it drips rather than mists, replace it with a cheap garden mister before starting.
- Check the fertilizer spike for breakage. A broken spike can still be used by crumbling it into the soil, but note this so you time your next fertilization properly.
- For hydroponic kits, inspect the grow sponges for dark mold patches or compressed/torn foam. A compromised sponge leads to root problems before the plant even gets started.
- Check the grow dome or lid for cracks. A humid enclosure is critical for germination — even a small crack reduces humidity significantly.
If you need replacement parts for a Back to the Roots kit, the manufacturer sells refill kits directly and you can contact them through their website. For Modern Sprout, the puck-style kits are typically one-use per seed pop, but the container (tin or pot) is reusable with a fresh puck. For AeroGarden-compatible pods, replacement strawberry seed pod kits are available from AeroGarden directly and through third-party Amazon sellers. AeroGarden's warranty language notes that non-germinating pods can be replaced if you contact customer service within about three weeks of planting, so keep your purchase receipt.
Setup for seed-based kits: step-by-step from disk to planted jar
This section covers the Back to the Roots Organic Wild Strawberry Grow Kit specifically, but the steps apply to any seed-in-soil kit you picked up from Target that starts with a compressed medium and a seed packet.
Step-by-step planting
- Place the compressed coconut-coir disk in the bottom of the mason jar. Pour roughly 1/3 cup of room-temperature water directly onto the disk and wait 5–10 minutes for it to fully expand. It will roughly double in height.
- Once expanded, use your fingers or a small spoon to break up any lumps and loosen the coir. Add the included organic potting mix on top, filling the jar to about 1 inch below the rim.
- Sprinkle 6–8 wild strawberry seeds evenly across the surface of the soil. Do not crowd them into a corner.
- Press each seed gently into the soil to a depth of about 1/8 inch (just barely below the surface). Wild strawberry seeds need light to germinate, so do not bury them deeper than this.
- Mist the soil surface gently with the spray bottle until the top inch is evenly moist but not dripping. You should not see water pooling.
- Place the lid on the jar to create a humidity dome. This keeps moisture stable while the seeds are trying to sprout.
- Label the jar with the planting date. You will use this to track the 4-week germination window and know when to expect thinning.
Medium preparation tip
The coir disk in the Back to the Roots kit is sterile when it arrives, which is a real advantage. Sterile media dramatically reduces damping-off (a fungal collapse that kills seedlings at the soil line) and fungus gnat infestations. Do not add extra outdoor soil or compost from your garden, doing so introduces pathogens that the sterile starting mix is specifically designed to avoid.
A note on wild strawberry seeds and germination timing
Wild and alpine strawberry seeds (the type used in the Back to the Roots kit) can be slow and erratic germinators. Research published in the Journal of the American Society for Horticultural Science confirms that cold-moist stratification (briefly chilling seeds in a damp medium) improves germination rates for some Fragaria seed lots. Enhanced Strawberry Seed Germination through (J. Amer. Soc. Hort. Sci.) reports that cold‑moist stratification improves germination rates for some Fragaria seed lots. The Back to the Roots manual does not require this step, but if your seeds have not sprouted after 5 weeks, try placing the sealed jar in the refrigerator for 2 weeks, then bring it back to room temperature. This mimics winter conditions and can break dormancy.
Setup for plug/plantlet kits: transplanting, hardening off, and spacing
Some Target grow kits, especially those sold closer to spring, include a live plantlet or a rooted runner rather than seeds. These need slightly different handling because the plant is already alive and the stress of transplanting can set it back if you rush.
How to transplant
- Do not transplant directly from the kit packaging into a sunny outdoor spot. The plant needs to adjust first.
- Place the plug or plantlet in its original container (or a small temporary pot) in a spot with bright indirect light indoors for 3–5 days. Water lightly to keep the root zone moist.
- After 3–5 days, move it to a windowsill with a few hours of direct sun each day. Do this gradually over another 3–5 days.
- Once the plant shows new leaf growth and looks stable, transplant it into its final container. Use a well-draining potting mix and a pot with drainage holes.
- Space matters: one strawberry plant needs at least a 6-inch diameter pot to develop properly. Runners (long horizontal stems the plant sends out) will need more room or should be trimmed off to keep energy focused on the main plant.
- Water thoroughly after transplanting, then allow the top inch of soil to dry slightly before watering again.
Hardening off sounds fussy but it matters. A plantlet that goes from a warm, low-light packaging environment directly into full sun outdoors will show leaf scorch within a day. Two minutes of wilted, bleached leaves is avoidable. The 7–10 day adjustment window above is the minimum, not optional.
Hydroponic sponge vs soil plug: what actually changes
If you have an AeroGarden-compatible strawberry pod kit from Target, the fundamentals of plant care are the same (light, temperature, nutrients), but the mechanics are very different from a soil kit. Here is where people run into confusion.
Watering and wicking in hydroponic kits
You do not water a hydroponic sponge pod the way you water a soil pot. The AeroGarden device handles water delivery automatically by circulating nutrient solution up to the root zone. Your job is to fill the reservoir to the 'Fill to Here' line, add liquid nutrients at setup (4 mL per 3-pod models, 8 mL per 6/7/9-pod models per AeroGarden's official instructions), and then top off the water and re-dose nutrients every two weeks. Do not let the reservoir run dry, exposed roots in a hydroponic sponge die within hours once they lose contact with moisture.
Drainage and medium differences at a glance
| Feature | Hydroponic Sponge Kit | Soil Plug Kit |
|---|---|---|
| Watering method | Reservoir fill + pump circulation | Surface misting or bottom watering |
| Drainage | No drainage needed; closed system | Needs drainage holes in container |
| Nutrients | Liquid nutrients added to reservoir every 2 weeks | Slow-release fertilizer spike or liquid feed monthly |
| Risk of overwatering | Low (self-regulating reservoir) | High if soil stays saturated |
| Risk of algae | Higher (open light + water) | Lower (opaque containers reduce algae) |
| Transplant needed? | No — seed sprouts in sponge in place | Yes, if growing from plug or starting in small tray |
| Cleaning between grows | Bleach or vinegar solution in reservoir | Replace soil; wash container |
One thing that catches people off guard with hydroponic kits: the grow dome (small plastic cap over the pod) stays on until the seedling touches it from the inside. That is usually about 2 weeks. Removing it too early drops humidity around the emerging seedling and causes the tiny leaves to dry out before they have a root system capable of keeping up with water loss.
Light, temperature, and humidity needs at each growth stage
Getting light right is the single thing most indoor strawberry kit growers get wrong. The plants are trying very hard to fruit, and insufficient light is the number one reason kits produce leggy, pale seedlings that never flower.
Germination stage (days 1–28)
During germination, the seeds do not need light yet but they do need consistent warmth and moisture. Keep your kit in a spot that stays between 65–70°F (18–21°C). Avoid windowsills in winter where the glass surface temperature can drop to 50°F at night, this significantly slows or prevents germination. The lid or dome stays on. Check moisture every 1–2 days and mist if the surface looks dry. Do not flood the medium.
Seedling stage (first leaves to about 2 inches tall)
Once you see green sprouts (typically around 3–4 weeks for wild strawberry seeds), move the kit to your brightest available spot. A south- or west-facing window in summer is usually sufficient. Indoors in winter, you will need a grow light. University extension programs recommend 14–16 hours of artificial light per day for seed-started seedlings, with the light fixture positioned 6–12 inches above the tops of the plants. A basic LED grow light strip on a timer works well and is inexpensive. Remove the dome or lid once seedlings are about 1/2 inch tall to prevent mold buildup from the trapped humidity.
For the Back to the Roots kit specifically, the manual says to thin seedlings to 3 plants once they reach 1/2 inch tall, then thin again to 1 plant at 1 inch tall. I know it feels wasteful to pull out perfectly good seedlings, but overcrowding in a mason jar kills all of them through competition and poor airflow. Be ruthless at thinning.
Flowering and fruiting stage
Strawberries flower best with at least 8 hours of direct sun (or 14–16 hours of bright grow light). Keep temperatures between 60–75°F. Above 85°F, pollen viability drops and you will get distorted or absent fruit. Below 60°F, flowering slows considerably. If you are growing indoors in summer near a window that gets afternoon sun and heat, consider a sheer curtain to buffer the hottest hours.
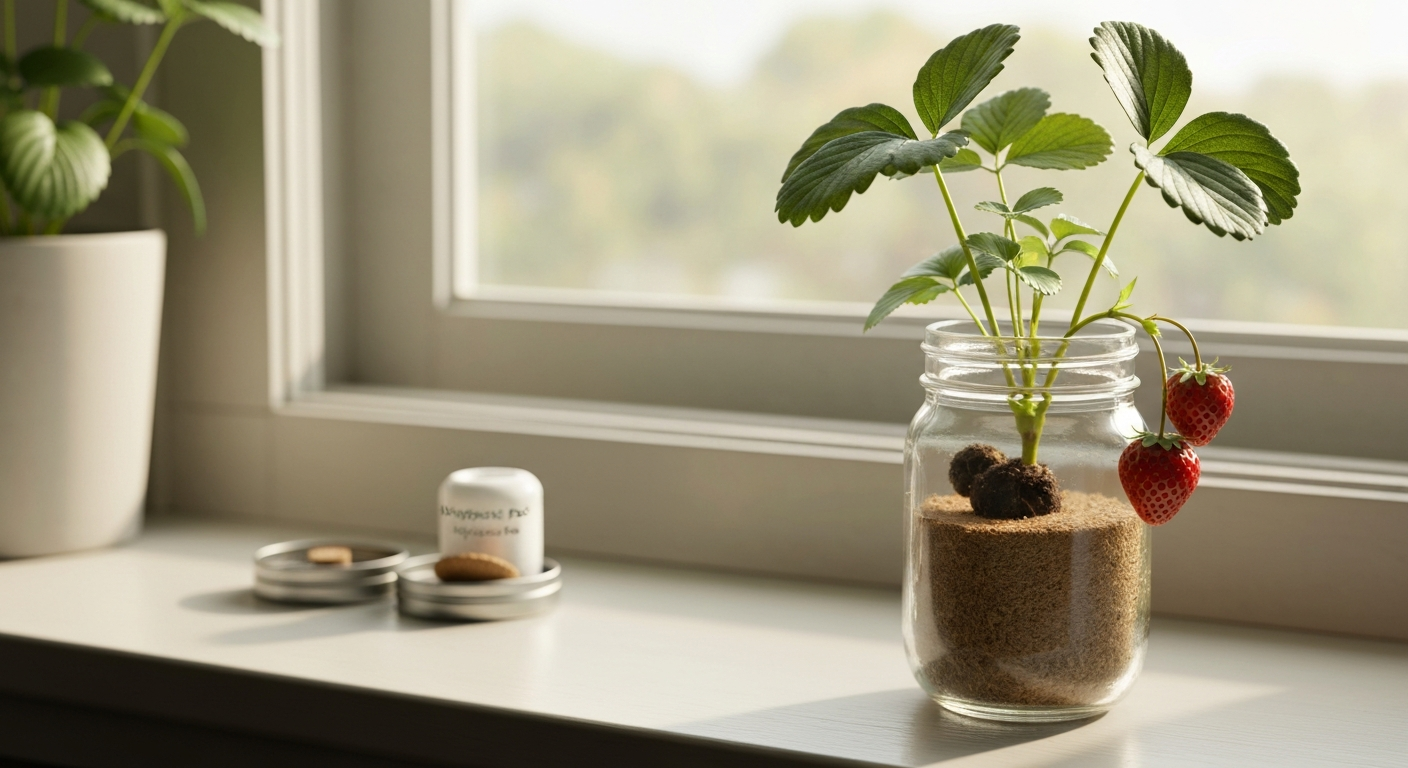
Wild strawberries like those in the Back to the Roots kit produce fruit that is small (roughly 1/2–1 inch wide) and intensely flavored. Expect the first fruits around 70–90 days from germination. Modern Sprout's product pages list a wider 70–120 day range to maturity. Do not confuse the first small fruits with the full harvest, wild strawberry plants produce continuously in small flushes rather than one big crop, so you will be picking a few berries at a time over several weeks.
Light and temperature quick reference
| Stage | Temperature | Light (natural) | Light (artificial) | Humidity |
|---|---|---|---|---|
| Germination | 65–70°F (18–21°C) | Not required | Not required | High (dome/lid on) |
| Seedling | 65–72°F (18–22°C) | 6+ hours bright indirect | 14–16 hrs, 6–12" above plants | Moderate (dome off at 1/2") |
| Vegetative growth | 65–75°F (18–24°C) | 6–8 hours direct | 14–16 hrs full-spectrum | Moderate |
| Flowering/fruiting | 60–75°F (15–24°C) | 8+ hours direct | 14–16 hrs, high intensity | Moderate; avoid misting flowers |
Feeding your strawberry kit: timing and what to use
The Back to the Roots kit includes one organic fertilizer spike. Insert it into the soil next to the plant when you thin down to your final single seedling at about 1 inch tall. The spike releases nutrients slowly over 1–2 months. After that, you will need to supplement. OSU Extension and other university sources recommend a balanced complete fertilizer for container strawberries, something in the 10-10-10 range for general maintenance, shifting toward a higher-potassium formula (like 10-5-10 or similar) as the plant begins to flower, since potassium supports fruit development. Liquid fertilizers are easier to control in small containers than granular ones. Start at half the label rate for seedlings to avoid salt burn, and increase to full rate once the plant is actively flowering.
For hydroponic kits, stick to the manufacturer's liquid nutrient formula and schedule. Third-party nutrients can be used if you need to replace the included bottle, but match the NPK ratio as closely as possible. AeroGarden's official instructions specify re-dosing every two weeks regardless of plant size.
Common problems, what they look like, and how to fix them
Poor or no germination after 5 weeks
Wild strawberry seeds are slow, but five weeks with nothing is a signal to act. First, check that the soil stayed consistently moist (not wet, not dried out) and warm. If the kit sat in a cold spot or dried out between mistings, germination may just be delayed. Try the cold stratification trick described earlier: place the sealed jar in the fridge for 2 weeks, then return it to a warm spot. If you are past 7–8 weeks with zero sprouts, the seed lot may have been non-viable. For AeroGarden-compatible pods, contact AeroGarden customer service within 3 weeks of planting to request a replacement pod under their warranty.
White fuzz or mold on the soil surface
White surface mold is common in high-humidity dome setups, especially if air circulation is minimal. It looks alarming but is usually not damping-off unless the seedling stems are pinching and collapsing at the soil line. Remove the dome immediately, let the surface dry slightly, and increase airflow by cracking a nearby window or running a small fan on low nearby. If damping-off (seedling collapse) does occur, it moves fast, remove affected seedlings immediately to protect any remaining ones. For future grows, the best prevention is sterile media and not overwatering.
Fungus gnats
Tiny flies hovering around your kit and crawling across the soil surface are almost certainly fungus gnats. Their larvae live in the top inch of moist organic soil and feed on roots, which can slow or kill young seedlings. Utah State University Extension identifies persistently wet, organic-rich media as the primary cause. The fix has two parts: let the soil surface dry out between waterings (gnat larvae need moisture to survive), and place yellow sticky traps near the kit to catch adults before they lay more eggs. For a faster knockdown of larvae, a soil drench with Bacillus thuringiensis israelensis (sold as Mosquito Bits or Gnatrol, used per label) is the most extension-endorsed treatment for edible indoor plants. Some growers use a diluted hydrogen peroxide drench (1 part 3% H2O2 to 4 parts water) as a home remedy to kill larvae, and it does work for this, but UC IPM does not list it as a primary recommended control, so treat it as a backup option rather than a first-line strategy. Many grow‑guides recommend mixing one part 3% hydrogen peroxide to four parts water (~0.6% final) for a soil drench to kill soft‑bodied larvae and oxidize pathogens mix one part 3% hydrogen peroxide to four parts water (~0.6% final).
Nutrient deficiency signs
- Yellowing of older (lower) leaves: likely nitrogen deficiency. Feed with a balanced liquid fertilizer at half strength and increase gradually.
- Purple or reddish coloring on leaf undersides: often phosphorus deficiency or cold stress. Check temperature first, then consider a fertilizer with higher phosphorus.
- Brown leaf edges on otherwise green leaves: salt buildup from over-fertilizing. Flush the soil with plain water and skip fertilizer for two weeks.
- Small, pale new leaves with green veins: iron or manganese deficiency, often caused by high pH in the growing medium. For soil kits, pH between 5.5 and 6.5 is ideal for strawberries.
Leggy, stretching seedlings
Seedlings that grow tall and floppy with long gaps between leaves are reaching for light. Move the kit closer to your light source or extend your grow-light hours to 14–16 per day. If using a grow light, lower it to 6 inches above the seedling tops. This is the most common setup mistake in indoor grow kits and one of the easiest to fix once you recognize it.
Maintenance, cleaning, and storing between grows
The Back to the Roots mason jar is reusable. After a grow cycle ends, empty the spent soil into compost, wash the jar with warm soapy water, rinse thoroughly, and let it dry completely before storing. The spray bottle should also be rinsed and dried. For a fresh grow, you will need a Back to the Roots refill kit (available directly from their website) since the coir disk, seeds, and fertilizer spike are single-use.
For AeroGarden-compatible hydroponic kits, AeroGarden's official instructions specify cleaning the reservoir between grow cycles by circulating a solution of 1/4 cup household bleach in a full reservoir for 5 minutes, then draining and rinsing completely. Distilled white vinegar is the recommended alternative if you prefer to avoid bleach. This step removes algae, mineral deposits, and any residual pathogens before the next round of pods goes in. Skipping it shortens the life of the pump and can introduce disease to new seedlings.
Where to find replacements and official support
For Back to the Roots kits purchased at Target, the product page on Target's website (search the TCIN or product name) links out to the manufacturer. Back to the Roots customer support handles missing components and non-germinating seed lots. For Modern Sprout kits, replacement seed pops are available on Modern Sprout's website and through their retailer network, which includes Target. For AeroGarden pod kits, use AeroGarden's website or call their customer service line. If you bought through Target and had a defective kit, Target's standard return window applies regardless of manufacturer warranty, so keep your receipt.
If you have misplaced your physical instruction sheet, both Back to the Roots and Modern Sprout post their care instructions on their product pages, and the Back to the Roots owner's manual (model C25801v2) is the key reference document for their strawberry kit. You can also find official Target grow kit instructions on the product page for your kit, search the listing for 'Target grow kit instructions' to access the manufacturer's care sheet and downloadable manual. You can also find mini sunflower grow kit instructions on the manufacturer's product page or as a downloadable PDF. For another example of a step-by-step manual, see cherry blossom grow kit instructions. Searching the model number along with the brand name will surface the PDF. For general seed-starting questions that go beyond what the kit manual covers, University Extension services from Minnesota, Maine, and UC Cooperative Extension publish free seed-starting and strawberry care guides that align with the best practices used in these kits.
How these kits compare to other Target grow kits
If you have already worked through a similar kit from Target, the learning curve for the strawberry version is short. The seed-based setup here is essentially the same process used in the Back to the Roots lavender grow kit and other Target soil-jar kits, with the main difference being germination time and light intensity at fruiting. If you're also working with small flowering kits, check the mini rose grow kit instructions for nearly identical setup and care steps. See Back to the Roots lavender grow kit instructions for the manufacturer's step‑by‑step care notes. For step-by-step lavender grow kit instructions and setup tips, see our dedicated lavender grow kit instructions guide. The Modern Sprout strawberry seed pop follows the same embed-and-water approach as Modern Sprout's lavender kits. If you are trying to decide between strawberry and another fruiting or flowering kit from Target, strawberry kits are among the more rewarding because you get edible output, but they do require a longer commitment than herb kits and more light than most indoor spaces provide without a supplemental grow light.
If you have tried or are comparing similar organic soil kits, the Trowel and Sprout organic grow kit line follows a nearly identical seed-in-amended-soil format, with organic certification being a shared feature. The setup steps in this guide transfer well to that kit type.
FAQ
How do I identify which Target strawberry grow kit I own or am considering buying?
Check the Target product page or packaging for brand/model (e.g., Back to the Roots Organic Wild Strawberry, Modern Sprout Seed Pops), TCIN/UPC, and included parts list. Back to the Roots lists components (organic potting mix, organic wild strawberry seeds, fertilizer spikes, expanding coconut‑coir disk, spray bottle) on the owner’s manual; Modern Sprout product pages list Seed Pops contents and germination/harvest windows. If packaging is missing, compare photos and listed contents on Target product pages to match your kit.
What are the key setup differences between seed‑based kits and plug/plantlet or hydroponic sponge kits?
Seed kits (e.g., Back to the Roots, Modern Sprout Seed Pops): expand or fill the provided medium, sow seeds on/just under the surface per manual (Back to the Roots recommends pressing seeds ~1/8" into medium), keep domed lid on until germination, mist gently. Plug/plantlet kits: remove plugs from packaging, keep moist, plant plug in potting mix or tray, avoid disturbing roots. Hydroponic sponge/seed pod kits (AeroGarden style): place seed in sponge pod, use net pot and dome, add manufacturer nutrient solution at start and top up per schedule (AeroGarden dosing guidance: follow model dosing; seeds/nutrients differ by pod count). Each system needs different watering and nutrient timing—follow the kit’s specific manual.
What exact environmental conditions (light, temperature, humidity) give the best germination and seedling success?
Aim for steady temperatures around 65–75°F (Back to the Roots recommends ~65–70°F). Provide plenty of light: 6–8 hours direct sun is common in kit manuals, but for reliable indoor starts use supplemental grow light at 14–16 hours/day with fixtures positioned 6–12 inches above seedlings (extension guidance). Maintain moderate moisture—keep medium consistently moist but not waterlogged; keep domed lid on for seed kits until visible germination to retain humidity.
What is a practical, step‑by‑step seed‑kit setup and early care timeline?
1) Expand or prepare provided medium per manual (e.g., expand coconut disk with ~1/3 cup water). 2) Fill container with medium, level surface. 3) Sow 6–8 seeds (Back to the Roots) spaced and press ~1/8" into soil; cover lightly. 4) Mist surface gently, place dome/lid on. 5) Place in bright warm location (65–75°F) or under grow light. 6) Keep lid closed until germination; mist twice daily to keep surface moist. 7) Once seedlings reach ~1/2" tall, thin to 3; at ~1" tall thin to 1 and insert starter fertilizer spike per directions. Expect germination in ~2–4 weeks (Modern Sprout lists ~14–28 days; Back to the Roots around 4 weeks).
How do I care for seedlings after germination and before fruiting?
After first true leaves appear, increase airflow by removing dome part‑time, reduce misting frequency to avoid damping‑off, and start gentle fertilization per kit instructions (starter spike or dilute liquid fertilizer at low strength). Provide 14–16 hours of light daily if indoors, keep lights 6–12" above seedlings, and maintain even moisture without saturation. Transplant to larger container if roots become crowded before flowering.
When should I expect flowering and harvest from a consumer strawberry kit?
Timing varies by kit and cultivar. Modern Sprout lists ~70–120 days to maturity depending on SKU; Back to the Roots seedlings can take several months to produce small fruit. Kit seeds are often wild/alpine types that produce small berries (~1/2–1") and variable yields. Expect at least multiple weeks to months from sowing to first fruit—plan for patience and ongoing care.