A Wholecelium grow kit is a ready-to-fruit mushroom block that comes pre-colonised with mycelium, so you are not starting from scratch. Your job is to trigger fruiting by giving it the right combination of fresh air, humidity, and temperature. Most kits follow the same core process: confirm what you have, clean your hands and workspace, initiate the kit, hang it in the right environment, mist and fan it daily, then harvest when the caps are ready to pop. The whole first flush usually takes one to three weeks from the day you start. Everything below is based on that framework, mapped specifically to what Wholecelium ships.
Wholecelium Grow Kit Instructions: Step by Step Setup

Marcus Thornfield
2 Jun 2026
First: figure out exactly which kit you have
Wholecelium sells several different kits and the box contents, substrate volume, and timing can vary between versions. Before you do anything else, check your packaging or order confirmation for the kit name. Common Wholecelium offerings include the OHM Kit, the Qubit Kit, and the Pandora's Box, and there are occasional limited-run strains on top of those. Each one ships pre-colonised, but the substrate block size, bag style, and recommended fruiting window can differ. If you no longer have the packaging, log into your Wholecelium account order history or check the sticker on the grow bag itself, which usually shows a strain code or kit name.
It is worth noting upfront that Wholecelium does not publish a single universal instruction page that is easy to find, and their documentation has shifted across versions. If your kit came with a printed insert, treat that as the primary reference and use this guide to fill the gaps. If there was no insert, the steps below cover the standard process that applies across their main kit range.
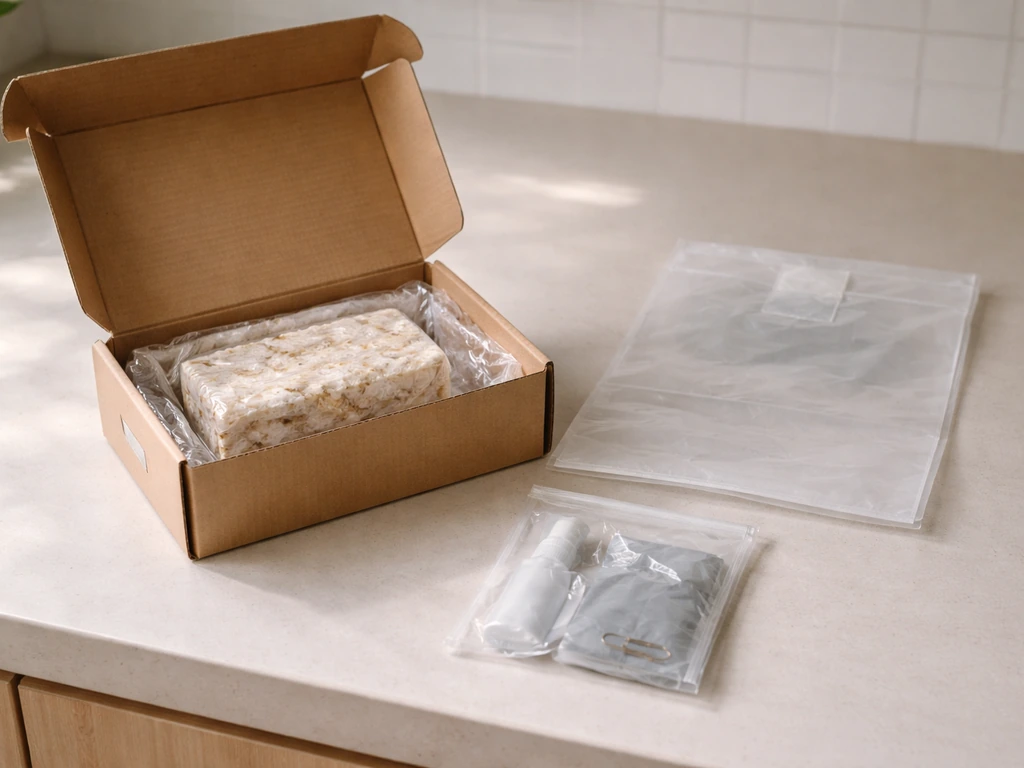
Confirm your kit contents before opening anything
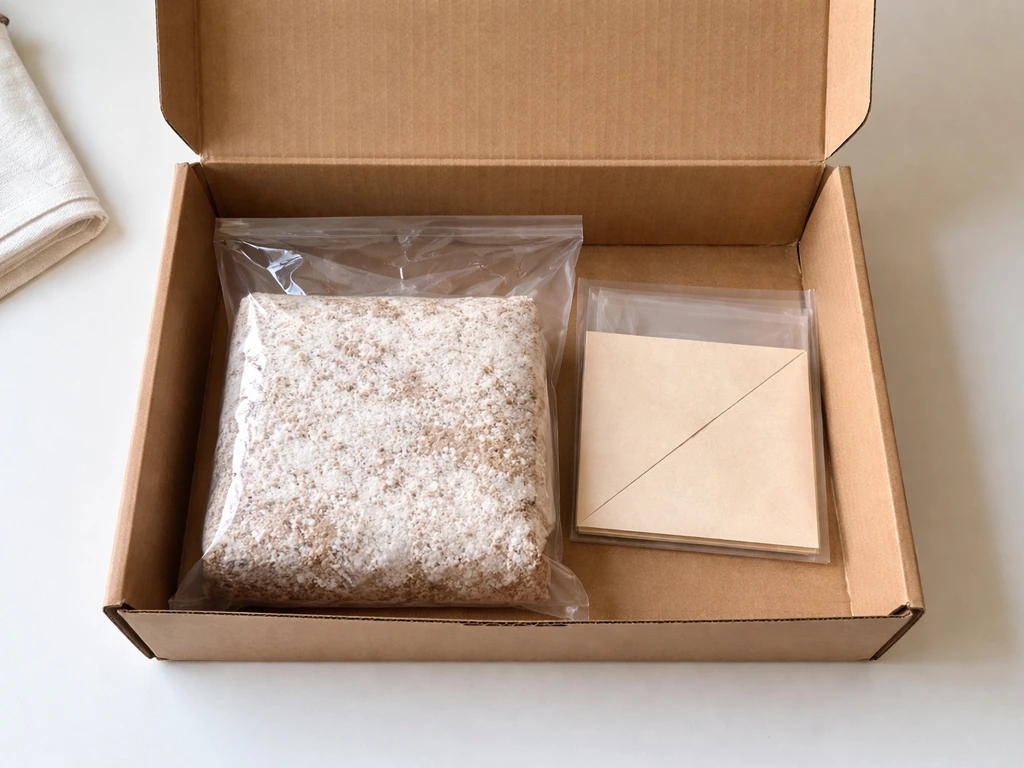
Most Wholecelium kits arrive with the same core components, though minor differences exist between models. Check your box against this list before you start.
- Pre-colonised substrate block (the dense, white-flushed mycelium cake inside a sealed grow bag)
- A clear plastic grow bag with a filter patch or perforated area for gas exchange
- A paper clip or rubber band to reseal the bag
- A printed or digital instruction insert (not always included in recent shipments)
- Some kits include a misting bottle or humidity tent; most do not, so have your own ready
If the block looks fully white and firm with no green, black, or pink patches, you are good to go. If you see unusual colours, check the troubleshooting section below before proceeding. A little yellow liquid pooled inside the bag is actually normal: it is called metabolite liquid and it does not mean the kit is contaminated.
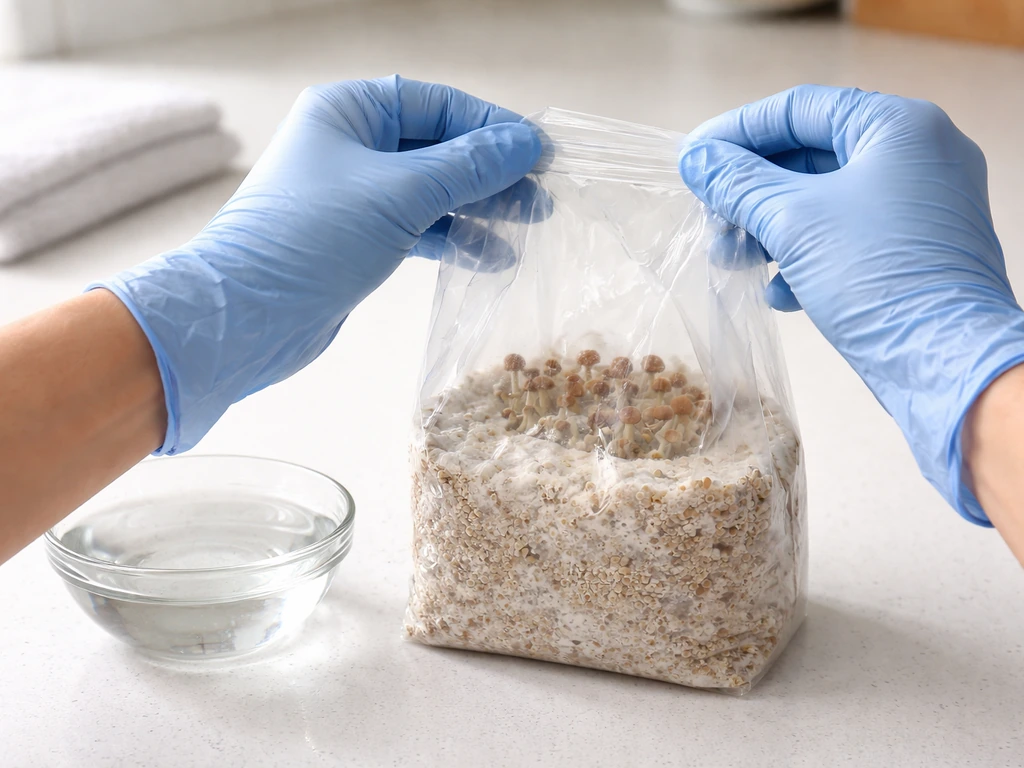
Unboxing, sanitation, and pre-setup checklist
Contamination is the number-one reason kits fail, and almost all of it comes from sloppy handling during setup. This is not a sterile lab situation, but you do need to be deliberate about cleanliness here. This grow-kit instruction PDF hosted at growkit.com, titled “English-grow-kit-instructions.pdf”, includes handling guidance such as cleanliness and handwashing language, and it is one reason to treat general sanitation practices consistently across kits cleanliness here.
- Wash your hands thoroughly with soap for at least 30 seconds before touching anything
- Wipe down your workspace with an isopropyl alcohol (70%) solution or a household disinfectant and let it air dry
- Have your misting bottle filled with clean (ideally filtered or boiled and cooled) water
- Keep pets and children away from the area while you set things up
- Do not open the substrate block bag in a dusty or windy area; a still indoor environment is ideal
- Check the bag is still fully sealed and that the filter patch (if present) is intact before you open it
- Set up your grow space: a clean shelf or countertop away from direct sunlight, drafts from fans, and heat sources
Step-by-step: how to start your Wholecelium kit
Once your workspace is ready, follow these steps in order. Do not skip the soaking or venting stages as they are what signals the mycelium to start producing pins (the tiny mushroom primordia that become your first flush). If you want to follow the same rhythm day by day, use your mycelium grow kit instructions to guide the next misting and fresh-air routine mycelium to start producing pins.
- Open the grow bag from the top using clean hands or scissors. Do not cut through the sides or bottom.
- Remove the substrate block from the bag and rinse the outside of the block gently under cool tap water for 10 to 15 seconds. This removes any surface debris and adds a small amount of surface moisture.
- Place the block back into the bag. The open end of the bag should face upward.
- For the Pandora's Box specifically: some users report better results leaving the bag open and loosely placed in a cool, dark spot for roughly 48 to 72 hours before the main fruiting stage. This 'oxygen puff' period allows the mycelium to sense the change in CO2 and begin pinning. This is not officially confirmed for all kit versions, but it is a low-risk step worth including.
- Fold the top of the bag down loosely (do not seal it completely) to allow gas exchange while maintaining some humidity inside.
- Mist the inside walls of the bag lightly with 3 to 5 sprays of water. Do not spray directly onto the block; hit the bag walls so water mists down onto the surface.
- Place the kit in its fruiting environment (see next section for exact settings).
- Mark the start date somewhere visible. First pins typically appear within 5 to 14 days depending on strain, temperature, and humidity.
The environment your kit needs to fruit
Getting the environment right is what separates a successful flush from a stalled or contaminated block. If you are growing lion's mane, using the best lion's mane grow kit helps you dial in the right conditions for a healthy, productive flush successful flush. Mushrooms are not as demanding as many people think, but they do have a specific range they like. Here is what to aim for.
| Parameter | Target Range | Notes |
|---|---|---|
| Temperature | 21°C to 25°C (70°F to 77°F) | Avoid dropping below 18°C or exceeding 27°C. Consistent temps beat fluctuating ones. |
| Humidity (inside bag) | 85% to 95% RH | Maintained by misting the bag walls twice daily and keeping the bag partially closed. |
| Light | Indirect ambient light, 12 hrs on / 12 hrs off | No direct sunlight. A north-facing windowsill or a basic LED desk lamp works well. |
| Airflow / Fresh Air Exchange | 2 to 3 fan-and-fold openings per day | Open the bag fully, fan it 5 to 10 times with the bag flap to flush CO2, then refold. |
| CO2 levels | Low (ambient room air is sufficient) | High CO2 causes long, leggy stems with small caps. More FAE (fresh air exchange) fixes this. |
Darkness is not required for fruiting. Mushrooms do not photosynthesize, but indirect light does help them orient correctly. A spot that gets normal household ambient light, without direct sun hitting the bag, is ideal. Direct sun will dry out the bag too fast and can overheat the block.
Daily care routine: what to do and when
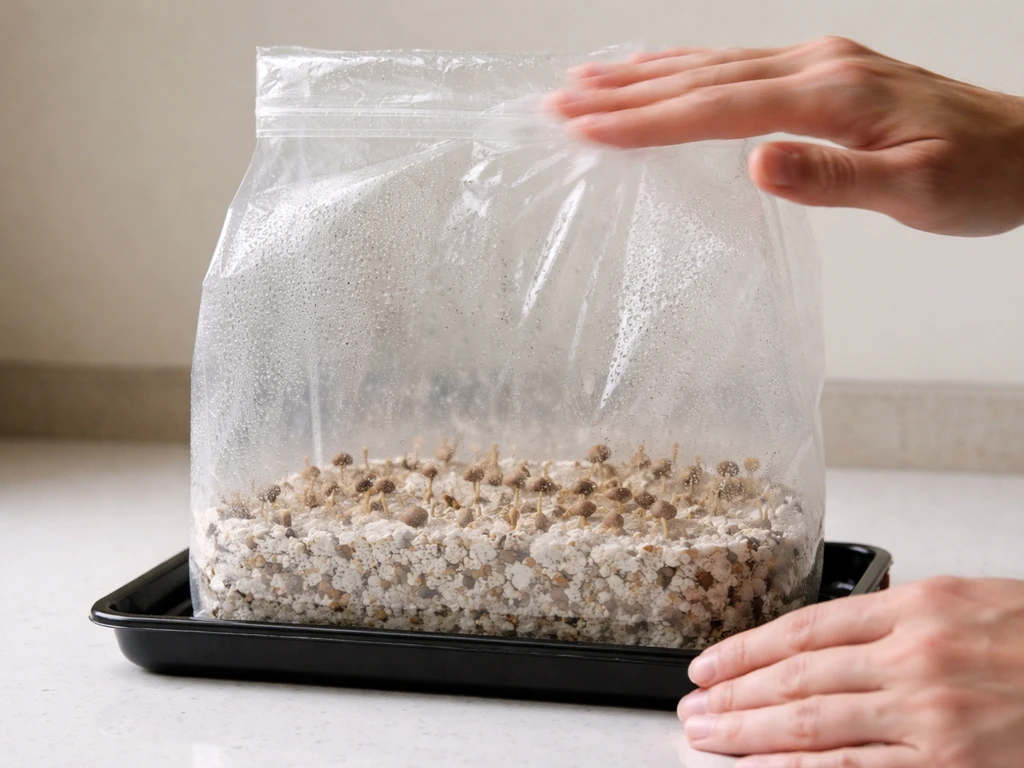
Once the kit is running, your daily routine is genuinely simple. The biggest mistake people make is either over-misting (drowning the block) or forgetting to fan (letting CO2 build up). Stick to this and you will be in good shape.
Morning check
- Open the bag and fan it 5 to 10 times to exchange stale CO2-heavy air for fresh air
- Check for condensation on the bag walls: a light film of water droplets is perfect. If the walls are completely dry, mist lightly (3 to 5 sprays on the bag walls). If there is pooling water at the bottom, skip misting today.
- Check for pin development: tiny white dots or bumps appearing on the block surface are your first mushroom pins. This is a win.
- Refold the bag and return it to its spot
Evening check
- Repeat the fan-and-mist check from the morning
- If pins have appeared, do not mist directly onto them. Continue misting bag walls only.
- Note any changes in colour, smell, or texture on the block surface
Troubleshooting: what to do when things go wrong
Most problems with mushroom grow kits fall into a handful of categories. If you are using a beginner automated boomr bin cvg monotub mushroom grow kit, the same categories of issues and fixes will help you diagnose problems fast mushroom grow kits. Here is a direct fix for each one.
No pins after 14 days
This is the most common issue and it usually comes down to one of three things: too much CO2, not enough humidity, or temperature too low. First, increase your fresh air exchanges to three times per day. Second, check that the bag walls have visible condensation: if they are dry, increase misting frequency. Third, check your room temperature with a thermometer, not just a rough guess. If you are below 20°C, move the kit somewhere warmer. Some strains also respond well to a 'cold shock': put the block (still in its bag) in the fridge for 12 hours, then bring it back to room temperature. This mimics seasonal change and can trigger pinning.
Green, black, or pink patches on the block
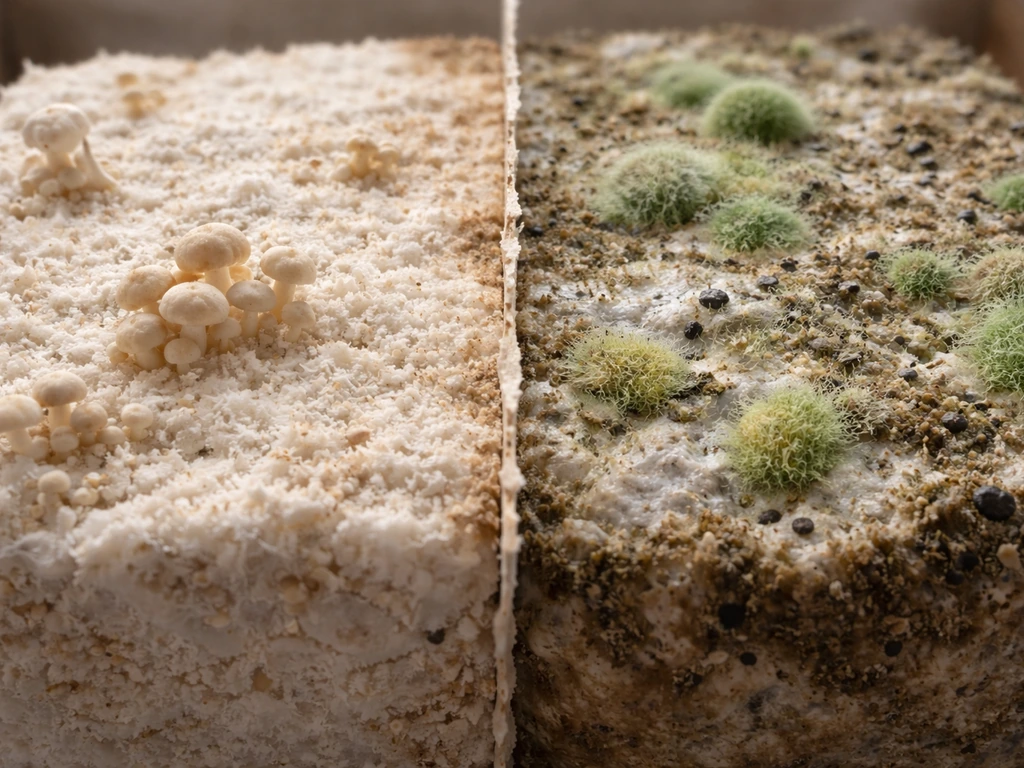
This is contamination, most commonly green Trichoderma mould. If the contaminated area is small (smaller than a 10-cent coin) and confined to one spot, you can try isolating it by placing tape over the area on the outside of the bag to limit spore spread, then monitor closely. If the contamination is spreading or covers a large area, the safest call is to bag the whole kit in a sealed bin bag and dispose of it outside. Do not open a heavily contaminated kit indoors. Contamination almost always traces back to unsanitary handling at setup, too much moisture, or a bag that was not properly sealed.
Mushrooms growing long and spindly with small caps
This is a classic sign of high CO2. Your block is not getting enough fresh air. Increase fanning to at least three times a day, and try leaving the bag slightly more open during the day if your humidity is consistently high enough. Thick, wide caps develop in environments with good fresh air exchange.
Block looks dry and the surface is pulling away from the bag
The substrate is losing too much moisture. Increase misting to three times daily and make sure the bag is folded more tightly after each session to retain humidity. If the block feels genuinely dry and hard, you can do a full rehydration soak: remove the block from the bag, submerge it in a container of cool water for 6 to 12 hours, drain it thoroughly, then return it to the bag and continue. This is the same principle as the rehydration flush used between harvest cycles.
Condensation pooling at the bottom of the bag
Too much water. Skip misting for 24 to 48 hours and increase your fresh air exchanges to help dry things out. Standing water at the base of the bag creates the perfect environment for bacterial contamination. If there is more than a centimetre of water pooled, open the bag and tip it slightly to pour out the excess, then continue with reduced misting.
When and how to harvest
Timing your harvest correctly makes a real difference to yield and to how easy the next flush is to trigger. The right time to harvest is just before or as the cap veil tears: the thin membrane connecting the cap edge to the stem will start to split open as the mushroom matures. Once the veil tears, the cap flattens out and the mushroom begins dropping spores. You can still harvest after the veil tears, but earlier is better for potency and for keeping the block clean.
- Wash your hands thoroughly before harvesting
- Grip each mushroom at the base of the stem, as close to the block surface as possible
- Twist gently while pulling upward in one smooth motion. Do not yank or cut at the surface if you can help it, as cutting leaves a stump that can rot.
- Harvest all mushrooms in a cluster at the same time, even smaller ones, to prevent the smaller ones from over-maturing and dropping spores onto the block
- After the full cluster is harvested, remove any leftover stem bases or debris from the block surface using clean tweezers or a paper towel
- Let the block rest for 24 hours before beginning the rehydration process for the next flush
Storing your harvest
Fresh mushrooms from a kit should be used within 5 to 7 days if stored in a paper bag (not plastic) in the fridge. Paper allows them to breathe and prevents the moisture build-up that accelerates decay. If you want to store them longer, dry them. Spread them on a wire rack or use a food dehydrator at around 35°C to 45°C until they are cracker-dry. Properly dried mushrooms stored in an airtight container in a cool, dark place will keep for months.
Getting a second (and third) flush from the same block
Wholecelium kits are capable of producing multiple flushes from the same block. Most blocks will give two to three good flushes, with the first usually being the largest. After each harvest, you trigger the next flush through rehydration. Third-party grower guides likewise describe rehydration between harvest cycles to restart production for additional flushes trigger the next flush through rehydration.
- After harvesting and cleaning the block surface, remove the block from the bag
- Submerge the block in a container of cool (not cold) clean water. Use a plate or bowl to weigh it down so it stays fully submerged.
- Leave it to soak for 6 to 12 hours. Some users prefer refrigerating the block during this soak for a cold-shock effect that can boost the next flush.
- Drain the block thoroughly and return it to the bag
- Begin the same daily misting and fanning routine you used for the first flush
- Expect pins to appear within 5 to 10 days. Subsequent flushes may take slightly longer as the block exhausts its nutrient reserves.
- Repeat this process after each flush until the block stops producing or shows signs of contamination
If the block turns green, brown, or slimy after two or three flushes, that is its natural end of life. Dispose of it in your compost or garden: spent mycelium substrate is excellent for soil. Do not try to force another flush from a block that is clearly exhausted or contaminated.
How this compares to other mushroom kit brands
If you have used kits from other brands before, the Wholecelium process will feel familiar. The core steps (soak, fruit, harvest, rehydrate) are consistent across most pre-colonised mushroom grow kits. Brands like Zamnesia and Mondo use a very similar method, though their bag designs and substrate volumes differ slightly, which affects misting frequency and flush size. If you have tried a mycelium grow kit from another supplier and found the documentation confusing or incomplete, the approach here applies broadly. The biggest variable between brands is usually the strain used and the substrate density, both of which affect how quickly pins form and how large each flush grows.
One practical tip if you are still deciding between kits: a pre-colonised block like the ones Wholecelium sells is one of the friendliest entry points into mushroom cultivation because someone else has already done the hardest and most contamination-prone part, the colonisation. If you find you enjoy the process and want more control over strain selection, substrate mix, or scale, that is when it makes sense to start looking at grain spawn and bulk substrate methods. But for your first few grows, a ready-to-fruit kit is the right call.
FAQ
How do I know which Wholecelium “wholecelium grow kit instructions” apply to my exact kit version if I lost the packaging?
Check the sticker or printed code on the grow bag first, then match it to the kit name shown in your Wholecelium order history. If you still cannot confirm the version, follow the standard cycle timing in this guide, but keep a closer eye on condensation level and smell during the first 48 hours, because those are more reliable than guessing based on kit model.
Can I open the grow bag to check how white the block is or whether pins have started?
Avoid frequent openings. The main reason is spore and contamination risk plus disrupted humidity. If you must inspect, do it briefly with clean hands, in a draft-free spot, and close it again immediately. Use external signs like condensation on bag walls and the visible progress of caps to minimize opening.
Do I need to soak the block more than the recommended soaking stage if it already looks wet?
Usually no. Extra soaking can create waterlogging, which increases bacterial contamination risk and slows healthy pin formation. If the bag already shows strong, even condensation, focus on getting fresh air exchanges and misting rhythm right rather than adding more water.
What should I do if I see condensation but the block still isn’t pinning after the usual first-flush window?
First verify fresh air exchanges. If CO2 is high, condensation alone will not fix it. Next, confirm the room temperature with a thermometer (not a guess). If temperature and fresh air are correct and you are still stalled, consider a controlled “cold shock” only if your kit documentation allows it, since not every strain responds the same way.
Should I mist until the bag is dripping wet, or is there a target level?
There is no “drip target.” Aim for visible, light condensation on the bag walls, not puddles. If you notice water collecting at the bottom or the substrate area looks overly glossy, pause misting and increase fresh air to dry it slightly before resuming.
Is it okay to move the kit to a new room during fruiting?
Yes, but move it only when you can keep the environment stable. Sudden changes in temperature and airflow can cause stress, stalled growth, or malformed caps. When relocating, keep the kit out of direct sun and avoid blasting it with a strong fan that strips humidity.
Can I use tap water for misting and soaking?
Often yes, but if your tap water is very hard or has noticeable odor or high chlorine, it can affect bag conditions over time. If you notice consistent “slimy” behavior or unusual smells that do not match the troubleshooting signs, switch to filtered or dechlorinated water for the next cycle and keep misting controlled rather than excessive.
How do I tell the difference between normal metabolite liquid and early contamination?
Metabolite liquid is typically pooled yellowish liquid without spreading colored patches. Contamination usually shows expanding green, black, brown, or unusual colored growth areas on the substrate or along the seam of the bag. If colors spread beyond a small spot or the area grows faster than new pin development, treat it as contamination and follow the containment or disposal approach.
My caps are growing thick, but I’m worried they are “too big.” Is that always a CO2 problem?
Thick, wide caps often indicate higher CO2, but it can also be influenced by humidity and airflow consistency. If caps are thick and you also see relatively dry bag walls, increase fresh air and ensure you are not over-drying. If the bag is consistently wet and caps are still thick, reduce misting and focus on fanning frequency.
What is the best way to store harvested mushrooms from a wholecelium kit to prevent sliminess?
Use a paper bag in the fridge, do not wrap in plastic, and keep them dry inside the bag. If mushrooms start to look wet or release liquid, remove them from the bag and pat off surface moisture with a clean paper towel, then return to a fresh paper bag.
How soon after rehydration should I expect the next flush to start?
Pinning timing varies, but you typically look for activity within the same general 1 to 3 week window depending on your environment. If you rehydrated correctly and conditions are stable, watch bag condensation and fresh air routine first. If nothing changes after several days, re-check temperature with a thermometer and increase fresh air exchanges rather than adding water.
When should I stop trying to get another flush from a kit?
Stop when the block becomes clearly exhausted after two or three flushes, or if it turns green, brown, or slimy. Forcing additional flushes from an exhausted block increases contamination risk and can contaminate your workspace, so it is better to dispose of the spent material promptly in compost or garden.