The term 'grow creature instructions' usually means one of a few things: you have a mushroom grow kit (a bag, box, or all-in-one substrate block), a mycelium casting kit where you're growing a shaped organic form rather than edible mushrooms, a microgreens or herb hydroponic kit, or a water-based terrarium toy. Each of these works completely differently, so the first thing to do is figure out which one you actually have, because the setup steps, care routine, and finish point are not interchangeable.
Grow Creature Instructions: Step-by-Step Setup and Care

Marcus Thornfield
21 Jun 2026
What kind of 'grow creature' kit do you actually have?
This matters a lot before you do anything else. There are four main types you'll run into under this umbrella, and mixing up their instructions is the number one reason people end up with nothing to show for their effort.
| Kit Type | What it Produces | Finish Signal | Water Medium |
|---|---|---|---|
| Mushroom grow bag/box | Edible or ornamental mushroom fruiting bodies | Caps are formed but not fully open | Misting inside bag, humidity tent |
| Mycelium casting/GIY kit (e.g., GROWN bio) | Shaped mycelium form (not edible) | Form is firm and fully colonized | Measured slurry (water + flour mixture) |
| Microgreens/herb hydro kit | Cuttable greens or herbs | Plants reach 2–3 inches, first true leaves | Reservoir water with optional nutrients |
| Water-based terrarium toy | Expanding foam/gel 'creature' | Shape is fully expanded | Tap or distilled water soak |
If your kit came with a bag of substrate (brown, earthy material), a filter patch on the bag, and possibly a spore syringe or injection port, you have a mushroom grow kit. If it came with a mold, a small bag of powder or granules, and instructions involving a water-and-flour slurry, you likely have a mycelium casting kit like those from GROWN bio.
GROWN bio’s grow kit examples show a mycelium casting kit can be identified by a mold plus a water-and-flour slurry kit component mycelium casting kit like those from GROWN bio. If you are looking for grow jar instructions, check whether your kit is designed for mycelium casting or for fruiting, because the steps differ a lot.
If it has a tray, grow medium, and seeds, it's a seed-starting or microgreens kit. If it's just a compressed tablet or foam shape in a box, it's a water-based terrarium toy. The rest of this guide covers all four, but it goes deepest on mushroom and mycelium kits since those cause the most confusion.
Unboxing and parts checklist
Before you touch anything, lay everything out on a clean surface and match it against the list below for your kit type. Missing parts are common in consumer kits, and discovering a missing component after you've already started is genuinely frustrating.
Mushroom grow bag or all-in-one kit
- Sealed grow bag with substrate (should feel firm and slightly damp, not bone dry or soaking wet)
- Filter patch on the bag (a small white or grey square that allows gas exchange — do not puncture or cover it)
- Self-healing injection port if the kit uses spore or liquid culture inoculation
- Spore syringe or liquid culture syringe (some kits include this; others require you to purchase separately)
- Rubbing alcohol wipes or spray for surface sanitization
- Optional: humidity tent or clear bag for the fruiting stage
- Optional: spray bottle for misting
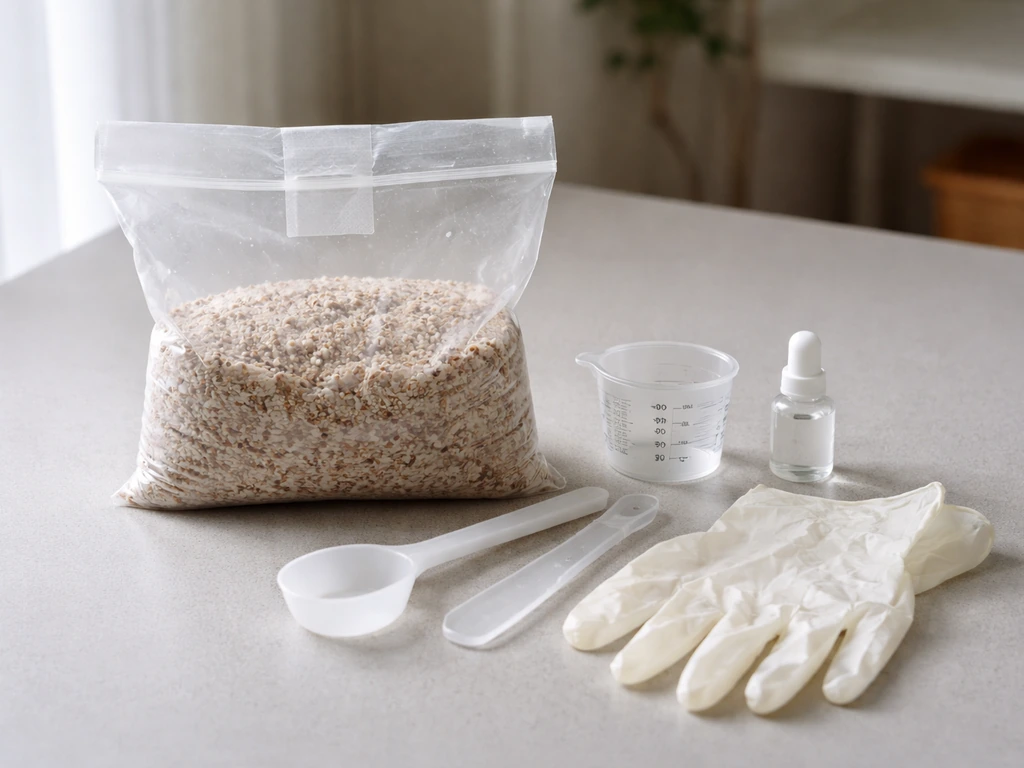
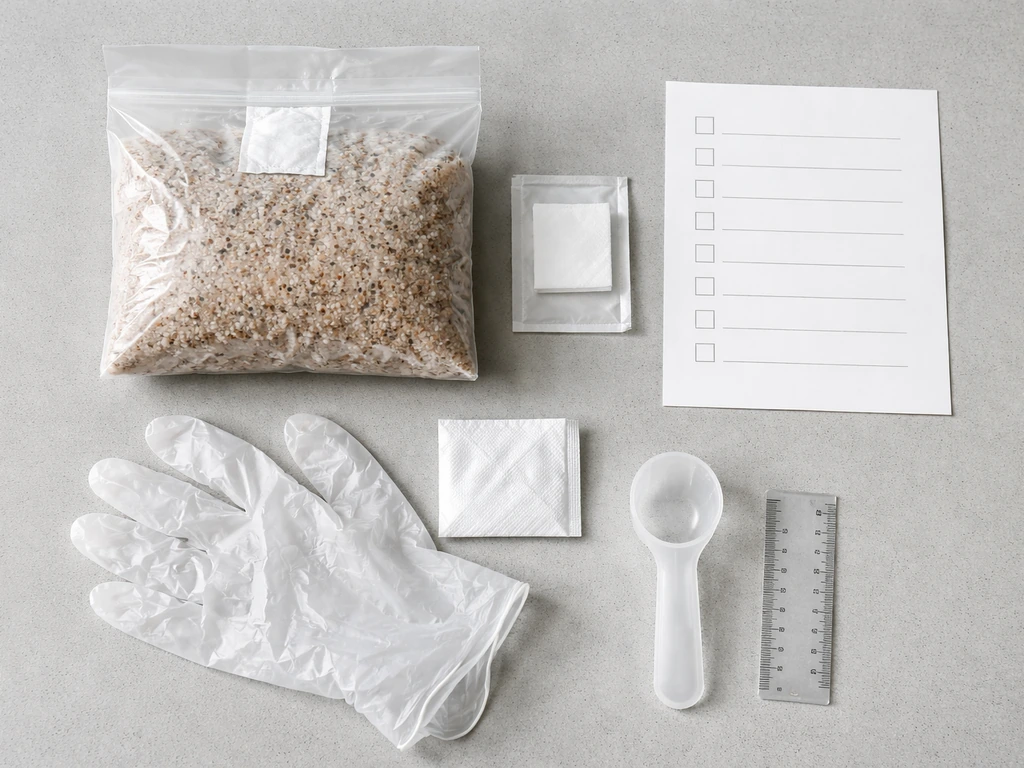
Mycelium casting/GIY kit (e.g., GROWN bio style)
- Mini bag with dry GIY substrate material inside
- Mold or form to shape the final piece (if included)
- Measuring tool or instructions specifying 9 teaspoons of water and 2 g of flour for the slurry
- Isopropyl alcohol wipes for sanitizing hands, table, and tools
- Gloves
- Sealing clip or instructions on sealing the bag above the filter patch
Microgreens, hydro herb, or seed-starting kit
- Growing tray (inner tray with holes and outer solid tray for the reservoir)
- Grow medium: rockwool cubes, coco coir mat, or soil plugs
- Seed packet(s)
- Grow light or guidance on light placement
- Optional: liquid nutrients or fertilizer
- Spray bottle or watering can with a gentle nozzle
Water-based terrarium toy
- Container or tray
- Compressed tablet, pod, or pre-formed creature shape
- Instructions specifying water temperature and soak duration
- Optional: colored water tablets or decorative accessories
Step-by-step setup
Mushroom grow kit setup
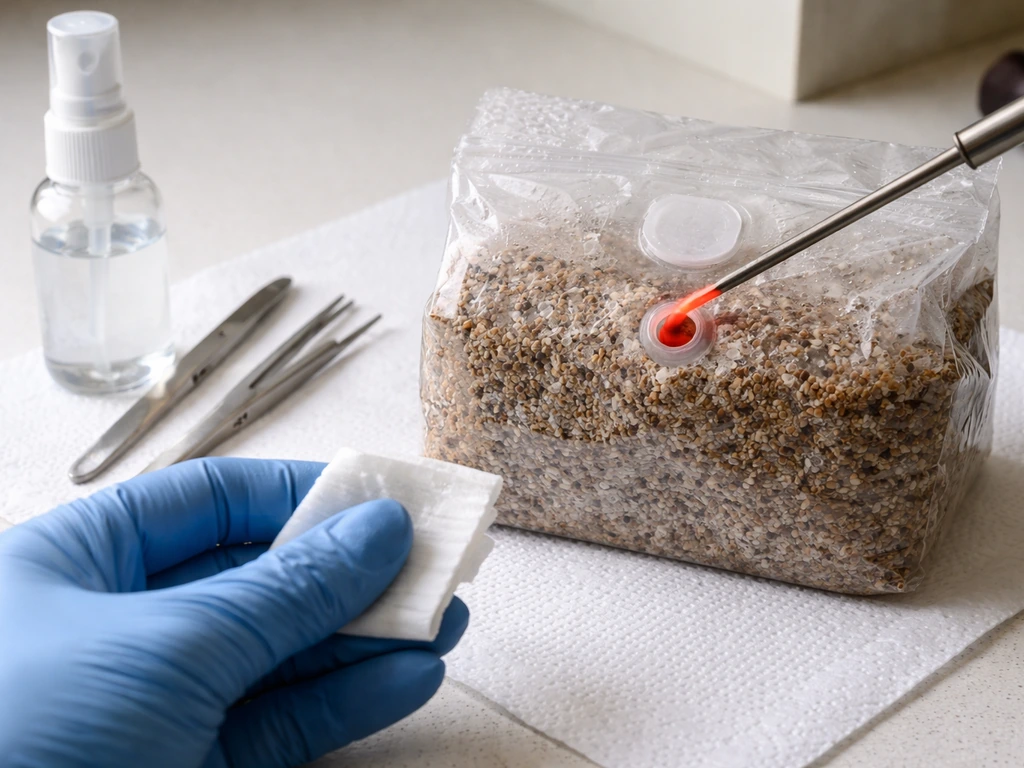
Sanitize everything first. Wipe down your table, your hands, and any tools with isopropyl alcohol before you open the outer packaging. This is not optional, contamination is the main reason mushroom kits fail, and it usually traces back to skipping this step. If your kit came pre-colonized and ready to fruit (like Out Grow's Mini All-in-One, which ships with 1.5 lbs of fully hydrated and sterilized substrate), you skip the inoculation step entirely and go straight to triggering fruiting.
- If inoculation is required: flame-sterilize your needle, wipe the injection port with alcohol, and inject your spore or liquid culture syringe at a slight angle. Use 1–2 ml per injection site and seal the port with an alcohol wipe afterward.
- Place the sealed bag in a dark or low-light spot at 24–27°C (75–80°F). This is the colonization phase — the white fuzzy mycelium needs warmth and darkness to spread through the substrate.
- Wait until the bag is at least 70–80% covered in white mycelium before moving to the fruiting step. This typically takes 7–21 days depending on species and temperature.
- Once colonized, move the bag to indirect light or a grow light on a 12-hour cycle. Keep the temperature at 24–27°C and aim for 85–95% relative humidity.
- If your kit uses a humidity tent (a clear bag or plastic dome over the grow bag), set it up now. Fold down the top of the grow bag or cut it open about 2–3 inches above the substrate surface as your kit's instructions specify.
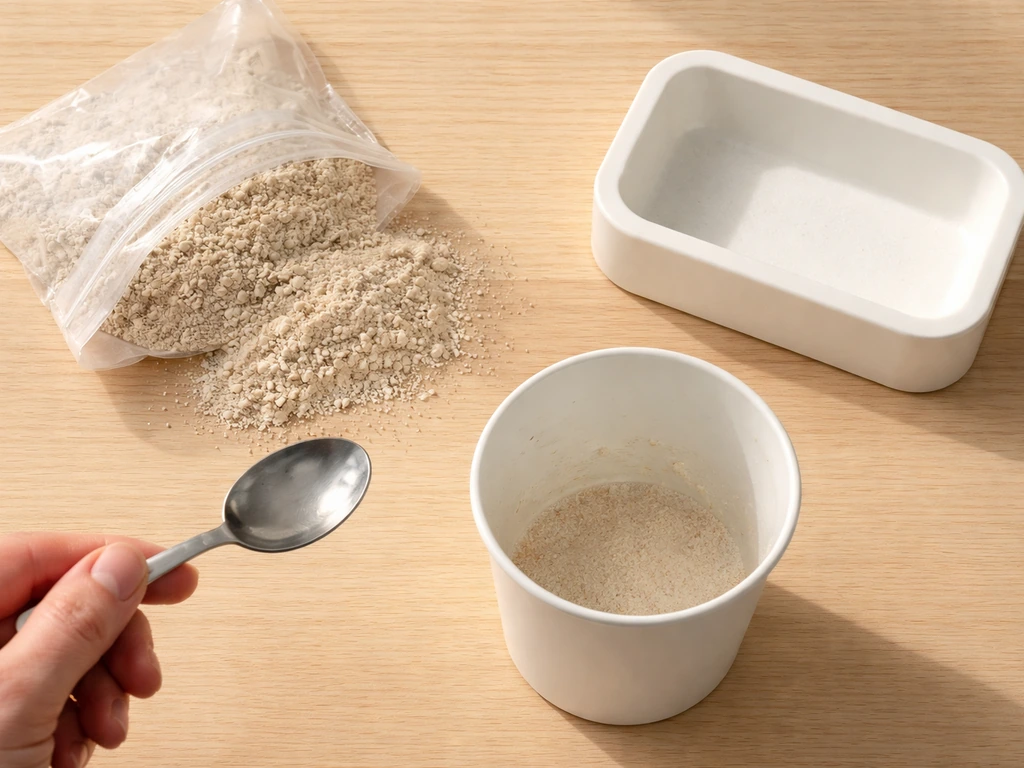
Mycelium casting/GIY kit setup
- Wipe down your table, gloved hands, and all tools with the provided isopropyl alcohol wipes before opening anything.
- Measure exactly 9 teaspoons of clean water and 2 g of flour (per GROWN bio's spec) and mix into a slurry.
- Pour the slurry into the GIY material bag, making sure to mix it thoroughly with the substrate.
- If using a mold, pack the inoculated material firmly into the mold to eliminate air pockets.
- Seal the bag above the filter patch — the filter needs to stay unobstructed for gas exchange.
- Store at room temperature, around 20–24°C, away from direct sunlight. If you're not starting immediately, store unopened substrate in the fridge at 1–7°C and use within five days. Do not freeze it.
Microgreens or seed-starting kit setup
- Pre-moisten your grow medium before placing seeds. It should be damp like a wrung-out sponge, not dripping.
- Spread seeds evenly across the surface — avoid clumping, which leads to mold.
- Place the inner tray inside the outer reservoir tray. Add water to the reservoir (not on top of the seeds).
- Cover with the humidity dome or a piece of plastic wrap for the first 2–3 days to encourage germination.
- Place under a grow light 2–4 inches above the surface, or in a bright south-facing window. Aim for 12–16 hours of light per day.
- Keep ambient temperature between 18–24°C for most common microgreen varieties.
Day-by-day care routine
Mushroom kits
Once pins (tiny mushroom buds) start to appear, your daily routine becomes about balancing moisture and fresh air. Here's what to check each day:
- Morning check: Look for condensation inside the bag or tent. If you see little or no condensation, open the bag, mist the inner walls of the bag (not the substrate surface directly), then reseal.
- Air exchange: Open the bag 1–3 times per day, gently squeeze out the stale air (CO₂), and let fresh air (O₂) flow in before resealing. This is critical once pins appear — CO₂ buildup stunts growth and causes long, leggy mushrooms with tiny caps.
- Once pins are visible: Stop spraying water directly. Moisture at this stage comes from the substrate itself, and spraying on pins can cause rotting. Keep doing air exchange.
- Temperature: Keep it consistently at 24–27°C. Fluctuations of more than a few degrees can slow or stall pinning.
- Light: Indirect natural light or a low-intensity grow light on a 12-hour cycle is enough. Mushrooms don't photosynthesize — light is mostly a directional cue.
Mycelium casting/GIY kits
These kits are lower-maintenance once set up. Check the bag every 1–2 days. White fuzzy growth spreading through the material is good. Green, black, or pink patches mean contamination. Keep the sealed bag at a stable room temperature and avoid moving it around, which can disrupt the forming mycelium structure. The filter patch does the aeration work for you, so resist the urge to open the bag unless instructed. If you want, you can follow grow kit in a bag instructions to set up and care for your specific kit type.
Microgreens and hydro herb kits
- Days 1–3 (germination): Keep dome on. Check reservoir daily and top up if it drops below 1 cm depth.
- Days 4–7 (sprouting): Remove dome once sprouts are 1–2 cm tall. Begin watering from below via the reservoir only.
- Days 7+ (growth): Check reservoir every 1–2 days. Mist lightly if the surface medium feels dry. Make sure the light is still 2–4 inches above the canopy — raise it as plants grow taller.
- If your kit includes nutrients: start at half-strength dose once the first true leaves appear (usually around day 10–14), mixed into reservoir water.
When things go wrong: troubleshooting
No growth or very slow growth
For mushroom kits, slow or absent growth almost always comes down to three things: temperature is too low (below 22°C), humidity is too low, or there's not enough fresh air exchange. Check all three before you assume the kit is dead. A colonizing bag that looks stalled at room temperature in winter may just need to be moved somewhere warmer. For microgreens, slow germination usually means the medium is too dry or the temperature is below 18°C.
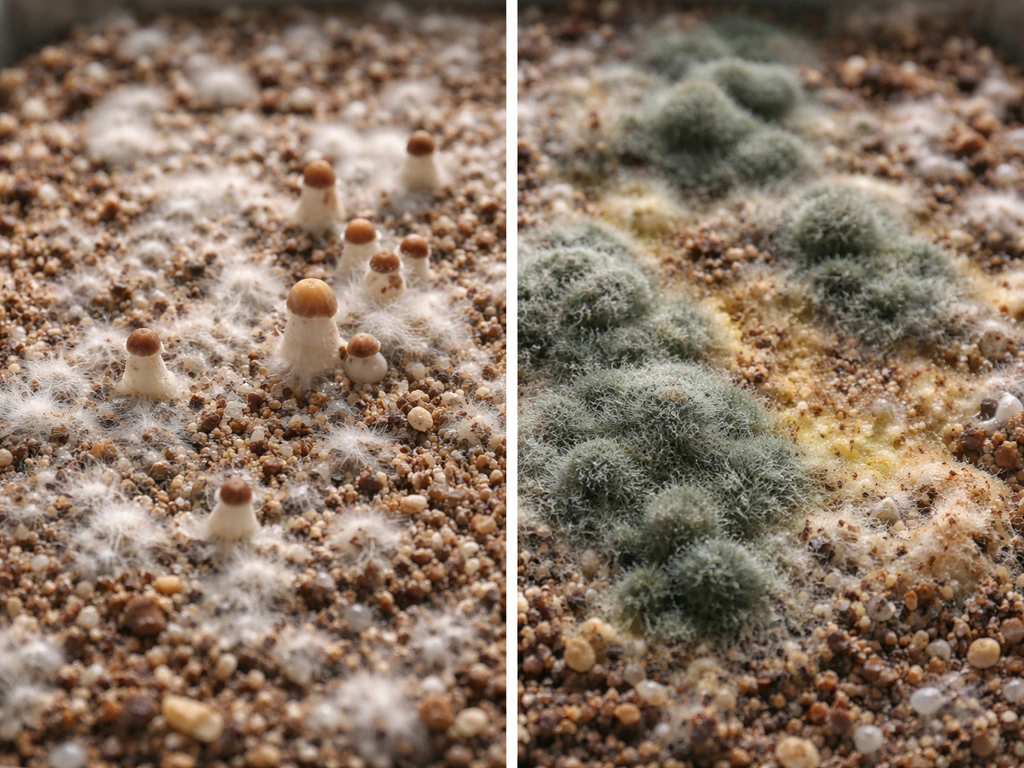
Mold and contamination
Green, black, pink, or orange patches on your mushroom substrate are almost always mold contamination, and here's the hard truth: contaminated mushroom kits cannot be saved. Isolating the bag in a sealed trash bag and discarding it is the right call. Trying to cut out the mold or continue with a contaminated kit rarely works and risks spreading spores around your home. The best prevention is strict sanitization at setup. For microgreens, surface mold is usually caused by overwatering or poor airflow, reduce misting, increase air circulation, and make sure seeds are not too densely packed.
Drying out vs. overwatering
A common beginner confusion (and one that comes up constantly in grower forums) is whether to mist the grow kit itself or just the inside walls of the bag. If you're wondering exactly when and how to mist, check your grow bar instructions so you follow the right schedule for your kit. For most mushroom kits: mist the bag walls, not the substrate. Substrate that's too wet promotes bacterial contamination and rot. Substrate that's too dry will stall pinning. The visual cue is condensation on the bag interior. Some, but not excessive, is ideal. For microgreens, always water from below through the reservoir. Top-down watering on young sprouts causes damping off (a fungal rot at the stem base).
Clogs, failed pumps, and leaks (hydro kits)
If your hydroponic kit has a small pump and it stops working or seems clogged, first check for root debris or algae buildup in the tubing. Flush the tubing with clean water. If the reservoir is leaking, check whether the inner tray is seated properly in the outer tray. A lot of 'leaks' are just the inner tray tipping slightly and water running over the edge of the seal. Reseating the tray and not overfilling the reservoir (keep it at the marked max line) solves most of these.
Wrong placement and temperature issues
Heat vents, air conditioning units, and drafty windowsills are the enemy of consistent results. A mushroom bag sitting near an AC vent in summer can drop below 20°C without you noticing. A microgreens tray on a cold north-facing windowsill in winter will stall germination. Use a cheap thermometer to verify the actual temperature where your kit is sitting, not just the room's general thermostat reading.
Knowing when it's ready: harvesting and finishing your kit
Mushroom kits
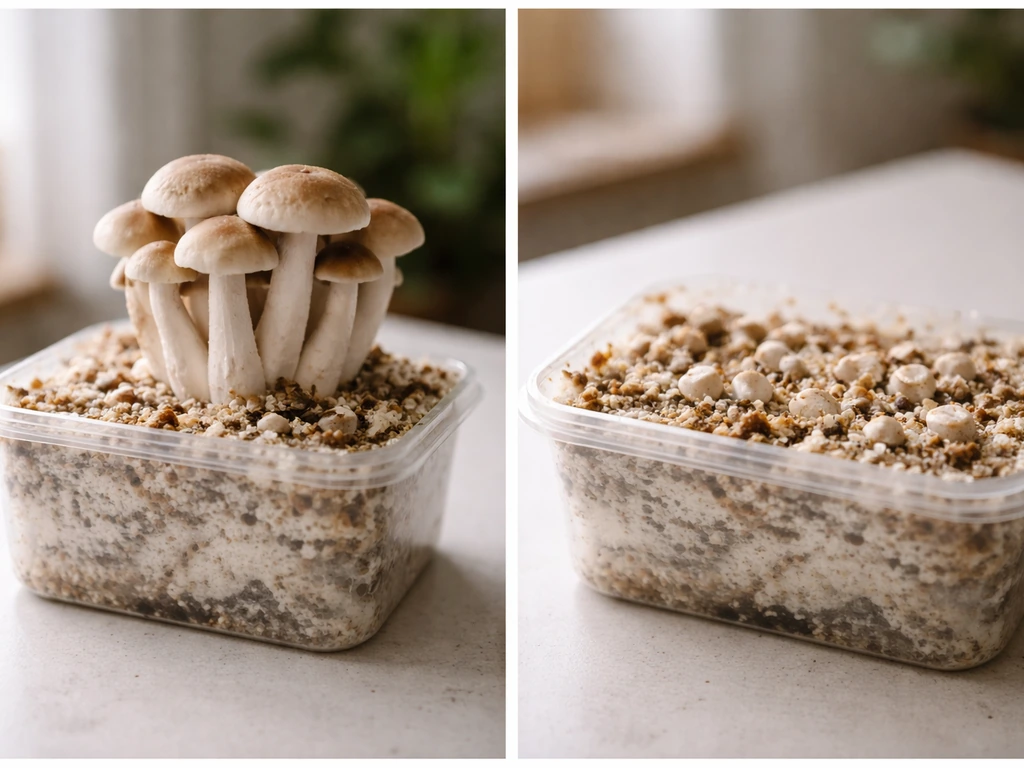
Harvest before the caps fully open. Once caps start to flatten and the veil underneath begins to tear away from the stem, you're at the harvest window. Waiting too long causes the caps to release spores, which creates a fine dark powder that covers everything and can trigger allergies. To harvest, gently twist and pull the mushrooms from the substrate with clean, gloved hands.
Do not cut them, twisting removes the base cleanly and reduces the chance of rot in the substrate. After the first flush, let the substrate rest for 7–14 days, keep it misted and ventilated, and a second flush will often appear. Most kits can reliably produce two flushes, though most manufacturers recommend stopping there for safety and quality reasons.
Mycelium casting kits
Your GIY kit is finished when the mycelium has fully colonized the form, it will feel firm and dry to the touch, uniformly white or off-white, and won't have any soft or green spots. At that point, remove it from the mold carefully. Some kits specify a drying period of 24–48 hours at room temperature before the final form is stable enough to handle freely.
Microgreens and seed-starting kits
Cut microgreens just above the growing medium when they reach 2–3 inches tall and the first true leaves are starting to develop (usually 8–14 days, depending on variety). Use clean scissors and harvest only what you'll use right away, since cut microgreens deteriorate quickly. Once the tray is harvested, most microgreen kits don't re-grow well, the roots and medium are spent, so it's time to compost the medium and start fresh.
Cleaning up, staying safe, and running another cycle
After your kit is finished, whether it was a mushroom flush, a mycelium cast, or a microgreens harvest, treat cleanup as seriously as setup. For mushroom kits, double-bag spent substrate before discarding it, especially if you ran multiple flushes or if you saw any contamination. Do not compost spent mushroom substrate outdoors unless you know exactly what species you grew. Wipe down all surfaces that contacted the kit with isopropyl alcohol.
For hydroponic or seed-starting trays, rinse all components thoroughly with a diluted hydrogen peroxide solution (3% H2O2 in water works well), then let them air dry completely before storing or re-using. Residual organic material left in trays between cycles is how mold colonizes your next batch before the seeds even sprout.
General hygiene rules that apply to every kit type: always wash hands before handling substrate, seeds, or growing medium; never reuse substrate that showed contamination; store any unused substrate materials in the fridge (not the freezer) and use within the manufacturer's specified window (GROWN bio recommends 1–7°C and within five days for their substrate). Follow the same approach when you set up your grow bucket instructions, including sanitizing and maintaining steady conditions General hygiene rules. If your kit includes alcohol wipes, use them every single time you open the grow environment, not just at setup.
If you're planning to run another cycle, the most important thing is a full dry-out and sanitize between runs. Rushing into a second cycle on damp, unwashed equipment is the fastest way to carry contamination from one batch into the next. Give trays, bags, and tools at least 24 hours of fully dry time after sanitizing before you start again.
The workflow here covers grow creature kits specifically, but if you're working with a different kit form, like a grow bottle, a grow jar, a grow bag, or a grow bucket, the principles around sanitization, humidity management, and harvest timing carry over directly. If you are using a grow bottle, follow the grow bottle instructions for sanitization, moisture control, and harvest timing. The container shape changes the setup steps but the biology stays the same.
FAQ
How can I tell whether my kit is pre-colonized or needs inoculation?
Check the label or the box insert for terms like “pre-colonized,” “ready to fruit,” or a stated start phase. If the substrate is already fully white and the kit doesn’t include an injection port or spores, it is typically ready to fruit. If there is a spore syringe included, or instructions mention inoculating the substrate, assume you still need to inoculate before triggering fruiting.
What should I do if the bag interior looks dry but mycelium growth has started?
Don’t automatically add extra water to the substrate. First look for condensation on the inner walls. If there is little to none, increase humidity by misting the bag walls only (not the substrate) in small amounts, then wait 24 hours to re-evaluate. If you fully soak the substrate, you raise the risk of bacterial contamination and rot.
Can I move my mushroom bag to a warmer spot once colonization has begun?
You can move it, but do so with minimal disruption and avoid repeated moves. Temperature swings and agitation can stall progress. When relocation is necessary (for example, winter cold), pick a stable warm location using a thermometer, and keep it there without opening the bag unless the kit instructions specifically require it.
Is it ever okay to cut off mold spots and keep going with a contaminated mushroom kit?
Generally no. If you see green, black, pink, or orange patches on mushroom substrate, treat it as contamination. Cutting out sections usually leaves microscopic contamination behind, and it can spread spores. The safer approach is to seal the entire kit and discard it, then sanitize your workspace thoroughly.
What’s the difference between condensation that’s good and moisture that’s too much?
Good moisture shows as light condensation on the inner bag surface and a slightly humid environment without pooling droplets. Too much moisture looks like heavy wetness, streams of water, or substrate that looks glossy or overly saturated. If you see pooling or dripping, reduce misting frequency immediately and focus on fresh air exchange.
How should I handle a hydroponic kit pump that starts but stops repeatedly?
First check whether the reservoir is at the correct level and not creating air gaps, then inspect the tubing for kinks and blockages. Algae or root debris can partially clog the line, causing intermittent flow. Clean the tubing with flush water as a first step, then consider inspecting whether the pump intake is exposed to solids that can clog it.
My seeds or microgreens are slow to sprout, but the temperature seems fine. What else could be wrong?
Verify humidity and watering method. For microgreens, top-down watering on young sprouts often increases damping-off risk, and dryness stalls germination. Also check seed density, overly dense packing can reduce airflow and slow emergence. If your kit includes a germination cover, confirm it is used only for the period your kit specifies.
When should I stop misting and focus more on ventilation?
Once pins begin to appear, switch from “encouraging colonization” to “maintaining balance.” If the bag is staying too wet, increase fresh air exchange and mist less. If you lack condensation and pins stall, mist bag walls lightly to restore humidity, but keep substrate from getting soaked.
How do I prevent allergies or a messy cleanup during spore release?
Harvest before caps flatten and before the veil tears away. Spore release creates airborne powder that sticks to surfaces. If you missed the window, avoid shaking the kit, seal it in a bag, and clean with a damp wipe or sanitized wipe on surfaces after disposal rather than sweeping dry dust.
For multiple flushes, do I need to re-sanitize between flushes or only between cycles?
Between flushes inside the same cycle, you usually avoid full teardown and re-sanitizing unless your kit instructions require it. Instead, maintain the same humidity and ventilation routine and rest the substrate for 7–14 days as directed. Full sanitation is for starting a new cycle, especially if you saw contamination or are reusing equipment.
What’s the safest way to store unused substrate materials, and for how long?
Store unused substrate in the fridge, not the freezer. Keep it in its original sealed packaging if possible, and use it within the manufacturer’s recommended window (some kits specify a few days). Label the date you opened the package, because “best within” timelines often tighten after exposure to room air.
Can I compost mushroom substrate indoors or outdoors after harvesting?
Avoid outdoor composting unless you know the species and you can manage it safely. Indoor disposal is still best handled as sealed disposal if contamination ever appeared. For clean, finished cycles, you can compost only if your growing instructions and materials explicitly allow it, otherwise use sealed trash disposal to reduce the chance of spreading spores.