
A 'grow kit in a bag' can mean three very different things: a mushroom substrate bag (where you inoculate and grow entirely inside the bag), a seed-starting or microgreens kit that uses a bag as its outer packaging, or a water-based terrarium toy that ships in a sealed pouch. Back to the Roots says its Mushroom Mini Grow Kit includes, at minimum, a bag of organic substrate and an instruction card, and that the kit’s box serves as the home during growth a mushroom substrate bag. Which one you have changes almost every step, so the first thing to do is figure out exactly what's in front of you before you add any water or light.
Grow Kit in a Bag Instructions: Setup, Care, Fixes

Marcus Thornfield
7 Jul 2026
How to figure out exactly which kit you have
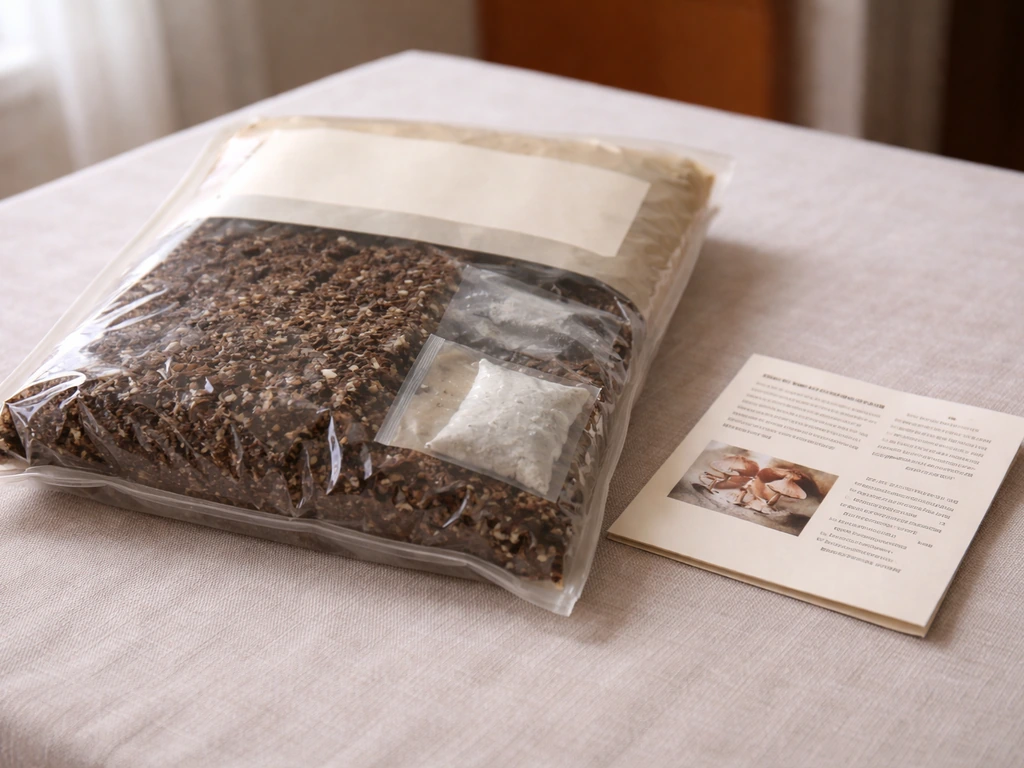
Pick up the bag and look at the contents, the label, and whatever card or insert came with it. The three most common types look quite different once you know what to check for.
| Kit Type | What's Inside the Bag | Bag Role | Common Brands/Examples |
|---|---|---|---|
| Mushroom grow bag | Dark, dense substrate block (often grain, compost, coco coir mix); may include an injection port or filter patch | The bag IS the growing chamber | North Spore ShroomTek, Back to the Roots Mushroom Mini, various all-in-one bags |
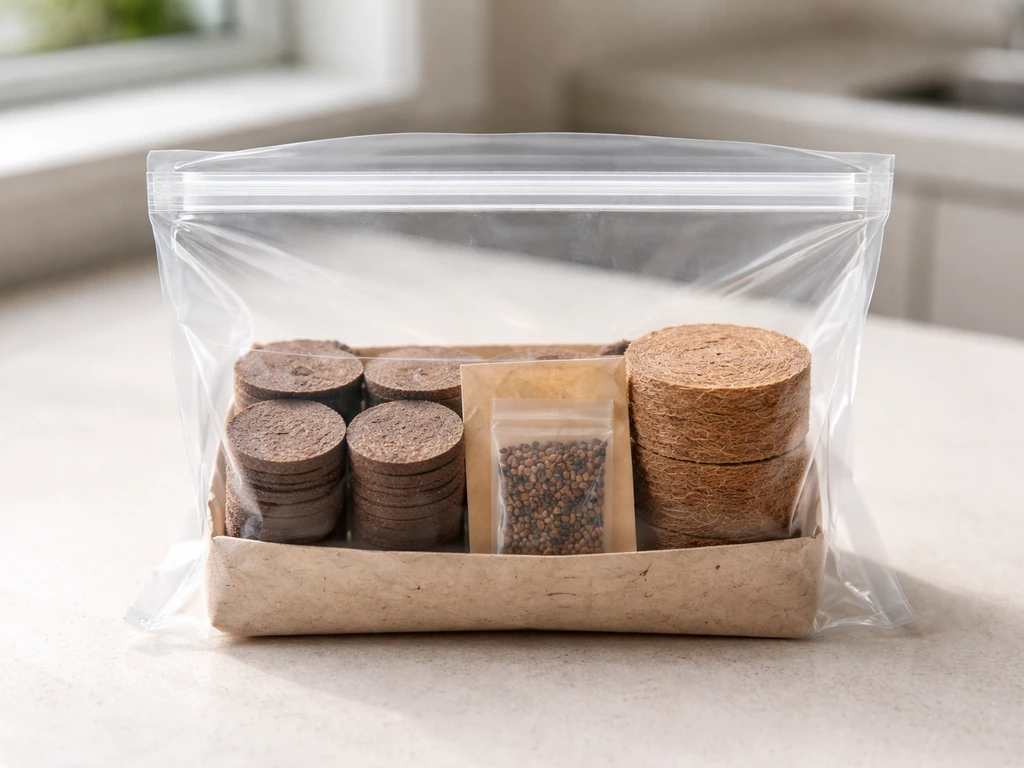
| Seed-starting / microgreens kit | Compressed soil puck or disk, seed packet, sometimes a small tray or planter | Packaging only; medium goes into a separate container | Back to the Roots Ceramic Microgreens Kit, seed-starting bag kits |
| Water-based terrarium / grow toy | Polymer crystals, a small foam or sponge figure, or dried plant material in a sealed pouch | Packaging only; contents expand in water in a bowl or included vessel | Grow creatures, grow dinosaurs, grow capsule kits |
If your bag contains a dark, heavy block of material and has a self-healing injection port or a small filter patch on the side, you have a mushroom grow bag. If you see a flat compressed disk and a seed envelope, it's a seed-starting kit. If the contents are lightweight, colorful polymer beads or a sponge figure, it's a water-based terrarium toy. The rest of this guide covers all three, branching wherever the steps differ. (For kits that come in a rigid container rather than a flexible bag, the general process is similar but the vessel handling changes, which is worth keeping in mind if you also have a grow jar, grow bucket, or grow bottle version of the same product. If you also have a grow jar version, follow the grow jar instructions since the vessel handling and moisture management are slightly different. )
Check the size and media before you start
Note the weight and volume of your substrate. Mushroom bags typically run from 3 lbs to 10 lbs. Microgreens soil pucks are usually 3 to 4 inches across. Water-based terrarium kits are almost weightless. These measurements matter because they determine how much water you use and whether your setup space is adequate. Write down what you see on the label, including any strain or seed variety listed, so you can look up specific parameters if the generic steps in this guide need adjusting for your exact product.
Unboxing and pre-check before you do anything
Lay everything out on a clean, flat surface and compare it against the packing list or instruction card. This sounds obvious, but missing a single component, like the instruction card, a specific vessel, or a spray bottle, will stall you at exactly the wrong moment. If you have a grow bottle version, the same principles apply, so follow the grow bottle instructions that match your specific kit contents instruction card. Here's what to confirm for each kit type.
Mushroom grow bag
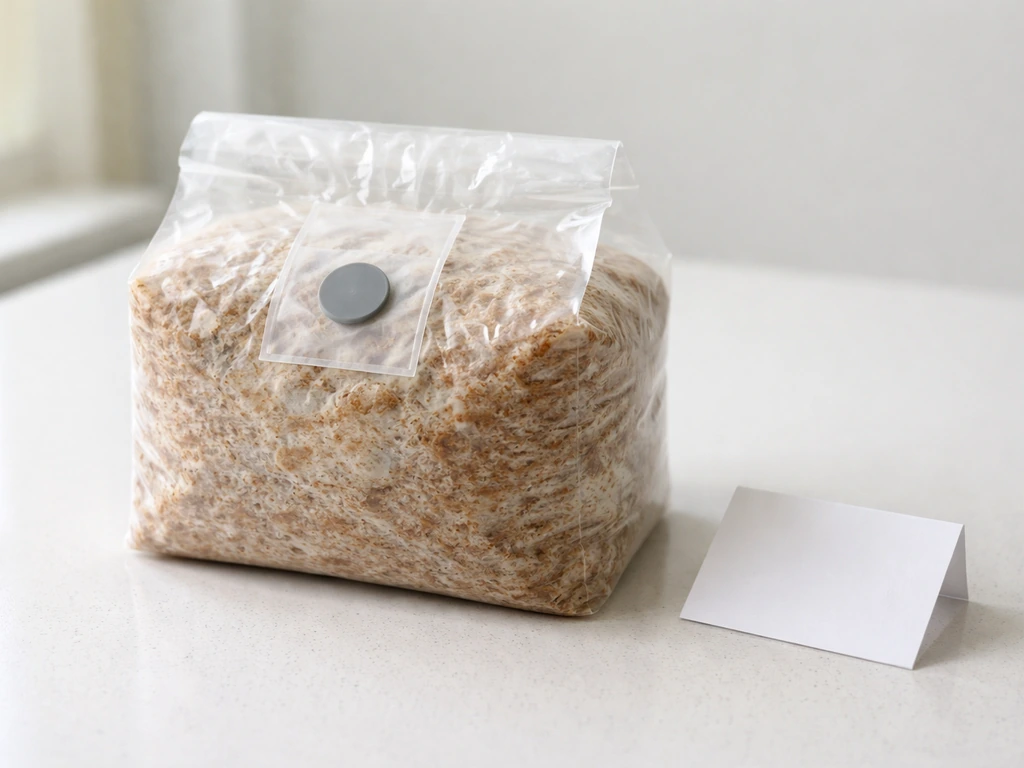
- The bag itself: intact, no punctures other than the designated injection port (if applicable), no visible green, black, or pink mold already present
- Instruction card or insert
- Any inoculant (liquid culture syringe or spore syringe) if the kit is not pre-inoculated
- Alcohol wipes or isopropyl alcohol for sterilizing injection points
- The box the kit came in, since some kits like the Back to the Roots Mushroom Mini use the box as the fruiting chamber
Seed-starting or microgreens bag kit
- Compressed soil disk or bag of growing medium
- Seed packet (check that it hasn't been punctured or moisture-damaged)
- Planter, tray, or container if included
- Any biodegradable mesh or cover film over the soil puck
- Measuring cup or tablespoon reference, since most kits give exact water volumes
Water-based terrarium / grow toy kit
- Sealed pouch with polymer beads or sponge figure
- Any included bowl, vessel, or tray
- Instruction sheet (these kits are simple but water volume and timing still matter)
Before setup, wipe down your workspace with a damp cloth. For mushroom bags especially, a cleaner environment reduces contamination risk dramatically. You don't need a sterile lab, but working away from compost bins, pet areas, or open windows on a windy day helps. For seed-starting and terrarium kits, this step is less critical but still a good habit.
Lighting and heat: set this up before you open anything
Choose your location before you open the bag. Mushroom bags need indirect light or no direct light at all during incubation, and a stable temperature between 55 and 75 degrees F. Seed-starting kits need bright indirect light or a simple grow light placed 4 to 6 inches above the tray. Water-based terrarium toys just need a spot away from direct sun and extreme temperatures. Getting this right before you start means you won't be scrambling to move a damp substrate bag or a germinating tray at the worst possible moment. If you want a similar walk-through for another setup style, see grow bucket instructions as a related guide for timing and placement.
Step-by-step setup: start to finish
Mushroom grow bag setup
- If your bag came pre-inoculated (already has mycelium colonizing it), skip to step 4. If it's a sterile substrate bag requiring inoculation, wipe the injection port with an alcohol wipe and let it dry for 30 seconds.
- Inject your liquid culture or spore syringe into the port at a slow, steady pace. Use the volume specified on your instruction card, usually 5 to 10 mL.
- Gently massage the bag from the outside to distribute the inoculant through the substrate. Do not puncture the bag anywhere other than the designated port.
- Place the bag in your incubation spot: stable temperature between 55 and 75 degrees F, no direct sunlight, good airflow in the room (but not a direct draft on the bag).
- If your kit uses the original box as a fruiting chamber (as the Back to the Roots Mushroom Mini does), follow the specific box-setup instructions on the card. Usually this means cutting a designated opening and keeping the box partially closed to hold humidity.
- Wait for colonization: white, fluffy mycelium will spread through the bag over 1 to 3 weeks depending on temperature and strain. Do not disturb or open the bag during this phase.
Seed-starting or microgreens kit setup
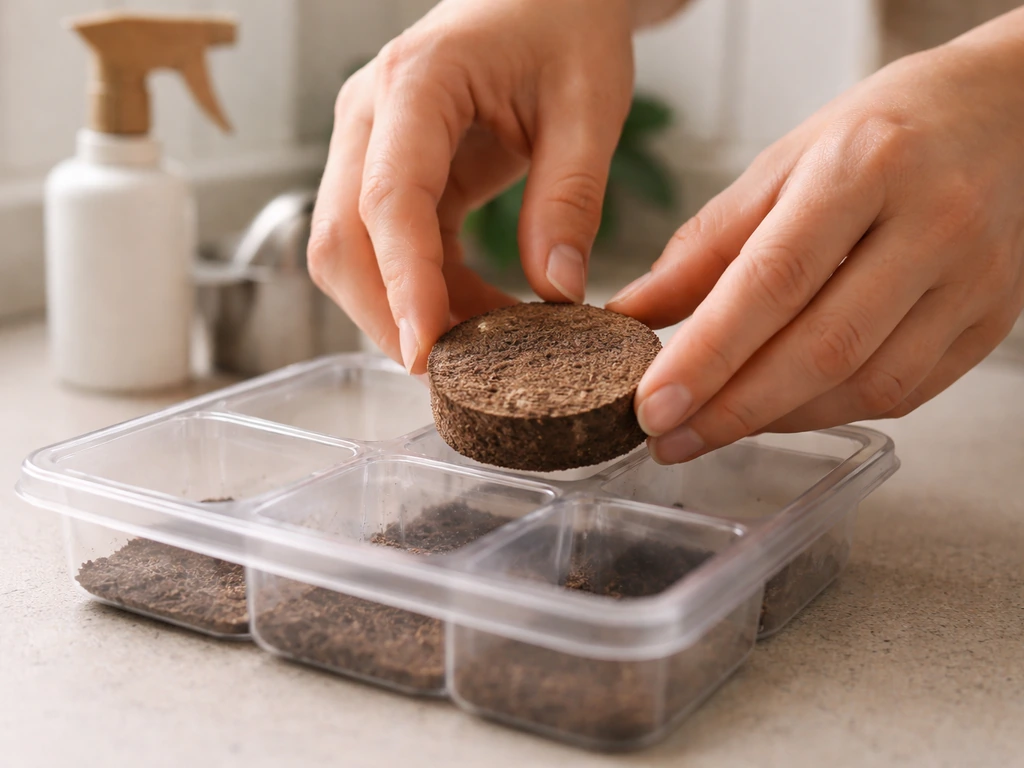
- Place the compressed soil disk or puck in your included planter or tray.
- Add water slowly and directly onto the disk. For a standard microgreens puck (like the Back to the Roots ceramic kit), pour 1/3 cup of water on top and wait for the puck to fully expand. This takes about 5 to 10 minutes.
- Once expanded, remove or cut away any biodegradable mesh netting around the puck and spread the soil evenly to fill the container.
- Sprinkle seeds evenly across the surface. Don't pile them in one corner.
- Add an additional 3 tablespoons of water directly over the seeds to help trigger germination.
- Cover the tray or container, either with the included dome or a piece of plastic wrap, and leave it undisturbed for 48 hours in a warm spot away from direct sun.
- After 48 hours, remove the cover, place the tray under your light source, and begin the regular care schedule.
Water-based terrarium / grow toy setup
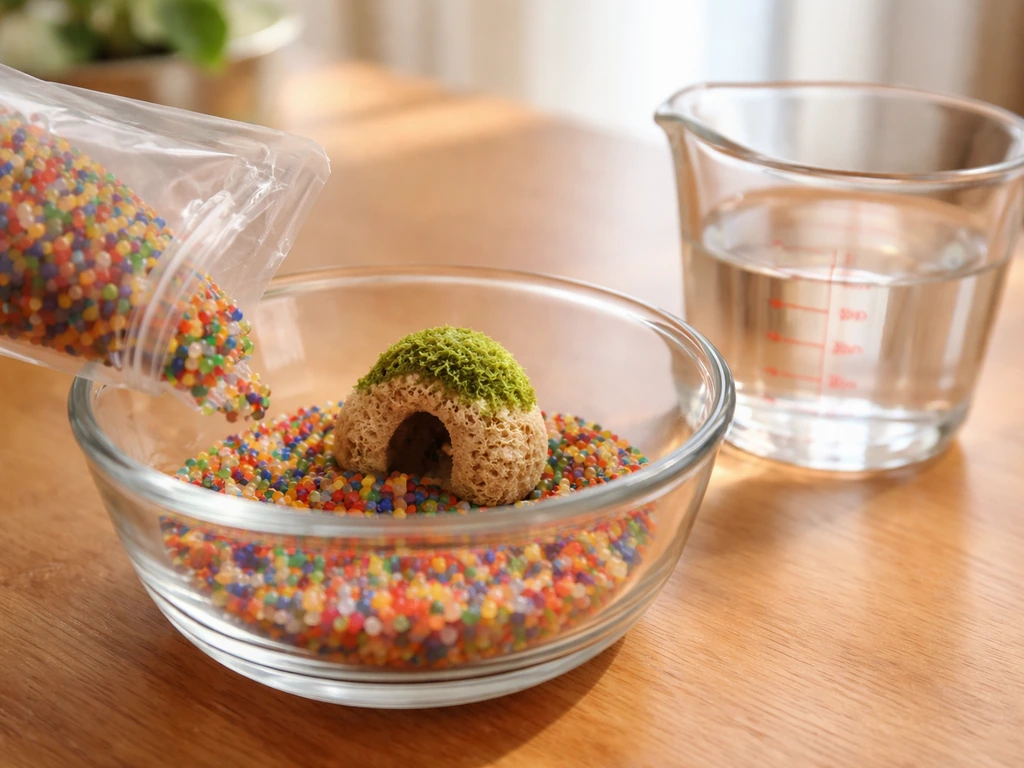
- Open the pouch and place the figure, beads, or dried material into the included bowl or vessel.
- Add the specified amount of water from the instructions. If no amount is listed, start with enough to just cover the material and add more slowly.
- Place in a spot with indirect light and room temperature between 65 and 75 degrees F.
- Watch for expansion over 24 to 72 hours. Most water-based terrarium kits reach full size within 3 days.
Water, medium, and bag preparation rules
Getting moisture right is where most people go wrong. Too dry and nothing grows; too wet and you invite mold, rot, or contamination before anything useful has a chance to develop.
Mushroom bags: moisture is already there
A properly prepared all-in-one mushroom substrate bag comes pre-hydrated. You should not add water to the substrate itself. The substrate blend, which typically contains organic compost, grain, coco coir, and nutrient supplements, is calibrated to the right field capacity already. What you do manage is the humidity of the air around the bag during fruiting. Once pins (tiny mushroom buds) start forming, mist the inside walls of the fruiting chamber or the cut opening of the bag lightly with clean water two to three times per day to keep humidity above 80%. Use a small spray bottle, not a pour. Never soak the substrate directly.
Seed-starting kits: measure, don't guess
These kits give you exact water volumes for a reason. The compressed disk needs a specific amount of water to expand correctly without becoming waterlogged. Back to the Roots’ Ceramic Microgreens Grow Kit instructions specify placing the organic soil disk in the ceramic planter and adding 1/3 cup of water on top before the puck expands blank" rel="noopener noreferrer">compressed disk needs a specific amount of water to expand correctly. Stick to the measurements on the instruction card (typically 1/3 cup to expand the puck plus 3 tablespoons over the seeds for germination). If you're unsure about your exact amounts, double-check the grow kit instructions that came with your seed-starting kit instruction card. After that, water only when the top layer of soil feels dry to the touch, not on a fixed schedule. Most small microgreens and seed kits need watering every one to two days, but your environment matters. A dry, heated room will dry out faster than a humid one. These kits don't typically include nutrients for the initial grow since the organic soil mix contains enough for the short cycle. If you're reusing the soil for a second round, a very diluted all-purpose liquid fertilizer at half strength can help.
Water-based terrarium kits: refresh, don't flood
Once the initial expansion is complete, simply top up the water as it evaporates. Keep the water level consistent but don't let the figure or beads sit in stagnant deep water for extended periods. Change the water completely every 5 to 7 days to prevent algae and odor buildup. There are no nutrients to manage in these kits.
A note on water quality and pH
For seed-starting kits and mushroom bags, tap water that has sat out for 30 minutes (to off-gas chlorine) works fine in most cases. If your tap water is heavily chlorinated or has a noticeably metallic taste, use filtered or bottled water. pH matters most in hydroponic-style grow kits where nutrient solution is recirculating; for soil-based and substrate-based bag kits at home, tap water in the 6.0 to 7.5 pH range is acceptable without testing. Water-based terrarium toys aren't sensitive to pH.
Ongoing care schedule
Mushroom bag care
| Phase | Daily Tasks | Weekly Tasks | Key Parameters |
|---|---|---|---|
| Incubation (colonization) | Check bag for contamination (green, black, or pink patches) | Verify temperature is between 55-75°F | No direct light; stable temp; no drafts |
| Fruiting (pins forming) | Mist fruiting chamber walls 2-3x/day; check for pin development | Check for signs of over-saturation or mold on exposed substrate | High humidity (80%+); indirect light 12 hrs/day; 65-75°F |
| Harvest window | Monitor mushroom caps daily for opening | Harvest before caps fully flatten | Harvest before spore drop for best flavor and yield |
Seed-starting and microgreens kit care
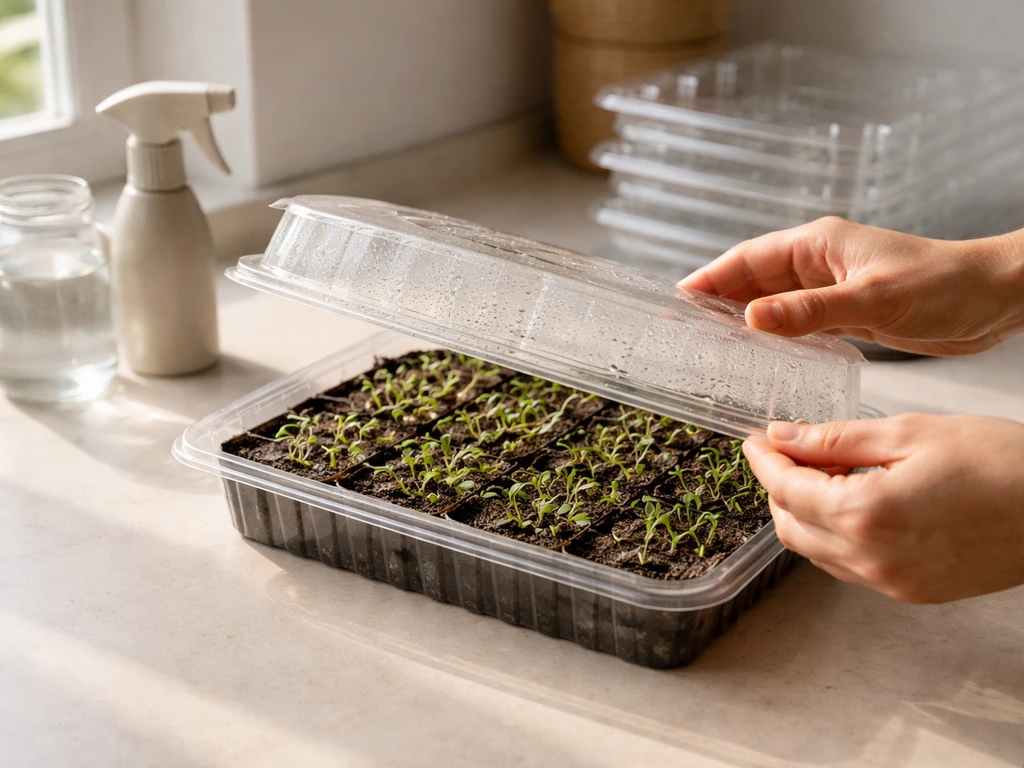
| Phase | Daily Tasks | Weekly Tasks | Key Parameters |
|---|---|---|---|
| Germination (first 48 hrs) | Keep covered; no watering needed | N/A | Warm spot, 65-75°F; no light needed |
| Seedling stage (days 3-10) | Check moisture; water if top layer is dry; keep under light | Rotate tray for even growth | Bright indirect light or grow light 12-16 hrs/day; 65-75°F |
| Harvest / mature stage | Check daily for harvest readiness | Harvest greens at 1-3 inches; reseed if kit allows | Maintain light and moisture until harvest |
Water-based terrarium kit care
Top up water as needed and do a full water change every 5 to 7 days. Keep away from direct sunlight to reduce algae. Room temperature between 65 and 75 degrees F keeps the material in good condition. There's no active growth schedule to manage beyond keeping the water fresh.
When things go wrong: common problems and direct fixes
No growth or very slow growth
For mushroom bags: the most common cause is temperature. If your room is below 55 or above 75 degrees F, mycelium growth stalls or dies. Move the bag to a more stable spot. A seed-starting kit with no germination after 5 days usually means the medium dried out under the cover, the cover wasn't sealed well enough, or the room is too cold. Lift the cover, check moisture, re-mist if needed, re-seal, and verify temperature is at least 65 degrees F.
Mold, fungus, or strange colors
On mushroom bags: white, fluffy growth is normal mycelium. Green, black, pink, or yellow patches are contamination. If you catch it early and it's a small spot (less than 10% of the bag), some growers quarantine the bag in a plastic bag and monitor it. If contamination spreads, the bag should be sealed and discarded. Do not open a contaminated mushroom bag indoors. For seed-starting kits, white fuzzy mold on the soil surface is usually harmless surface mold encouraged by the cover being left on too long. Remove the cover, let the surface dry slightly, and improve airflow. If mold appears on the seeds themselves, that batch is likely lost.
Odor
A healthy mushroom bag smells earthy and faintly mushroomy. A sour, ammonia, or rotten smell means contamination or anaerobic (no-oxygen) conditions in the substrate. Discard and start fresh. Seed-starting kits can develop a slightly sour smell if overwatered and waterlogged. Let the medium dry out a bit and improve drainage if the tray allows. Water-based terrarium kits develop odor when water goes stagnant; a full water change fixes this immediately.
Drying out
Mushroom bags in fruiting mode can dry out quickly in low-humidity rooms, especially in winter with forced-air heating running. Increase misting frequency to three to four times per day and consider placing a humidity tent (a clear plastic bag draped loosely over the fruiting area) to trap moisture. For seed-starting kits, dry soil pulls away from the sides of the container: water slowly and deeply until you see moisture reach the bottom of the medium.
Algae or slime in water terrarium kits
Green algae or slime means the kit is getting too much direct sunlight or the water hasn't been changed often enough. Move to a spot with indirect light only and do a full water change, rinsing the vessel and the figure or beads gently before refilling.
Pests
Fungus gnats are the most common pest for both mushroom kits and seed-starting kits. They're attracted to moist organic material. Yellow sticky traps placed near the kit catch adults and break the cycle. Let the surface of seed-starting soil dry slightly between waterings to make it less appealing for egg-laying. For mushroom bags, keeping the bag sealed during incubation prevents gnats from accessing the substrate.
Uneven growth
Seeds or mushroom pins clustering on one side usually mean uneven light or an uneven surface. Rotate your tray or bag 180 degrees daily. For mushroom bags, the side closest to the light source often fruits first; this is normal and not a problem as long as humidity is even around the whole kit.
Harvesting, reuse, and safe disposal
When and how to harvest mushrooms
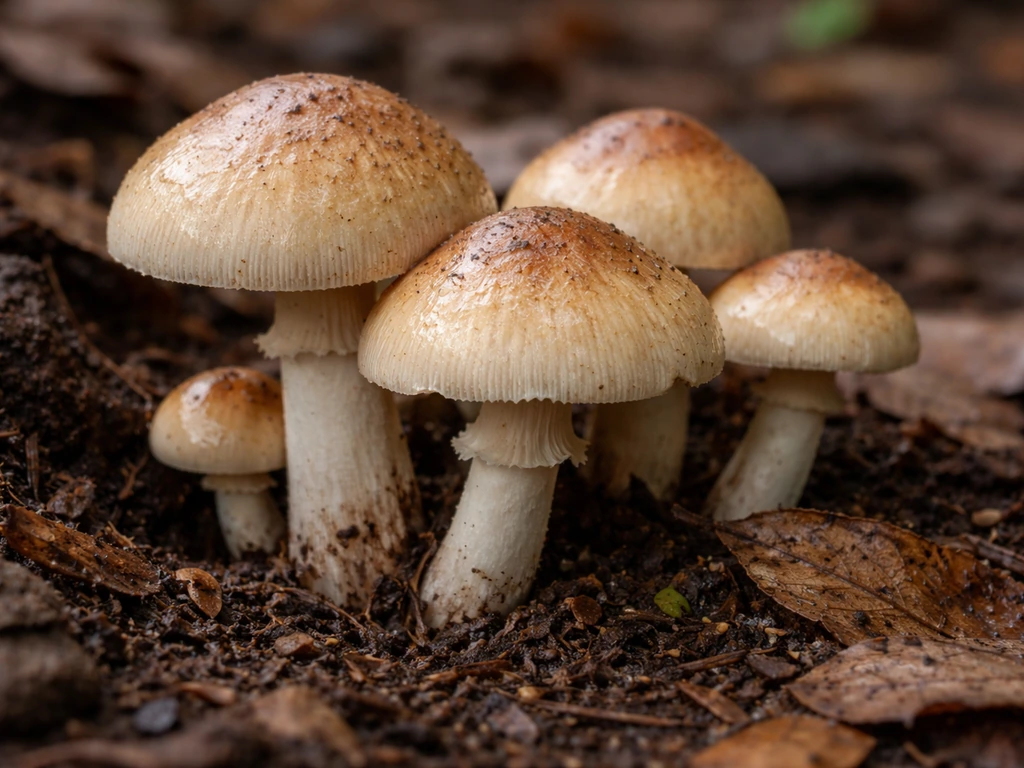
Harvest mushrooms just before or as the caps begin to flatten out and the veil (the thin membrane under the cap, if present) starts to tear away from the stem. At this stage they have the best flavor and the least spore drop. To harvest, twist and pull gently at the base rather than cutting, which leaves a cleaner wound on the substrate and reduces contamination risk. After the first flush (harvest), remove any remaining stubs, mist the substrate surface lightly, and allow 1 to 2 weeks of rest for a potential second flush. Most consumer mushroom kits yield 2 to 3 flushes before the substrate is exhausted.
Harvesting microgreens and seedlings
Microgreens are ready to harvest when they reach 1 to 3 inches tall and have developed their first set of true leaves, usually 7 to 14 days from germination depending on variety. Use clean scissors and cut just above the soil line. Most microgreens are a single-harvest crop; the roots and soil can then be composted. Some larger seed-starting kits are designed to transplant seedlings outdoors once they reach 3 to 4 inches tall with a strong root system.
Reuse vs. discard
Most consumer mushroom grow bags are single-use in the sense that the substrate is exhausted after 2 to 3 flushes. The spent substrate can be composted in a home compost bin since it's typically made from organic materials. Seed-starting soil from microgreens kits can often be refreshed with a diluted fertilizer and reseeded, though yields typically drop after the first round. Water-based terrarium kits are meant to be ongoing displays; simply keep refreshing the water. The polymer beads or sponge figures don't biodegrade, so they go in household trash rather than compost when you're done with them.
Safe disposal and handling
Seal contaminated mushroom bags in a plastic bag before binning them to avoid spreading mold spores in your home. If you ever need to adjust or verify how to handle contamination and safe disposal, see grow safe instructions for related safety guidance. Spent organic substrate (compost, grain, coco coir blends) can go directly into a home compost pile. Mushroom caps from an unidentified or unlabeled kit should never be consumed; only eat mushrooms from a kit that clearly identifies the species. For seed-starting kits, soil and plant material go in compost; any plastic trays should be rinsed and recycled if your local program accepts them.
What to do right now
If you haven't already: identify your kit type using the table at the top of this guide, lay out all your components, and confirm your temperature and light setup before you open anything. That single step, getting the environment ready first, prevents the most common early failures. Once you know which kit you have, follow the matching setup sequence above, keep the moisture rules in mind, and you'll be in good shape. Most grow kits in bags are genuinely beginner-friendly once you understand what kind of growing is actually happening inside that bag. If you want step-by-step grow creature instructions, start by matching the right kit type and environment to what the bag actually contains grow kits in bags.
FAQ
What should I do if my grow kit in a bag instructions don’t match what’s printed on the insert or label?
Use the insert and label first, because kits can vary by substrate hydration and timing by strain or seed variety. If there’s a conflict, follow the moisture and temperature values tied to your specific strain or variety, and only use the general ranges (like temperature windows) as a fallback until you can identify the kit type and intended stage (incubation vs fruiting).
Can I open a mushroom grow bag to “check progress” if I’m worried something is wrong?
It’s better to avoid frequent opening. For contamination prevention, only open if the insert specifically tells you to, or if you must check moisture after a clear stall. In that case, open briefly, adjust humidity by misting the chamber walls, then reseal immediately (and keep the bag away from pets and open windows).
How do I tell if my seed-starting kit is too dry versus too wet?
Too dry usually shows uneven shrinkage or pulling back from the tray sides, seeds that do not swell, and slow or stalled sprouting. Too wet often looks like persistent surface saturation, pooling water, or a heavy sour smell. A practical fix is to water more slowly and only until moisture reaches the bottom, then pause and let the top layer lighten before the next watering.
What water should I use for terrarium-style bag kits, and do I need to dechlorinate?
Typically room-temperature tap water is fine, but if you notice recurring cloudy water or strong odor, switch to filtered or bottled water. Since these kits are sensitive to stagnant water, the bigger driver is sticking to full water changes on schedule rather than trying to fine-tune pH.
Is it okay to add nutrients to a seed-starting or microgreens bag if my plants look pale?
Often the soil mix is designed for the short grow cycle, so adding fertilizer early can burn seedlings or worsen algae by changing water chemistry. If you do supplement, keep it diluted and only after you have established growth, and avoid pouring more liquid than the tray medium can hold.
My mushroom bag smells fine but has visible weird colors. Could that still be normal?
Color matters. White, fluffy growth is generally expected mycelium, but green, black, pink, or yellow patches are strong contamination signals. If you see those colors, treat it as contamination rather than a “normal variation,” and prioritize isolation and safe disposal if it spreads beyond a small localized spot.
How do I prevent mold on seed-starting medium without giving up too much moisture?
Reduce condensation and improve airflow rather than drying everything out. Remove the cover as directed by your kit for brief periods, reseal properly so humidity is controlled, and water only when the top layer starts to dry slightly. If mold appears on seeds directly, the problem tends to be more severe and the batch may not recover.
Do fungus gnats mean my kit is contaminated, or is it just a moisture issue?
Gnats usually mean the environment is too attractive for egg-laying, not necessarily that the kit is contaminated. The fastest practical approach is sticky traps to reduce adults, let the surface dry slightly between waterings, and avoid leaving excess moisture pooled in any reservoir or tray area.
Why are my mushrooms or seedlings growing on one side, even though I followed the light placement?
Uneven light or an uneven surface is a common cause, even when the initial setup seems correct. Rotate the tray or bag daily (for mushrooms, one side may fruit first, which can be normal as long as humidity is consistent around the whole kit). Also ensure the bag is level and not pressed against a wall that blocks part of the airflow.
When should I harvest microgreens or mushrooms, and what happens if I wait too long?
Microgreens are best when they reach about 1 to 3 inches tall and have developed true leaves, harvesting close to that window prevents them from getting woody or overly bitter. For mushrooms, harvesting as the veil starts to tear helps avoid maximum spore drop and keeps texture best, waiting too long can lead to more messy cleanup and faster decline in quality.
Can I reuse the substrate or medium after the first cycle, and what are the limits?
Mushroom kits are usually effectively single-use, with diminishing returns after 2 to 3 flushes. Seed-starting soil can sometimes be refreshed and reseeded, but yields often drop. Terrarium kits are ongoing by design, while polymer beads or sponge figures do not biodegrade, so disposal follows typical trash rules rather than composting.
What is the safest way to dispose of a contaminated mushroom kit in my home?
Seal contaminated material in a plastic bag before taking it out to reduce the spread of spores indoors. Do not open a contaminated bag indoors. If you’re unsure about how to handle a specific contamination scenario, use the kit’s safety guidance or related safe disposal instructions before proceeding.