
Set your Buzzy succulent grow kit up today by expanding the growing medium pellet in about 3/4 cup of water, fluffing it with a fork until it's evenly moist (not soggy), planting your seeds or cuttings at the right depth and spacing, and placing the whole thing in the brightest warm spot you have. That's the core of it. The rest of this guide walks you through every step in detail, plus what to do if something goes sideways. For tomato seed kits, follow the Buzzy tomato grow kit instructions for planting depth, timing, and early watering so germination stays on track. Follow the buzzy lavender grow kit instructions for the right depth, watering rhythm, and early-care timing for lavender seeds.
Buzzy Succulent Grow Kit Instructions: Setup in 1 Hour

Marcus Thornfield
30 May 2026
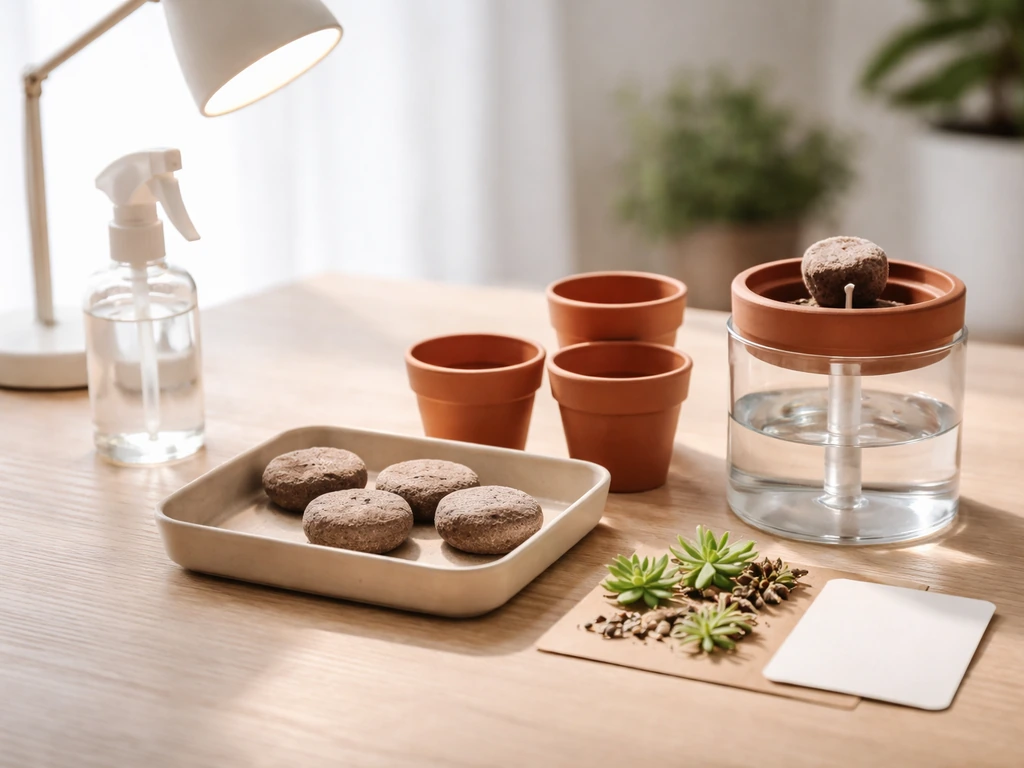
What's in your Buzzy succulent grow kit (parts check)
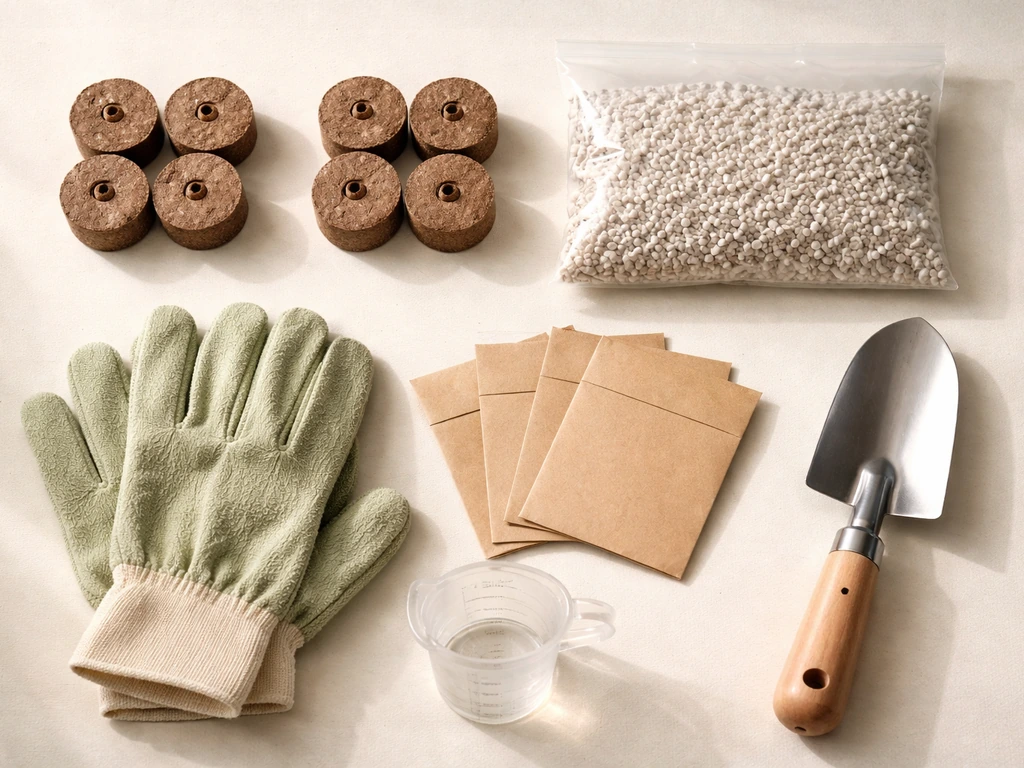
Before you do anything, lay everything out on a table and match it against this list. Buzzy kits vary a little by product line, but the core components are consistent. If something's missing or you're not sure what a piece does, check the inside of the box lid or look up your specific model number, because Buzzy's general instructions page points you to a separate Seed Planting Guide for depth and timing details that differ by variety. For buzzy cactus grow kit instructions, also follow the same depth and timing details for your specific variety so germination stays on track Buzzy's general instructions page points you to a separate Seed Planting Guide.
- Growing medium pellet(s): Compressed coir or peat discs that expand when you add water. Many kits include more than one pellet, so count them before you start.
- Seeds or cuttings: Succulent seeds are tiny. If your kit includes cuttings instead, they should be sealed in a small bag or wrapped to prevent drying out.
- Container or pot: Usually a small decorative pot, tray, or pail. Some Buzzy kits use a basin-style container that holds multiple pellets side by side.
- Drainage setup: Check whether your container has drainage holes. If it doesn't, your kit may include a liner, a gravel layer, or instructions to add perlite at the bottom.
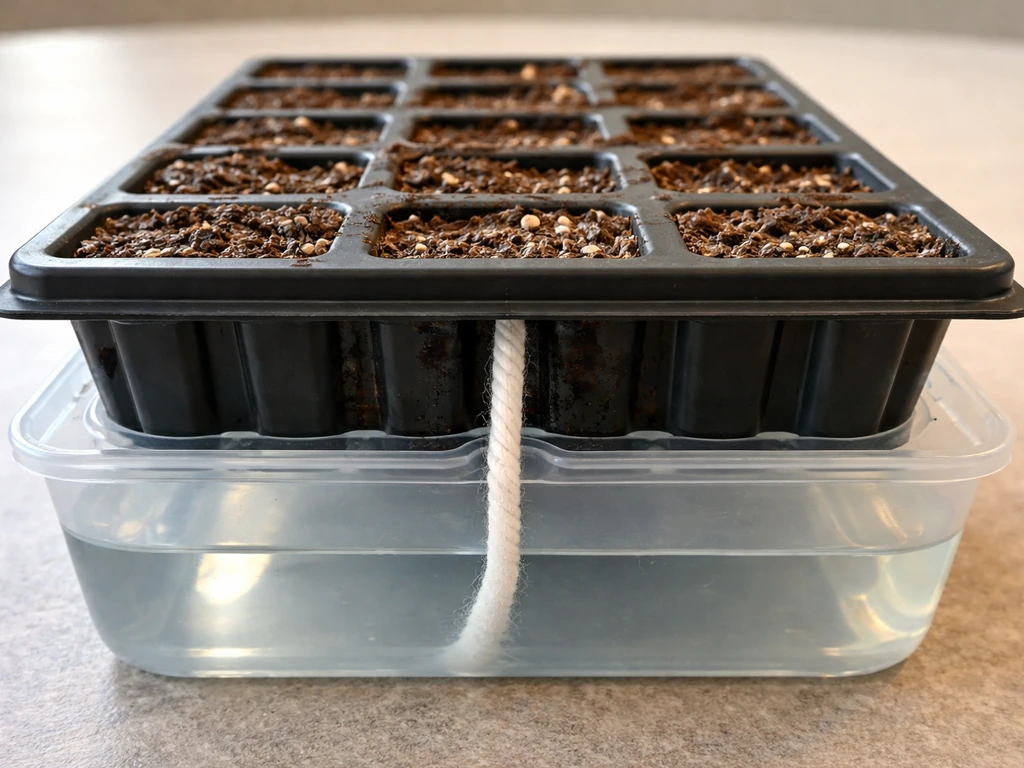
- Wick or reservoir (if included): Some Buzzy-style kits use a self-watering wick system where a cord connects a water reservoir to the soil. If yours has a small inner pot sitting inside a larger outer pot, that's a wick-and-reservoir setup.
- Instructions sheet: Sometimes a folded card, sometimes printed on the box itself. If yours is missing or unclear, Buzzy Seeds has an online instructions page and a Seed Planting Guide that covers depth and sprout timing by species.
- Optional extras: A small spray bottle, plant marker, or grow-light recommendation card may be tucked in depending on the kit version.
If your kit has a wick system, take a second to thread the wick through the drainage hole before you add any medium or soil. It's much harder to do after everything is planted. blank" rel="noopener noreferrer">The wick should hang down into the reservoir chamber and sit in contact with the growing medium above.
Prepping the setup: medium, container, drainage, and spacing
This is the step most people rush, and it's where a lot of early problems start. The Buzzy medium prep method is specific: dissolve your pellet(s) in about 3/4 cup of water per pellet, then use a fork to fluff the expanded coir until the moisture is completely even throughout. You're looking for a texture like a wrung-out sponge, moist all the way through but not dripping. Buzzy explicitly flags avoiding both soggy and dry spots, because dry pockets leave seeds without moisture to germinate, and soggy zones are where mold gets started.
Once the medium is fluffed, check your container before you fill it. If it has drainage holes, great. If not, and your kit includes a small layer of gravel or sand, put that in the bottom first. Succulents are extremely sensitive to standing water at their roots, so drainage is non-negotiable. For basin-style kits with multiple pellets, fill each section evenly and smooth the surface with your fingers without pressing down. Gently smooth the top, but don't pack it. Compressing the medium cuts off airflow, which slows germination and promotes rot.
For spacing: if you're planting seeds, you'll spread them across the surface and thin later. Walmart’s listing for the Buzzy 95203 kids daisy grow pail includes instructions to fill the container with expanded medium, sprinkle seeds evenly across the surface, and thin seedlings to give them enough space to grow thin later. If you're working with multiple cuttings, leave at least 2 to 3 inches between each one so there's airflow and room for roots to develop without competing.
Planting step-by-step (seeds vs cuttings)
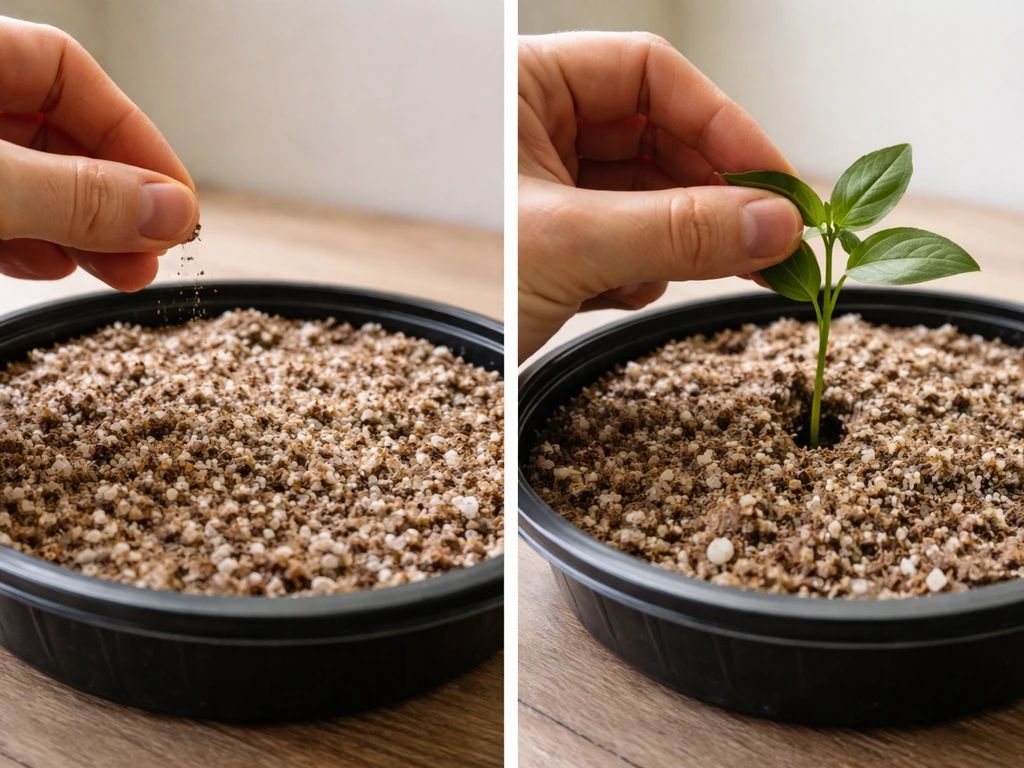
If your kit includes seeds
- Expand and fluff your pellet(s) as described above. The medium should be in the container before you plant.
- Check your Buzzy Seed Planting Guide (or the card in the box) for the correct planting depth for your succulent variety. Succulent seeds are often surface-sown or planted at very shallow depths, around 1/8 inch at most.
- Sprinkle seeds evenly across the surface. Don't dump them all in one spot. A light, even scatter gives each seedling room to grow. For smaller kits, aim for no more than 8 to 10 seeds per small pot to avoid severe crowding.
- Very gently press seeds into contact with the medium using a fingertip, but don't bury them deeply if the guide says surface-sow.
- Mist the surface lightly with a spray bottle. Don't pour water directly on freshly placed seeds or you'll wash them into a pile.
- Cover loosely with the plastic lid or plastic wrap if your kit includes a humidity dome. This holds moisture during germination without requiring constant misting.
- Label the container with the date so you can track how long germination is taking.
If your kit includes cuttings
- Before you plant anything, check the cut end of each cutting. If it looks fresh, moist, or pale, let it sit out uncovered for two to three days in a dry spot with indirect light. This forms a callus (a dry scab over the wound) that dramatically reduces the chance of rot once it's in the medium.
- Once callused, prepare your container and medium as described above.
- Make a small indent in the medium and set the callused end into it so the cutting stands upright or leans slightly. Don't jam it in deeply.
- Water the medium until it's evenly moist and excess just begins to drain from the bottom, then stop. During establishment, keep the medium lightly moist (not wet) until you see new root activity, which usually shows up as slight resistance when you gently tug the cutting after two to three weeks.
- After establishment, shift to the dry-down watering method described in the ongoing care section below.
Initial watering and early-care routine (first days to weeks)
The first week or two is when most beginner mistakes happen, almost always from overwatering. Here's the honest truth about succulents: they germinate and establish best in medium that is lightly moist, not wet, and they need to dry slightly between waterings even while still very young.
For seed kits: mist the surface once or twice a day to keep the top layer from drying out completely. You're not soaking the medium at this stage, just maintaining surface moisture so tiny seeds don't dry out before they sprout. If your kit came with a humidity dome or plastic cover, keep it on until you see the first sprouts emerge, then remove it gradually to prevent fungal issues from trapped moisture.
For cutting kits: water the medium when the top inch feels dry to the touch. During the first two to three weeks of rooting, the medium can stay slightly more moist than it would for a mature succulent, but it should never sit wet or have water pooling near the roots.
If your kit uses a wick-and-reservoir system, fill the outer reservoir up to the indicator line or the top of the window. The wick will draw water up as the medium dries out. Check the reservoir every few days initially. If the reservoir runs dry and the wick dries out completely, it can lose its ability to draw water upward, so top it off before it empties.
A useful early-care milestone checklist: seeds typically sprout anywhere from one to three weeks depending on variety (check your Seed Planting Guide for the specific window). Once you see the first set of leaves (seed leaves, called cotyledons), keep light consistent and continue light misting. When the second set of leaves appears, those are the first true leaves, and that's your signal to thin overcrowded seedlings to one per cell or spot, and to begin light feeding about a month later.
Light and temperature placement for succulents
Succulents are high-light plants, and this is one area where you can't compromise much. Place your kit in the brightest spot you have, ideally a south-facing windowsill with at least 6 hours of direct or very bright indirect sun per day. Avoid cold windowsills where the glass chills the air right next to the plants, especially overnight. Buzzy Seeds specifically warns against drafty or cold window locations, which can stall germination even if the room itself seems warm.
Temperature-wise, aim for somewhere in the 65 to 75 degrees Fahrenheit range for germination and early growth. Most succulents won't thrive in anything consistently below 55 degrees, so keep them away from air conditioning vents and cold floors.
If natural light in your space is limited, a grow light is genuinely worth using. Run it for 12 to 16 hours per day, keeping the light 2 to 4 inches above seedlings if it's a standard LED grow panel. Buzzy Seeds acknowledges that a grow light can substitute for limited natural light, and for succulents specifically it's often a better option than a dim windowsill because the intensity and consistency beat patchy natural light in many homes.
Common problems and how to fix them
Mold on the surface of the medium
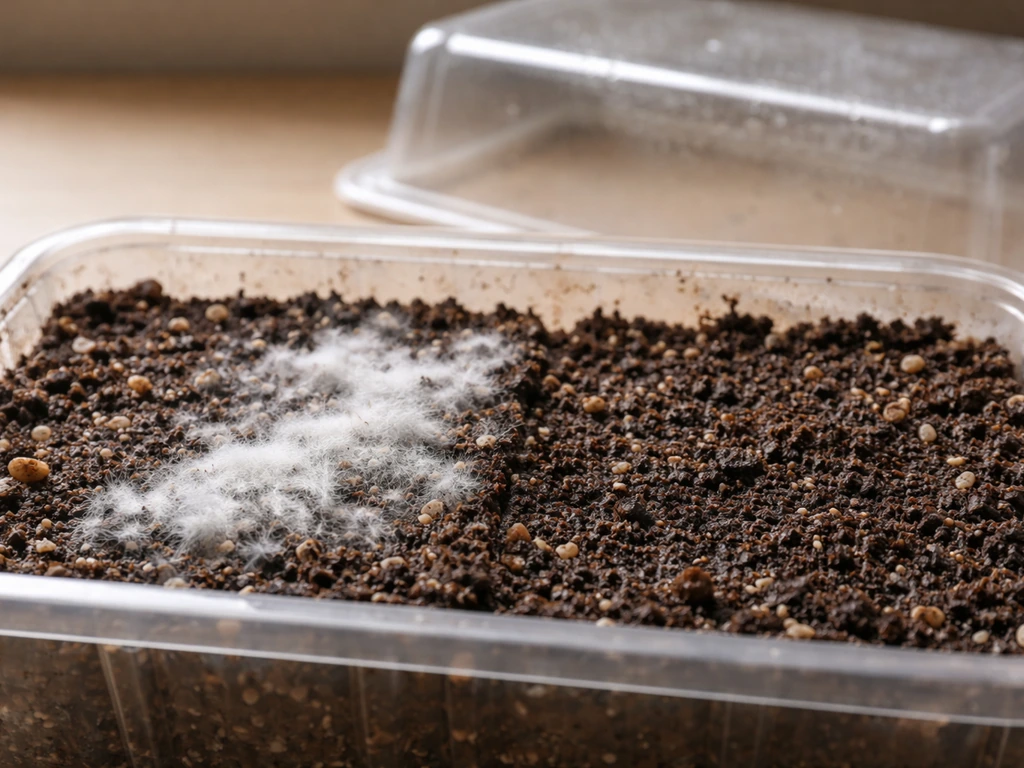
White fuzzy growth on the soil surface almost always means the medium is staying too wet and has too little airflow. Remove the humidity dome if you still have it on, move the kit to a brighter warmer spot, and let the surface dry out between mistings. A light sprinkle of cinnamon on the surface can help suppress surface mold. If it keeps coming back, check that water isn't pooling at the base of the container.
Root rot and mushy leaves
If the lower leaves of a cutting or young seedling look translucent, soft, or mushy, overwatering is the likely culprit. Overwatered succulents develop a condition called edema in the leaves, and the roots turn brown to black and collapse. Gently lift the plant and inspect the roots. Brown-black roots that feel slimy need to be trimmed back to healthy white tissue before the plant has any chance of recovery. Let it dry out and callus for a few days before replanting in fresh dry medium. Going forward, only water when the soil at the drainage holes feels dry.
No germination or very slow sprouting
First, check the actual germination window in your Seed Planting Guide. Succulent seeds can take two to three weeks, and some varieties run longer. If you're past that window, check that the medium is consistently moist (not dry), the temperature is at least 65 degrees, and the seeds aren't buried too deep. Very small succulent seeds sown too deeply often simply don't have enough energy to push through.
Leggy, pale, or stretched seedlings
This is etiolation, and it's caused by insufficient light, plain and simple. Succulents stretch toward any light source they can find when they're not getting enough. The fix is to move the kit closer to a brighter window or add a grow light. You can't reverse stretching that's already happened, but you can stop new growth from continuing to etiolate. If the seedlings are already very tall and thin, you may need to provide some gentle support until the stems strengthen.
Instructions missing or don't match your kit
If your instruction sheet is missing, incorrect, or just confusing, go directly to the Buzzy Seeds website and look up the Seed Planting Guide. For buzzy forget-me-not grow kit instructions, you can use the same Seed Planting Guide approach to confirm depth, timing, and early moisture levels for your specific variety. You can also look for a model number on the bottom of your pot or inside the box lid. If you still can't find a match, use the general guidelines in this article as your working instructions. The core process (hydrate medium, plant at shallow depth, keep lightly moist, provide maximum light, thin after true leaves emerge) applies broadly to all succulent seed kits.
Drainage issues and wick problems
If your container has no drainage holes and you're seeing standing water or soggy medium, add a 1-inch layer of perlite or small gravel at the very bottom of the container to create a reservoir gap below the roots. For wick systems, if the plant seems dry despite a full reservoir, check that the wick is still making contact with both the medium above and the water below. A dried-out wick loses its capillary action and needs to be re-wetted by dunking the whole inner pot in water for a few minutes.
Ongoing care: watering long-term, feeding, and when to transplant
Watering rhythm for mature succulents
Once your succulents are past the establishment phase (roughly four to six weeks after germination or rooting), switch fully to the soak-and-dry method. Water deeply until water drains freely from the bottom, then don't water again until the soil is completely dry all the way through. In most indoor environments this means watering every 10 to 14 days in summer and even less in winter. The single most common long-term killer of succulents is watering on a fixed schedule regardless of what the soil is actually doing.
Fertilizing
Wait until seedlings have their second set of leaves (true leaves, not the initial seed leaves) before feeding. Then use a balanced fertilizer at half the recommended strength, about once a month during the active growing season (spring through early fall). Don't fertilize in winter when growth slows. Overfeeding is a much more common mistake than underfeeding with succulents.
Thinning and transplanting
Thin seedlings once the first true leaves appear. In a small Buzzy kit pot, you'll typically want to keep just one or two of the strongest seedlings per container. Snip extras with small scissors rather than pulling, which can disturb neighboring roots. When your succulent outgrows its kit container, which usually happens within three to six months depending on the variety, transplant into a pot only one to two sizes larger with well-draining succulent mix. Going too large with the container leads to excess moisture retention in the unused soil, which circles back to the rot problem.
Pest prevention
Succulents are generally hardy, but fungus gnats love moist soil. The best prevention is letting the soil surface dry out between waterings. Mealybugs can appear as white cottony clusters in leaf joints; wipe them off with a cotton swab dipped in rubbing alcohol at first sight. Inspect new plants before placing them near your kit.
Do these things right after finishing setup
- Write the planting date on a label and stick it on the container so you can track germination timing against the Seed Planting Guide window.
- Double-check that your medium is moist but not dripping, and that no water is pooling at the base.
- Place the kit in your brightest warm spot or set up a grow light on a 14-hour timer.
- If your kit came with a humidity dome, put it on now and plan to remove it as soon as the first sprouts emerge.
- Set a reminder to check moisture every two to three days for the first two weeks, rather than watering on a fixed schedule.
- Bookmark or save your Buzzy Seed Planting Guide for your specific variety so you know exactly when to expect sprouts and what to do at each milestone.
One last thing worth knowing: if you enjoy working through Buzzy kits, the same core medium-prep and care principles carry across the whole Buzzy lineup. After that, follow the buzzy bonsai grow kit instructions for planting depth, timing, and early watering for bonsai varieties. Kits for lavender, cactus, bonsai, and other varieties all follow a similar hydrate-plant-light-thin sequence, with the main differences being planting depth, germination time, and watering frequency. Succulents and cacti are among the most forgiving on the watering side, so this is genuinely a good kit to start with if you're new to the brand.
FAQ
How do I tell whether the medium is correctly hydrated after expanding the pellet?
After fluffing, squeeze a small handful firmly in your palm, then release. It should crumble and feel like a wrung-out sponge, not form a wet clump that drips and not look dusty or pull away dry. If it’s too wet, fluff longer and let it sit for 10 to 20 minutes before planting so excess moisture equalizes.
What if my seeds look like they did not germinate but the medium is staying lightly moist?
First confirm the variety’s germination window, then check three variables: temperature (stay at least in the mid 60s F), light level (bright light or a grow light), and planting depth (most tiny succulent seeds should be near the surface, barely covered). If the surface is drying too fast between mistings, use a slightly warmer bright spot or shorten the time between mist passes, but never soak.
My wick system seems to stop watering even though the reservoir has water. What should I check?
Confirm the wick tip is fully contacting the medium above and is not floating or folded away from the contact area. Also inspect whether salts or medium dust blocked the wick end, if so, rewet the wick by dunking the inner pot for a few minutes, then let the system sit for a day before judging moisture levels.
Can I use tap water for the kit, and does it matter?
You can usually use tap water, but let it sit to reduce chlorine smell and avoid very cold water straight from the tap, which can chill seedlings and slow germination. If your tap water is very hard, occasional misting can leave mineral residue on the surface, wipe off crust gently and use fresh water during the next misting cycle.
How often should I mist a seed kit if my home is dry?
Use a top-layer rule instead of a strict schedule. Mist just enough that the surface stays lightly damp but not glossy, check every few hours during the warmest part of the day. If the surface dries within a few hours, move the kit slightly closer to the light (without overheating) or increase mist frequency, but keep the medium itself from re-wetting deeply.
Should I remove seedlings from the humidity dome immediately after they sprout?
Unseal gradually. Leave it on until you see the majority of sprouts, then open for short intervals each day (for example, once in the morning and once later) before fully removing. This reduces sudden drying stress and lowers the chance of mold after the domed moisture environment changes.
When thinning, is it better to cut seedlings or remove them?
Cut extras at the soil line with small scissors when possible. Pulling can tug neighboring roots and leaves, which can cause uneven growth and slow recovery. Thin to the strongest plants once true leaves appear, not right at the sprout stage.
Why do my seedlings look pale or stretched even though they are alive?
Etiolation is typically from insufficient light intensity or inconsistent light hours. Move closer to the brightest window or set the grow light to 12 to 16 hours a day, and keep the light at the recommended height for your panel. If they are already tall, avoid turning the container too slowly, rotate it every few days so growth stays even.
What does edema look like, and can it be reversed?
Edema often appears as translucent, swollen, or soft leaves, followed by mushiness. If you catch it early, stop watering immediately, improve airflow and light, and inspect roots. If roots are brown-black and slimy, trim to healthy tissue, callus the cut ends for a few days, then replant in dry fresh medium.
How can I prevent fungus gnats without soaking the medium?
Let the surface dry between mistings, and ensure air movement around the kit (a small fan nearby can help). If you see gnats, use sticky traps near the kit and avoid standing water in trays. For severe outbreaks, replace the top dry layer once it has dried out and reduce misting frequency until the problem stops.
Do I need to fertilize during the first month?
Usually no. Wait until seedlings have their second true leaves, then feed with a balanced fertilizer at half strength about monthly during active growth. If growth is slow but leaves are healthy, focus on light and correct watering first, fertilizer won’t fix low light or consistently wet medium.
When do I know it’s time to transplant out of the grow kit?
Transplant when roots fill the container and the plant shows signs of crowding, often around three to six months depending on variety. Step up only one to two pot sizes, and switch to a well-draining succulent mix. If you move to a much larger pot, excess unused soil holds moisture longer and increases rot risk.