
Sensi Grow A & B is a two-part liquid base nutrient from Advanced Nutrients. You mix equal amounts of Part A and Part B into your water (starting at around 1 mL per liter for seedlings and working up to 4 mL per liter for full vegetative growth), check that your pH lands between 5.5 and 6.3, and feed your plants on a regular schedule through the entire grow phase. That is the core of it. The rest of this guide fills in every detail you need to get that right with your specific setup, whether you are running a grow pod garden, a sow-and-grow seed starter kit, a coco tray, or a hydroponic reservoir.
How to Use Sensi Grow: Kit, Pod & Seed-Starter Guide + Hydro

Marcus Thornfield
23 Jul 2026
What Sensi Grow A & B actually is (and where it fits your kit)
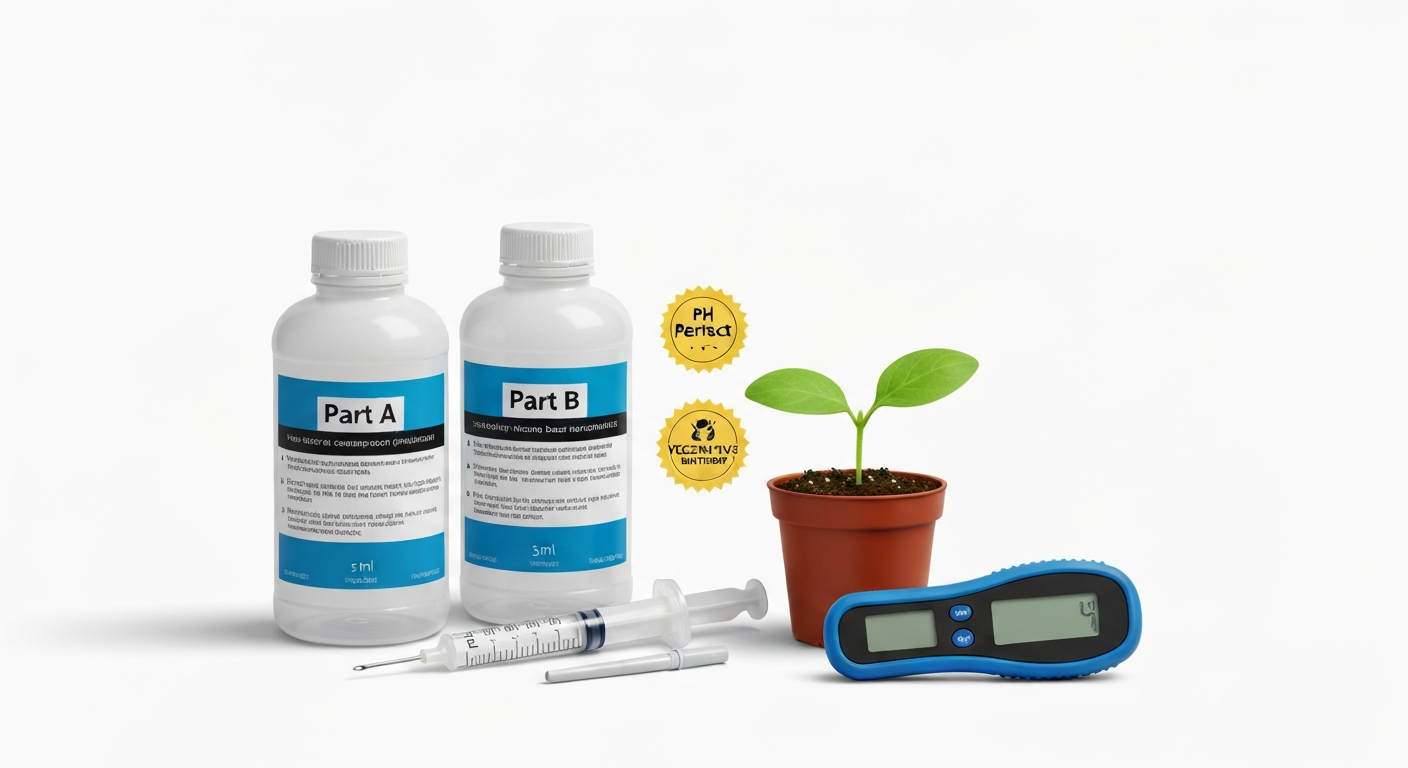
pH Perfect Sensi Grow is a vegetative-phase base nutrient. 'Base nutrient' just means it is the foundation of your feeding program, the product that supplies your plants with the primary building blocks: nitrogen, phosphorus, and potassium. Part A is nitrogen-dominant (approximately 3-0-0 NPK), while Part B covers phosphorus and potassium (approximately 1-2-6 NPK). Together they deliver a balanced vegetative profile that supports leafy growth, root development, and stem strength.
The 'pH Perfect' part refers to a built-in buffer system that Advanced Nutrients includes in the formula. The manufacturer claims this technology helps hold the solution pH within the optimal root-zone window for roughly one week without constant manual correction. That is genuinely useful if you are using a small consumer kit and do not want to be checking pH every single day. It is not magic, though; you still need to verify pH when you mix a new batch, which we will cover below.
Sensi Grow works across soil, coco coir, and hydroponic systems including deep water culture (DWC), nutrient film technique (NFT), drip systems, flood and drain tables, and aeroponics. If you are running a grow pod setup like an AeroGarden or a seed-starter tray, Sensi Grow A & B fits right into that workflow once your seeds have germinated and pushed their first true leaves. It is not a germination product on its own; seeds sprout on plain water, then you introduce nutrients at low doses.
What you need before you start
Do not skip the prep stage. Getting this stuff out without a pH meter and a measuring syringe is how people end up with yellow leaves and confusion two weeks in.
- Sensi Grow Part A and Part B bottles (shake each bottle before opening)
- Measuring syringes or a graduated pipette — 1 mL and 5 mL sizes cover most small-kit volumes; do not eyeball this
- A clean mixing container or your reservoir
- pH meter (digital pen-style is fine — calibrate it with buffer solution before first use and periodically after)
- EC or TDS meter — EC meters read in mS/cm, TDS/PPM meters estimate dissolved solids by multiplying EC by a conversion factor (0.5 for 500-scale meters, 0.7 for 700-scale); note which scale your meter uses
- pH Up and pH Down solutions (although pH Perfect technology reduces the need for adjustments, keep these on hand)
- Chemical-resistant gloves and safety glasses — both Part A and Part B SDS documents list eye and skin irritation as potential hazards
- Room-temperature water — cold water stresses seedlings and can affect how nutrients dissolve
- Clean cloth or paper towel for spills
One thing beginners frequently skip is the EC meter. Your pH can look perfect but if you accidentally double-dosed, the EC will tell you. For small kits with reservoirs under 4 liters, a 1 mL syringe is non-negotiable because the doses are tiny and a 1 mL error at that scale makes a real difference.
Quick start: using Sensi Grow with a typical consumer grow kit
Most consumer kits (grow pod gardens, sow-and-grow trays, small seed-starter systems) follow the same basic flow. Here is how to slot Sensi Grow into that process. For full mixing and feeding details, see the sensi grow instructions for step-by-step dosing, pH targets, and schedule guidance (Advanced Nutrients). See a full step-by-step guide on how to use Sensi Grow A & B for consumer kits.
- Plant your seeds or pods and add plain, room-temperature water only. No nutrients at the seed stage.
- Keep domes on pod-style kits (like AeroGarden models) until seedlings break the surface. This holds humidity while germination happens.
- Once seedlings show their first true leaves (not just the seed leaves), it is time to introduce nutrients. Mix at the seedling/cutting dose: 1 mL of Part A per liter, then 1 mL of Part B per liter.
- Check pH of the mixed solution (target 5.5–6.3). Adjust with pH Up or Down if needed.
- Check EC: target around 0.3–0.5 mS/cm for tiny seedlings.
- Add the mixed solution to your kit's reservoir or water tray.
- As plants develop more leaves and grow visibly larger, step up concentration gradually toward 2 mL/L, then eventually 4 mL/L at full vegetative stage.
- Top up the reservoir with plain water between full refills to replace what plants drink. Only mix a fresh full-strength batch when doing a complete reservoir change.
Mixing and dosing for soil setups
Soil growing (including coco coir and peat-based mixes) is the most forgiving setup for beginners. Sensi Grow works well here, though coco coir behaves more like hydroponics in terms of how quickly pH can shift, so treat coco more like the hydro section below if that is your medium.
Mixing order for soil
- Start with your full volume of room-temperature water in a clean container.
- Shake Part A bottle, then measure and add Part A to the water. Stir or swirl gently for 30 seconds.
- Shake Part B bottle, then measure and add Part B to the water. Stir again for 30 seconds.
- If you are adding any supplements (like Cal-Mag), add them now, one at a time, mixing between each addition.
- Check pH last. Adjust with pH Up or Down as needed. Target pH for soil: 6.0–7.0 (aim for 6.2–6.8 in most cases).
- Check EC/TDS to confirm you are in the right concentration range.
- Use immediately or within a few hours. Do not pre-mix large batches and let them sit for days.
Never mix Part A and Part B together in concentrated form before adding to water. Always add them separately to the water. Mixing concentrates together causes precipitation, meaning the nutrients clump and become unavailable to plants. Add to water, not the other way around.
Soil dosing by growth stage
| Growth Stage | Part A dose | Part B dose | Metric example (10 L) | Imperial example (1 gal / ~3.8 L) | Target EC (mS/cm) |
|---|---|---|---|---|---|
| Seedling / cutting | 1 mL/L | 1 mL/L | 10 mL A + 10 mL B | 3.8 mL A + 3.8 mL B | 0.3–0.5 |
| Small plant (3–4 leaf sets) | 2 mL/L | 2 mL/L | 20 mL A + 20 mL B | 7.6 mL A + 7.6 mL B | 0.8–1.0 |
| Full vegetative | 4 mL/L | 4 mL/L | 40 mL A + 40 mL B | 15.1 mL A + 15.1 mL B | 1.2–1.5 |
| Transplant recovery | 2 mL/L | 2 mL/L | 20 mL A + 20 mL B | 7.6 mL A + 7.6 mL B | 0.8–1.0 |
The transplant recovery row is important. Whenever you move a plant to a bigger pot or a new medium, drop back to the small-plant dose for a few waterings. Roots are stressed during transplant and a full-strength feed right afterward can cause tip burn or wilting even in otherwise healthy plants.
Mixing and dosing for hydroponic and reservoir systems
Hydroponics is where Sensi Grow really shines, and it is also where mistakes are amplified because there is no soil to buffer errors. Your mixing sequence matters more here, and you need to monitor EC and pH more consistently.
Mixing order for hydro reservoirs
- Fill your reservoir with the full volume of clean, room-temperature water before adding anything.
- Turn on circulation or aeration pumps if your system has them — this helps nutrients disperse evenly.
- Shake Part A, measure and add Part A to the reservoir. Run the pump (or stir) for at least one minute.
- Shake Part B, measure and add Part B separately. Run the pump again for one minute.
- Add any supplements one at a time with mixing between each. Cal-Mag goes in before bloom boosters or silica if you use them.
- Check and adjust pH last (target 5.5–6.3 for hydro). Let the pump circulate for a few more minutes, then recheck.
- Log your EC and pH readings with a date. This makes it easy to spot drift over the week.
Reservoir top-ups between refills
As plants drink, the water level drops but the nutrient concentration stays behind, meaning EC can creep up over time. Top up with plain pH-adjusted water (not fresh nutrient solution) until you hit your next scheduled full reservoir change. This is one of the most common mistakes I see beginners make: they top up with full-strength solution and wonder why their EC keeps climbing and their leaf tips go brown.
Hydro dosing reference
| Growth Stage | Dose (A and B each) | Metric (20 L reservoir) | Imperial (~5 gal / 18.9 L) | Target EC (mS/cm) | Target PPM (500 scale) |
|---|---|---|---|---|---|
| Seedling / plug | 1 mL/L | 20 mL A + 20 mL B | 18.9 mL A + 18.9 mL B | 0.3–0.5 | 150–250 |
| Early veg | 2 mL/L | 40 mL A + 40 mL B | 37.8 mL A + 37.8 mL B | 0.8–1.2 | 400–600 |
| Full veg | 4 mL/L | 80 mL A + 80 mL B | 75.7 mL A + 75.7 mL B | 1.2–1.5 | 600–750 |
| Transplant / stress | 2 mL/L | 40 mL A + 40 mL B | 37.8 mL A + 37.8 mL B | 0.8–1.0 | 400–500 |
The official Advanced Nutrients feed chart targets approximately 1.2 mS/cm EC during the grow phase (around 500 PPM on the 500-scale). These numbers are a starting point, not a hard ceiling. Some plants, especially in smaller consumer kits, do fine at the lower end of these ranges.
Getting pH and EC right: the meters, the targets, and when to check
pH measures how acidic or alkaline your solution is on a 0–14 scale. In the plant nutrient context, it controls which minerals your roots can actually absorb. EC (electrical conductivity) measures how many dissolved salts are in your water, which is a proxy for total nutrient concentration. Both numbers matter and neither replaces the other.
pH targets
- Soil and coco coir: target pH 6.0–7.0, ideally 6.2–6.8
- Hydroponics (DWC, NFT, drip, flood and drain, aeroponics): target pH 5.5–6.3
- Seedlings in any medium: keep closer to 6.0–6.2 to minimize osmotic stress
EC/TDS targets
- Tiny seedlings / first true leaves: EC 0.3–0.5 mS/cm
- Early vegetative (small established plants): EC 0.8–1.2 mS/cm
- Full vegetative: EC 1.2–1.5 mS/cm (Advanced Nutrients official target for grow phase: approx. 1.2 mS/cm)
- If using a PPM meter on the 500 scale, multiply EC by 500; on the 700 scale, multiply by 700 — always note your meter's scale when recording readings
Check pH and EC every time you mix a new batch of solution, and at least twice a week in active hydro reservoirs. In soil, check your runoff pH and EC occasionally (not every watering) to catch any buildup. If your runoff EC is significantly higher than your input EC, you may have salt accumulation and it is time for a plain-water flush.
A note on meters: a cheap pH pen is fine to start, but calibrate it with pH 4.0 and 7.0 buffer solutions before first use and monthly after that. Uncalibrated pH meters are the single most common reason for nutrient problems in beginner setups. For EC, most mid-range meters are accurate enough, but rinse the probe with clean water between readings.
Feeding schedule at a glance
| Stage | Sensi Grow A dose | Sensi Grow B dose | Target EC (mS/cm) | Feed frequency | Notes |
|---|---|---|---|---|---|
| Seed (pre-germination) | None | None | N/A | Plain water only | Keep medium moist, use dome for humidity |
| Plug / seedling | 1 mL/L | 1 mL/L | 0.3–0.5 | Every 2–3 waterings | Introduce gently; watch for tip curl |
| Early veg | 2 mL/L | 2 mL/L | 0.8–1.2 | Every 1–2 waterings | Step up only once plants look settled |
| Full veg / maintenance | 4 mL/L | 4 mL/L | 1.2–1.5 | Every watering / reservoir top-up with plain water | Monitor EC; top up reservoir with plain pH-adjusted water |
| Transplant recovery | 2 mL/L | 2 mL/L | 0.8–1.0 | Every 2 waterings for first week | Return to full dose once new root growth is visible |
| Pre-flush / reset | None | None | Near 0 | 1–2 plain water flushes | Flush before switching to bloom nutrients or to reset salt buildup |
The plain-water flush between growth phases is worth doing even if your plants look fine. It clears accumulated salts from the medium and gives you a clean baseline when you switch to a bloom nutrient. One or two waterings with clean, pH-adjusted water (no nutrients) is enough.
Seed, plug, grow-pod and transplant guidance for sow-and-grow kits
This section is specifically for people using consumer kits: AeroGarden-style grow pod systems, sow-and-grow trays, and seed-starter kits. For an example of a consumer grow-pod product, see the stop and shop grow and learn seed pod. For model-specific steps, see Nature's Blossom sow-and-grow seed starter kit instructions. AeroGarden 7‑Pod User's Manual / Master Gardener Guide (official manual) provides the manufacturer's instructions for pod assembly, use of grow sponges and seed domes, 'Fill to Here' water levels, using room‑temperature water, the supplied nutrient/feeding schedule, and recommended pod/transplant timing. The workflow is slightly different from a purpose-built hydroponics setup, but Sensi Grow fits into it cleanly once you know the timing.
Sowing seeds in pods or trays
- Sow seeds at the depth specified in your kit manual or seed packet (typically 2–5 mm for small herb and vegetable seeds, up to 10–15 mm for larger seeds)
- Fill the reservoir to the manufacturer's marked fill line with plain room-temperature water only — no nutrients yet
- Place domes over pods if your kit includes them; this traps humidity and dramatically improves germination rates
- Keep the kit away from drafts and in a warm spot (most herb and vegetable seeds germinate best between 18–24°C / 64–75°F)
- Do not add any Sensi Grow solution during germination — seeds need moisture, not nutrients, to sprout
First feed timing
The right moment to introduce Sensi Grow is when seedlings have pushed past the dome height and have opened their first true leaves (the pair that looks like the plant's real leaves, not the rounded seed leaves). At that point, mix a dilute solution at 1 mL/L of each part and refill your reservoir. For small kit tanks, like the roughly 1.2-liter tank on a 3-pod smart garden or the approximately 4-liter tank on a 9-pod model, the volumes are tiny, so use your 1 mL syringe carefully.
Stay-in-pod systems: transplant cues and steps
Some grow pod kits are designed as stay-in-pod systems, meaning plants live in the pod for their entire life. Others are designed for transplanting the plug into soil or a larger container once roots appear. Here is how to handle both.
- Watch for roots emerging from the bottom of the pod or grow sponge — this is the primary transplant cue for kits that are designed to move to soil
- A second cue is when the plant's canopy is crowding neighboring pods or the light height is maxed out
- Before transplanting, water the destination pot with plain pH-adjusted water so the medium is moist but not saturated
- Gently remove the plug or pod from the kit — handle by the foam or rockwool, not the stem
- Place the plug into a pre-made hole in your soil or coco medium so the top of the plug sits level with or just below the medium surface
- Firm the medium gently around the plug to eliminate air pockets
- Water in with a reduced-strength Sensi Grow solution (2 mL/L of each part) to ease the transition
- Keep the plant out of direct intense light for 24–48 hours after transplanting; gentle stress recovery is normal
For stay-in-pod systems where you never transplant: simply maintain the reservoir at the correct concentration for the plant's current growth stage, change out the full reservoir every 7–14 days (depending on the kit's guidance), and top up with plain water between changes.
Compatibility: Cal-Mag, bloom feeds, and mixing other products safely
Sensi Grow A & B is a base nutrient, which means you can build a broader feeding program around it. Here is how to layer products without creating problems.
Cal-Mag
Advanced Nutrients' Sensi Cal-Mag Xtra is specifically described by the manufacturer as completely compatible with all pH Perfect base nutrients including Sensi Grow. This matters because coco coir in particular tends to bind calcium, so a Cal-Mag supplement is commonly needed when growing in coco. Add Cal-Mag to the reservoir after your A and B additions, following the manufacturer's dose on the Cal-Mag label. For most consumer kits using standard potting mix and tap water with moderate hardness, Cal-Mag is optional but helpful if you notice yellowing between the leaf veins (a classic magnesium deficiency sign).
Switching to bloom nutrients
Sensi Grow is the vegetative-phase product. When your plants start flowering or fruiting (or when you intentionally trigger flowering), switch to a bloom base nutrient, such as Sensi Bloom A & B from the same Advanced Nutrients line. Do a plain-water flush first, then begin the bloom phase at a reduced introductory dose. Do not run Sensi Grow and a full-strength bloom base at the same time.
Mixing order with multiple products
- Start with water
- Add Cal-Mag first (if using)
- Add Sensi Grow Part A, mix
- Add Sensi Grow Part B, mix
- Add any other base supplements one at a time, mixing between each
- Adjust pH last
What to avoid
- Never mix Part A and Part B concentrates together directly — always add each to water separately
- Avoid combining high-PK bloom boosters with Sensi Grow in the same reservoir unless following a specific manufacturer-designed feed chart that accounts for this
- Low-quality silica products can destabilize nutrient mixes; if you use a silica supplement, add it first to the water before any other nutrients, and stick to reputable brands
- Mixing nutrients from competing manufacturers' programs can cause precipitation and pH instability; the safest approach is to stay within one manufacturer's product ecosystem or consult compatibility data before combining
Troubleshooting common problems
Even with a well-designed product like Sensi Grow, things go sideways. Most problems trace back to one of five root causes: wrong pH, wrong EC, light issues, medium problems, or water quality. Here is a quick reference.
| Symptom | Likely cause | Quick fix |
|---|---|---|
| Yellow lower leaves, slow growth | Nitrogen deficiency or pH too high blocking uptake | Check and correct pH first; if pH is fine, slightly increase Sensi Grow dose |
| Crispy brown leaf tips | Nutrient burn (EC too high) | Flush with plain water, reduce dose by half, check EC |
| Pale green or yellow new growth | pH too low blocking calcium/iron uptake, or Cal-Mag deficiency | Check pH; raise if below 5.5 (hydro) or 6.0 (soil); consider adding Cal-Mag |
| Wilting despite wet medium/reservoir | Root rot or overwatering (soil), or air stone failure (hydro) | Check root color (healthy roots are white); improve drainage or aeration; reduce watering frequency |
| Green slime in reservoir (algae) | Light reaching reservoir water | Block all light from the reservoir; cover openings; change water immediately |
| Nutrient lockout (deficiencies despite correct dose) | Salt buildup from accumulated feeds | Flush with plain pH-adjusted water for 1–2 cycles, then restart at half dose |
| pH swinging constantly in hydro | Reservoir too small, plant demand high, or low buffering | Increase reservoir volume if possible; use pH Perfect products consistently; check for CO2 off-gassing |
Root rot is the one that catches beginners off guard most often in pod and reservoir kits. Healthy roots are white and have a slightly fuzzy appearance. Brown, slimy roots with a bad smell mean root rot is already in progress. The fix involves removing and rinsing affected roots if possible, doing a full reservoir change, improving oxygenation, and temporarily reducing nutrient concentration to let the root zone recover.
Safe handling and storage
Both Part A and Part B are classified as potential skin and eye irritants per their official Safety Data Sheets. The guidance is practical: wear chemical-resistant gloves and eye protection when measuring and mixing. If you get either part in your eyes, rinse with clean water for at least 15 minutes and seek medical advice. Keep the SDS documents (downloadable from the Advanced Nutrients website) with your kit so anyone helping you knows what they are working with.
- Store bottles upright in a cool, dry location away from direct sunlight and heat sources
- Keep out of reach of children and pets
- Do not freeze; freezing can alter the chemical balance of the formula
- Keep lids tight between uses to prevent oxidation and contamination
- Do not pour unused mixed nutrient solution back into the concentrate bottles
- Dispose of unused mixed solution responsibly — dilute heavily with water and do not pour undiluted concentrates into storm drains
Quick measurement and conversion reference
| Volume | At 1 mL/L dose (each part) | At 2 mL/L dose (each part) | At 4 mL/L dose (each part) |
|---|---|---|---|
| 1 liter | 1 mL A + 1 mL B | 2 mL A + 2 mL B | 4 mL A + 4 mL B |
| 2 liters | 2 mL A + 2 mL B | 4 mL A + 4 mL B | 8 mL A + 8 mL B |
| 4 liters (~1 US gal) | 4 mL A + 4 mL B | 7.6 mL A + 7.6 mL B | 15.1 mL A + 15.1 mL B |
| 10 liters | 10 mL A + 10 mL B | 20 mL A + 20 mL B | 40 mL A + 40 mL B |
| 20 liters (~5 US gal) | 20 mL A + 20 mL B | 40 mL A + 40 mL B | 80 mL A + 80 mL B |
For EC to PPM conversion: if your meter uses the 500 scale (common in North America), multiply the EC reading in mS/cm by 500. If it uses the 700 scale (common in Europe), multiply by 700. So 1.2 mS/cm equals 600 PPM on a 500-scale meter, or 840 PPM on a 700-scale meter. This difference causes a lot of confusion when comparing readings with other growers online, so always state which scale your meter uses.
A few closing thoughts for kit users
Sensi Grow A & B is a well-documented, widely-used product that genuinely simplifies vegetative feeding once you understand the two-part mixing logic. The biggest wins come from using the right dose for your plants' current size (not jumping straight to full strength), keeping your pH meter calibrated, and topping up reservoirs with plain water rather than fresh nutrient solution. If you are using a sow-and-grow or grow pod style kit, the detailed pod and transplant workflows covered in related guides for those specific kit types will help you pair the right nutrient timing with your kit's mechanics. For step-by-step sow and grow instructions specific to pod and tray kits, see the dedicated sow and grow instructions guide. See Nature's Blossom sow and grow instructions for detailed pod-specific timing and transplant steps. For users switching brands, see the Dutch Nutrients Grow A & B instructions for brand-specific mixing and dosing. Getting these fundamentals right means fewer yellow leaves, healthier roots, and plants that actually deliver on what the kit promised.
FAQ
What core product facts should be stated about Sensi Grow A & B in a kit‑focused how‑to article?
Identify Sensi Grow as a two‑part (Part A + Part B) base nutrient from Advanced Nutrients formulated for vegetative growth and for use in soil, coco and common hydroponic systems (DWC, NFT, drip, flood & drain, aeroponics). Note the ‘pH Perfect®’ claim (helps stabilize pH), that bottles are used together as a matched A&B system, and that guaranteed analysis/N‑P‑K is printed on the label (consult the bottle/SDS for exact values). Cite product pages, the official feeding charts and the SDS documents for Parts A and B.
What authoritative measurements and dosing rates must be included (metric and imperial)?
Give the manufacturer’s official dosing range and starting points: seeds/cuttings ≈1 mL per L (≈0.13 tsp per US gallon), small plants ≈2 mL/L (≈0.26 tsp/gal), full vegetative ≈4 mL/L (≈0.52 tsp/gal). State that these are base nutrient rates and that additional supplements change totals. Source the official Advanced Nutrients feeding charts and product pages.
What mixing order and basic mixing procedure should be stated for safety and correctness?
Provide stepwise mixing: 1) Shake bottles; 2) Fill reservoir or mixing container with water first (room temperature); 3) Add Part A dose and mix thoroughly; 4) Add Part B dose and mix thoroughly; 5) Let solution circulate and re‑check mixture; 6) Adjust pH last if needed. Emphasize ‘add nutrients to water, not water to nutrients’ and refer to Advanced Nutrients mixing guidance.
What pH and EC/TDS target ranges should be recommended for seedlings, vegetative and general kit use?
Recommend targets: seedlings/plug stage EC ≈0.3–0.5 mS/cm (ppm ≈150–250 on 500‑scale) and pH ≈5.8–6.2; vegetative EC ≈1.0–1.5 mS/cm (≈500–750 ppm on 500‑scale) with common official grow target ≈1.2 mS/cm (≈500 ppm); pH range for grow ≈5.5–6.3. Explain that ppm depends on meter scale (500 vs 700) and advise reporting EC where possible. Cite Advanced Nutrients feed charts and extension hydroponic guidance.
How should EC → ppm / TDS conversions and meter scales be explained?
Explain EC units (mS/cm or µS/cm) are preferred and direct. State that TDS/ppm meters use a conversion factor (commonly 0.50 for 500‑scale or 0.70 for 700‑scale). Give instruction to check the meter’s documented scale and, where possible, report EC. Cite instrument manuals (e.g., Hanna) and hydroponics references.
What compact feeding schedule elements must the article include for kit users?
Include a compact week‑by‑week table (seed/plug → early veg → full veg) listing ml/L and approximate tsp/US‑gal equivalents, target EC and pH ranges for each stage, and notes on when to add Cal‑Mag or other supplements. Use the official Advanced Nutrients feeding charts as the basis for numbers and label the table as a kit‑friendly quick reference.