
Zamnesia fresh mushroom grow kits come pre-colonised with mycelium, so the hardest work is already done. Your job is to give the block the right conditions: a short soak, a clean grow bag, the right temperature and humidity, and daily fresh air. Do that and most kits pin within one to three weeks and produce at least two to three solid flushes. This guide walks you through every step, from unboxing to cleanup, with species-specific care numbers and a troubleshooting table you can scan mid-grow whenever something looks off.
Zamnesia Mushroom Grow Kit Instructions and Quick Start

Marcus Thornfield
25 Jul 2026
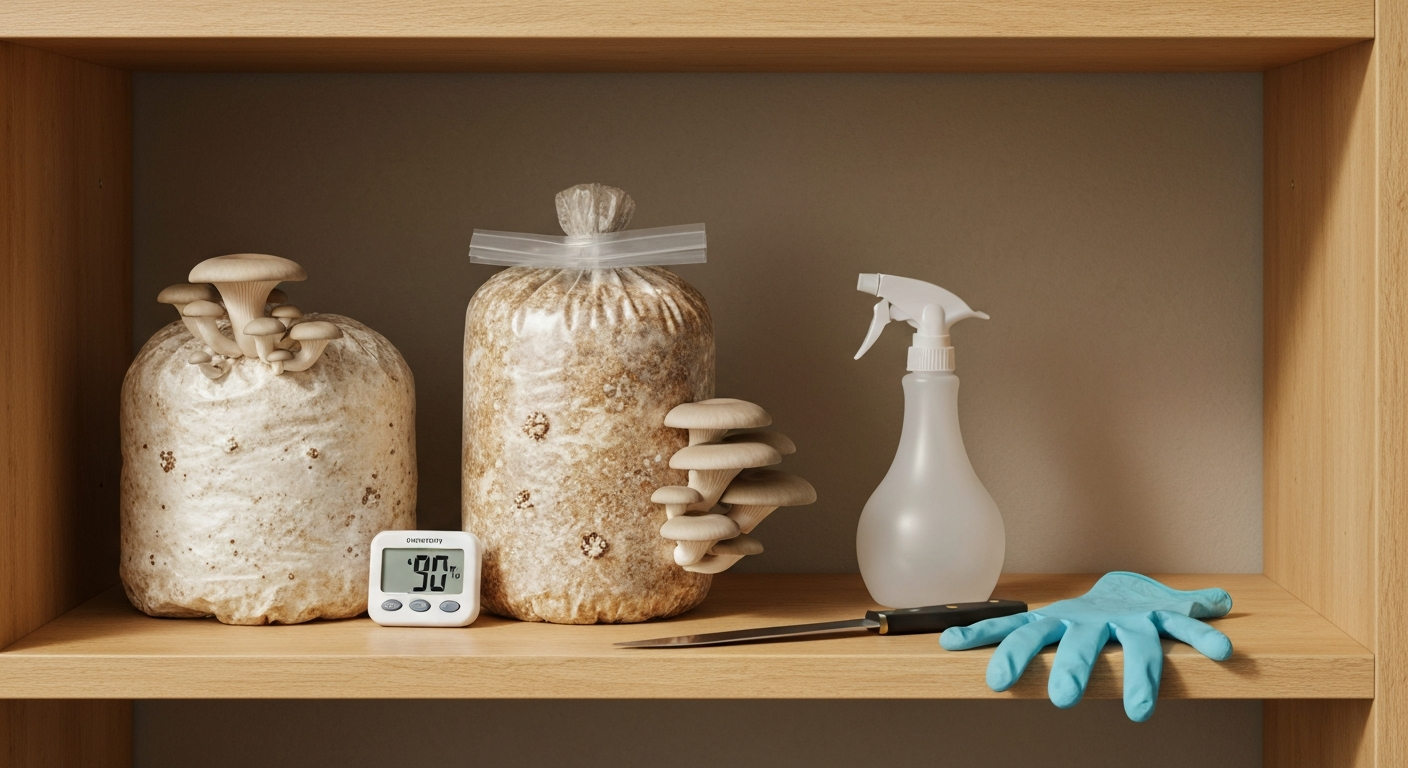
Quick-Start Checklist
Tape this to the wall near your growing space. Every item here is covered in detail further down, but if you want to get moving right now, these are the non-negotiables.
- Read the label on your specific kit before touching anything else — soak instructions vary by brand
- Wash hands thoroughly and wipe your workspace with isopropyl alcohol (70%)
- Soak the colonised block in clean, cool water for 9–12 hours (Zamnesia Classic and SUPREME kits); skip soaking if your kit has a perforated bag and the label says not to soak
- Drain fully, then place block inside the supplied grow bag with roughly 150 ml of clean water added to the bag (not poured over the block)
- Mist the inner walls of the bag once, fold the top, and secure with the clip
- Keep the kit at 23–27 °C during colonisation and early pinning
- Target 85–100% relative humidity inside the bag at all times
- Once pins appear, open the bag 1–3 times per day for fresh air exchange (FAE) — fan gently, close again
- Harvest mushrooms just before or as caps begin to flatten and edges start to curl upward
- Soak the block again between flushes to rehydrate it
Before You Begin: Safety, Legality, and Setting Realistic Expectations
Zamnesia sells kits for legal edible species including oyster, lion's mane, and shiitake. This guide covers only legal edible cultivation. If you have any doubt about what species your kit contains or whether home cultivation is permitted where you live, check your local regulations before starting. Some regions have restrictions around specific species or spore-related materials even when the mushrooms themselves are legal to grow and eat.
From a safety standpoint, always work clean. Pre-colonised blocks are not sterile once opened, and introducing bacteria or competing mould at this stage can ruin a flush quickly. Wear nitrile gloves when handling the block, keep pets out of your growing area, and wash the grow bag if it came with residue from transit. If your kit produces any unexpected colours (green, black, red) on the substrate, treat that as contamination and see the troubleshooting section before proceeding.
On expectations: manufacturers often list impressive flush counts and weights on product pages, and Zamnesia's SUPREME line has been described as capable of four or more flushes under good conditions. That is achievable, but your actual yield depends on genetics, your home environment, and how well you follow the daily care routine. A first flush of 150–300 g from a standard block is a realistic and genuinely satisfying result. Treat anything above that as a bonus.
Essential Tools and Supplies to Have Ready Before Unboxing
You do not need a lot, but having everything ready before you open the packaging keeps things clean and quick. Fumbling for tools mid-setup is one of the most common ways contamination sneaks in.
- Isopropyl alcohol (70%) spray bottle and clean paper towels or lint-free cloths
- Nitrile gloves (non-powdered)
- A large clean bowl or bucket for soaking (if your kit requires a dunk)
- Clean, room-temperature or refrigerated tap/filtered water
- A measuring jug (to add the correct 150 ml to the bag)
- A digital thermometer/hygrometer placed at fruiting level — the ThermoPro TP50 is a popular budget option; Extech units are worth it if you want more precision or data logging
- The supplied grow bag and clip (or a new food-safe zip-lock bag if the supplied one is damaged)
- A small fan or the ability to fan manually for fresh air exchange
- A spray bottle filled with clean water for misting
- A clean knife or scissors for harvesting
- A camera or phone — photograph each stage so you can compare progress and send images to support if anything goes wrong
Understanding Your Kit: Zamnesia Fresh Kits vs Pre-Colonised and Mycelium Blocks
Not all grow kits work the same way, and mixing up the instructions from one brand with another is one of the most common beginner mistakes. Zamnesia's own Classic and SUPREME kits are pre-colonised rye-grain blocks that ship ready to fruit, requiring an initial soak to rehydrate the mycelium before fruiting begins. Other brands sold alongside or through similar retailers, such as Fresh Mushrooms or Supa Gro, use perforated grow bags and explicitly instruct you not to soak the block. The perforation style and bag design are the giveaway: if your bag has small holes pre-punched around the sides, check the printed label carefully before adding any water.
Wholecelium and Mondo-style kits (you may have come across these in related guides) are another category: typically sterile sawdust or grain blocks fully colonised with a specific strain, sometimes shipped in a different format than rye-based kits. The core principles of humidity, temperature, and fresh air apply across all of them, but the substrate type, soak duration, and bag-cutting technique can differ. If you arrived here from a Mondo or wholecelium kit search, the setup steps below are very close to what you need, with specific notes where they diverge. For detailed setup steps specific to that format, see wholecelium grow kit instructions.
| Kit Type | Substrate | Soak/Dunk Required? | Bag Style | Typical Flushes |
|---|---|---|---|---|
| Zamnesia Classic | Colonised rye grain | Yes, 9–12 hours | Sealed, supplied grow bag | 2–3 |
| Zamnesia SUPREME | Colonised rye grain (premium strain) | Yes, 9–12 hours | Sealed, supplied grow bag | 4+ (under ideal conditions) |
| Fresh Mushrooms / Supa Gro | Colonised grain | No — do not soak | Pre-perforated bag | 2–4 |
| Mondo / Wholecelium style | Colonised sawdust or grain block | Optional dunk (see below) | Varies — some sealed, some open-top | 2–4 |
The single most important habit is reading the label on your specific kit first. This guide follows Zamnesia Classic and SUPREME instructions as the primary reference, with notes for Mondo-style kits where relevant.
Species Primer: How Oyster, Lion's Mane, and Shiitake Behave Differently
The species in your kit shapes almost every decision you make: what temperature range to aim for, how long to expect before pinning, and how aggressively to push fresh air exchange. Here is a practical comparison.
Oyster Mushrooms (Pleurotus spp.)
Oysters are the most forgiving species in this format and the most common in home kits. They tolerate a wide temperature band, typically 15–25 °C for most strains with fruiting best around 18–24 °C, and they respond well to fresh air exchange, sometimes pinning within days of bag opening. A review 'Factors affecting Pleurotus spp. cultivation (review, PMC)' reports typical incubation/fruiting temperatures of approximately 15–25 °C and recommends high fruiting humidity (≈85–97% RH) A review 'Factors affecting Pleurotus spp. cultivation (review, PMC)' reports typical incubation/fruiting temperatures of approximately 15–25 °C and recommends high fruiting humidity (≈85–97% RH).. Target 85–97% RH. Oysters are light-sensitive in the sense that they use indirect light as a directional cue, growing caps toward the light source, but they do not need direct sun or a grow light. Timelines from setup to first harvest are usually 7–14 days once the kit is set up and placed in conditions.
Lion's Mane (Hericium erinaceus)
Lion's mane is a beautifully unusual mushroom that forms white, shaggy 'icicle' clusters rather than caps. It prefers cooler conditions than oyster mushrooms: aim for 15–21 °C (60–70 °F) during fruiting and maintain 85–95% RH. Insufficient humidity is the most common reason lion's mane develops yellowing or browning at the tips rather than forming those characteristic white spines. It also needs robust fresh air exchange, CO2 buildup causes elongated, poorly developed fruitbodies. Expect a slower timeline than oysters: 14–21 days to first harvest is typical. Lion's mane kits are usually sawdust-based sterile blocks. For tested recommendations and buying tips, see our guide to the best lion's mane grow kit.
Shiitake (Lentinula edodes)
Shiitake is the most demanding species of the three in terms of fruiting stimulation. Home kits typically use wide-range strains that fruit between 10–24 °C (50–75 °F), with humidity around 80–90% RH. The key difference from oyster and lion's mane is that shiitake often needs a 'cold shock' or thorough soak to trigger fruiting: either submersing the block in cold water for 8–12 hours or placing it in a cooler spot for 24 hours before returning it to fruiting conditions. If you are using a Zamnesia shiitake kit and pins seem stuck, a cold-water soak between flushes is often the fix. Expect 14–21 days to first harvest.
| Species | Fruiting Temp (°C) | Target RH (%) | FAE Need | Typical Days to First Harvest | Key Gotcha |
|---|---|---|---|---|---|
| Oyster (Pleurotus spp.) | 18–24 °C | 85–97% | High — 1–3× daily bag opening | 7–14 days | Pins grow toward light; rotate bag for even clusters |
| Lion's Mane (Hericium erinaceus) | 15–21 °C | 85–95% | High — tips brown without FAE | 14–21 days | Yellowing tips = too dry or too little fresh air |
| Shiitake (Lentinula edodes) | 10–24 °C | 80–90% | Moderate | 14–21 days | Needs cold shock or soak to initiate fruiting |
Unboxing and Initial Inspection: What to Check Before You Do Anything Else
Before you soak or set up anything, take five minutes to inspect your kit thoroughly. This is the moment to catch problems that are covered under the supplier's returns policy, and it is also when you establish your baseline so you know what 'normal' looks like for this specific block.
- Photograph the sealed bag before opening — useful for support tickets if the kit later underperforms
- Check for obvious damage to the packaging: punctures, excessive moisture inside the outer box, or signs of freezing during transit
- Inspect the block itself through the bag for colour: healthy colonised mycelium should be white to off-white and dense, not patchy or discoloured
- Look for any green, black, pink, or red patches — these indicate contamination and the kit should not be opened near other growing projects; contact the supplier with photos
- Check the bag seal: if it is already open or torn, treat the block as potentially compromised and contact support before proceeding
- Confirm the kit species and strain on the label matches what you ordered
- Note the batch number and purchase date on the label — you will need these if you contact Zamnesia support
Light yellowing or slight browning on the outer surface of the block is often normal metabolite secretion (called 'metabolite droplets') and does not indicate contamination. If you are unsure, photograph it and ask support before discarding. A good rule of thumb: when in doubt, document it before opening.
Step-by-Step Setup: From Unboxing Through Incubation
Step 1: Prepare Your Space
Wipe down your work surface with isopropyl alcohol. Put on gloves. Keep pets and strong air drafts away from the area while the block is exposed. A kitchen bench away from cooking splatter is usually fine.
Step 2: Remove the Lid and Soak the Block (Zamnesia Classic and SUPREME)
Remove the plastic lid from the kit. Fill a clean bowl or bucket with cool, clean water. Submerge the colonised block and weigh it down if needed (a clean plate works). Soak for 9–12 hours, ideally in the refrigerator if your tap water is warm. Refrigerating the soak water also provides a mild cold shock that can help trigger pinning. After the soak, drain fully and let excess water drip off for a few minutes.
Step 3: Place the Block in the Grow Bag
Place the drained block into the supplied grow bag with the open side of the block (where pins will emerge) facing up. Pour approximately 150 ml of clean water into the bottom of the bag, not directly onto the block. This water creates a humidity reservoir that keeps the atmosphere inside the bag saturated. Spray the inner walls of the bag once with clean water from your spray bottle.
Step 4: Seal the Bag and Find a Spot
Fold the top of the bag over twice and secure it with the clip that comes with the kit. The bag should be loosely but fully closed, you are not trying to create a vacuum, just keeping humidity in. Place the kit somewhere with indirect light and a stable temperature of 23–27 °C. Avoid windowsills with direct sun, areas above radiators, or spots where the temperature swings overnight. A shelf in a spare room, a kitchen counter away from appliances, or a designated growing cupboard all work well.
Step 5: Wait for Pins and Begin FAE
The block now needs time to recover from the soak and begin forming pins (the tiny 'primordia' that develop into mushrooms). Keep the bag sealed during this period and check daily. Once you see pins forming, usually small white bumps on the surface of the block, start opening the bag 1–3 times per day for fresh air exchange. Hold the opening open and gently fan the inside for a few seconds, then reseal. This removes CO2 buildup, which is essential: too much CO2 leads to thin, long-stemmed, poorly developed mushrooms. Mist the inside walls of the bag (not the pins directly) when you open it if the walls look dry.
Optional Prep: Dunking, Soaking, and Casing
The Dunk and Soak Technique
The initial soak described above is essentially a 'dunk' technique: fully submerging the block to rehydrate the mycelium and encourage fruiting. For Zamnesia Classic and SUPREME kits, the manufacturer recommends this at the start and again between flushes. The recommended duration is 9–12 hours. Going longer than 12 hours can waterlog the substrate and create anaerobic conditions that favour bacterial contamination, so stick to the window.
For Mondo-style sawdust blocks, an optional short dunk of 4–6 hours is common practice if the block feels light and dry before a subsequent flush, but it is not always required after the first flush if the block is still visibly moist. Use your hands to gently feel the weight: a rehydrated block feels noticeably heavier than a depleted one. If in doubt, a 4-hour dunk in cool water is unlikely to cause harm and is often the fastest way to restart a stalled flush.
Cold Water Soak for Shiitake
As noted in the species section, shiitake blocks often need a cold shock to initiate fruiting. Fill the soak bowl with cold water (around 10–15 °C, so tap cold in most homes) and soak the block for 8–12 hours. This temperature drop mimics seasonal change and tells the mycelium it is time to produce spores, which it does by forming fruiting bodies. This is worth doing between every flush with shiitake, not just the first.
Casing and Overlay Options
Casing refers to applying a thin layer of neutral, non-nutritive material (such as 50/50 peat and vermiculite, or coco coir) over the top surface of the block to help retain moisture and encourage pinning at the surface. Most Zamnesia kit instructions do not require casing, and for casual home growers it adds complexity without guaranteed gain. Where casing is worth considering is if your environment is very dry and you are losing humidity faster than misting can compensate, or if you are on a third or fourth flush and the block surface has dried and cracked significantly. If you want to explore this further, mycelium grow kit guides cover the technique in more detail.
Daily and Weekly Care: Humidity, Temperature, Light, and Fresh Air
Growing mushrooms successfully is less about doing a lot and more about doing the same simple things consistently. Most problems I have seen come from neglect or, conversely, over-intervention: misting too much, opening the bag too often, or moving the kit every time it seems slow.
| Parameter | Target Range | How to Check | Common Mistake |
|---|---|---|---|
| Temperature | 23–27 °C (Zamnesia kits); 15–21 °C for lion's mane fruiting | Thermometer at kit level | Placing kit above a heat source or in a cold garage |
| Relative Humidity | 85–100% inside bag | Hygrometer inside or just outside bag | Opening bag too long — RH drops fast |
| Fresh Air Exchange (FAE) | 1–3× daily once pins appear | Manual fanning or brief opening | Skipping FAE; CO2 causes leggy, pale mushrooms |
| Light | Indirect ambient light, 12 hrs/day | Visual check — no direct sun | Direct sun overheats kit and dries substrate |
| Misting | Once daily or as needed to keep bag walls misted | Visual — walls should have condensation | Misting directly onto pins (causes blotching) |
Harvest Timing and Technique
The right harvest window depends on the species, but the general principle is: harvest before the cap fully flattens. For oyster mushrooms, pick clusters when the caps are still curved downward at the edges and before they start to drop spores (a fine white dusting around the base of the bag is a sign you have waited a little long, though the mushrooms are still edible). For lion's mane, harvest when the white spines are fully developed but before any yellowing appears. For shiitake, pick when the veil under the cap is just starting to tear away from the stem.
To harvest, twist and pull the cluster from the base in one smooth motion, or cut with a clean knife as close to the block surface as possible. Leaving stub ends attached to the block encourages rot. After harvesting, remove any small leftover stubs or pin aborts with a clean tool, and wipe the block surface gently with a damp, clean cloth to remove debris before starting the next flush.
Between Flushes: Rehydration and Resting the Block
After each harvest, the block has used significant moisture and nutrients. To encourage the next flush, soak the block again for 9–12 hours (Zamnesia Classic/SUPREME), drain, and return it to the bag with fresh water added as before. The rest period between flushes is typically 5–10 days. During this time, keep the bag loosely sealed and maintain humidity, but you can reduce misting frequency slightly while waiting for the next set of pins to appear.
Successive flushes tend to be slightly smaller than the first, which is normal as the block gradually depletes its nutrient reserve. Three flushes from a Zamnesia Classic kit and four or more from a SUPREME kit are achievable with good care. Once the block no longer pins after a soak and 3-week wait, it is spent.
Expected Timeline and Yield Estimates
| Stage | Oyster Mushrooms | Lion's Mane | Shiitake |
|---|---|---|---|
| Setup to first pins | 3–10 days | 7–14 days | 10–21 days |
| Pins to harvest-ready | 4–7 days | 7–10 days | 5–10 days |
| Total first flush (setup to harvest) | 7–14 days | 14–21 days | 14–21 days |
| Number of flushes | 2–3 (Classic), 4+ (SUPREME) | 2–3 | 2–4 |
| Typical first-flush yield | 150–300 g (home kit) | 100–250 g | 100–250 g |
These numbers are realistic baselines, not guarantees. Zamnesia's own support guidance notes that pins can take up to three weeks to appear, and if you have not seen any pins after three weeks you should check your temperature (aim for 22–25 °C), revisit the kit-specific instructions, and contact support with a photo, your order number, and the batch number from the label.
Troubleshooting: What That Symptom Probably Means
| Symptom | Most Likely Cause | Fix |
|---|---|---|
| No pins after 3 weeks | Temperature too high or low; insufficient humidity; block too dry | Check temp (22–25 °C), resoak block for 9–12 hours, ensure bag is properly sealed |
| Green powdery patches on block | Trichoderma (green mould) contamination | Isolate immediately — do not open near other grows. Bag and discard. Do not attempt to salvage |
| Grey/white wispy web on surface (not mycelium) | Cobweb mould (Cladobotryum/Dactylium) | Improve FAE, reduce humidity slightly, remove affected tissue with sterile tool; disinfect bag walls |
| Slimy, wet, discoloured patches on block | Bacterial blotch (Pseudomonas spp.) or wet rot | Discard block — bacterial contamination spreads fast and cannot be reversed at home |
| Thin, long, pale stems; small caps | CO2 buildup — not enough fresh air exchange | Increase FAE to 3× daily; fan bag opening more vigorously for 10–15 seconds each time |
| Pins forming but drying out before maturing | Humidity too low | Check bag seal, mist walls more frequently, verify hygrometer reading |
| Yellow or brown tips on lion's mane | Low humidity or CO2 buildup | Increase misting, increase FAE, ensure temp is 15–21 °C |
| Mushrooms dropping white dust at base | Spore drop — harvested too late | Harvest at next flush earlier; mushrooms are still edible but messy |
| Soggy/waterlogged block, no growth | Over-misting or too much water in the bag | Drain excess water from bag, reduce misting, improve FAE |
| Tiny black specks or tunnels in substrate | Fungus gnats | Check for adult flies near the kit; add a fine mesh over the bag opening during FAE; dispose of kit if heavily infested |
A quick note on contamination identification: green means go, go throw it away. Trichoderma (the bright green powdery mould most commonly encountered) is extremely aggressive and outcompetes mycelium rapidly. Peer‑reviewed reviews note that Trichoderma is among the most destructive contaminants in mushroom cultivation, and prevention relies on sanitation, proper substrate pasteurization/sterilization, and environmental controls such as temperature, airflow, and irrigation water quality Trichoderma is among the most destructive contaminants; prevention uses sanitation, proper substrate pasteurization/sterilization, and environmental controls (temperature, airflow, irrigation water quality).. Extension and IPM guidance is consistent on this: home growers should not attempt to save a Trichoderma-contaminated block. Bag it, seal it, bin it, and sterilise your workspace before starting again.
Post-Harvest Cleanup and Safe Disposal
Once a block is fully spent, it is organic material that will break down. If the block shows no signs of contamination, you can add it to a compost bin or bury it in the garden, the spent mycelium is a reasonable soil amendment. If it is contaminated with mould or bacteria, double-bag it in plastic before disposal and do not add it to open compost where spores can spread.
Clean the grow bag with hot water and dish soap if you plan to reuse it, then wipe with isopropyl alcohol and let it air dry completely before storing. Wipe down the entire work area with isopropyl alcohol after each grow cycle. Fungal spores from a finished grow can persist in the environment and become contaminants in your next kit, so the few minutes of cleanup genuinely matter.
A Note on Kit Brands and Related Guides
If you are shopping around and have not yet committed to a Zamnesia kit, it is worth comparing options across the category. For direct comparisons and buying advice, see our roundup of the best grow your own kits. Guides covering beginner grow kits and best grow-your-own kits lay out the differences between rye-based formats like Zamnesia and sawdust block formats in more detail, which is helpful if you want to grow lion's mane or shiitake specifically. If you ended up here from a Mondo or wholecelium search, the Mondo grow kit instructions and wholecelium grow kit instructions guides cover the small but important differences in bag-cutting technique and soak duration for those specific brands. If you want a straightforward, automated setup, also see our beginner automated boomr bin cvg monotub mushroom grow kit guide for an entry-level option that reduces daily maintenance. For a broader look at how pre-colonised blocks work before any brand specifics, the mycelium grow kit instructions guide is a solid starting point. For another relevant comparison, see mycelium grow kit instructions.
The grow kit category is genuinely a great entry point into cultivation, you do not need to understand spore culture or grain inoculation to get a satisfying harvest. If you’re curious whether do morel grow kits work, see our guide on morel grow kits, which covers their success rates and special requirements. Follow the label on your specific kit, keep things clean and consistent, and do not panic if the first few days look uneventful. The mycelium is doing its thing. Your job is mostly patience and humidity.
FAQ
Which official manufacturer sources must I consult to produce an accurate Zamnesia grow‑kit guide?
The kit's printed label and the official Zamnesia product page and PDF/manual (e.g., 'How To Grow Zamnesia Classic') and any brand‑specific support articles (Zendesk/helpdesk entries). These provide the kit‑specific soak/dunk instructions, exact temperatures/humidity ranges, number of recommended flushes, and any cautions or differences between product lines (Classic vs SUPREME). Always treat the kit's instructions as primary and note any contradictions with general advice.
What institutional or extension resources should I use for reliable species‑specific environmental ranges and best practices?
Use university extension and government/agricultural institution guides (Penn State Extension, Cornell Small Farms, UConn/New Farms, ATTRA/NCAT). These sources give trusted ranges for fruiting temperature, humidity, light and FAE for species such as oyster (Pleurotus spp.), lion’s mane (Hericium erinaceus) and shiitake (Lentinula edodes), and offer validated small‑scale cultivation protocols and sanitation guidance.
Which peer‑reviewed or scientific literature is useful for species details and troubleshooting?
Peer‑reviewed articles and reviews (PMC/NCBI, Frontiers) on Pleurotus and Hericium growth optima, mycelial physiology and contamination biology. Use these for evidence‑based temperature/humidity optima, growth timelines, and to explain contamination agents (Trichoderma, bacterial blotch, cobweb) and their biology.
What authoritative sources should I consult for contamination diagnosis and remediation advice?
Extension IPM handbooks, laboratory SOPs, and peer‑reviewed contamination reviews (e.g., Pennsylvania mushroom IPM handbook, Frontiers/PMC reviews) that identify common contaminants, visual symptoms, rapid response procedures and safety/disposal recommendations. These sources commonly advise isolation and disposal for aggressive contaminants (e.g., Trichoderma) and give stepwise removal/disinfection for some less aggressive issues.
Which practical tools, instruments and product references are needed to recommend monitoring gear?
Consumer and professional thermo‑hygrometer product specifications (e.g., ThermoPro TP50 for hobbyists; Extech data sheets for more accurate meters) to recommend placement, accuracy expectations and calibration strategies. Also reference recommended misting/spraying tools, clean trays, hygrometer placement and PPE.
What types of visual assets are required to make the guide practical and clear?
High‑quality photos or annotated diagrams for: unboxing and identifying kit parts, correct places to cut/perforation examples, dunk/soak technique and timing, correct bag folding/clipping, ideal pin and fruit morphology for each species, examples of common contamination symptoms, and a troubleshooting flowchart. Source images from the manufacturer (with permission), extension publications, or create original photos/illustrations.