
A beginner automated BOOMR bin CVG monotub mushroom grow kit gives you a nearly complete system for growing mushrooms at home: a food-grade bin, a humidity controller, a small misting humidifier, and a controllable fan all work together so you spend less time babysitting and more time watching mushrooms grow. You set your humidity target, plug in the fan, and the kit handles most of the environmental management for you. This guide walks you through exactly how that system works, from choosing your kit and unboxing it to harvesting your first flush, with practical automation settings, a real troubleshooting flow, and notes on which species and kit styles this approach actually suits.
Beginner Automated BOOMR Bin & CVG Monotub Mushroom Grow Kit Guide

Marcus Thornfield
11 Aug 2026
Who this guide is for
If you just bought (or are about to buy) an automated BOOMR bin, a CVG monotub setup, or a similar prebuilt or DIY mushroom bin kit, this is written for you. You do not need any prior cultivation experience. I have tried to define every piece of jargon the first time it comes up, and the sections are short enough to read while you are actually unpacking your box. If you are comparing specific commercial kit brands like Mondo, Wholecelium, or Zamnesia, or looking at species-specific options like lion's mane kits, you will find notes on those throughout, plus pointers to model-specific walkthrough guides.
Kit types explained: what you are actually choosing between
Before you set anything up, it helps to know what category your kit falls into, because the workflow is different depending on the answer.
Pre-inoculated (ready-to-fruit) kits
These kits arrive with mushroom mycelium (the root-like network that eventually produces mushrooms) already colonizing a substrate block. You open the box, follow a short setup, and wait for pins (the tiny baby mushrooms) to appear. Brand kits from companies like Wholecelium, Zamnesia, and Mondo typically follow this model. The tradeoff is simplicity versus control: you did not choose the strain or substrate, and you are working with whatever colonization state the block arrived in. If yours stalls, the Zamnesia support team notes it can take up to three weeks for pins to appear, and recommends keeping temperature around 22 to 25 degrees Celsius while following the kit-specific misting instructions.
DIY inoculation kits (spawn-to-bulk)
The BOOMR bin and CVG monotub setups usually fall into this category. You start with colonized grain spawn (grain jars or bags fully overtaken by mycelium) and mix it into a bulk substrate, which is the main growing medium. The most popular bulk substrate for beginners is CVG: coco coir, vermiculite, and gypsum. Once mixed together, this bulk substrate sits in your bin and colonizes over one to two weeks before you trigger fruiting. DIY inoculation gives you more control, works for a wider range of species and strains, and is generally cheaper per harvest once you have the equipment.
BOOMR bin vs CVG monotub vs other bin systems
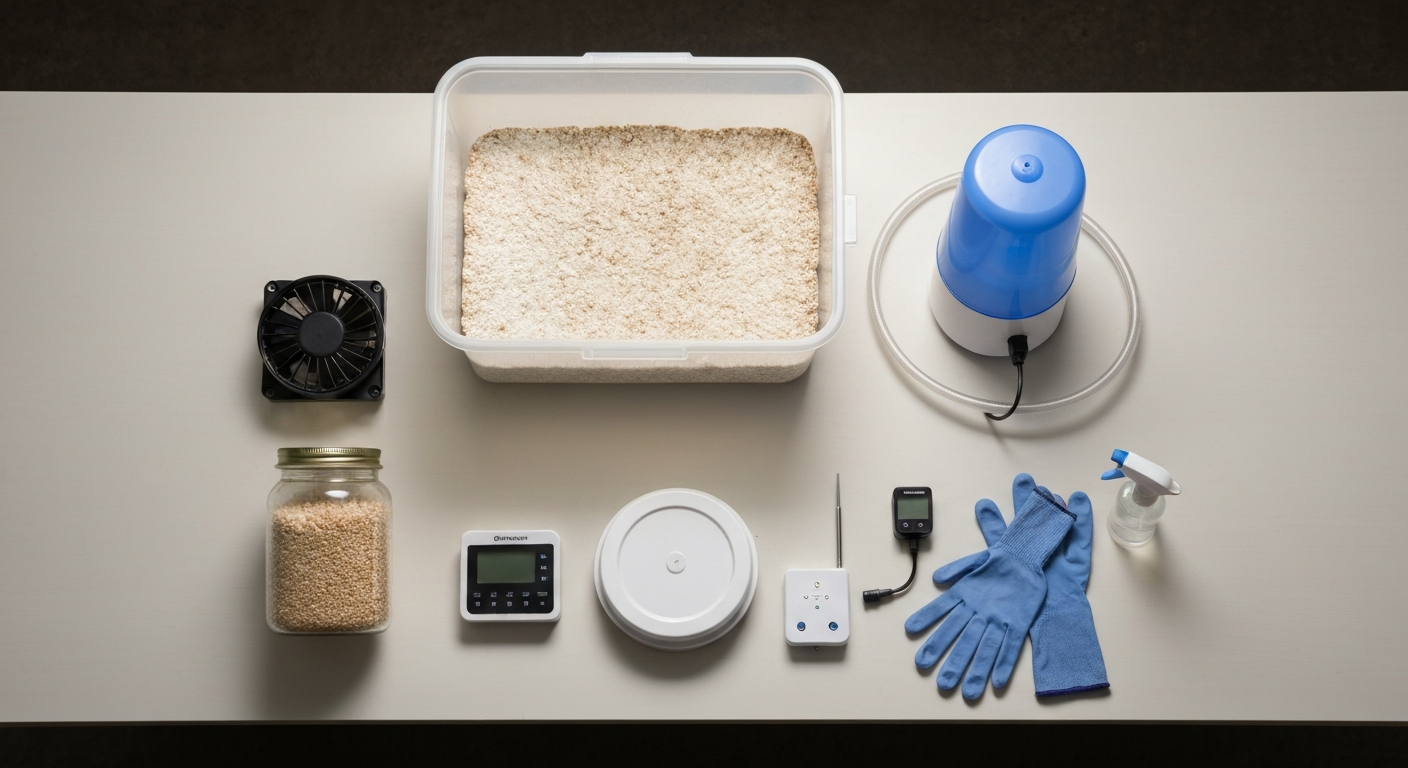
The North Spore Automated BOOMR bin is a specific commercial product: a 22 by 15 by 11 inch food-grade polypropylene bin with a recessed base for stacking, rated to hold up to roughly 25 lb of substrate. The automated kit bundles it with a FAE Fan Mini (a controllable fresh-air-exchange fan), a Myco-Mister Mini humidifier with a 4-liter reservoir capable of evaporating up to about 380 ml per hour, a monotub hose connector to fit the mister output, and a Mycontroller humidity controller that reads and maintains 0 to 99 percent relative humidity with 0.1 percent accuracy. A standard DIY CVG monotub is the same concept using a plain opaque storage tub you drill yourself, the same CVG substrate, and optional standalone automation components. The core growing process is identical; the BOOMR bin just bundles the hardware more neatly.
| Feature | BOOMR Bin Automated Kit | DIY CVG Monotub | Pre-Inoculated Kit (Mondo, Wholecelium, etc.) |
|---|---|---|---|
| Substrate prep required | Yes (CVG or similar) | Yes (CVG or similar) | No (arrives colonized) |
| Inoculation required | Yes (grain spawn) | Yes (grain spawn) | No |
| Automation included | Yes (fan, mister, controller) | Optional (buy separately) | Rarely included |
| Cost to start | Mid-range (kit price) | Low (DIY) | Low to mid (kit price) |
| Control over strain/species | High | High | None |
| Best for | Beginners wanting guided automation | Hands-on DIYers | Absolute beginners, first flush experience |
How mushroom grow kits work: the basic lifecycle
Every mushroom kit, automated or not, follows roughly the same biological stages. Knowing these stages makes every step in the setup instructions make sense instead of feeling arbitrary.
- Substrate preparation: You hydrate and prepare the bulk growing medium (CVG in most cases) so it holds moisture without being waterlogged.
- Inoculation: Colonized grain spawn is mixed into the bulk substrate, introducing the mycelium that will spread through the whole bin.
- Colonization: The bin is sealed or covered and kept warm in the dark. Mycelium spreads through the substrate over roughly 7 to 14 days. No fruiting conditions yet.
- Casing (optional): A thin layer of sterile casing material (often plain CVG or a peat-lime mix) is applied over the colonized surface to help trigger pinning.
- Fruiting initiation: You introduce fruiting conditions: fresh air exchange, a humidity target of 85 to 95 percent RH, some ambient light, and sometimes a small temperature drop.
- Pinning: Tiny primordia (pins) form on the surface. This is the most exciting and fragile stage.
- Fruiting and harvest: Pins develop into full mushrooms over several days. Harvest just before or as the veil under the cap begins to tear.
- Flushes: After harvest, the substrate rests, rehydrates (often by soaking the block or misting the surface), and produces another round of mushrooms. Most substrates give two to four flushes.
Before you start: workspace, sterile basics, and legal notes
Setting up your workspace
You do not need a laboratory. You need a clean, still-air area with a flat surface, good lighting, and no obvious sources of contamination like open compost bins, pets, or heavy foot traffic. Wipe your work surface with isopropyl alcohol (70 percent is ideal) before handling any substrate or spawn. Still-air conditions matter most during inoculation, when you are mixing spawn into substrate. Do that step quickly and minimize how long the substrate is exposed to open air.
Sterile basics you actually need
- 70% isopropyl alcohol spray for wiping hands, surfaces, and tools
- Nitrile gloves (one pair per session minimum)
- A face mask or at least avoid breathing directly over open substrate
- Clean paper towels or lint-free cloth for wiping down the bin interior
- A clean mixing bowl or bag for combining CVG and spawn
If you are sterilizing grain spawn at home rather than buying pre-colonized bags, grain sterilization requires saturated steam at 121 degrees Celsius and 15 psi for 60 to 120 minutes depending on load size. ISO standard references for steam sterilization (general guidance) recommend validating saturated-steam sterilization at 121 °C (15 psi) with load-specific holding times and the use of indicators/spore strips to confirm effectiveness. This needs a pressure cooker. CVG bulk substrate does not require sterilization; pasteurization by pouring boiling water over coco coir and letting it cool is standard and sufficient, because pasteurization kills most competitors while preserving beneficial microbes that actually help colonization.
Safety and legal considerations
Mushroom grow kits are legal to own and use in most jurisdictions when growing edible or gourmet species such as oyster, lion's mane, shiitake, or king oyster. If you are in a region where psilocybin-containing species are controlled substances, verify the legal status of both spore syringes and cultivation before purchasing. This guide covers cultivation technique and does not advocate for any illegal activity. Always confirm the species you are growing is legal for cultivation in your specific location.
Unboxing your kit: what to check immediately
Before you touch a single component, photograph everything. Lay it out on a clean surface, take one wide shot of the full contents, then individual shots of each item. If anything is damaged, missing, or shows signs of contamination (green, black, or slimy patches on any substrate block), you want photos for the vendor before you proceed. Here is what a complete automated BOOMR bin kit should include:
- BOOMR Bin monotub (22" × 15" × 11", food-grade)
- FAE Fan Mini with power cable and speed controller
- Myco-Mister Mini humidifier (4 L reservoir) with power cable
- Monotub hose connector (fits mister output to bin port)
- Mycontroller humidity controller with probe and dual outlet sockets
- Printed setup instructions or instruction card
- Any included filter sheets or polyfill for air holes (check your specific kit version)
For pre-inoculated kits (Wholecelium, Mondo, Zamnesia style), the typical unboxing checklist looks different:
- Pre-colonized substrate block or grow bag (check for healthy white mycelium, no green or black patches)
- Plastic grow bag or humidity tent
- Paper clip or bag clip for resealing
- Printed instructions with species-specific temperature and misting guidance
- Misting bottle (sometimes included, sometimes not)
Suggested photos to take during unboxing: full kit spread flat, close-up of the substrate block surface, serial or batch number on any packaging, the controller display (confirm it powers on), and the mister reservoir filled with water as a leak check before any substrate goes in. These images are invaluable if you need to contact support later.
Prep options: out-of-the-box workflow vs DIY inoculation workflow
Out-of-the-box (pre-inoculated) workflow
Open the kit, remove the substrate block, place it inside a humidity tent or the grow bag provided, and skip straight to the fruiting setup section below. Your only prep tasks are setting up any included automation, confirming temperature is in range for your species, and misting lightly to restore surface moisture if the block looks dry. No substrate mixing, no inoculation, no waiting for colonization. This is where Mondo, Wholecelium, and Zamnesia kits shine for true beginners.
DIY inoculation workflow (BOOMR bin or CVG monotub)
This is a four-step prep process before fruiting conditions even begin. First, prepare your CVG substrate. Hydrate a 650-gram coco coir brick by pouring 3.5 to 4.5 liters of boiling water over it in a large clean bucket or tote. Stir in vermiculite (equal volume to the coir once expanded) and about one tablespoon of gypsum. Cover the bucket loosely with foil and let it cool completely, ideally overnight. Test hydration using the field-capacity squeeze test: grab a handful and squeeze firmly. You want 2 to 3 drops of water to appear. More than that means it is too wet; less means too dry. This test matters because substrate that is too wet will drown the mycelium and invite bacteria.
Second, prepare your grain spawn. North Spore recommends mixing one colonized grain spawn bag with two to three BOOMR Bags (their bulk substrate bags), noting that higher inoculation rates improve success rates. For a DIY setup, a 1:2 or 1:3 ratio of grain spawn to bulk substrate by volume is a reliable starting point for most species. Third, mix the colonized grain into the cooled CVG inside the cleaned bin. Do this quickly in a still-air environment. Fourth, seal the bin for colonization and do not open it for monitoring until you see signs of full coverage. The colonization stage is covered in detail in its own section below.
Step-by-step setup from substrate to first flush
Stage 1: substrate loading and bin placement
- Clean the inside of the BOOMR bin with a damp cloth and allow to dry before loading
- Add mixed CVG spawn layer to a depth of roughly 3 to 5 inches (deeper loads colonize slower but yield more)
- Smooth the surface flat without compacting it hard
- Attach the monotub hose connector to the designated port
- Place the bin on a stable, level surface away from direct sunlight and drafts
- Keep the bin away from HVAC vents, which cause uneven drying
Stage 2: colonization environment
- Seal or close the bin fully during colonization (no active FAE needed yet)
- Maintain substrate temperature at the species-appropriate colonization range (most saprotrophs prefer 24 to 27 degrees Celsius for this stage)
- Keep the bin in the dark or under very low ambient light
- Do not open the bin to check progress more than once every few days; trust the process
- Expect full colonization in 7 to 14 days depending on spawn ratio and temperature
Stage 3: fruiting initiation
- Once the surface is 90 to 100 percent white with mycelium, switch to fruiting conditions
- Connect the Myco-Mister Mini hose to the bin port and fill the reservoir with clean water
- Plug the mister into the Mycontroller humidity outlet and set target RH to 88 to 92 percent
- Position the FAE Fan Mini at the bin's air hole or filter patch; set to a low duty cycle to start
- Place the RH probe inside the bin near the substrate surface, sliding it through a filter patch hole as described in the North Spore documentation
- Provide 6 to 12 hours of indirect ambient light per day as a directional pinning cue
- A small temperature drop of 2 to 5 degrees Celsius from colonization temperature can help trigger pinning for many species
Stage 4: pinning to harvest
- Pins typically appear within 3 to 10 days of fruiting initiation for most common species
- Do not disturb pins once formed; avoid misting directly onto pins
- Harvest individual mushrooms or clusters by twisting and pulling clean at the base before the veil tears
- Remove any remaining stub material cleanly from the surface to prevent rot
- After harvest, lightly mist the surface, cover, and allow the substrate to rest 5 to 7 days before the next flush
Colonization stage: targets, monitoring, and smart automation
Colonization is the stage where most beginners get nervous, because nothing visible is happening and the temptation to open the bin and poke around is real. Resist it. Opening the bin too often introduces contaminants and slows growth. Here are the targets and a simple monitoring approach that works for both the BOOMR bin and standard DIY CVG monotubs.
Environmental targets during colonization
| Parameter | Colonization Target | Notes |
|---|---|---|
| Substrate temperature | 24–27 °C (75–81 °F) | Air temp can be 1–3 °C lower than substrate |
| Relative humidity (inside bin) | ~90–95% passively retained | Bin is sealed; humidity builds naturally |
| Light | Dark or very low ambient | Light does not help colonization; darkness is fine |
| CO2 | Not actively managed yet | Sealed environment; normal for colonization |
| Air exchange | Minimal to none | Open only briefly for checks, every 2–3 days max |
How to monitor progress without contaminating things
Healthy mycelium growth looks like dense white or off-white fluffy growth spreading across and down through the substrate. A faint sweet or earthy smell is normal. Green, black, or pink patches mean contamination. Yellow or brown liquid pooling on the surface (called metabolite) can be normal in small amounts during early colonization, but large wet brown areas with a foul smell point to bacterial contamination. If you see green patches of Trichoderma mold, act quickly: bag and seal the entire bin in a heavy-duty garbage bag and remove it from your grow space. Do not open it indoors.
Simple automation to support reliable colonization
For colonization, you are mainly trying to hold a stable warm temperature. Mycelium is surprisingly forgiving of minor fluctuations, but sustained temperatures above 30 degrees Celsius will stress most species and above 35 degrees will kill most mycelium. If your home drops below 20 degrees Celsius at night, a basic seedling heat mat placed under the bin with a cheap plug-in thermostat (available for under 20 dollars) keeps the substrate in range without any guesswork. Set the thermostat probe near the substrate surface rather than in the ambient air, because substrate generates a small amount of metabolic heat and may run 1 to 2 degrees warmer than room temperature on its own.
During colonization you do not need the mister or the fan running. You can leave the Mycontroller powered off and simply plug the heat mat into its own thermostat. Some growers add a basic digital thermometer and hygrometer probe inside the bin (available for 5 to 10 dollars) to log temperature and humidity without opening the lid, using a small pass-through hole sealed with polyfill. That kind of passive monitoring is genuinely useful: you can spot a temperature spike or drop without disturbing the bin.
Colonization in BOOMR bin vs standard DIY monotub
The process is identical. The BOOMR bin's recessed base lets you stack a second bin on top as a makeshift lid, which improves passive humidity retention during colonization compared to a loose-fitting standard tote lid. If you are using a plain DIY tub, simply tape a sheet of foil or a plastic bag over the top of any drilled holes during colonization to achieve the same effect, then remove it when you switch to fruiting conditions.
Fruiting environment: automation settings and CO2 management
Once fruiting starts, CO2 management becomes the job of your FAE fan. Elevated CO2 in a sealed bin causes long, leggy mushrooms with small caps, a condition called etiolation. Cornell cultivation guidance targets CO2 below about 1,000 ppm in fruiting rooms, with air exchange roughly every 5 to 10 minutes as a design rule. For a small home bin, a low-speed fan running on a timer for 5 to 10 minutes every hour achieves this without the constant airflow that would dry out your substrate.
The Mycontroller in the BOOMR bin kit handles humidity automatically: when RH drops below your setpoint, it triggers the mister until the target is restored. The key is placing the probe correctly (inside the bin, near the substrate surface) and setting a realistic target. For most beginner species, 88 to 92 percent RH is a practical sweet spot. Pushing to 95 percent or higher risks condensation pooling on the substrate, which invites bacterial blotch. If you see water droplets pooling, increase your fan duty cycle briefly to evaporate the excess.
| Parameter | Fruiting Target | Automation Tool |
|---|---|---|
| Relative humidity | 88–92% RH | Mycontroller + Myco-Mister Mini |
| Temperature | 18–25 °C (species-dependent) | Heat mat + thermostat (if needed) |
| CO2 | Below ~1,000 ppm | FAE Fan Mini on a timer |
| Light | 6–12 hours indirect ambient | Lamp on a plug-in timer |
| Air exchange | 5–10 min per hour | Fan duty cycle setting or plug-in timer |
Species compatibility: what works in a CVG monotub and what does not
Species that thrive in CVG monotub setups
Most of the commonly cultivated saprotrophic species (those that grow on dead organic matter) are well-suited to CVG monotub setups. Oyster mushrooms, king oyster, pioppino, and many others colonize CVG readily and fruit with good yields. The BOOMR bin automation kit is well-matched to these species.
Lion's mane is a partial exception
Lion's mane (Hericium erinaceus) can be grown in an automated bin system, but it performs significantly better on hardwood sawdust substrate rather than CVG. Commercial tech sheets and cultivation guides consistently recommend supplemented hardwood sawdust spawn for reliable lion's mane yields, with fruiting temperatures in the 18 to 24 degree Celsius range and humidity around 85 to 95 percent. If you have a lion's mane specific kit, the substrate inside is likely already hardwood-based, and you should follow the species-specific setup instructions rather than the CVG workflow described here.
Morel kits are a completely different category
Morels (Morchella species) do not behave like standard saprotrophic bin-grown mushrooms. Modern indoor morel cultivation, which only became commercially viable around 2012 following breakthroughs in China, uses specific nutrient-bag techniques and controlled environmental staging rather than a simple CVG monotub approach. Penn State research on adapting the Chinese nutrient-bag technique notes that mating type, species choice, and environmental staging are all critical variables. If you have purchased a morel grow kit, treat it as its own category entirely and follow the included morel-specific instructions. Do not attempt to apply CVG monotub fruiting protocols to a morel kit.
Routine maintenance after first flush
After each harvest, your job is to help the substrate recover so it can produce the next flush. Remove all harvested mushroom stubs and any aborted pins completely from the surface, because leftover organic material rots quickly and invites contamination. Lightly mist the surface to restore moisture, then cover and leave the bin undisturbed for 5 to 7 days at colonization temperature. Some growers do a full rehydration soak between flushes by removing the substrate block, submerging it in cold water for 6 to 12 hours, then returning it to the bin. This is particularly effective for blocks that show signs of drying out after the second or third flush.
Clean the interior walls of the bin between flushes if you see condensation with debris in it or any discoloration on the walls. Wipe with a clean damp cloth. Refill the mister reservoir with fresh water regularly, ideally every 2 to 3 days, to prevent stagnant water in the humidifier. After a substrate block is fully exhausted (no new pins after 7 to 10 days rest and rehydration), it is compostable. Clean the bin thoroughly with isopropyl alcohol before starting a new cycle.
Troubleshooting: what went wrong and how to fix it
Green, black, or pink patches on the substrate
This is contamination. Green patches are almost always Trichoderma, a fast-growing competitive mold. Black or pink can indicate other fungal or bacterial contamination. If the contaminated area is small and clearly isolated, some growers carefully remove the affected section with a sterile tool, then seal the remaining surface with a light layer of fresh casing material. If contamination is spreading or covers more than about 20 percent of the surface, bag the entire bin and dispose of it outside. Do not try to salvage heavily contaminated substrate. The likely causes are insufficient pasteurization of CVG, substrate that was too wet, or exposure to airborne spores during inoculation.
Slow or stalled colonization
Check temperature first. Substrate below 20 degrees Celsius will colonize very slowly. Confirm your heat mat and thermostat are set correctly. Also check that your spawn-to-bulk ratio was not too low; a very thin inoculation point spreads slowly. If you see no growth at all after 10 days, and there are no contamination signs, the spawn may have been dead or underconditioned on arrival. Contact the vendor with your batch information and photos.
No pins after full colonization
Confirm you have actually switched to fruiting conditions: humidity controller active, fan running, ambient light introduced. Many beginners forget one of these cues. For pre-inoculated kits, as Zamnesia support notes, some kits take up to three weeks for pins to appear even under ideal conditions, so patience is genuinely the first recommendation. If still nothing after three weeks of correct fruiting conditions, try a small temperature drop of 2 to 4 degrees Celsius and confirm your RH probe is reading correctly by comparing it against a second cheap hygrometer placed nearby.
Long, leggy mushrooms with small caps
This is a CO2 problem. Increase your FAE fan duty cycle or run it more frequently. If using a basic timer, try running the fan for 10 minutes every 30 minutes instead of every hour. Make sure your air holes are not blocked by polyfill that has compacted too tightly.
Excessive condensation and wet substrate surface
Your humidity setpoint may be too high, or the mister is cycling too aggressively. Try lowering your RH target by 2 to 3 percentage points and increasing FAE fan frequency slightly. Pooled water on the surface invites bacterial blotch (slimy, brown, foul-smelling areas). If blotch appears, remove the affected area immediately with a sterile tool and adjust your humidity settings before it spreads.
| Problem | Most Likely Cause | First Action |
|---|---|---|
| Green patches on substrate | Trichoderma contamination | Isolate or dispose; review pasteurization and sterile technique |
| Stalled colonization | Low temperature or weak spawn | Check heat source; verify spawn quality |
| No pins after colonization | Missing fruiting cues | Confirm humidity, FAE, and light are all active |
| Leggy, thin mushrooms | High CO2 / insufficient FAE | Increase fan frequency or duty cycle |
| Wet surface, bacterial smell | Excess humidity or poor airflow | Lower RH setpoint; increase FAE; remove affected material |
| Grey cobweb-like growth | Cobweb mold (not Trichoderma) | Lightly mist directly on cobweb; usually resolves with airflow increase |
Choosing or upgrading your kit: a quick decision guide
If you have never grown mushrooms before and just want to see it work, start with a pre-inoculated kit like Mondo or Wholecelium. For a curated list of the best grow your own kits, see our buyer's guide to compare starter-friendly pre-inoculated kits and DIY automation bundles. You will learn the fruiting stage well, with minimal risk and minimal investment. If you find yourself wanting more control, more yield, or more species variety after that first experience, then the BOOMR bin automated system or a DIY CVG monotub is the natural next step. The BOOMR bin automated kit is genuinely beginner-friendly because the humidity controller removes the most tedious manual task. For a short shopping and setup checklist, see the beginner grow kit. If you want a similar setup at lower cost and are comfortable drilling holes and sourcing components, a DIY monotub with a standalone humidistat, a small ultrasonic mister, and a USB fan accomplishes the same thing for significantly less money.
For species-specific kits like lion's mane, look for kits that explicitly state hardwood sawdust substrate and follow the species-specific setup instructions included with those kits rather than a generic CVG workflow. This site has dedicated model-specific walkthroughs for kits from Mondo, Wholecelium, Zamnesia, and Mycelium-brand kits if you need a step-by-step guide for those exact products. For step-by-step guidance, see the Zamnesia mushroom grow kit instructions which cover model-specific setup and species notes. For step-by-step Wholecelium grow kit instructions, see the model-specific walkthrough for Wholecelium kits on this site. For step-by-step help on Mycelium-brand kits, see mycelium grow kit instructions. See Mondo grow kit instructions for a concise step-by-step walkthrough tailored to that brand.
Quick-reference timeline for a typical CVG monotub grow
| Stage | Typical Duration | Key Actions |
|---|---|---|
| Substrate prep and inoculation | Day 1 (a few hours) | Hydrate CVG, mix spawn, load bin |
| Colonization | Days 1–14 | Seal bin, maintain warmth, minimal disturbance |
| Fruiting initiation | Day 14–15 | Activate mister, fan, controller, introduce light |
| Pinning | Days 14–21 | Monitor daily, do not disturb |
| First harvest | Days 21–28 | Harvest before veil tears |
| Rest and rehydration | Days 28–35 | Remove stubs, mist or soak, rest at colonization temp |
| Second flush | Days 35–45 (approx.) | Repeat fruiting conditions |
These timelines are approximations. Temperature, spawn ratio, species, and substrate depth all shift them. The most important thing is to respond to what the mycelium is actually doing rather than the calendar. A healthy grow that colonizes in 10 days is ready for fruiting at day 10, not day 14.
FAQ
What primary types of source material are required to write an authoritative beginner guide for automated BOOMR bin and CVG monotub kits?
Collect three classes of sources: 1) Manufacturer/kit documentation (product pages, user manuals, troubleshooting/support articles for North Spore, Mondo, Wholecelium, Zamnesia, etc.) for exact dimensions, included parts, recommended spawn ratios, and model‑specific setup steps; 2) Established cultivation references and tek documents (The Mushroom Cultivator, university extension publications, Cornell Small Farms, peer‑reviewed theses) for validated sterilization/pasteurization parameters, contamination ID & control, CO2/humidity targets, and species protocols; 3) Community/proven practical tek guides and hardware documentation (monotub tek tutorials, CVG recipes, humidity controllers/fans/misters specs, wiring/automation how‑tos) to supply step‑by‑step procedures, field tests, and low‑cost automation parts.
Which specific manufacturer and product documents should be obtained?
Obtain official product pages and PDFs/manuals for the target kits and bundles: North Spore (Automated Boomr Bin: parts list, controller wiring, recommended spawn:bulk ratios, RH setpoints), Zamnesia and Wholecelium grow‑kit support articles, plus any prebuilt kit model sheets (Mondo, other brands). Include vendor troubleshooting FAQs and any assembly/maintenance videos provided by manufacturers.
What cultivation textbooks and institutional sources are necessary?
Key authoritative texts and institutional guides: The Mushroom Cultivator (Stamets & Chilton) for sterilization/contaminant ID and safe practices; university extension/commercial manuals (Cornell Small Farms methods, Penn State/other theses on species like morel) for CO2/FAE and production staging; ISO/medical sterilization guidance for autoclave validation and spore‑indicator use when sterilizing grain.
What substrate and spawn preparation references are required?
Collect validated CVG bulk recipes and procedures (coir:vermiculite:gypsum hydration, field‑capacity squeeze test) from community tek pages and established guides (SporeBuddies, MushroomGrowingTips), pasteurization/boiling guidance for coir and straw (temperatures and exposure times), and grain sterilization parameters (121 °C/15 psi timing guidance from The Mushroom Cultivator and autoclave standards). Also include spawn:bulk ratio recommendations from manufacturers (North Spore suggested 1:2–3 for Boomr Bags) and industry practice for species‑specific spawn rates.
What specific environmental target values and timelines must be cited?
Cite species‑appropriate ranges with sources: humidity 85–95% RH for fruiting/pinset (GrowMushrooms/extension guides), CO2 target <~1,000 ppm or regular FAE schedules (Cornell Small Farms), temperature ranges by species (common saprotrophs 18–25 °C), and colonization/fruiting timelines: colonization days/weeks and expected pinning windows (manufacturer kit guidance, community tek averages). Provide these as ranges with source citations rather than absolute promises.
What automation hardware and documentation should be referenced?
Gather specs and manuals for consumer humidistats/controllers (Mycontroller-type units), ultrasonic/evaporative misters, controllable FAE fans (speed/Duty cycle data), RH/temperature/CO2 sensors (probe placement guidance), and product wiring diagrams. Include vendor examples (North Spore FAE Fan Mini, Myco‑Mister Mini, controller) and generic part datasheets for low‑cost alternatives (USB fans, commercial humidifiers, Sonoff/Smart relays for timed control) plus safety electrical wiring references.